
How does an alarm system work? Or you may be trying to figure out how to arm your existing alarm system. Look no further, as this guide will provide all the information you need to know about how to arm an alarm system.
Arming an alarm system is a fundamental security measure that helps protect your property and ensure the safety of its occupants. Whether you’re leaving your home for a few hours or securing a business after hours, understanding how to properly arm your alarm system is crucial.
This guide will walk you through the basic steps needed to arm your system effectively, ensuring that you can leave with peace of mind, knowing your property is safeguarded against unauthorized access.
We’ll cover everything from using the control panel to setting up specific zones, providing you with the knowledge needed to use your alarm system to its fullest potential.
What Does It Mean to Arm the Alarm System?
Before we discuss how to arm an alarm system, it’s essential to understand what it means exactly. Arming the alarm system refers to activating all sensors and detectors connected to it, making them ready for potential security breaches. Once armed, any unauthorized entry or activity will trigger the alarm, alerting you and/or a monitoring center of a potential threat.
Overall, arming the alarm system is a simple process that ensures your property is protected at all times. However, it’s essential to understand the different types of arming modes available and when to use them.
Different Types of Arming Modes
There are generally three types of arming modes for an alarm system: Away, Stay, and Instant. Each mode corresponds to different situations and provides varying levels of security.
- Away Mode: This mode is used when you’re leaving your property for an extended period, such as going to work or on vacation. All sensors are fully armed, and any movement or disturbance will trigger the alarm.
- Stay Mode: This mode is used when you’re staying at home but want to arm your system. In this mode, most interior motion sensors are disabled, allowing you to move freely inside while still keeping all entry points secure.
- Instant Mode: This mode is similar to Stay Mode but arms all sensors, including the interior motion sensors. It’s useful if you want to arm your system while staying inside or leaving for a short period and still have complete protection.
By understanding these different modes, you can choose the most appropriate arming mode for your specific needs and circumstances. Consult your alarm system manual for instructions on how to activate each mode.
What Will You Need?
Depending on the type of alarm system you have, the steps to arm it may vary. However, here are some essential items that you’ll need regardless of your specific system:
- User Manual: This is an instruction manual that comes with your alarm system and provides all the necessary information on how to operate it.
- Control Panel: The control panel is the central hub of your alarm system, where you can arm and disarm the system.
- Access Codes: These are unique codes used to activate or deactivate your alarm system.
- Sensors: Sensors are devices that detect movement, sound, or changes in temperature. They are placed on doors, windows, and other entry points to trigger the alarm if tampered with.
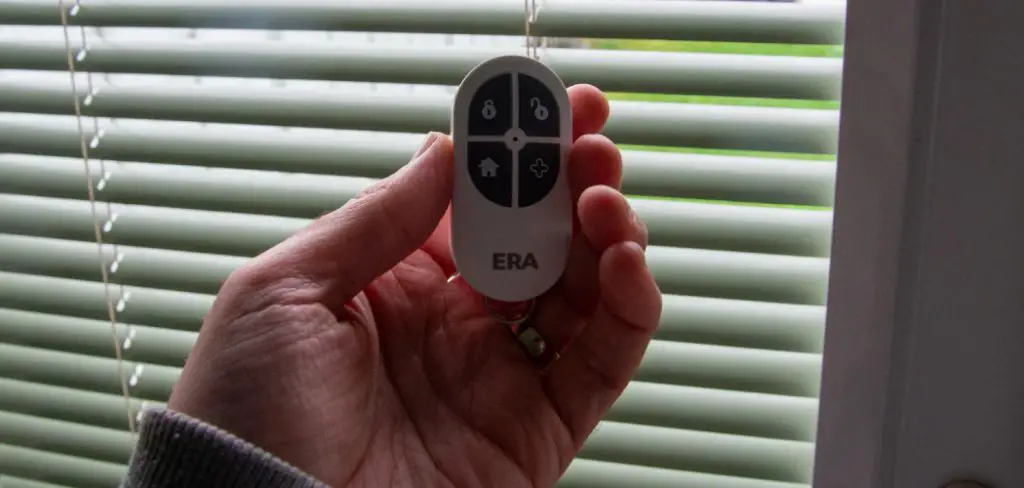
- Key Fob or Remote: Some alarm systems come with a key fob or a remote that allows you to arm and disarm the system from a distance.
Now that you have everything ready let’s dive into how to arm your alarm system.
10 Easy Steps on How to Arm an Alarm System
Step 1. Consult Your User Manual:
Before you begin, it’s essential to consult the user manual that came with your alarm system. Each system has its specific features and procedures for arming and disarming. Familiarizing yourself with your system’s capabilities and requirements will make the arming process smoother.
Step 2. Enter Your Access Codes:
The next crucial step involves entering your unique access codes into the control panel. This action verifies your identity to the system and allows you to make changes to its settings. Make sure to keep your codes confidential to prevent unauthorized access to your alarm system. After entering your codes, the control panel should indicate that it is ready for the next command.
Step 3. Set Up Zones:
Setting up zones is a pivotal aspect of arming your alarm system efficiently. Zones allow you to segment your property into different areas, each of which can be armed and monitored separately. This is especially useful if you wish to arm the doors and windows of your house while leaving space for a pet to move freely without triggering the alarm.
To set up zones, you will typically use the control panel to assign each sensor to a specific zone and then activate or deactivate them as needed. This customized setup helps ensure that your alarm system is tailored to your specific security needs.
Step 4. Activate All Sensors:

With your zones set up, the next step is to activate all the sensors within the zones you wish to arm. This includes door sensors, window sensors, motion detectors, and any other monitoring devices you have installed. Activation usually involves ensuring that all sensors are switched on and functioning correctly. It’s a good practice to periodically check these sensors for batteries, damage, or any issues that might impair their functionality.
Step 5. Check the System Status:
Before arming the system, it’s crucial to verify that all components are working correctly. This involves checking the system status on your control panel or app, ensuring that all sensors are active, and reporting no fault indicators or malfunctions. If your system highlights any issues, address these before proceeding to arm the system to ensure your property is fully protected.
Step 6. Choose the Appropriate Arming Mode:
Most alarm systems offer various arming modes such as “Stay,” “Away,” and “Night” modes. Each mode is designed for different scenarios, allowing you to customize which sensors are active and how they react. The “Stay” mode, for example, might arm perimeter sensors while leaving interior motion sensors off to allow movement inside the house. Understanding and selecting the appropriate mode for your situation is key to effectively using your alarm system.

Step 7. Arm the System:
Once you have chosen the appropriate arming mode for your needs, you can proceed to arm the system through the control panel. This step typically involves selecting the desired mode on the control panel and confirming your choice. You may need to enter your access code again to finalize the arming process.
Upon successful arming, the system will indicate that it is active, often through a series of beeps, a verbal confirmation, or a change in the display panel’s status. It’s important to ensure that after arming, all entry points are securely closed, as opening a door or window can trigger the alarm immediately. Additionally, make sure to inform all household members that the system has been set to avoid any false alarms.
Step 8. Verify Arming Status:
After arming your system, take a moment to verify that it is indeed in the armed state. Most alarm systems offer visual or auditory indicators, such as a solid red light on the control panel or a specific tone that confirms the system is armed. You can also check the system’s status through a mobile app if your alarm is connected to one.
This step is crucial to ensure that your system is fully operational and your home is secure. Misunderstandings in arming procedures are common, and this double-check helps prevent any unwanted surprises or vulnerabilities.
Step 9. Inform Your Monitoring Service (If Applicable):
If a service provider monitors your alarm system, it’s essential to inform them whenever you plan to test the system or when you’re implementing any changes that could affect its operation. This step helps to prevent false alarms and ensures that the monitoring service is aware of the system’s status.
Contact your service provider to notify them that the system has been armed and confirm any necessary details regarding your account or the monitoring protocol. This communication is key to maintaining an effective and responsive security system.
Step 10. Regular Maintenance Checks:
Regularly scheduled maintenance checks are crucial for ensuring the long-term reliability and functionality of your alarm system. These checks should include testing all sensors, batteries, and communication lines to the monitoring service, if applicable. It’s also a good opportunity to review and update your access codes and make any necessary adjustments to zones and settings based on changes in your living situation or security needs.
Keeping your alarm system well-maintained not only prolongs its lifespan but also maximizes the protection it provides to your home and family.
By following these 10 easy steps, you can arm your alarm system confidently, ensuring that your property is securely protected whether you are at home or away. Remember, the effectiveness of your alarm system relies not only on the technology itself but also on the regular upkeep and knowledgeable use of its features.
5 Additional Tips and Tricks
- Leverage Mobile App Controls: Many modern alarm systems come with mobile apps that allow you to arm and disarm your system remotely. Utilize this feature to ensure your home is secure, even if you’ve forgotten to arm the system before leaving the house.
- Utilize Schedule Settings: Set your alarm system to automatically arm and disarm at specific times of the day. This is particularly useful for maintaining a routine, ensuring your home is always protected, especially during hours when you’re regularly away.
- Employ Multi-Factor Authentication: For systems that support it, activate multi-factor authentication to add an extra layer of security. This ensures that even if someone gains access to your disarm code or app, they cannot easily disarm your system without additional verification.
- Consider Adding Security Cameras: While not directly related to arming your alarm system, adding security cameras can enhance the overall security of your home. You can easily monitor your property and respond to any potential threats or suspicious activity with real-time footage.
- Don’t Forget to Test Your System Regularly: It’s important to periodically test your alarm system to ensure all sensors and devices are functioning properly. This will also give you peace of mind, knowing that your system is ready in case of an emergency. Make sure to follow the manufacturer’s instructions on how to properly test your system.
Remember, the most effective way to arm your alarm system is to create a routine and consistently use it. By following these additional tips and tricks, you can have an even more secure and reliable alarm system.
5 Things You Should Avoid When Arming an Alarm System
- Neglecting to Update Your Contact Information: Always ensure that your alarm system’s contact list is up to date. If your system triggers an alert, the monitoring service needs accurate contacts to notify you or your emergency contacts promptly.
- Sharing Your Disarm Code Liberally: Be cautious about who you share your disarm code with. Limit this information to family members or trusted individuals who need to access your home. Frequent sharing can compromise your security.
- Forgetting to Activate All Sensors: Often, homeowners might activate the main alarm but forget to enable window or door sensors. Ensure all parts of the system are armed to maintain full protection.
- Ignoring System Updates and Maintenance: Just like any technological device, alarm systems require updates and maintenance. Ignoring software updates or not fixing hardware issues can lead to system failures when you most need protection.
- Leaving Entry Points Unsecured While the System is Armed: Even with your alarm system armed, an unlocked door or open window can provide an easy entry for intruders. Double-check that all potential entry points are secure to enhance your system’s effectiveness.
By avoiding these common mistakes, you can ensure your alarm system is functioning at its best and providing the highest level of security for your home.
What are the Benefits of Arming an Alarm System?
Before diving into the steps on how to arm your alarm system, it’s essential to understand the benefits of having one in the first place. Here are a few key advantages:
- Deters Burglars and Intruders: The mere presence of an alarm system can be enough to deter potential thieves from targeting your property.
- Provides Peace of Mind: Knowing that your property is protected can give you the peace of mind to go about your daily routine without worrying about potential break-ins.
- Can Save Money on Insurance Premiums: Many insurance companies offer discounts for properties with installed and active alarm systems.
- Provides Evidence in Case of a Break-in: In the unfortunate event of a burglary, an armed alarm system can provide valuable evidence to help in the investigation and recovery of stolen property.
Now that we’ve covered the benefits let’s jump into arming an alarm system.
How Does a Basic Alarm System Work?
A basic alarm system consists of various components that work together to detect and alert you of potential intrusions. These components typically include:

- Control Panel: This is the main hub of the system, where all sensors and devices are connected.
- Sensors: These can be placed on doors, windows, or other entry points to detect movement or changes in the environment.
- Keypad: This is where you enter your disarm code and arm/disarm the system.
- Alarm Siren or Bell: When triggered, this component emits a loud noise to alert occupants and potentially scare off intruders.
- Monitoring Service: Some alarm systems come with a professional monitoring service that will receive alerts and notify emergency services if necessary.
With these components working together, an alarm system can provide comprehensive protection for your home or property. So, it’s essential to understand how each component works and ensure they are all functioning correctly before arming the system.
Conclusion
How to arm an alarm system effectively is a vital step in safeguarding your home and providing peace of mind for you and your loved ones. By understanding the components of your system, utilizing smart features, and adhering to best practices for security, you can ensure that your property remains secure. Remember, the key to a robust security system lies not only in the technology itself but also in the consistent and mindful application of security measures.
Whether it’s through regular system checks, smart scheduling, or the integration of multiple security layers, each action you take contributes to creating a safer home environment. With the guidance provided, arming your alarm system should now be a straightforward and routine part of your daily security measures, ensuring that your home stays protected against potential threats.
Hopefully, with this knowledge, you can confidently arm your alarm system and enjoy the benefits of having a reliable and efficient security system in place. Remember to always stay vigilant and regularly evaluate and update your security measures to ensure maximum protection for your property. Stay safe!