
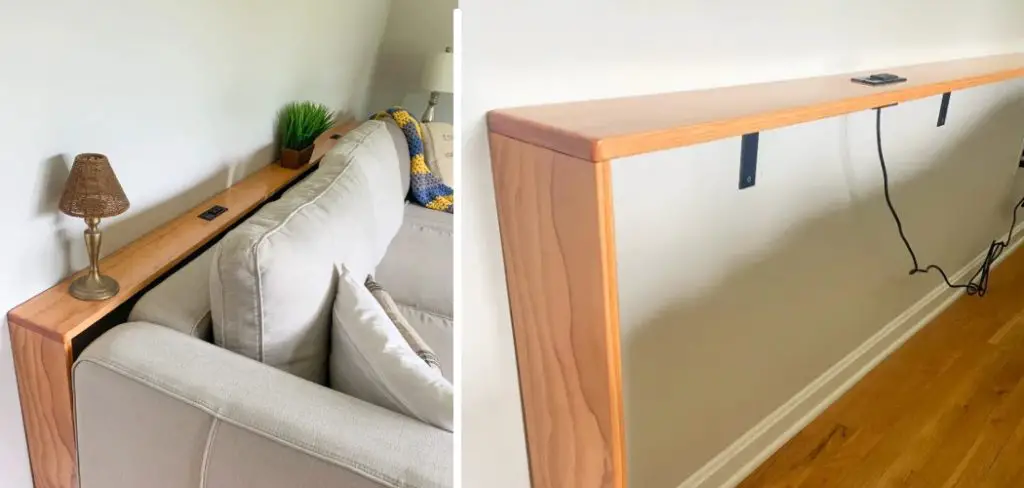
Behind-the-couch tables offer a functional and stylish solution for optimizing living space. These versatile pieces of furniture serve multiple purposes, making them a popular choice for modern homes. Often placed against the back of a sofa, they can function as storage units, decorative displays, or even charging stations for electronics.
This article guides you through crafting a personalized behind-the-couch table that fits your unique style and needs. By following this step-by-step guide on “how to build a behind the couch table,” you’ll be able to create a custom piece that complements your decor and adds practical value to your space. Whether you’re looking to minimize clutter or add a personal touch to your living room, building your own behind-the-couch table is a rewarding DIY project that offers endless possibilities for personalization.
Materials and Tools Needed
Essential Materials
When creating a behind-the-couch table, selecting the right materials is crucial to ensure both affordability and durability. Wood forms the backbone of your table, with choices like pine, oak, or plywood being popular for their distinct characteristics. Pine and plywood are generally more affordable yet durable, making them ideal for budget-conscious DIY projects.
In contrast, oak offers a more premium and robust finish. You’ll also require screws, brackets, and wood glue to hold everything together securely. Finishing touches such as paint or stain are optional but recommended to enhance the aesthetic appeal of your table, allowing personalization that suits the existing decor.
Necessary Tools
Equipping yourself with the right tools is essential to achieving precise cuts and sturdy construction. A manual or electric saw is necessary for cutting the wood to the desired dimensions. A drill, in conjunction with a screwdriver, will help fasten pieces together efficiently. Measuring tape ensures accuracy in sizing, while clamps hold components steady during assembly.
A sander is crucial for smooth, splinter-free surfaces. Don’t forget to prioritize safety by wearing gloves, goggles, and a dust mask to protect against potential hazards during the woodworking process. These tools will streamline the building process, ensuring a sturdy and professional-looking finish.
Designing and Planning Your Table
Measuring and Fitting
Begin by measuring the length and height of your couch to determine the appropriate dimensions for your behind-the-couch table. This ensures the table aligns seamlessly with the sofa without overpowering the space.

It’s vital to strike a balance when determining the table’s depth; aim for functionality without creating crowding. Consider how the table will be used and the items it will hold to decide on the best width and proportions, ensuring practicality and an unobstructed walkway in your living area.
Choosing a Style
When selecting a style for your table, consider rustic, modern, minimalist, or industrial designs. Each offers a distinct aesthetic that can complement your current decor. Rustic tables might feature distressed finishes, while modern designs highlight sleek lines and gloss. Minimalist tables focus on clean, simple forms, and industrial options often include metal accents. Be inventive by incorporating unique features like storage cubbies or built-in outlets, adding both style and functionality to your piece.
How to Build a Behind the Couch Table: Cutting and Preparing the Wood
Cutting the Boards
To begin crafting your behind-the-couch table, accurately cutting the wood is essential. Start with the tabletop, carefully measuring the length and width to align with the dimensions of your couch. Use a saw to cut the selected wood type, whether pine, oak, or plywood, ensuring each cut is straight by following your measurements precisely.
Repeat this process for the table legs and any necessary supports, ensuring each piece matches your design specifications. Always prioritize safety by wearing protective gear, such as goggles and gloves, and maintain a steady hand to avoid errors. For best results, work in a well-lit area and double-check each measurement before making cuts to reduce waste and inaccuracies. These practices will set a solid foundation for a precise and sturdy table assembly.
Sanding and Smoothing
After cutting the boards, the next step involves sanding the edges and surfaces to create a smooth, splinter-free appearance. Select sandpaper grit based on your wood type; for instance, start with a coarser grit, like 60 or 80, to remove any roughness and unevenness from the cut edges. Transition to medium grit, such as 120, for further smoothing, and finally, use a fine grit, like 220, for a professional finish.

Sand along the wood grain to prevent scratches and ensure a uniform texture. Pay particular attention to the edges and corners of each piece to eliminate potential splinters and enhance the overall aesthetic. As you sand, periodically wipe away dust with a cloth to evaluate your progress and maintain a clear work environment. This meticulous approach will result in a refined and polished look for your table components.
Pre-Assembling Components
Before final assembly, conduct a pre-assembly of the components to ensure a precise and proper fit. Arrange the tabletop, legs, and supports in their intended positions, verifying that all pieces align correctly with your design layout. This step highlights any necessary adjustments or re-measuring before committing to drilling and fastening.
Once satisfied with the fit, use a pencil or marker to mark drilling points on each component. This preparation simplifies the construction process, providing a clear guide for where screws and brackets will connect during assembly. Take this opportunity to confirm that all pieces are square and level, as this will impact the stability and appearance of the finished product. By thoroughly checking the setup and marking essential points, you streamline the subsequent assembly phase, minimizing errors and ensuring a successful build.
Assembling the Table
Building the Frame
To construct the frame of your behind-the-couch table, begin by attaching the legs to the tabletop using screws and brackets. Position each leg at the corners of the tabletop, ensuring they are flush with the edges. Use a drill to fasten the brackets securely, maintaining equal spacing and alignment for a stable structure. As you attach each leg, frequently check that the table remains level and square to prevent wobbling. A carpenter’s square or measuring tool can aid in this process, assuring that the legs are perpendicular to the tabletop. Stability is critical, so don’t rush this step. Adjust as necessary to achieve a firm and supportive frame.
Adding Supports and Details
For added durability, install cross-braces or additional supports between the legs. These components can be secured beneath the tabletop, further stabilizing the structure and increasing its strength. Position the cross-braces diagonally or horizontally, depending on your design, and attach them with screws or wood glue. Beyond functionality,

consider enhancing the aesthetics with decorative touches like routed edges or trim along the tabletop and legs. These small details can elevate the table’s appearance, giving it a polished and custom look that reflects your personal style. With all elements securely in place, your table will be ready to serve as both a functional piece and a stylish addition to your living space.
Finishing Touches
Painting or Staining
Applying the right finish can enhance your table’s appearance and durability. Begin by deciding whether to paint or stain the wood, considering the effect you want to achieve. Start with a primer to ensure the paint adheres effectively and provides a smooth base. Apply your chosen paint color using a brush or roller, working in thin, even coats to avoid drips or streaks.
If staining, apply the wood stain with a cloth or brush, following the grain for consistent absorption. Regardless of your choice, seal the surface with a high-quality sealant to protect against wear and moisture. Use gentle, uniform strokes with a fine-bristle brush or a sprayer for the best finish.
Adding Functional Features
To enhance the table’s practicality, consider attaching a power strip beneath the tabletop for convenient access to electricity. Use screws or adhesive strips for secure mounting. Additionally, hooks or cable management clips should be incorporated along the sides to keep cords organized and out of sight.
To safeguard floors, affix non-slip pads to the bottom of the table legs. These pads prevent unwanted movement and protect against scratches, keeping your furniture and flooring pristine. Such thoughtful additions optimize functionality and maintain a tidy living area.
Styling and Using Your Table
Decorating Ideas
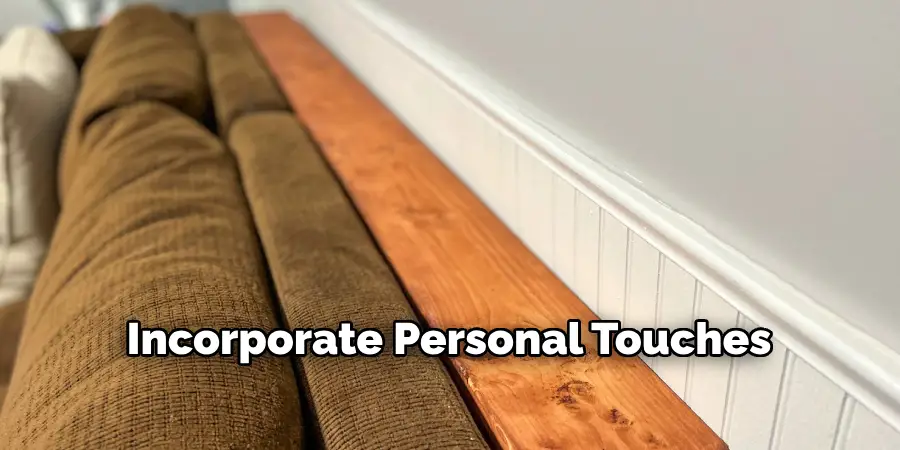
Incorporate personal touches to style your table, adding character and charm to your space. Consider adorning the tabletop with a decorative lamp for ambient lighting, a stack of favorite books to express your personality, or a small plant for a touch of nature and freshness.
Practical Uses
Explore its various applications to transform your behind-the-couch table into a versatile piece. It can serve as a convenient storage solution for remote controls and magazines, enhance your entertainment setup by holding speakers or a media device, or even double as a compact workspace for reading and laptop use.
Conclusion
Building a behind-the-couch table is an enriching project that combines creativity with practicality. By meticulously following the steps from preparing the wood to adding functional features, you’ve not only learned how to build a behind the couch table but have also crafted a unique, functional piece for your home.
Personalize your creation with different finishes and decorative flourishes that reflect your style. Experiment with various designs and techniques to make your table truly one-of-a-kind. Embrace this opportunity to develop your skills and enjoy the satisfaction of creating something both beautiful and useful.
you can also check it out Decorate Office Space