Connecting a printer using an Ethernet cable can significantly enhance your printing experience, especially in a networked office or home setting. This method ensures a stable and reliable connection, allowing multiple devices to access the printer simultaneously without the delays often associated with wireless connections.

In this guide, we will walk you through how to connect printer with ethernet cable, ensuring you can enjoy seamless printing without the hassle of frequent disconnections or slow data transfer speeds.
Benefits of Connecting a Printer via Ethernet Cable
Connecting a printer via Ethernet cable offers several advantages that enhance both functionality and user experience. Firstly, the wired connection provides superior stability and reliability compared to wireless setups, reducing the likelihood of dropped connections and interruptions during printing.
Additionally, Ethernet connections typically offer faster data transfer speeds, ensuring that print jobs are completed promptly, which is particularly beneficial in high-volume environments. Another significant benefit is improved security; wired networks are less susceptible to unauthorized access compared to wireless ones, which helps safeguard sensitive documents.
Furthermore, setting up a printer on an Ethernet network is often easier to manage, with less interference from external factors like Wi-Fi signal strength, ensuring that all connected devices can reliably access the printer at all times.
10 Methods How to Connect Printer with Ethernet Cable
1. Direct Connection to a Router or Switch
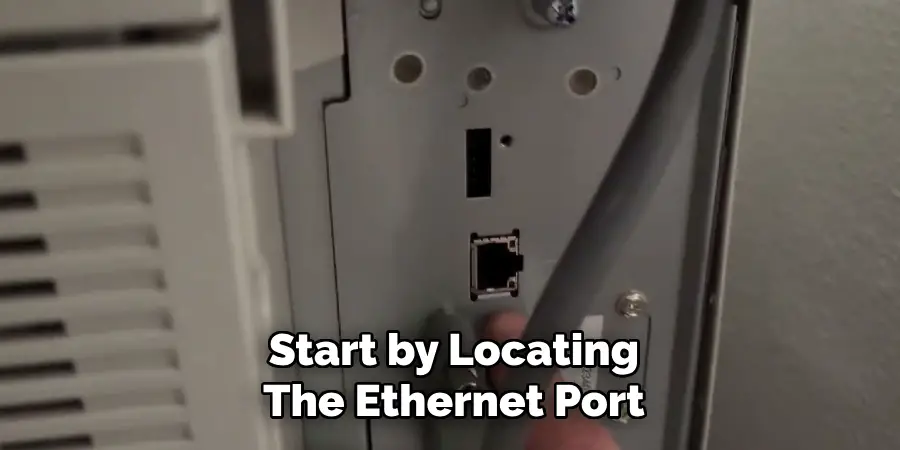
The most straightforward method to connect a printer with an Ethernet cable is to plug it directly into a router or network switch. Start by locating the Ethernet port on the printer, typically found on the back or side of the device. Next, take one end of the Ethernet cable and plug it into this port. Then, connect the other end of the cable to an available port on your router or switch.

Once connected, power on the printer and ensure it’s properly connected to the network. Most printers will automatically configure themselves and appear on the network, ready for use by any device on the same network.
2. Using a Static IP Address
If you need your printer to have a consistent network identity, assigning a static IP address is a good method. After connecting the printer to your router or switch using an Ethernet cable, access the printer’s control panel or web interface. Navigate to the network settings and choose the option to manually configure the IP address.
Assign an IP address that is within your router’s subnet but outside the range of dynamically assigned addresses (DHCP). For example, if your router’s IP range is 192.168.1.2 to 192.168.1.100, you might assign the printer an IP like 192.168.1.101. This ensures that the printer’s IP address remains consistent, making it easier to locate and connect from other devices.
3. Connecting Through a Network Hub
In situations where you have multiple devices that need to connect via Ethernet in a single location, using a network hub can be effective. A network hub allows multiple Ethernet devices to share a single network connection. To connect your printer via a hub, first connect the hub to the router with an Ethernet cable. Then, plug one end of another Ethernet cable into the printer and the other end into the hub.
Once connected, ensure that all devices, including the printer, are powered on and properly connected. The hub will facilitate communication between the printer and the router, allowing it to be accessed by other network devices.
4. Configuring the Printer Through its Control Panel
Many modern printers have a built-in control panel with a screen that allows for easy network configuration. After connecting the printer to the network with an Ethernet cable, use the control panel to configure the network settings. Navigate to the network or Ethernet settings menu and select the option to set up the connection.

Most printers will automatically detect the network and configure the connection, but you may need to manually enter network details such as the IP address, subnet mask, and gateway, especially if you’re using a static IP. This method is user-friendly and doesn’t require access to a computer or router settings.
5. Connecting via a Print Server
A print server is a device that allows multiple computers to share a single printer over a network. To connect your printer with an Ethernet cable using a print server, first connect the printer to the print server via USB or another appropriate connection. Next, use an Ethernet cable to connect the print server to your router or switch.
Once the physical connections are made, you’ll need to configure the print server using its web interface or software, setting it up to recognize the printer and assign it a network identity. This method is ideal for situations where you want to share a non-network printer with multiple users on the same network.
6. Setting Up a Printer on a Corporate Network
When connecting a printer to a corporate network, additional security and configuration steps may be necessary. Start by connecting the printer to the network using an Ethernet cable. Next, access the printer’s web interface or control panel to configure the network settings. Depending on the network’s security protocols, you may need to enter credentials, such as a network username and password, or configure settings like VLANs (Virtual Local Area Networks).
It may also be necessary to register the printer’s MAC address with the network administrator to allow it access to the corporate network. This method ensures that the printer is secure and compliant with the company’s IT policies.
7. Using a Computer as a Network Bridge
If your printer lacks an Ethernet port or if you want to connect it through a computer, you can use the computer as a network bridge. First, connect the printer to the computer via USB. Then, connect the computer to the network using an Ethernet cable. In the computer’s network settings, enable Internet Connection Sharing (ICS) or configure a network bridge between the USB and Ethernet connections.

This setup allows the printer to use the computer’s network connection, effectively connecting it to the Ethernet network. This method is useful for older printers or those without direct network connectivity options.
8. Connecting Through a Powerline Adapter
Powerline adapters use your home’s electrical wiring to transmit network signals, which can be useful if your router is far from the printer. To connect your printer via a powerline adapter, first plug one adapter into a power outlet near your router and connect it to the router with an Ethernet cable.
Then, plug the second adapter into a power outlet near your printer and connect it to the printer with another Ethernet cable. Once connected, the adapters will create a network connection over the electrical wiring, allowing the printer to join the network without needing a direct Ethernet connection to the router. This method is ideal for homes or offices with limited Ethernet ports or where wireless connections are unreliable.
9. Configuring Printer Sharing on a Networked Computer
If your printer is connected to a computer via Ethernet and you want to share it with other devices on the network, you can configure printer sharing. First, connect the printer to the computer via USB, then connect the computer to the network using an Ethernet cable. On the computer, go to the printer settings and enable printer sharing.
You may also need to adjust the network settings to allow other computers on the network to find and use the printer. This method is straightforward and allows multiple users to access the printer without directly connecting it to the network.
10. Testing and Troubleshooting the Connection
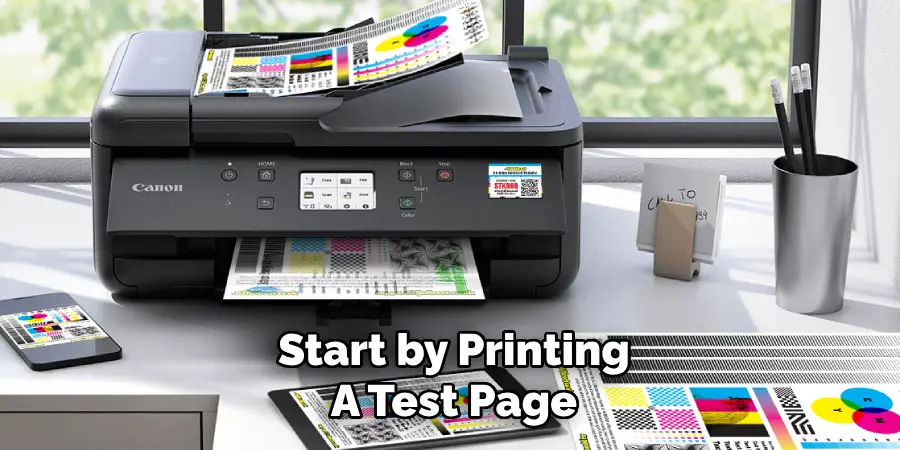
After connecting your printer to the network using an Ethernet cable, it’s important to test the connection to ensure everything is working properly. Start by printing a test page from a computer on the same network. If the printer doesn’t appear on the network, check the Ethernet cable connections and ensure that the printer is powered on.

Access the printer’s network settings to confirm that it has an IP address and is properly configured. If necessary, reboot the printer, router, or switch to reset the connection. This method ensures that your printer is correctly connected and ready for use by all devices on the network.
Conclusion
Connecting a printer with an Ethernet cable offers a reliable and secure way to integrate it into your network, making it accessible to multiple devices. Whether you’re using a direct connection to a router, configuring a static IP, or employing a print server, these methods provide various options to suit different environments and needs.
By following these steps, you can ensure that your printer is properly connected, configured, and ready to handle the printing demands of your home, office, or corporate network. Thanks for reading, and we hope this has given you some inspiration on how to connect printer with ethernet cable!

