Connecting multiple monitors to a MacBook Pro can significantly enhance your productivity and create a more immersive workspace. Whether you’re a creative professional needing extra screen real estate for design work, a programmer requiring multiple windows for coding, or simply someone who enjoys multitasking, setting up three monitors can provide the flexibility and efficiency you need.
This guide will walk you through on how to connect three monitors to macbook pro, ensuring you can leverage the full potential of your device and streamline your workflow.
Benefits of Connecting Three Monitors to a MacBook Pro
Connecting three monitors to your MacBook Pro unlocks a multitude of advantages that can greatly enhance your working experience. Firstly, the increased screen real estate allows for better organisation of your applications and windows, enabling you to work more efficiently by reducing the need to switch between tabs or applications.
This is especially beneficial for tasks such as video editing, graphic design, and software development, where multiple programs often need to be visible simultaneously.
Additionally, having multiple monitors can improve focus and reduce distractions. With dedicated screens for specific tasks, you can maintain a clearer workflow, minimising clutter and visual confusion.
Furthermore, it fosters better collaboration; if you’re working in a team, sharing ideas and presentations becomes seamless as you can have content displayed for everyone to see without crowding a single screen. Ultimately, connecting three monitors transforms your MacBook Pro into a powerful workstation, optimising both productivity and creativity.
Understanding the MacBook Pro’s Capabilities
Before connecting three monitors, it’s essential to understand the specifications and capabilities of your MacBook Pro model. Most recent models come equipped with powerful graphics processing units (GPUs) and an array of connectivity options, enabling support for multiple displays.
Depending on whether you have a standard MacBook Pro or a Pro with M1 or M2 chip, the number of supported external displays can vary significantly. Typically, Intel-based models can handle up to four external monitors, while newer M1 and M2 models support one or two external displays, respectively.
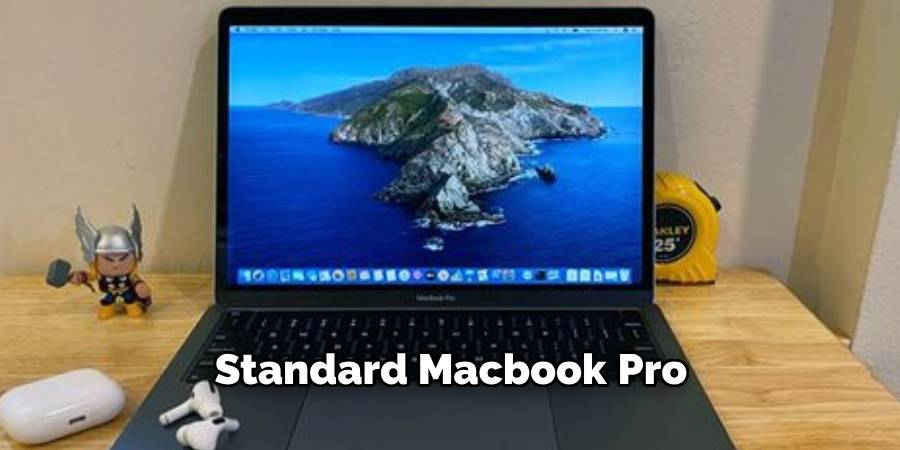
Additionally, knowing the ports available on your MacBook Pro—such as Thunderbolt 3/USB-C—will help you select the right adapters and cables to facilitate the connection of multiple monitors. Understanding these capabilities lays the groundwork for optimising your multi-monitor setup and achieving a seamless user experience.
10 Methods How to Connect Three Monitors to Macbook Pro
1. Using Thunderbolt 3/USB-C Ports Directly
Most modern MacBook Pro models come with multiple Thunderbolt 3 or USB-C ports, which can be used to connect external monitors directly. If your MacBook Pro has at least three Thunderbolt ports, you can connect three external monitors using USB-C to DisplayPort or USB-C to HDMI cables, depending on your monitor’s input options.
Make sure to use high-quality cables to ensure smooth performance. Once connected, macOS should automatically detect the monitors, and you can configure their arrangement in System Settings under Displays. This method is straightforward but is only available on MacBook Pros with multiple Thunderbolt 3/USB-C ports.
2. Using a Thunderbolt 3 Docking Station
A more efficient method for connecting three monitors is by using a Thunderbolt 3 Docking Station. These docks provide multiple video output options, such as HDMI, DisplayPort, and even additional Thunderbolt ports, allowing you to connect up to three monitors without directly plugging each monitor into your MacBook Pro.
Popular docks from brands like CalDigit or OWC come equipped with multiple display outputs, and you can connect the dock to your MacBook Pro via a single Thunderbolt cable. This not only simplifies cable management but also frees up additional ports for other peripherals like external storage or USB devices.
3. Using a USB-C to Dual HDMI Adapter
If your MacBook Pro has limited Thunderbolt ports, you can use a USB-C to Dual HDMI Adapter to connect two external monitors through a single USB-C port. Many dual HDMI adapters are designed to split one USB-C connection into two HDMI outputs, effectively allowing you to connect two monitors with just one port.
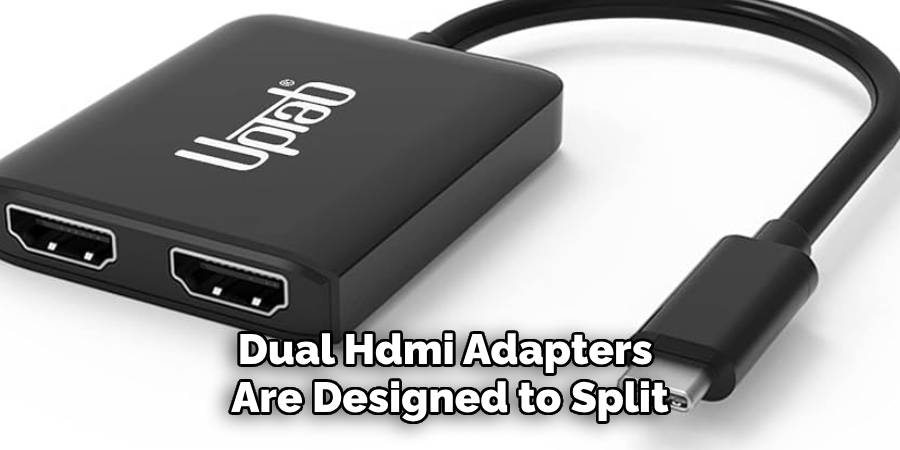
To connect the third monitor, you can use one of the remaining Thunderbolt or USB-C ports with a USB-C to HDMI or DisplayPort cable. This method works well for users who need to conserve ports for other purposes.
4. Using an eGPU (External Graphics Processing Unit)
An eGPU (External Graphics Processing Unit) is a powerful solution for users who need to connect multiple monitors, especially if they require higher graphical performance. eGPUs are connected to your MacBook Pro via Thunderbolt 3, and they provide additional video outputs such as HDMI, DisplayPort, or USB-C.
Once an eGPU is connected, it effectively boosts your MacBook Pro’s graphical capabilities, allowing you to connect three or more monitors seamlessly. This method is particularly beneficial for tasks that require high-end graphics processing, such as video editing, gaming, or 3D rendering.
5. Using DisplayLink Adapters
Another workaround for connecting multiple monitors is through DisplayLink technology, which allows multiple monitors to be connected through USB or Thunderbolt ports using DisplayLink adapters. DisplayLink adapters convert USB connections into display signals that can be sent to monitors, allowing for an extended desktop setup with three or more displays.
To use DisplayLink, you’ll need to install the DisplayLink driver on your MacBook Pro, and then connect the monitors via compatible adapters. While this solution may introduce slight latency, it’s a versatile method for connecting several monitors when you don’t have enough native video outputs.
6. Using a HDMI Splitter
If your monitors only support HDMI input and your MacBook Pro lacks enough HDMI ports, you can use a HDMI Splitter to connect two monitors to a single HDMI port on your MacBook Pro. HDMI splitters are designed to duplicate the video signal, sending the same output to multiple screens.

While this method can mirror your display across two monitors, some splitters support extended desktop functionality, where each monitor displays different content. You would connect one monitor directly to an available port and use the splitter for the remaining two monitors, thus connecting all three.
7. Using a Thunderbolt to HDMI/DisplayPort Hub
If your MacBook Pro has limited Thunderbolt ports, a Thunderbolt to HDMI/DisplayPort Hub can provide a simple solution. These hubs are designed to expand one Thunderbolt port into multiple video outputs, such as two or three HDMI or DisplayPort ports. Once connected, you can attach up to three monitors through the hub, allowing for an extended desktop experience.
These hubs work similarly to docking stations but tend to be more compact and focused solely on video outputs, making them ideal for users who only need to connect monitors without the additional ports offered by a full docking station.
8. Connecting Monitors via Daisy-Chaining (DisplayPort)
Some monitors with DisplayPort connections support daisy-chaining, where multiple monitors are connected in series using only one video output from the MacBook Pro. This method is limited to monitors that support DisplayPort Multi-Stream Transport (MST).
You can connect the first monitor to your MacBook Pro using a USB-C to DisplayPort cable, then use another DisplayPort cable to connect the second monitor to the first, and the third monitor to the second. Daisy-chaining simplifies cable management and reduces the number of ports required on your MacBook Pro.
9. Using AirPlay for Wireless Display
Apple’s AirPlay feature allows you to wirelessly connect your MacBook Pro to external displays like Apple TVs or AirPlay-compatible smart TVs. Although AirPlay is typically used for mirroring, you can also extend your display to an AirPlay device, effectively creating a multi-monitor setup.
To use this method, ensure both your MacBook Pro and the AirPlay device are connected to the same Wi-Fi network. Go to System Settings, then Displays, and select the AirPlay device as an additional display. While this method is convenient, it is best suited for environments where wireless connectivity is strong and stable.
10. Connecting via a USB-C Dock with Multiple Outputs
For users with newer MacBook Pro models equipped with USB-C ports, a USB-C Dock with multiple video outputs can provide a simple and effective solution for connecting three monitors. These docks often come with multiple HDMI, DisplayPort, or VGA ports, allowing you to connect several monitors simultaneously.
After connecting the dock to your MacBook Pro via USB-C, simply plug your monitors into the appropriate video outputs on the dock. Most modern USB-C docks are designed to support multiple displays with high resolutions, making them a versatile option for creating a multi-monitor setup.

Conclusion
Connecting three monitors to a MacBook Pro requires careful consideration of the available ports, adapters, and accessories, but it’s entirely achievable with the right setup. Whether you choose to use Thunderbolt docks, USB-C hubs, DisplayLink adapters, or even an eGPU, there are multiple methods to suit your hardware and performance needs.
Each method has its advantages based on your monitor’s input options, the number of available ports on your MacBook Pro, and your desired workflow. Thanks for reading, and we hope this has given you some inspiration on how to connect three monitors to macbook pro!

