
Recliners are a staple of comfort in many homes, offering a perfect relaxing spot after a long day. However, recliners can develop problems over time, like any piece of furniture. Common issues include jammed mechanisms that prevent smooth reclining, broken handles that make operation difficult, and sagging cushions that diminish comfort and support.

Learning how to fix recliner issues yourself can be incredibly rewarding. Not only does it save you the cost of professional repairs, but it also helps extend the lifespan of your cherished furniture.
This guide will walk you through everything you need to know, starting with diagnosing issues and then moving on to specific repair techniques for various problems. With a little effort and the right tools, you can restore your recliner’s functionality and ensure it remains a reliable part of your living space for years to come.
Diagnosing Recliner Problems
Identifying the Problem
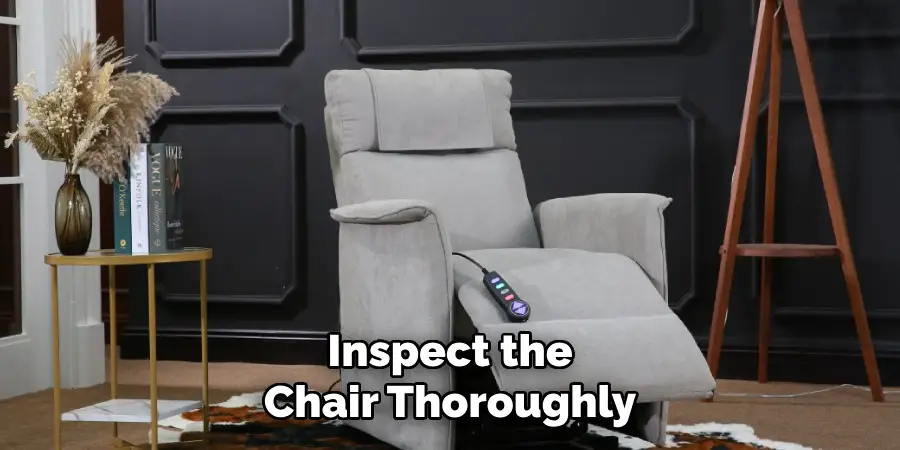
Before attempting to fix your recliner, it’s essential to first identify the issue. Start by inspecting the recliner for any visible signs of damage, such as loose screws, torn upholstery, or bent levers. These visual checks can often provide clues about what might be wrong.
Next, test the recliner’s mechanism by gently operating it. Listen for unusual noises like creaking or grinding, and take note of any stiffness, lack of movement, or irregular operation. This process will help you pinpoint the specific area that requires attention.
Common Recliner Issues
Several problems are frequently encountered in recliners. A stuck footrest is a common issue that can often be traced to jammed or damaged mechanisms. Handles that are broken or disconnected can make operating the recliner impossible. Worn-out or sagging cushions reduce comfort and support, while uneven reclining or tilting indicates misalignment or structural problems.
Tools Needed for Repairs
Having the right tools is crucial for successful repairs. Basic tools like screwdrivers and a wrench set are often required. Depending on the issue, replacement parts, a fabric repair kit, and lubricant may be necessary. With these tools at hand, you’ll be well-equipped to tackle most recliner problems effectively.
How to Fix Recliner: Fixing a Jammed Footrest
Inspecting the Footrest
Begin by carefully inspecting the reclining mechanism for any obstructions. Look for debris, such as small objects or dirt, blocking the footrest from operating smoothly. Pay close attention to the hinges and joints, as these areas are most prone to accumulating blockages. Clear away any foreign matter you find, and ensure all parts are clean and grime-free.

Adjusting the Mechanism
After inspecting the footrest, examine the bolts and screws within the footrest assembly. Tighten any loose components using the appropriate tools to restore stability and alignment.
Apply a generous amount of lubricant, such as silicone-based spray, to the moving parts of the footrest mechanism. This lubrication helps reduce friction and ensures smoother operation. Make sure to wipe away any excess lubricant to prevent buildup.
Testing the Repair
Once the adjustments and lubrication are complete, test the recliner’s footrest by operating it multiple times. Extend and retract the footrest fully to verify that it moves freely without sticking or resistance.
If the footrest functions correctly during these tests, the repair is successful. If issues persist, further inspection may be required to address more complex problems.
How to Fix Recliner: Repairing a Broken Handle or Lever
Removing the Damaged Handle
Begin by identifying the screws or fastening mechanism securing the broken handle to the recliner. Carelessly unscrew and detach the damaged handle using the appropriate screwdriver or tool.
Keep the screws or clips safe, as you might reuse them depending on the replacement handle. Examine the area for any debris or remnants of the broken handle and clean it thoroughly to ensure smooth installation of the new piece.

Installing a Replacement
Purchase a compatible replacement handle or lever, preferably from the recliner’s manufacturer or a trusted hardware store, to ensure proper fit and functionality.
Align the new handle with the mounting point on the recliner, ensuring it sits flush against the surface. Secure the handle by tightening screws or attaching clips, making sure it is firmly fixed in place. Double-check the fit to prevent wobbling or misalignment during operation.
Checking Functionality
Test the new handle by operating it multiple times, ensuring it engages and disengages the recliner’s mechanism smoothly. The handle should function without sticking, resistance, or excessive force. If the handle performs as expected, the repair is complete. If issues persist, recheck the alignment or consult a professional for assistance.
Resolving Uneven Reclining Issues
Inspecting the Frame and Mechanism
Begin by carefully inspecting the recliner’s frame and reclining mechanism to identify the root cause of the uneven reclining. Check for any bent or damaged parts of the frame, as these can lead to an imbalance during operation.
Examine the reclining mechanism for misaligned components that might be preventing the chair from reclining evenly. Identifying all problem areas before proceeding with adjustments or repairs is crucial.
Aligning the Recliner
To restore balance, adjust the screws or bolts on the reclining mechanism. Use the appropriate tools, such as a wrench or screwdriver, to realign any misaligned parts.
If you notice bent metal components, gently straighten them with a wrench, taking care not to apply too much force and risk further damage. Ensure all adjustments are made systematically, testing the recliner’s functionality after each modification. Proper alignment is essential for smooth and balanced operation.
Securing Loose Components
Inspect the chair thoroughly for any loose screws or bolts in both the frame and the reclining mechanism. Tighten all fasteners securely to prevent further instability.
If you find any worn-out or damaged components beyond repair, replace them with new parts compatible with your recliner model. Ensuring all components are secure and in good condition will help maintain the chair’s structural integrity and resolve uneven reclining issues.
Restoring Sagging Cushions
Assessing Cushion Wear
Over time, the cushions of your recliner may begin to sag due to regular use or aging materials. To restore their shape and support, start by carefully assessing the condition of the foam or padding inside the cushions.
Check for signs of wear, such as compression, loss of firmness, or uneven thickness. If the cushions feel overly soft or fail to provide adequate support, it may be time to replace the interior padding.
Adding New Padding
To revitalize the cushions, you will need to access their interior. Begin by carefully removing the upholstery fabric, taking care not to damage it, as you will need to reattach it later.
Once the interior is exposed, remove the old foam or batting. Replace it with high-density foam or fresh batting, both of which provide excellent support and durability. Cut the new padding to fit the dimensions of the cushion, ensuring a snug and uniform fill. After replacing the padding, smooth it out to eliminate any lumps or uneven spots.
Repairing Upholstery
If the cushion’s fabric has tears or holes, address these issues before reassembling the recliner. Use a fabric repair kit to fix any damage, following the kit’s instructions to achieve a seamless repair. Once the fabric is restored, reattach the upholstery securely.
Use a staple gun or upholstery tacks to fasten the fabric tightly, ensuring it remains smooth and firmly in place. Properly restored cushions will not only enhance comfort but also improve the overall appearance of your recliner.
Lubricating and Maintaining the Recliner
Lubricating Moving Parts
To ensure a smooth and quiet operation, apply a silicone-based lubricant to all moving parts of the recliner, including joints, hinges, and any mechanisms that control its movement. Silicone-based lubricants are ideal as they reduce friction without attracting dust or debris.
Begin by identifying the areas where motion occurs, and use a clean cloth to wipe away any dust, dirt, or old lubricant build-up. Then, a small amount of lubricant is applied to each moving part, working it in by gently operating the recliner to distribute the product evenly. Regular lubrication not only prevents squeaking but also extends the lifecycle of the recliner’s components.
Preventing Future Issues
Proper maintenance plays a key role in prolonging the durability of your recliner and avoiding future problems. Prevent overloading the recliner, as excessive weight or force can damage its mechanisms over time. When adjusting or reclining, use smooth and steady movements to minimize strain on the components.
Additionally, incorporate regular cleaning and inspection into your routine. Dust the surfaces and check for loose screws, bolts, or signs of wear. Address minor issues promptly to prevent them from escalating into costly repairs. By practicing these preventive measures, you’ll ensure your recliner remains comfortable and functional for years to come.
When to Seek Professional Help
Complex Repairs
For electrical recliners or severe structural damage, it’s best to consult a professional technician. Attempting complex repairs without proper expertise could lead to further issues or safety hazards.
Warranty Repairs
Contact the manufacturer or an authorized service provider for repairs if your recliner is still covered under warranty. This ensures that the warranty remains valid and the repairs are completed to the manufacturer’s standards.
Benefits of Professional Service
Professional technicians provide comprehensive repair services and have the tools and expertise to address intricate issues. Their assistance ensures your recliner is restored without risking additional damage.

Conclusion
Learning how to fix recliner issues can save time and money while prolonging the life of your chair. Start by diagnosing common problems to identify the root cause, then follow targeted repair tips to resolve specific issues such as mechanical faults or upholstery wear.
Regular maintenance, like cleaning and inspecting components, ensures your recliner remains in top condition. While basic repairs can often be done at home, always seek professional help for complex repairs or warranty-covered services. With these simple repair tips, your recliner can be restored to its former comfort and functionality!