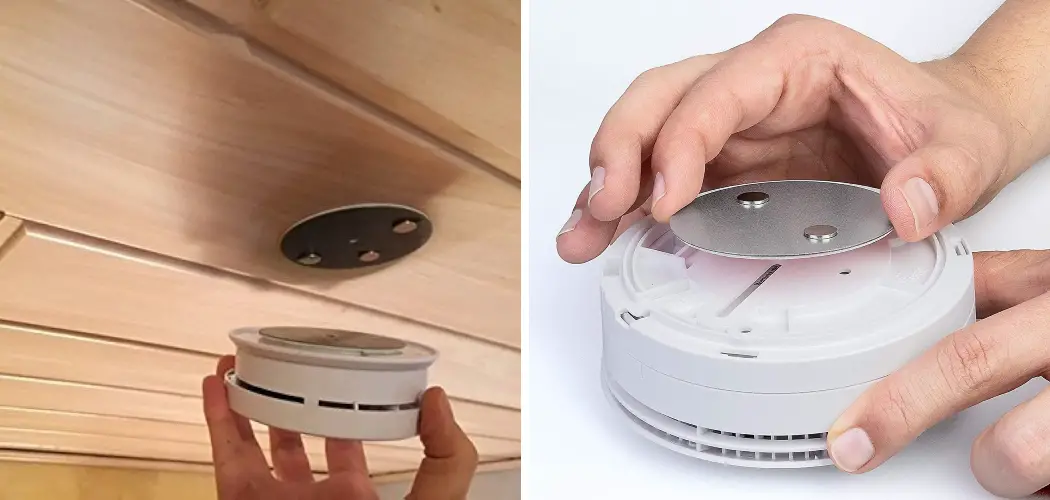
Are you tired of drilling holes in your walls to install smoke detectors? Don’t worry—there are now alternative methods to install smoke detectors without drilling. As a bonus, these methods are also easier and less time-consuming.

Installing a smoke detector without drilling can be an appealing option for renters or individuals seeking to avoid damage to walls and ceilings. This method not only preserves the aesthetic integrity of the living space but also ensures safety compliance in a non-invasive manner. Utilizing adhesive strips or magnetic mounting kits offers a straightforward, reliable solution that can be executed quickly and efficiently.
In the following guide, we will explore various techniques and tips on how to install smoke detector without drilling, ensuring your home remains safe without the need for permanent alterations.
What are the Benefits of Installing Smoke Detectors Without Drilling?
Before diving into the installation process, it’s essential to understand the benefits of choosing alternative methods for installing smoke detectors without drilling. Here are some of the main advantages:
- Non-Invasive: As mentioned earlier, using adhesive strips or magnetic mounting kits avoids damaging walls and ceilings. This makes it an ideal option for renters who may not have permission to drill holes or for homeowners who want to avoid potential repairs.
- Cost-Effective: Compared to traditional drilling methods, installing smoke detectors without drilling is a cost-effective option. Adhesive strips and magnetic kits are relatively inexpensive and can be reused if needed.
- Quick and Easy: The installation process for these alternative methods is quick and easy, often taking only a few minutes. This can save you time and effort compared to drilling, especially if you are installing multiple smoke detectors.
- Versatile: Adhesive strips and magnetic mounting kits can be used on various surfaces, including metal, wood, and even glass. This versatility allows for flexible placement of smoke detectors in different areas of your home.
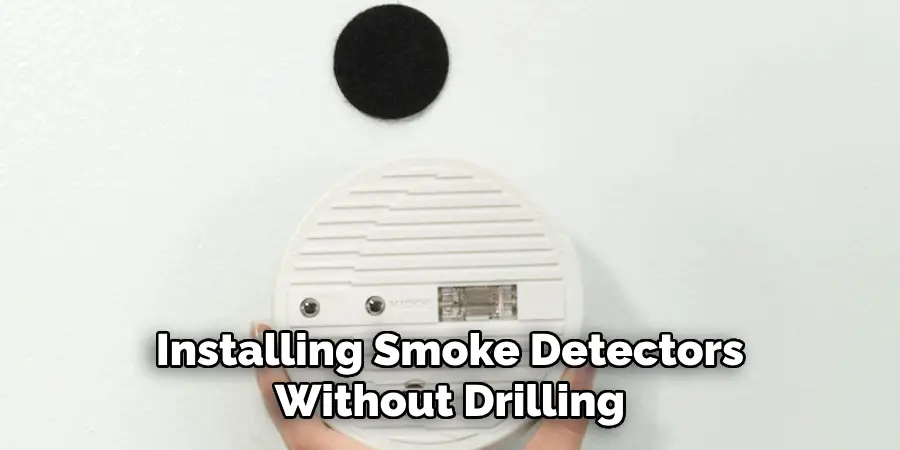
These benefits make installing smoke detectors without drilling an attractive option for many individuals.
What Are the 3 Types of Smoke Detectors?
Before installing a smoke detector, it’s crucial to understand the different types available and their specific functions. Here are the three main types of smoke detectors:
- Ionization Smoke Detectors: These detectors use ionized air to detect small particles of smoke produced by fast-burning fires.
- Photoelectric Smoke Detectors: Using light sensors, these detectors can detect slow-burning fires that produce larger smoke particles.
- Dual-Sensor Smoke Detectors: As the name suggests, these detectors combine both ionization and photoelectric technologies to provide comprehensive fire detection.
Depending on your needs and preferences, you can choose a specific type of smoke detector for installation without drilling.
What Will You Need?
To install smoke detectors without drilling, you will need the following materials:
- Smoke detector
- Adhesive strips or magnetic mounting kit (depending on your preference)
- Alcohol wipes or cleaning solution
- Pencil and measuring tape (optional for marking placement)
Once you have gathered all the necessary materials, you can start the installation process.
10 Easy Steps on How to Install Smoke Detector Without Drilling
Step 1. Choose the Location
Before installing your smoke detector, it’s essential to choose a suitable location. According to the National Fire Protection Association (NFPA), smoke detectors should be installed on every level of your home, including inside and outside bedrooms. Avoid placing them near windows, doors, or air vents, as these areas can affect the detector’s effectiveness.
Step 2. Clean the Surface

To ensure strong adhesion of the adhesive strips or magnetic mounting kit, start by thoroughly cleaning the area where you’re planning to install the smoke detector.
Use alcohol wipes or a cleaning solution to remove any dust, dirt, or grease from the surface. Allow the surface to dry completely before proceeding to the next step. This preparation is crucial as it prevents the smoke detector from falling off due to a weak bond with the installation surface.
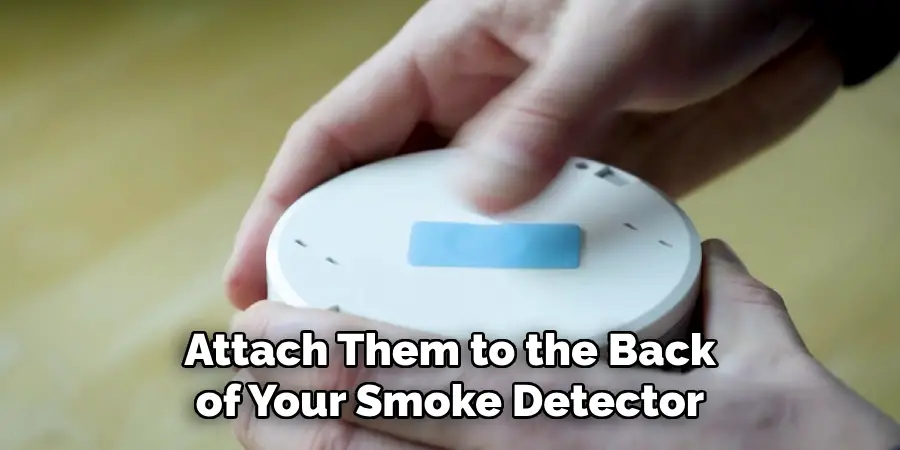
Step 3. Prepare the Adhesive Strips or Magnetic Mounting Kit
Take your adhesive strips or magnetic mounting kit and prepare it according to the instructions provided. If using adhesive strips, ensure that they are compatible with your smoke detector’s weight and size.
For a magnetic mounting kit, align the magnets as directed to ensure a strong hold. Peel off any backing from the adhesive strips or magnetic components to get them ready for installation. This step is key to making sure that your smoke detector will stay securely in place once mounted.
Step 4. Attach the Adhesive Strips
After preparing the adhesive strips or magnetic mounting kit, attach them to the back of your smoke detector. Press firmly to ensure that they are securely bonded to the detector’s surface. If using a magnetic kit, make sure the magnetic plate is properly aligned and attached to the detector. This step is crucial for ensuring that the smoke detector will be securely mounted to the ceiling or wall.
Step 5. Mark the Installation Spot
Using a pencil and measuring tape, lightly mark the spot on the ceiling or wall where you will install the smoke detector. This step ensures precision in placement, especially if you’re aligning multiple smoke detectors throughout your home. Ensure that the chosen spot aligns with safety recommendations, away from windows, doors, and vents, to optimize the detector’s efficacy.
Step 6. Attach the Detector to the Surface
Once you’ve marked the installation spot, take the smoke detector with the adhesive strips or magnetic mounting kit already attached and press it firmly against the surface. Hold it in place for a few seconds to ensure it adheres well.
If using a magnetic mounting kit, the magnetic force should instantly secure the detector to the surface. This step is pivotal to the installation process as it determines the stability of the smoke detector in its designated position.
Step 7. Test the Adhesion
After affixing the smoke detector to the ceiling or wall, it’s crucial to test the strength of the adhesion or magnetic connection. Gently tug on the detector to ensure it’s securely in place and doesn’t move or detach. This step is vital for ensuring the safety and functionality of the smoke detector.
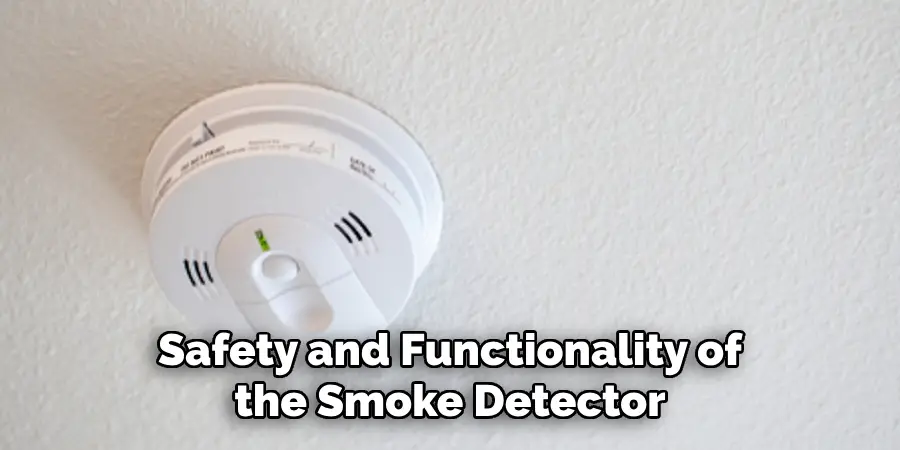
If the detector feels loose or unstable, remove it carefully and reapply the adhesive strips or adjust the magnetic mounting kit as necessary. Repeat the attachment process, ensuring the surface is clean and free of debris for optimal adhesion. Remember, a secure mount today can prevent potential hazards tomorrow.
Step 8. Perform a Functionality Test
Once the smoke detector is installed securely, conduct a functionality test according to the manufacturer’s instructions. This usually involves pressing a test button on the detector to trigger a loud, audible alarm.
Testing the detector immediately after installation ensures it is operating correctly and can effectively alert you in case of smoke or fire. This step is non-negotiable, as it confirms the device’s readiness to perform its crucial safety function.
Step 9. Schedule Regular Maintenance Checks
It’s essential to schedule regular maintenance checks for your smoke detector to ensure its continuous operation. Check the manufacturer’s guidelines for specific maintenance recommendations, but generally, it’s advisable to test the functionality of your smoke detector monthly.
Additionally, replace the batteries at least once a year or as needed, and clean the detector according to the manufacturer’s instructions to prevent dust buildup, which could impede its sensors. Marking your calendar for these maintenance activities can be a simple yet effective way to remember these important tasks.

Step 10. Keep a Record of the Installation Date
Finally, make a note of the installation date for each smoke detector in your home. This information is crucial for tracking the lifespan of your detectors, as they typically need to be replaced every 10 years, according to the National Fire Protection Association (NFPA).
Keeping a record will help you ensure that all smoke detectors in your home are up to date and functioning properly, providing you and your family with optimal protection against fire hazards.
By following these simple steps, you can easily and effectively install your smoke detectors in the safest and most efficient way.
6 Additional Tips and Tricks
1. Use Adhesive Strips or Double-Sided Tape: Secure the smoke detector to the ceiling or wall using high-quality adhesive strips or double-sided tape. Ensure the surface is clean and dry so the adhesive will stick properly. This method is ideal for lightweight models.
2. Magnetic Mounting Kit: Some smoke detectors come with magnetic mounting kits, which you can purchase separately. These kits typically include a magnetic base that attaches to the ceiling and a metal disc that adheres to the smoke detector, making installation quick and tool-free.
3. Tension-mounted Grips: Consider using tension-mounted grips, which can be adjusted to fit tightly between the floor and ceiling. The smoke detector is then mounted to this grip. This method is particularly useful in hallways or areas with a vertical surface area.
4. Suction Cups: Suction cups can be a viable option for attaching a smoke detector to a glass or tiled surface. Ensure the suction cups are of high quality to prevent the detector from falling.

5. Velcro Strips: Heavy-duty Velcro strips can provide a sturdy and reliable hold for smoke detectors. Ensure both surfaces are clean before attaching the Velcro to the detector and the wall or ceiling.
6. Removable Glue or Putty: For a less permanent solution, using a strong, removable adhesive putty or glue can keep the smoke detector in place without leaving residue or damaging surfaces upon removal. This can be particularly useful for renters.
With these additional tips and tricks, you can easily install a smoke detector without drilling, making it convenient for both homeowners and renters.
5 Things You Should Avoid
- Avoid Using Low-Quality Adhesives: Using cheap or low-quality adhesive strips, tapes, or putties can lead to the smoke detector falling, which may cause damage to the device or fail to alert in case of an emergency.
- Steer Clear of Unstable Surfaces: Ensure that smoke detectors are not mounted on surfaces that are uneven, dirty, or likely to experience temperature fluctuations that could weaken the adhesive bond over time.
- Don’t Ignore Manufacturer’s Instructions: Every smoke detector comes with a set of installation guidelines from the manufacturer. Ignoring these can not only risk improper installation but may also void the warranty.
- Avoid Blocking Ventilation Holes: When choosing a location for your smoke detector, make sure not to obstruct any ventilation holes. These are crucial for detecting smoke accurately. Installing too close to walls or corners can hinder its sensitivity.
- Do Not Forget to Test Regularly: Even if you’ve installed the smoke detector without drilling, it’s essential to test its functionality regularly. Avoid the mistake of ‘set and forget.’ Periodic testing ensures it’s working correctly and can save lives in an emergency.
By avoiding these common mistakes, you can ensure your smoke detector is installed correctly and functioning effectively.
Some Frequently Asked Questions
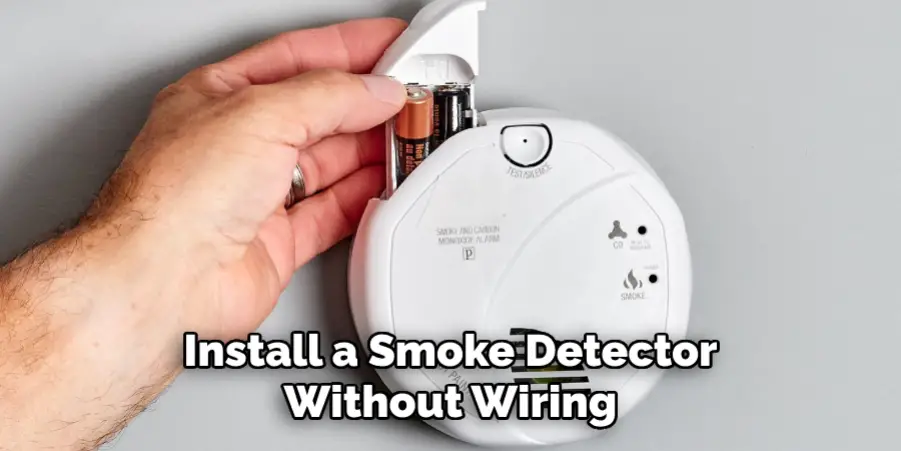
1. Can You Install a Smoke Detector Without Wiring?
Yes, it is possible to install a smoke detector without wiring. Battery-operated smoke detectors are widely available and can be easily installed using the steps mentioned above. Additionally, there are wireless options that do not require any electrical wiring and use radio frequency signals to communicate with each other.
These wireless detectors can also be interconnected to provide maximum coverage throughout your home. It’s essential to follow the manufacturer’s instructions for installation and testing, regardless of whether the detector is wired or wireless.
Another option for those looking to install a smoke detector without drilling is to use a plug-in model. These detectors can be plugged into an electrical outlet and do not require any wiring or drilling. However, they still need to be regularly tested and maintained for optimal performance.
2. Will the Smoke Detector Work Without a Battery?
No, a smoke detector will not work without a battery. While hardwired smoke detectors use electricity to power on and communicate with each other, they still require batteries as backups in case of a power outage. Battery-operated smoke detectors depend entirely on the battery for power and will not function without one. It’s crucial to regularly test and replace the battery to ensure proper functioning.
Additionally, some smoke detectors come with a sealed 10-year lithium battery, which eliminates the need for frequent battery changes. However, it’s still essential to regularly test these detectors and replace them if they malfunction.
3. Do Smoke Sensors Have Cameras?
No, smoke detectors do not have cameras. Their primary function is to detect and alert you to the presence of smoke or fire in your home. While some security systems may include a camera in their smoke detectors, this is not a standard feature for traditional smoke detectors. If you are interested in having surveillance capabilities within your home, it’s best to invest in a separate security system.
Additionally, smoke detectors are not designed to capture images or record video, and it’s essential to respect the privacy of individuals within your home. Instead, focus on installing functioning smoke detectors in appropriate locations throughout your home for optimal safety.
4. What is the Difference Between a Smoke Sensor and a Smoke Detector?
A smoke sensor and a smoke detector are often used interchangeably, but there is a slight difference between the two. A smoke sensor is a component of a fire alarm system that detects smoke and triggers an alarm. It works by measuring the particles in the air caused by combustion and can detect small amounts of smoke before it becomes visible to the naked eye.
On the other hand, a smoke detector is a standalone device that detects smoke and triggers an audible alarm to alert individuals of a potential fire. While both serve the same purpose, smoke detectors are more commonly found in residential settings. In contrast, smoke sensors are typically used in commercial or industrial buildings as part of a larger fire detection system.
Overall, whether you choose to install a smoke detector with drilling or without, it’s crucial to have functioning smoke detectors in your home for the safety of you and your loved ones.
5. Do You Need to Replace Your Smoke Detector If It Keeps Beeping?
If your smoke detector keeps beeping, it could indicate a low battery or a malfunction. First, try replacing the battery and testing the detector again. If the beeping persists, it’s possible that the detector is expired and needs to be replaced.
Smoke detectors typically have a lifespan of 8-10 years, after which they can become less reliable. It’s essential to check the expiration date on your smoke detector and replace it accordingly. Additionally, if your smoke detector is damaged or has been triggered multiple times due to cooking smoke or dust buildup, it may also need to be replaced.
Ultimately, it’s crucial to regularly test and maintain your smoke detectors to ensure proper functioning.
Conclusion
How to install smoke detector without drilling is not only possible but also quite practical for many homeowners and renters looking to enhance their safety measures without altering their living spaces permanently. Utilizing strong, high-quality adhesives, selecting stable surfaces, and following the manufacturer’s installation instructions allow for a secure and effective setup.
By avoiding common pitfalls such as blocking ventilation holes or neglecting regular functionality tests, you can ensure that your smoke detector remains a reliable safeguard against fire-related emergencies. Whether opting for battery-operated, wireless, or plug-in models, the key is regular maintenance and testing to guarantee optimal performance.
In conclusion, with a careful approach to installation and maintenance, securing your home with smoke detectors without the need for drilling is not only feasible but also effective in promoting fire safety and peace of mind.