Recliner chair covers are a practical and stylish way to protect your furniture while breathing new life into your décor. Over time, recliners can show signs of wear, from spills to everyday use, diminishing their appeal. Covers provide an effective solution, safeguarding your chair while allowing you to express your personal style. Custom-made recliner chair covers offer several advantages over store-bought options. They ensure a tailored fit, cater to your preferred fabric choices, and can be more cost-effective.
Additionally, crafting your own cover provides a rewarding sense of accomplishment and the opportunity to truly personalize your living space. The purpose of this article is to guide you step-by-step through the process of how to make recliner chair covers, from selecting materials to completing the final fitting. Whether you’re protecting your chair or looking for a fun DIY project, this guide will set you on the path to success.
Materials and Tools Needed
Materials Overview
You’ll need a selection of quality materials to create a durable and attractive recliner chair cover. Fabric is the most important component, and you can choose options like cotton, polyester, velvet, or even waterproof fabric for added durability and comfort. Cotton is lightweight and breathable, while velvet provides a luxurious touch. Waterproof fabrics are great for spill resistance in households with kids or pets.
Additionally, you’ll need measuring tape to ensure accurate dimensions, a sewing machine (or needle and thread for hand-sewing), and fabric scissors for precise cutting. Other helpful items include pins or fabric clips to secure pieces while sewing and zippers, Velcro, or elastic to create a secure and adjustable closure. Fabric adhesive or hot glue can also be optional for extra reinforcement.
Tools Overview
Having the right tools is key to a smooth and efficient crafting process. A ruler or straightedge is necessary for accurate fabric cutting, and an iron with an ironing board helps press fabric and seams for a clean, professional finish. Pattern paper can be used to create custom templates for your chair dimensions, which is especially useful if your recliner has unique features. Ensure your sewing machine is equipped with the necessary attachments, such as a walking foot, which aids in stitching thicker fabrics or multiple layers with ease. These tools will help you achieve optimal recliner chair cover project results.

Measuring the Recliner Chair
Accurate measurements are crucial for creating a custom-fitted recliner chair cover. Taking precise dimensions of the seat, backrest, and other parts of the chair ensures a snug and professional look. Follow these guidelines to ensure that your cover fits perfectly.
Measuring the Seat and Backrest
To begin, measure the seat’s width, depth, and height. Use a measuring tape to record the seat width from one side to the other and the depth from the front edge to where the seat meets the backrest. For the backrest, measure its height from the top of the chair to where it meets the seat and its width from edge to edge.
Don’t forget to measure the armrests—record their length and circumference to ensure the fabric wraps securely around them. If your recliner features a footrest or headrest, take measurements for those areas as well to provide full coverage. Be thorough and double-check your measurements to avoid any errors.
Allowing for Fabric Overlap and Seams
When planning your fabric cuts, add 2-3 inches to each measurement to account for seam allowances and fabric overlap. This ensures you have enough material for stitching and adjusting the pieces. If you’re using stretchy fabric like spandex or jersey, remember that it will naturally stretch to fit the recliner; in such cases, you may opt for a slightly smaller pattern to create a tight, tailored finish. Allowing for extra material makes it possible to adjust the fit during the sewing process and achieve a polished final look.
Choosing the Right Fabric
Fabric Options for Durability and Comfort
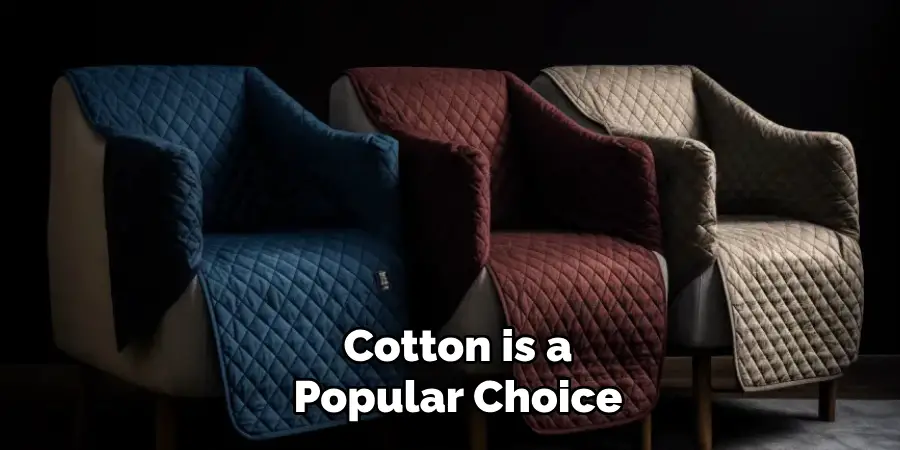
Selecting the right fabric is essential for creating a durable, comfortable recliner chair cover. Cotton is a popular choice, as it is soft, breathable, and versatile. For a more sophisticated look, linen offers a natural texture and a lightweight feel, though it may require more care. Denim provides durability and a casual aesthetic, while polyester blends are easy to clean and resistant to wear and tear, making them ideal for everyday use.
For households with children or pets, faux leather or waterproof fabric is a practical option, offering spill resistance and easy maintenance. Keep in mind the primary use of your recliner when choosing fabric—soft fabrics like cotton and linen are great for lounging, while sturdier options like polyester or faux leather provide longevity against daily use.
Design and Aesthetic Considerations
Regarding aesthetics, the fabric you choose should blend seamlessly with your room’s décor. Neutral tones like beige, gray, or cream create a timeless, versatile look that complements most styles. Consider patterns such as stripes, florals, or geometric designs for a touch of personality. Bold colors can make your recliner a focal point, adding vibrancy.
Additionally, consider the fabric’s texture. Smooth textures like faux leather lend a modern or luxurious feel, whereas natural textures like linen evoke a casual and laid-back vibe. Matching the fabric to your desired aesthetic ensures your cover enhances your recliner and your home’s overall atmosphere.
Creating the Pattern
Making a Template for the Recliner Cover
Creating a pattern is crucial in crafting a custom recliner chair cover. Using your measurements, start by transferring the dimensions onto large sheets of pattern paper or even inexpensive fabric like muslin. This template will guide your cuts and ensure all pieces fit accurately. Begin by outlining seat, backrest, armrest, and footrest sections, marking their respective measurements.

Cut out these individual pieces, leaving extra space for seam allowances. Lay the template pieces on top of your recliner to confirm their alignment and adjust as needed. This careful preparation ensures your cover will match the recliner’s shape and size precisely.
Alternatives to Creating a Pattern
If creating a custom pattern from scratch feels daunting, you can use an existing cover or piece of fabric to simplify the process. Drape the fabric directly over the recliner, pinning it in place to follow the chair’s contours. Take care to smooth wrinkles and align edges, ensuring the fabric molds snugly to the chair’s shape. Once pinned, use fabric chalk to trace the outline of the recliner, marking areas for seams, folds, or overlaps.
Alternatively, if you already own a recliner cover, disassemble it and use the pieces as a pattern for cutting out your new fabric. Regardless of your method, double-check the fit on the recliner and adjust the template as needed to accommodate functional features like reclining or footrest movement. These adjustments ensure a secure, tailored fit that doesn’t hinder the recliner’s usability.
Cutting the Fabric Pieces
Cutting the Fabric for Each Part of the Recliner
Carefully cutting the fabric pieces for your recliner chair cover is essential to achieving a clean and tailored appearance. Begin by laying your fabric on a flat, clean surface and securing it in place with fabric weights or pins to avoid shifting. Use the template or marked outlines to guide your cuts. Start with the seat cover, cutting along the dimensions you’ve measured, and repeat the process for the backrest, armrests, and footrest.
For each piece, ensure the cuts are straight and smooth by using sharp fabric scissors or a rotary cutter. If the fabric has a high stretch factor, like spandex, handle it carefully to avoid distorting its shape during cutting. Take your time to double-check the measurements on each section before making your cuts to prevent mistakes.
Preparing the Fabric Edges
Finishing the edges of your fabric is an important step to prevent fraying and ensure durability. For non-stretch fabrics, consider hemming the edges by folding them over about half an inch and sewing a straight stitch along the fold. Overlocking or serging is another effective option, particularly for woven or synthetic fabrics. If you cannot access a sewing machine, fabric adhesive or seam tape can provide extra reinforcement for fray-prone materials.
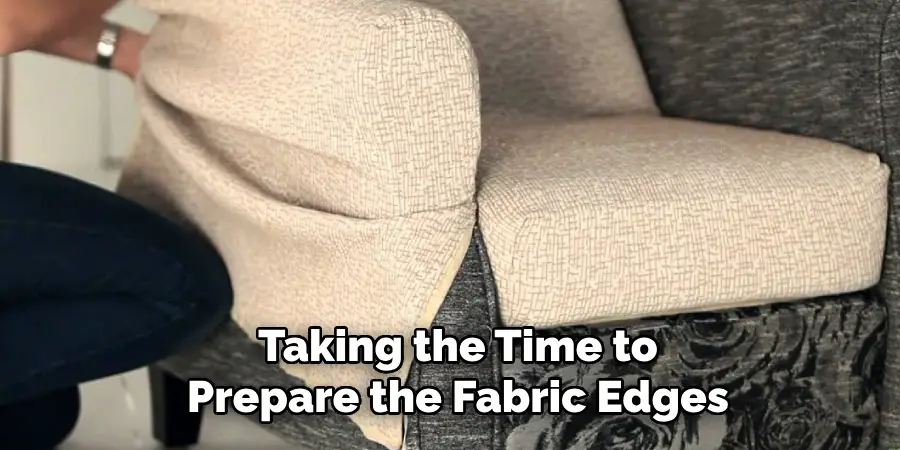
Apply these products along the edges to secure the threads and create a professional, clean edge. Taking the time to prepare the fabric edges ensures your recliner chair cover will look polished while withstanding regular use.
How to Make Recliner Chair Covers: Sewing the Recliner Chair Cover
Sewing the Seat, Backrest, and Armrest Pieces
Start by sewing the individual pieces for the seat, backrest, and armrests to form the main body of the recliner cover. Align the fabric pieces with their corresponding seams, ensuring the fabric’s right sides face each other. Use sewing pins or clips to hold the sections in place, and stitch along the edges using a straight stitch, leaving a ½-inch seam allowance.
For added durability, consider double-stitching these seams or using a zigzag stitch. To match seams neatly, press them open with an iron before stitching, which helps reduce bulk and ensures a polished look. Take your time to sew slowly and carefully, especially around corners, to produce tight stitches that can withstand daily use.
Attaching the Footrest and Additional Elements
Once the main body is complete, attach the footrest cover and any additional elements like a headrest cover or side panels. Pin or clip each additional piece to its corresponding recliner section, ensuring they align properly and don’t interfere with the chair’s reclining mechanism. Use a walking foot on your sewing machine to sew smoothly around corners and curves, as this tool prevents fabric bunching and ensures even stitching.
Work carefully around complex areas, such as curved armrests, by sewing slowly and using short stitches for better precision. This step provides a seamless, tailored look for the entire recliner.
Adding Closures and Fasteners
Finally, add closures like zippers, Velcro, or elastic to secure the cover in place. For movable parts like the footrest or backrest, consider using zippers or Velcro strips for ease of removal and reattachment. Ensure the fasteners are securely stitched, and test them to confirm they operate smoothly while keeping the cover firmly in place during use. These finishing touches provide practicality and efficiency for your custom recliner chair cover.
Fitting the Cover to the Recliner
Placing the Cover on the Recliner
Begin by draping the cover over the recliner and positioning it so that each section aligns with the corresponding part of the chair. Smooth the fabric over the seat, backrest, armrests, and footrest, ensuring there are no wrinkles or creases. Adjust the fabric around the corners and seams to ensure it follows the chair’s contours and lies flat. Take your time to shape the edges for a professional appearance, checking that all sections are properly aligned.

Securing the Cover
Once the cover is in place, use the designated fasteners, such as zippers, Velcro, or elastic, to secure it around the recliner. Ensure that the fasteners are tightly affixed without overtightening, allowing the fabric to stay taut and snug. Check that the cover remains flexible enough to accommodate the recliner’s functionality, such as reclining or moving the footrest, while maintaining its position without shifting during use.
Conclusion
Learning how to make recliner chair covers is a rewarding process that combines creativity and practicality. You can craft a custom cover that fits your recliner perfectly by following the steps of measuring, cutting, sewing, and fitting. The process allows for personalization, enabling you to choose fabrics, patterns, and colors that complement your home decor.
Not only does a DIY chair cover protect your furniture, but it also adds a unique and polished touch to your space. Creating your own cover is an enjoyable and cost-effective way to refresh your recliner and showcase your craftsmanship.