
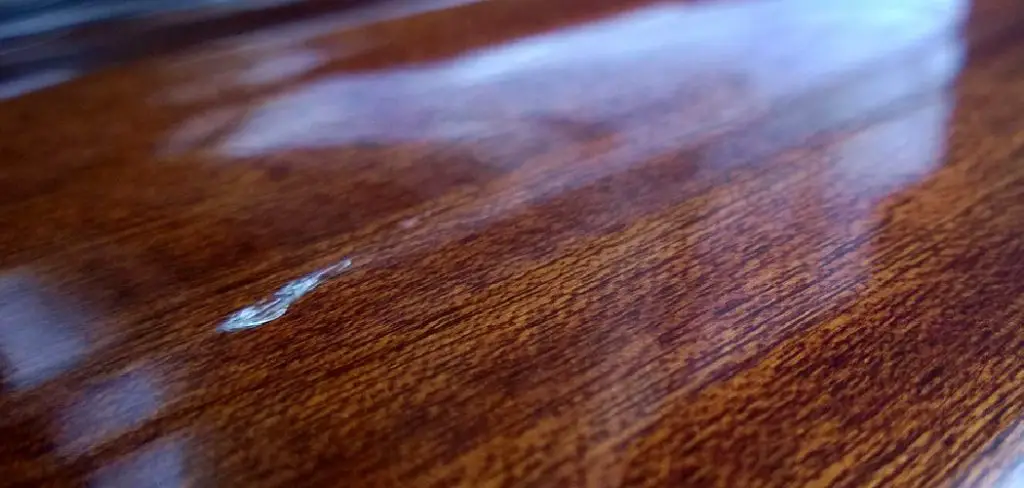
Are you looking to repair your scratched or damaged laminate furniture? Laminate is a popular material used in furniture due to its durability and affordability, but it can still get damaged over time.
How to repair laminate furniture can be an economical and straightforward way to extend the life of your furnishings without the need for replacements. Laminate furniture is a popular choice due to its affordability and versatility, but over time, it may show signs of wear such as scratches, chips, or peeling. Fortunately, many of these common issues can be addressed with some essential tools and a little DIY effort.
In this guide, we’ll explore step-by-step strategies to tackle a variety of damages, ensuring your laminate furniture looks revitalized and remains functional for years to come. Whether dealing with minor blemishes or more significant damage, these tips will help you restore your furniture’s original charm.
What Will You Need?
Before starting the repairs, you’ll need to gather a few essential tools and materials. Depending on the type of damage your furniture has sustained, the supplies required may vary slightly. However, here are some general items you’ll likely need for most repair jobs:
- Cleaning Supplies: To begin any repair project effectively, it’s vital to have a clean surface to work on. Prepare mild soap or detergent, water, and a soft cloth or sponge. You can also use all-purpose cleaners designed for laminate surfaces.
- Sandpaper: Sandpaper is a versatile tool for repairing laminate furniture. It’s available in different grits or levels of coarseness, ranging from fine to coarse. For small scratches or scuffs, you’ll likely only need fine-grit sandpaper (around 220 grit). You may need a coarser option (100 grit) for more extensive damage.
- Laminate Repair Paste: This product is specially designed to fill in chips and cracks in laminate furniture and can be found at most hardware stores.
- Wood Filler: If your laminate furniture has damaged edges, you can use wood filler to address the issue. Wood filler is available in various colors and can be easily sanded down once dry.
- Putty Knife: A putty knife is handy when applying filler or repair paste. You can also use a plastic scraper or an old credit card as an alternative.
- Paint and Paintbrush: In some cases, you may need to repaint the damaged area of your laminate furniture. Make sure to choose a paint color that closely matches the existing finish.
- Clear Coat Sealant: Once you’ve completed all necessary repairs and touched up any paint, protecting your furniture with a clear coat sealant is essential. This will help prevent future damage and keep your furniture looking new for longer.
Now that you have all the necessary tools and materials let’s dive into the step-by-step repair process for different types of damage.
10 Easy Steps on How to Repair Laminate Furniture
Step 1. Clean the Surface
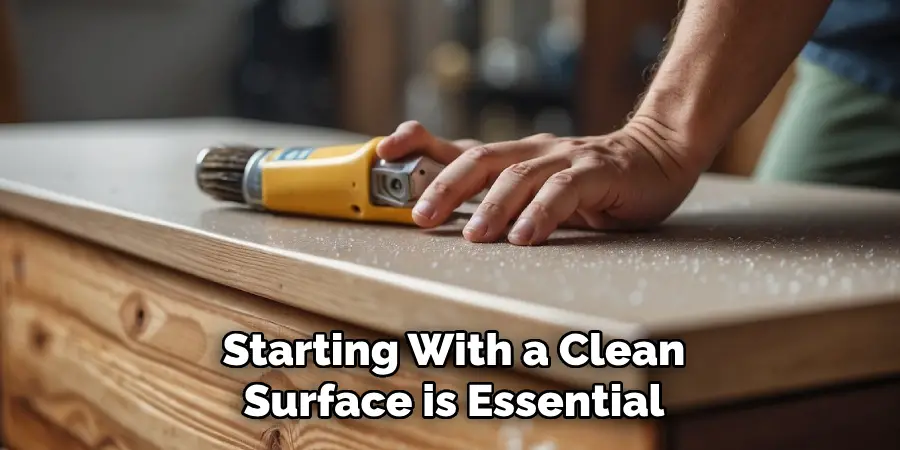
Before you begin any repairs, starting with a clean surface is essential. Dust, dirt, and debris can interfere with the effectiveness of repairs, so thoroughly clean the damaged area using mild soap or detergent mixed with water. Use a soft cloth or sponge to scrub the surface, ensuring you remove all grime gently. An all-purpose cleaner designed for laminate surfaces might be necessary for more stubborn stains. Once cleaned, dry the surface thoroughly with a clean, dry cloth. A clean and dry surface ensures that fillers and paints adhere correctly, providing a smooth finish.
Step 2. Sand the Area
Next, assess the level of damage and select the appropriate sandpaper. Fine-grit sandpaper (around 220 grit) is ideal for minor scratches and scuffs. Opt for a coarser grain, such as 100 grit, if the damage is more severe. Sand the damaged area gently in a circular motion to smooth out rough spots. Be careful not to sand too vigorously, which could cause additional damage. Once you’ve finished sanding, wipe away any dust and debris with a clean cloth to prepare the surface for fillers or repair paste.
Step 3. Apply Laminate Repair Paste or Wood Filler
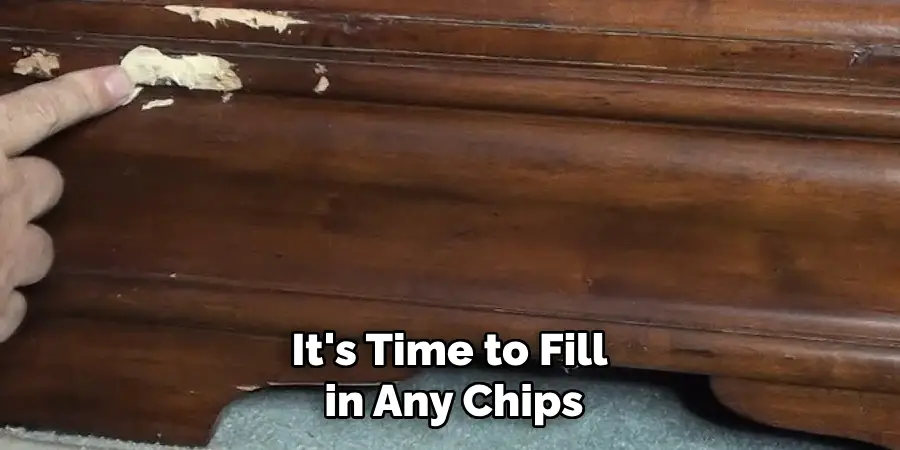
Once the surface is prepped, it’s time to fill in any chips or cracks. Depending on the type of damage, use either laminate repair paste or wood filler. Apply the laminate repair paste directly to the affected area using a putty knife for chips or small cracks. Smooth it out until it’s level with the surrounding surface. Wood filler may be more suitable if you are dealing with edges or more significant gaps. Apply it in the same manner, ensuring you fill the area and spread it evenly.
Step 4. Sand and Smooth the Filled Areas
Once the laminate repair paste or wood filler has dried completely, it’s time to smooth out the filled areas. Use fine-grit sandpaper (around 220 grit) to gently sand the surface until it’s flush with the surrounding area. The goal is to transition between the repaired section and the undamaged laminate seamlessly. Take care to sand gently to avoid removing too much material or causing further imperfections. After sanding, wipe the area clean with a damp cloth to remove any dust particles, ensuring a smooth and even surface for painting or sealing.
Step 5. Touch Up Paint
After smoothing the filled areas, if needed, you can touch up the paint to match the original finish of your laminate furniture. Choose a touch-up paint that closely resembles the existing color. Use a small paintbrush to carefully apply the paint over the repaired areas. Apply the paint in thin layers, allowing each coat to dry thoroughly before applying the next. This layering technique will help blend the new paint with the old, making the repair less noticeable.
Step 6. Seal the Repaired Areas
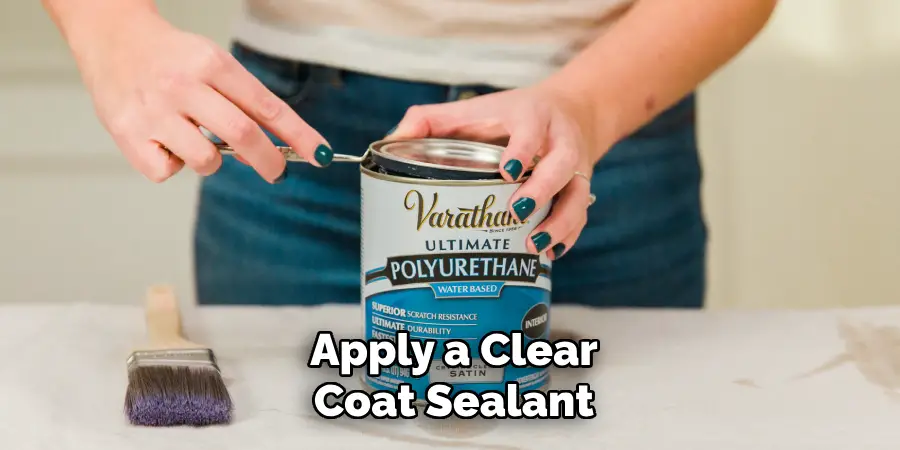
Once the paint has dried and you are satisfied with the finish, the final step is to apply a clear coat sealant to protect your repaired laminate furniture. This sealant not only safeguards the newly repaired areas from future wear and tear but also enhances the appearance and longevity of the finish. Select a sealant compatible with laminate surfaces and apply it evenly across the repaired section and surrounding areas. Depending on your preference and product instructions, a brush or spray applicator can be used. Allow the sealant to dry completely, following the manufacturer’s guidelines.
Step 7. Inspect and Finalize
After the sealant has dried thoroughly, carefully inspect the repaired areas of your laminate furniture. Check for any uneven surfaces, visible seams, or color discrepancies. If any of these issues are present, address them by gently sanding and reapplying paint or sealant as necessary. This final check ensures any imperfections are corrected, leaving your furniture looking as good as new. Once satisfied with the repairs, give the entire piece a light polish with a laminate-safe polish to bring out its shine and enhance the overall appearance. Your diligent restoration efforts will have renewed your laminate furniture, extending its life and restoring its beauty.
Step 8. Reassemble and Position
With the repairs complete and the furniture polished, it’s time to reassemble any removed parts during the repair process. Ensure all screws, hinges, or any other hardware are securely fastened and that each component is aligned correctly. Once reassembled, carefully move the laminate furniture back to its original position or to a new desired location. Don’t drag it across the floor to avoid scratches or further damage. Position the furniture to avoid direct sunlight or extreme temperature changes, which could affect the laminate surface.
Step 9. Regular Maintenance
To maintain the longevity and appearance of your repaired laminate furniture, incorporate regular maintenance into your routine. Dust the surfaces weekly using a soft cloth to prevent the buildup of dirt and grime. Avoid harsh chemical cleaners that can damage the finish; instead, use a mild soap solution for deeper cleaning when necessary. Keep the furniture away from direct sunlight and excessive moisture to prevent fading and warping. Regularly inspect the furniture for signs of wear or damage to catch problems early and address them promptly.
Step 10. Enjoy Your Refreshed Furniture

After completing your repair and maintenance process, it’s time to enjoy your laminate furniture’s renewed look and functionality. Position the furniture to complement your space and showcase the care and effort you have invested in its restoration. Whether it’s a dining table, a bookshelf, or a desk, admire the smooth, polished surface and take pride in the durability and beauty your efforts have brought to this essential piece. Enjoy using your furniture, knowing that it will serve you well for years to come with proper care and attention.
By following these steps and repairing and maintaining your laminate furniture properly, you can save money and extend the life of your beloved pieces.
Conclusion
How to repair laminate furniture is a rewarding process that not only extends the life of your pieces but also enhances their aesthetic appeal.
You can achieve professional-looking results at home by carefully following each step—from preparation and filling to sanding, painting, and sealing. The key to success lies in patience, attention to detail, and using the appropriate materials for each task. Regular maintenance following the repair ensures the longevity and beauty of your furniture.
With these comprehensive instructions, you can confidently restore your laminate surfaces, preserving their function and style for years.