
Are you looking for a way to bring new life to your old furniture pieces? Consider using white wax as a finishing touch! This easy-to-use product can add dimension, depth, and character to any piece of furniture.
White wax is a popular finishing product used to enhance and protect wood furniture. It imparts a subtle patina that highlights the natural beauty of the grain. Its unique formulation nourishes the wood and provides a durable, water-resistant layer that guards against everyday wear and tear.
How to use white wax on furniture is a straightforward process, giving it a fresh, elegant look. In this guide, we’ll explore the steps to effectively apply white wax, ensuring your furniture remains both stunning and well-preserved for years to come.
What Will You Need?
To start, gather the following materials:
- Clean and dry furniture pieces
- White wax
- Soft lint-free cloth
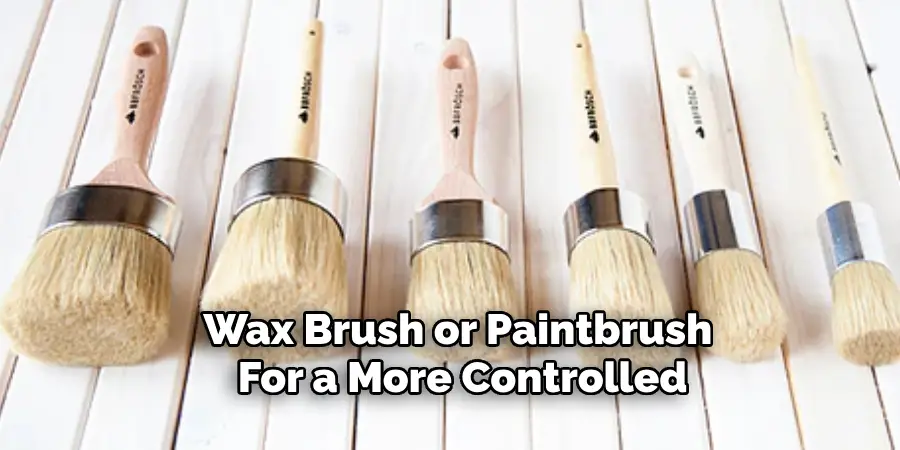
- Wax brush or paintbrush (optional)
10 Easy Steps on How to Use White Wax on Furniture
Step 1: Prepare Your Furniture
Before applying white wax, it’s essential to prepare your furniture correctly. Begin by thoroughly cleaning the surface with a gentle, non-abrasive cleaner to remove dirt, dust, and oils that could interfere with the wax’s adherence.
If the piece has been previously finished, consider light sanding to create a smooth surface that allows the wax to penetrate better; be sure to sand in the direction of the grain and wipe away any dust with a damp cloth. Allow the furniture to dry completely before moving on to the next step, as moisture can affect the finish.
Taking the time to prepare your furniture will ensure a more even application of the white wax and enhance the overall aesthetic result.
Step 2: Apply the White Wax
Now that your furniture is prepped and dry, it’s time to apply the white wax. Using a soft lint-free cloth, take a small amount of white wax and work it into the furniture’s surface in circular motions. If you prefer, you can use a wax brush or paintbrush for a more controlled application.
Apply the wax evenly, focusing on any intricate details or carved areas to ensure thorough coverage. Start with a light layer; you can always add more if needed. Allow the wax to sit for a few minutes to allow it to set before proceeding to the next step.
Step 3: Buff the Waxed Surface
Once the white wax has set for a few minutes, it’s time to buff the surface to achieve that beautiful sheen. Using a clean, soft lint-free cloth, gently buff the waxed areas in a circular motion. This step will enhance the patina and give your furniture a polished look.
Apply even pressure and continue buffing until you reach the desired shine. If you notice any areas with excess wax, go over them lightly with your cloth to smooth them out. This will improve the appearance and help ensure that the wax adheres properly to the wood.
Step 4: Allow the Wax to Cure
After buffing, it’s essential to allow the wax finish to cure correctly. This step typically takes 24 hours, during which the wax hardens and fully bonds with the furniture surface.
Ensure the piece is placed in a dry, well-ventilated area away from direct sunlight or extreme temperatures. Curing is crucial for achieving a durable finish that enhances the wood’s beauty and protects it effectively against moisture and scratches.
Step 5: Apply Additional Coats (if desired)
If you wish to deepen the color or finish, you can apply additional coats of white wax after the first one has cured. Repeat Steps 2 and 3, ensuring that each layer is completely cured before applying the next.
Multiple layers can provide a richer appearance and added protection, so feel free to adjust the number of coats based on your preference and desired outcome.

Step 6: Maintain Your Waxed Furniture
To keep your furniture looking its best, regularly dust the surface with a soft, lint-free cloth to remove any dirt or debris. Avoid using harsh cleaners, as they can strip away the wax finish. Instead, if needed, gently clean the surface with a damp cloth and allow it to dry. Periodically, you should reapply a layer of wax to maintain the finish and protect the wood, especially in high-traffic areas or on pieces that receive regular use.
Step 7: Touch Up as Necessary
Over time, your waxed furniture may experience minor scratches or wear from everyday use. Inspecting your pieces and performing touch-ups when needed periodically is a good idea. If you notice scratches, clean the area with a damp cloth, allow it to dry, and then reapply a small amount of white wax to the affected area following the same application and buffing techniques outlined in Steps 2 and 3. This will repair the damage and blend it seamlessly with the rest of the wax finish.
Step 8: Experiment with Different Techniques
Once you’re comfortable with the primary application of white wax, consider experimenting with various techniques to achieve unique finishes and effects. For instance, layering the wax over different colored paints creates a washed effect, where the underlying colour subtly influences the final look.
Another technique involves applying the white wax in a more distressed manner, where you can deliberately create a weathered appearance by buffing less in certain areas or using a sandpaper technique on corners and edges to give a rustic charm.
Additionally, consider using different application tools. A sponge applicator can create a different texture than a cloth, resulting in a more textured finish. You can also use a stippling brush for a pounced effect, adding depth and dimension to carved details or intricate designs in the wood.
Don’t be afraid to combine colors or play around with the amount of wax used; each piece of furniture is unique and can benefit from your creative touch. By exploring these variations, you can personalize your furniture pieces, enhancing their aesthetic value and making them true reflections of your style.
Step 9: Store Wax Properly
Proper storage of your white wax is essential for maintaining its quality and effectiveness. Keep the wax in a cool, dry place away from direct sunlight and extreme temperatures, which could alter its consistency. Ensure the lid is tightly sealed after each use to prevent contamination and drying out.

If the wax has thickened over time, it can be softened by gently placing the container in warm water for a few minutes before stirring. By taking care of your supplies, you can ensure that each application remains as effective and smooth as the first, enabling you to achieve beautiful results consistently.
Step 10: Enjoy Your Newly Finished Furniture
After all your hard work in waxing and maintaining your furniture, it’s time to enjoy the fruits of your labor. Take a moment to appreciate the enhanced beauty and character of your pieces. Arrange them in your space to create a warm and inviting atmosphere, and don’t hesitate to show them off to family and friends.
With proper care and attention, your waxed furniture will remain visually appealing and last for years to come, becoming a cherished part of your home.
By following these steps, you can confidently use white wax to transform your furniture and create unique, personalized pieces.
What are the Benefits of Using White Wax for Furniture?
Apart from enhancing the appearance and character of wood, using white wax on furniture has several other benefits, making it a popular choice among DIY enthusiasts and professional furniture makers alike. Some of these advantages include:
- Natural Ingredients: Most white waxes are made from all-natural ingredients such as beeswax, carnauba wax, and mineral oil, making them environmentally friendly and safe to use in your home.
- Easy Application: Compared to other finishes like varnish or polyurethane, applying white wax is relatively simple and requires minimal tools. It can also be easily touched up or removed if needed.
- Versatility: White wax can be used on various types of wood, including hardwoods, softwoods, and painted surfaces. It can also be combined with other waxes or paints for unique effects.
- Added Protection: In addition to enhancing the appearance of furniture, white wax provides a protective barrier against moisture and scratches, helping to prolong the life of your pieces.
- Aesthetic Appeal: White wax can create various finishes that range from subtle to dramatic, depending on the technique used. It can add depth and dimension to plain wood or highlight intricate details in carved or textured surfaces.
In conclusion, using white wax is an excellent way to elevate the beauty and durability of your wooden furniture while providing endless creative possibilities.

Conclusion
In summary, how to use white wax on furniture is a straightforward yet transformative process that not only enhances the visual appeal of your pieces but also offers several protective benefits.
By following the steps outlined in this guide—from preparation and application to maintenance and creative experimentation—you can ensure your wooden furniture retains its beauty and charm for years to come. With the ability to personalize finishes and the ease of touch-ups, white wax is an excellent choice for novice DIY enthusiasts and seasoned professionals.
Embrace the opportunity to explore different techniques and make each piece a unique reflection of your style. Ultimately, you will enrich your living space with beautifully finished and durable furniture.