Are you tired of lifting heavy tables and moving them around your home or office? Adding wheels to a table can make it much easier to move and rearrange furniture as needed.
How to add wheels to a table can transform a stationary piece of furniture into a versatile and mobile asset in your home or office. Whether you’re looking to enhance the functionality of a work desk, dining table, or craft station, installing casters is a practical solution that offers flexibility in space management. This guide will walk you through choosing the right type of wheels, gathering the necessary tools and materials, and securely attaching the wheels to your table legs.
You can create a maneuverable table that caters to your dynamic lifestyle needs with a few simple steps.
What Will You Need?
- Table with legs
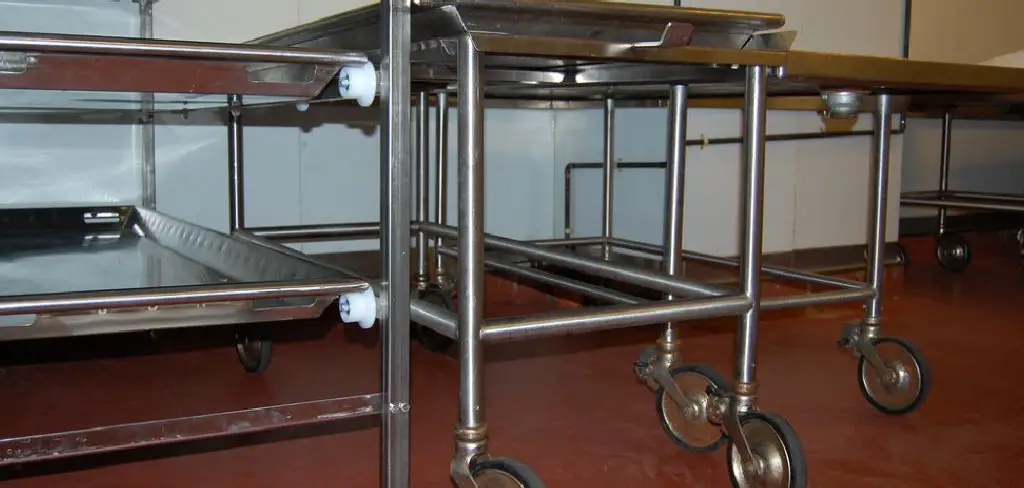
- Casters/wheels (choose the appropriate type and size)
- Screws or bolts (size will depend on the caster’s attachment method)
- Drill or screwdriver
- Measuring tape or ruler
- Pencil or marker
Once you have all of the necessary materials, you can begin adding wheels to your table.
10 Easy Steps on How to Add Wheels to a Table
Step 1: Choose the Right Wheels
When choosing the right wheels, you must consider several factors to ensure the casters you select to suit your table and specific needs. First, assess the size and weight capacity of the casters. They must be capable of supporting your table’s weight, including any additional weight it might bear in daily use. Measure the diameter of the wheel to understand how much elevation they will add to your table’s height, ensuring it remains at a comfortable, functional level.

Additionally, consider the flooring type where the table will be used; soft casters are better for hard floors to prevent scratching, while rigid casters are more suitable for carpeted surfaces. Finally, decide whether you need locking casters to keep the table stationary when desired, which is particularly useful for tables that will be used for tasks that require stability, like writing or eating.
Step 2: Gather Your Tools and Materials
Before you begin the installation, make sure all your tools and materials are readily available. This includes the selected casters, screws or bolts, a drill or screwdriver, measuring tape or ruler, and a pencil or marker. Having everything within reach will streamline the process and prevent interruptions.
Double-check the compatibility of your screws or bolts with both your table and the casters to avoid any issues during attachment. Once all items are accounted for, you can proceed confidently with the next steps in adding wheels to your table.
Step 3: Measure and Mark the Table Legs
With your tools and materials ready, the next step is to measure and mark the placement of each caster on the table legs. Use a measuring tape or ruler to position the casters evenly on each leg for balanced support and stability. Start by marking the center point at the base of each table leg with a pencil or marker. Double-check the measurements to confirm that each mark is consistent, ensuring the table remains level once the wheels are attached. Accurate marking is crucial to maintaining even weight distribution and the smooth movement of your table.
Step 4: Pre-Drill Holes for the Casters
To ensure the stability and secure attachment of the casters, you’ll need to pre-drill holes into the table legs. Using the marks you made in the previous step as guides, choose a drill bit that’s slightly smaller than the screws or bolts you’re planning to use. Carefully drill straight holes into each marked point at the base of the table legs. This step helps prevent the wood from splitting and makes it easier to drive in the screws or bolts when attaching the casters. Ensure each hole is drilled at the proper depth to accommodate the fasteners, allowing the wheels to sit flush against the table legs for optimal support.
Step 5: Attach the Casters
You can now attach the casters to the table legs with the pre-drilled holes ready. Align each caster over the holes you’ve drilled, ensuring they are correctly oriented based on their design, such as the direction of a swivel caster. Use a screwdriver or a drill with the appropriate bit to securely fasten the screws or bolts through the caster’s base plate and into the pre-drilled holes.

Tighten each screw or bolt firmly to ensure a secure and stable attachment. Be careful not to overtighten, as this could damage the screws, bolts, or wood. Once all casters are attached, gently test the table’s mobility to ensure it rolls smoothly and remains stable when positioned.
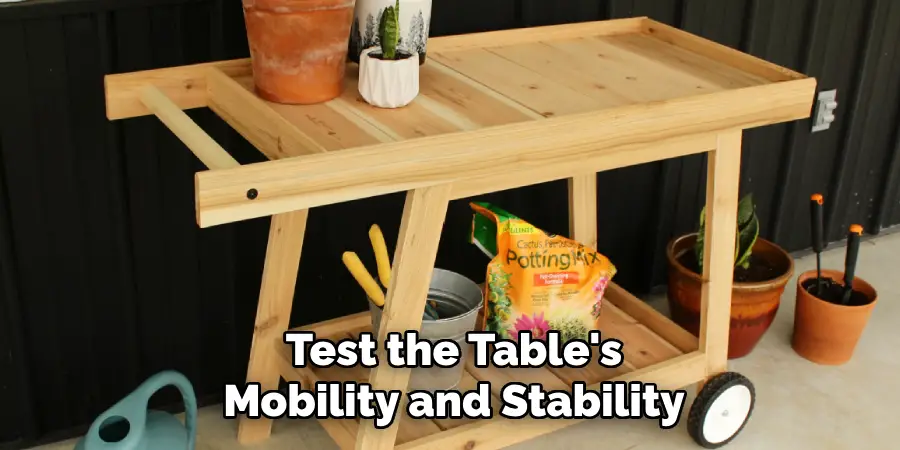
Step 6: Test Your Work
Once all the casters are securely attached, testing the stability and functionality of your newly mobile table is essential. Carefully tip the table upright and check that each caster is securely fastened and swivels freely. Roll the table across the floor to ensure smooth movement and check for any wobbling that might indicate an uneven attachment or misalignment. If you notice any instability, double-check the tightness of the screws or bolts and adjust as needed. For tables with locking casters, engage the locks to ensure the table remains stationary when desired. Testing your work ensures that the table is safe and meets your mobility needs.
Step 7: Secure the Table to Prevent Tipping
Now that your table is mobile, it’s crucial to ensure it remains stable during use to prevent any tipping hazards. This is particularly crucial if you plan to carry or store heavy items on the table. If your table is top-heavy or has an uneven weight distribution, consider adding stabilizing features such as additional support brackets or weights attached to the bottom. These can provide extra balance and minimize the risk of the table tipping over. Furthermore, when the table is not in use, use locking mechanisms on the casters to keep it securely in place. Taking these precautions ensures that your table is functional and safe for everyday use.
Step 8: Maintain Your Table’s Mobility and Appearance
To ensure your newly mobile table continues to function well and look its best, regular maintenance is key. Periodically inspect each caster for signs of wear or damage, such as worn treads or loose connections, and replace them to maintain smooth movement and stability. Clean the wheel surfaces and any locking mechanisms to remove dust and debris, which can accumulate over time and hinder performance.

Additionally, check that the screws or bolts remain securely fastened to prevent any wobbling. By performing routine inspections and maintenance, you can extend the life of your table and keep it safely and effectively mobile.
Step 9: Evaluate and Improve Your Setup
After ensuring that your table is mobile and functional, take some time to evaluate its performance in your everyday activities. Consider aspects such as ease of movement, stability during use, and any specific needs that might arise based on how you utilize the table. If you find areas for improvement, don’t hesitate to make adjustments or enhancements. This could involve upgrading to more advanced casters if you require smoother mobility or adjusting the setup of stabilizing features to secure heavy loads better.
Continuous evaluation and willingness to adapt your setup will ensure that the table remains a practical and versatile addition to your space, fully tailored to your unique needs and preferences.
Step 10: Customize and Personalize Your Table
With your table now fully mobile and functional, consider adding your personal touch to make it fit your style and needs truly. You can customize the table by painting or staining the wood to match your existing decor or by adding decorative elements such as decals or stencils.
Consider installing additional features, like hooks or holders, to increase the table’s usability and convenience. Suppose you plan to use the table in different environments. In that case, you can add interchangeable elements that can easily be adjusted based on location, such as different caster types for indoor and outdoor use. This customization not only enhances your table’s aesthetics but also ensures it serves your functional requirements perfectly.
By following these steps, you can quickly transform your stationary table into a mobile and versatile piece of furniture.
5 Things You Should Avoid
- Using Inappropriate Wheels: Avoid choosing wheels not designed to support the weight of your table. Selecting the right size and material for the casters is crucial to ensure stability and functionality.
- Ignoring Surface Compatibility: Before adding wheels, consider the type of flooring on which the table will be moved. Using wheels that are unsuitable for your specific floor type could damage or reduce mobility.
- Skipping Measurement Checks: It’s essential not to overlook measuring the table and wheel height. Please do so to avoid an uneven table or raised height that may be inconvenient for usage.
- Poor Attachment Methods: Avoid attaching wheels with weak or inadequate fasteners. Ensure that the wheels are securely fitted to prevent instability or accidents when moving the table.
- Neglecting to Test Before Final Use: Once the wheels are installed, test the table’s mobility and stability under different conditions. Skipping this step might mean missing necessary adjustments, risking safety and efficiency during use.
Conclusion
How to add wheels to a table can significantly enhance its functionality, ease of movement, and versatility in various spaces.
You can achieve a stable and mobile table setup by carefully selecting the correct type of wheels, considering surface compatibility, and ensuring proper attachment. Remember that precise measurements and thorough testing before final use are crucial steps.
By avoiding common pitfalls and following these guidelines, you can transform a stationary piece into a practical mobile asset in your home or workspace. Happy wheeling!