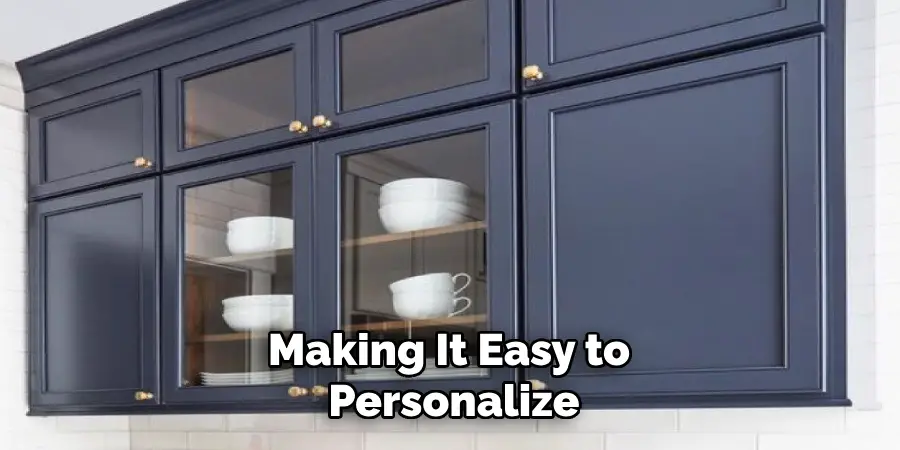
Building cabinet boxes can be a rewarding project that enhances your woodworking skills and offers a custom solution for your storage needs. Whether you’re renovating a kitchen, updating a bathroom, or creating a new piece of furniture, understanding the fundamentals of cabinet construction is essential. This guide will walk you through the essential materials and tools you’ll need, along with step-by-step instructions for how to build cabinet boxes. By the end of this project, you will have a sturdy, functional, and aesthetically pleasing cabinet box ready for installation.
What Are Cabinet Boxes?
Cabinet boxes are the foundational structures of most cabinetry systems, serving as the main component that forms the body of cabinets. These box-like structures are typically constructed from durable materials such as plywood, MDF, or particleboard, providing the essential support needed for shelves, drawers, and doors.
The design of a cabinet box includes the back, sides, bottom, and sometimes the top, which define the overall framework. Cabinet boxes can be customized in various sizes and shapes to meet specific design requirements and are integral to both standalone pieces of furniture and built-in installations. Their versatility and sturdy construction make them a popular choice in kitchens, bathrooms, and storage areas, where functionality and form are equally important.
Types of Cabinet Boxes
When embarking on a cabinetry project, choosing the appropriate type of cabinet box is crucial for meeting specific aesthetic and functional needs. There are primarily two types of cabinet boxes: face frame and frameless.
- Face Frame Cabinets: This traditional style features a frame attached to the front of the cabinet box, creating a sturdy structure that supports the cabinet doors and drawers. The frame conceals the edges of the box and adds an extra layer of strength. Face frame cabinets are common in American homes and offer a classic look, allowing for varied design elements like raised panel and inset doors.
- Frameless Cabinets: Also known as European-style cabinets, these lack the front frame, providing a sleeker and more modern appearance. The doors and drawers attach directly to the cabinet box, offering maximum storage space since there are no extra structural components within the cabinet interior. This style is popular for its clean lines and efficient use of space, fitting seamlessly into contemporary designs.
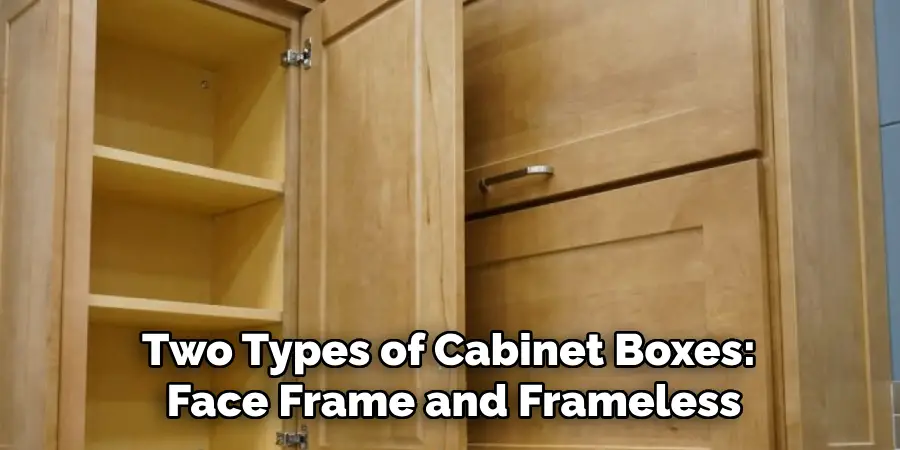
Both types of cabinet boxes have distinct advantages and can be tailored to complement a range of styles and functional needs in home renovations or new constructions. Understanding their differences aids in making informed choices that align with your design plans and desired outcomes.
10 Methods How to Build Cabinet Boxes
1. Planning and Measuring the Space
Before you begin building cabinet boxes, thorough planning and accurate measurements are essential. Start by measuring the area where the cabinets will be installed, taking into account the height, width, and depth of the space.
Also, consider the purpose of the cabinet—whether it will store dishes, linens, or tools—as this will influence the design and shelving requirements. Sketch a simple blueprint of the cabinet, including all dimensions, which will help you visualize the layout and ensure that everything fits perfectly. By planning ahead, you avoid costly mistakes and ensure that the final product meets your needs.
2. Choosing the Right Materials
The materials you select for your cabinet boxes will determine both their durability and appearance. Plywood is the most commonly used material for cabinet construction due to its strength and resistance to warping. Opt for high-quality, furniture-grade plywood that is at least ¾-inch thick for the sides, top, and bottom of the cabinet boxes.
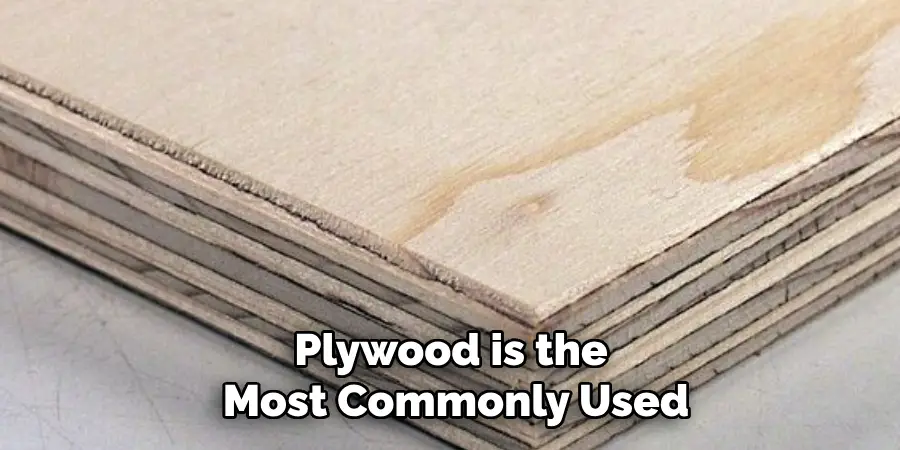
If you’re on a budget, MDF (medium-density fiberboard) is a more affordable option, although it is less durable and can be prone to water damage. For the back panel of the cabinet, you can use ¼-inch plywood, as it will not bear much weight. Choosing the right materials ensures that your cabinets will last for years to come.
3. Cutting the Plywood to Size
Once you have your materials, it’s time to cut the plywood sheets to the appropriate dimensions for your cabinet boxes. Using a table saw or circular saw, cut the plywood for the sides, top, bottom, and back of the cabinet according to your measurements. It’s important to cut as accurately as possible to ensure a tight fit during assembly.
If you have multiple cabinet boxes to build, consider cutting all of your pieces at once to maintain consistency. Label each piece as you cut it to avoid confusion later. Proper cutting is a critical step, as any inaccuracies will affect the alignment and stability of the final structure.
4. Assembling the Cabinet Sides
With all of your pieces cut to size, the next step is assembling the sides of the cabinet box. Begin by attaching the top and bottom panels to the side panels using wood glue and screws or pocket hole joinery. If using screws, pre-drill holes to prevent the wood from splitting.
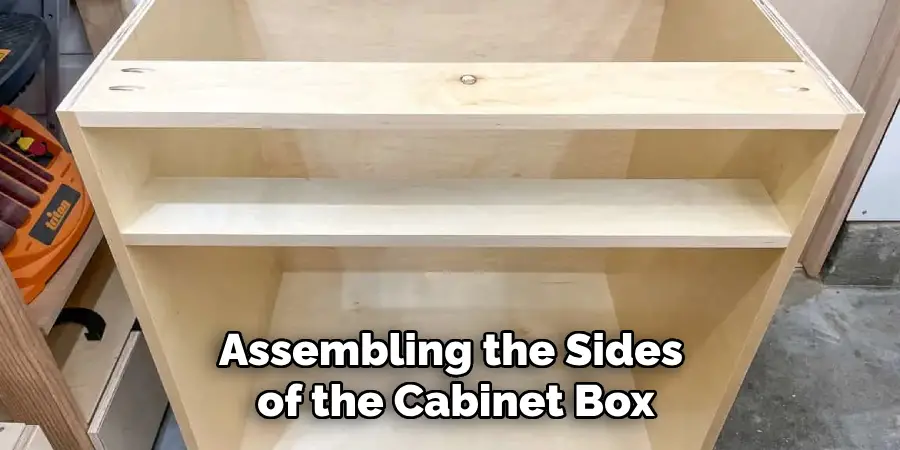
Clamp the pieces together as you work to ensure that the corners are square and aligned properly. Pocket hole joinery offers a more seamless look, as the screws will be hidden inside the cabinet, providing a clean, professional appearance. Take your time during this step, as the accuracy of your assembly will affect the overall structure.
5. Installing the Back Panel
Once the sides, top, and bottom are securely attached, it’s time to install the back panel. The back panel provides structural support and helps keep the cabinet square. Cut a piece of ¼-inch plywood to fit the back of the cabinet, ensuring that it sits flush with the sides.
Apply wood glue along the edges of the cabinet and position the back panel in place. Secure it using finish nails or screws, spacing them evenly around the perimeter. For larger cabinets, you may want to add additional support braces to prevent bowing. Installing the back panel ensures that your cabinet box is sturdy and stable.
6. Adding Shelf Supports
If your cabinet box will include shelves, the next step is installing shelf supports. There are several methods for securing shelves, such as using adjustable shelf pins or fixed wooden cleats. For adjustable shelves, drill evenly spaced holes along the inside of the cabinet sides using a shelf pin jig.
This allows you to move the shelves up or down depending on your storage needs. If you prefer fixed shelves, attach wooden cleats to the sides of the cabinet box using wood glue and screws. The cleats will support the weight of the shelves, keeping them securely in place.
7. Securing the Cabinet Box Together
Once the main components of the cabinet box are in place, reinforce the entire structure by securing it with additional screws or fasteners. Check that all corners are square and that the cabinet is level.
Use a carpenter’s square to ensure precision, and adjust as needed before tightening any remaining screws. This step helps reinforce the cabinet box, ensuring that it is structurally sound and capable of supporting the weight of its contents. The more securely the pieces are fastened together, the more durable and long-lasting your cabinet will be.
8. Finishing the Edges
To achieve a polished, professional look, it’s important to finish the edges of your cabinet box, especially if you’re using plywood. The raw edges of plywood can look unfinished and detract from the appearance of the cabinet. There are several ways to finish the edges, including applying edge banding or using solid wood trim.
Edge banding is a thin strip of material that can be ironed onto the raw edges, giving them a smooth, finished look. Alternatively, you can cut strips of solid wood and glue them to the edges of the plywood, then sand and stain them to match the rest of the cabinet. This step elevates the aesthetic of your cabinet, making it look professionally crafted.
9. Sanding and Prepping for Finish
Before applying any paint or stain, thoroughly sand the cabinet box to ensure a smooth, even surface. Start with medium-grit sandpaper (around 120 grit) to remove any rough spots or imperfections, then finish with a fine-grit sandpaper (220 grit) for a smooth finish.
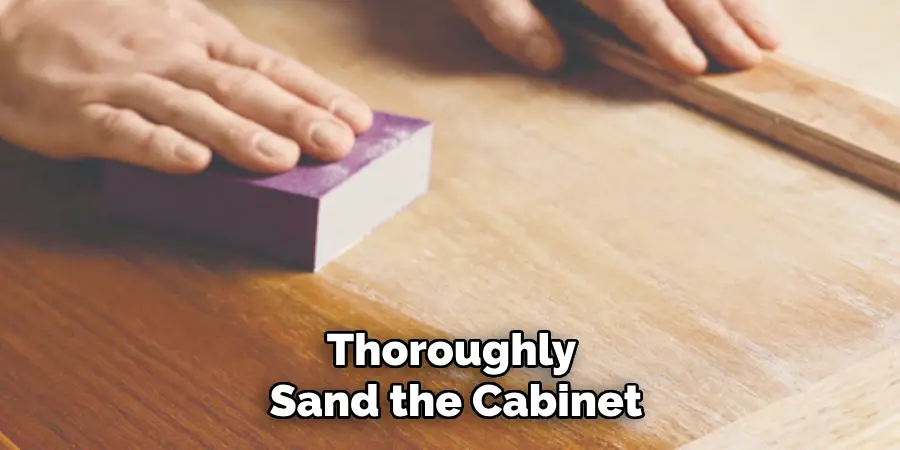
Sand all visible surfaces, including the edges and corners, taking care to remove any glue residue. Once sanding is complete, wipe down the cabinet with a tack cloth to remove dust and debris.
10. Applying Paint or Stain
The final step in building your cabinet box is applying a finish, whether it’s paint, stain, or clear varnish. If you’re painting the cabinet, apply a coat of primer first to ensure even coverage.
Once the primer is dry, apply two coats of paint, allowing each coat to dry fully between applications. For a stained finish, apply the stain using a brush or cloth, working in the direction of the wood grain. After the stain has dried, apply a clear coat of polyurethane to protect the wood and enhance its durability.
Conclusion
Building your own cabinet box can be a rewarding project that results in a custom piece fitting perfectly into your space. By following these detailed steps, you ensure that your cabinet is not only aesthetically pleasing but also structurally sound and durable. Thanks for reading, and we hope this has given you some inspiration on how to build cabinet boxes!