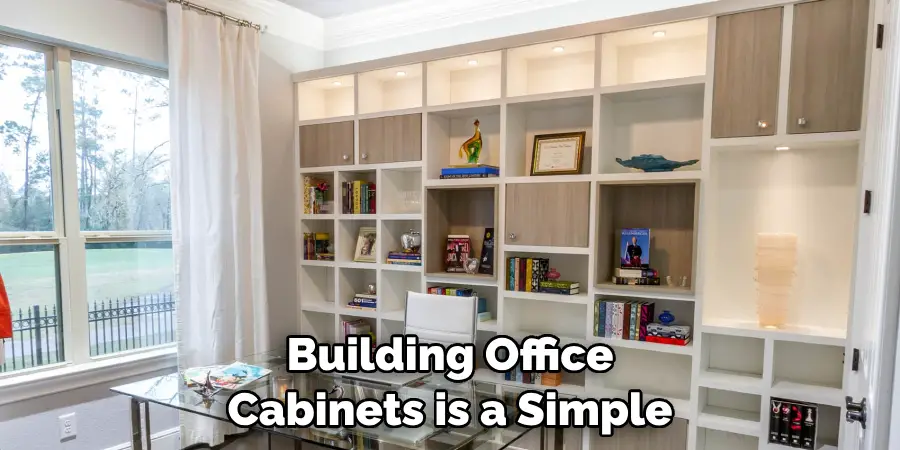
Are you looking to build office cabinets that will create more space and improve the overall look of your home or business? Office cabinetry offers a great way to add style and functionality without breaking the bank. It also allows for better organization of items, which makes it easier for employees and customers alike to find what they need quickly.

In this blog post, we will provide step-by-step instructions on how to build office cabinets with basic tools in just a few hours. Read on to learn how easy it is – with just some woodworking skills – to turn an ordinary room into one that looks like it belongs in a professional workplace!
The Significance of Well-Designed Office Cabinets
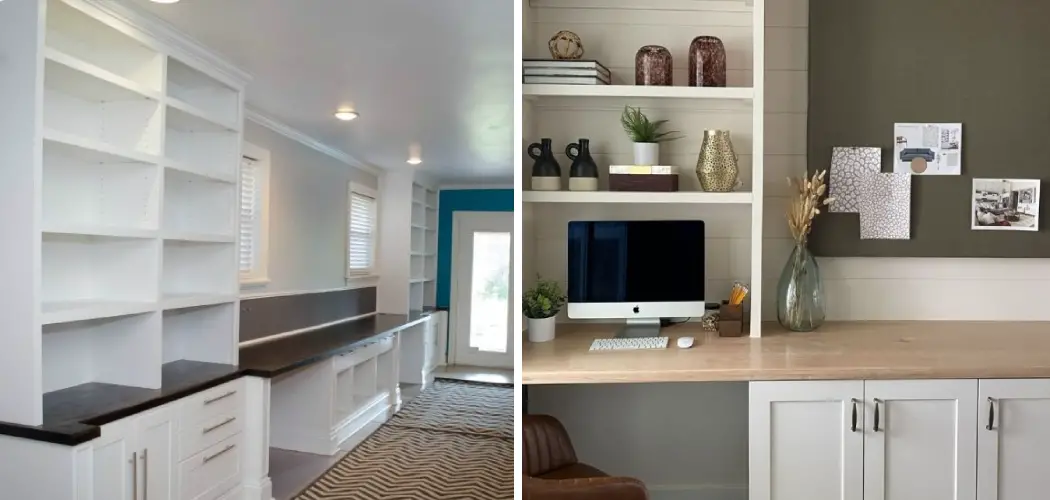
Office cabinets are an integral part of organizing and storing documents, supplies, and tools. An efficient workspace should feature well-designed office cabinets that offer ample storage space while not taking up too much area in the work environment. Well-made office cabinets can help keep everything neat and orderly, making it easier to find what you need when you need it.
They also provide a sense of aesthetic to your workspace, adding a professional touch to the interior design without overwhelming the room with clutter. Additionally, having quality built cabinetry can significantly increase the value of any office building or home office.
When designing office cabinets for your space, there are several factors to consider, such as size, material type, color scheme, and function. Office cabinet sizes vary widely, so it’s important to choose the right size for your workspace.
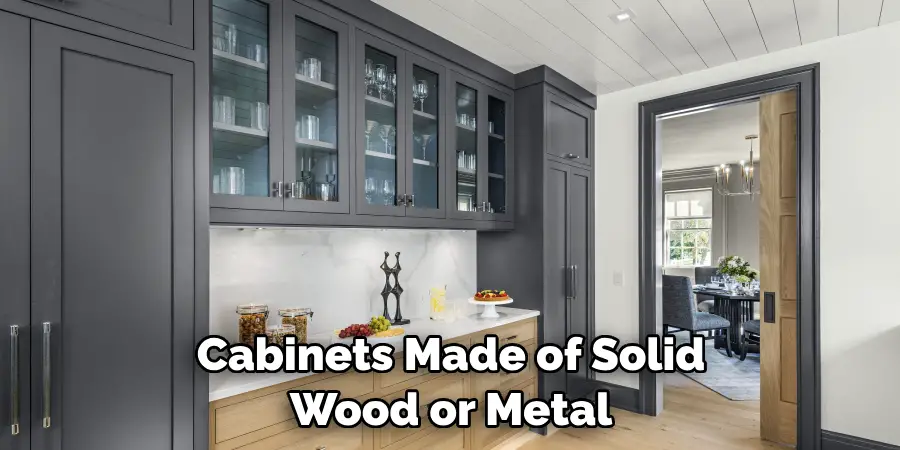
Cabinets made of solid wood or metal are the most common and provide a sturdy base for storing documents and other items. Furthermore, it’s important to select cabinets that fit in with the overall color scheme of your office. This will create an aesthetically pleasing area that is both stylish and functional.
Benefits of Custom-Built Cabinets
Custom-built office cabinets come with a myriad of benefits that make them an attractive choice for any workspace.
First and foremost, custom-built cabinets allow you to perfectly match the design of your office space. This is because they are built according to your exact specifications and measurements, allowing you to create a cabinet that will fit comfortably in any room.
If necessary, they can also be designed with special features or other material additions that can make them more durable and functional for your needs.
Custom-built office cabinets offer additional benefits, such as enhanced security and privacy. By design, these cabinets can be built with locks that provide additional layers of protection for your documents and items. This makes them ideal for work environments where sensitive materials need to be kept secure at all times.
Furthermore, custom-built office cabinets are typically much more durable than their store-bought counterparts. This is because they are built with higher-quality materials and construction techniques, making them ideal for long-term use.
Finally, custom-built cabinets can be designed to fit any specific storage requirements you may have. Whether it’s room to store books or files, or a specific shelving system, custom-built cabinets can be tailored specifically to your needs.
10 Methods How to Build Office Cabinets
1. Plan and Design:
Start by assessing your office space and determining the specific requirements for your cabinets. Consider the dimensions, layout, and functionality needed. Sketch out a design or use software tools to create a detailed plan that includes measurements, the number of shelves or drawers, and any additional features or accessories you desire.

However, keep in mind that custom cabinets can be complex and expensive to make. Make sure you’re aware of all the costs and requirements regarding materials, tools, and labor before beginning.
2. Gather Materials and Tools:
Once you have a clear design, compile a list of materials and tools required for the project. Common materials include plywood or medium-density fiberboard (MDF) for the cabinet carcass, solid wood for face frames and doors, hinges, drawer slides, screws, and finishing materials such as paint or stain.
Ensure you have the necessary tools, such as a saw, drill, router, tape measure, clamps, and sanding equipment. If you lack any of these, consider renting or borrowing them.
3. Measure and Cut the Carcass Components:
Using the measurements from your design, cut the plywood or MDF sheets into the required pieces for the cabinet carcass. This typically includes the top, bottom, sides, back, and shelves. Use a table saw or circular saw to ensure accurate and clean cuts. Remember to account for the thickness of the blade when measuring and cutting.
4. Assemble the Carcass:
Begin by joining the cabinet’s top, bottom, and sides using glue and screws or nails. Use clamps to hold the pieces together while assembling. Add the back panel, ensuring it is flush with the edges. Install the shelves at the desired height using shelf pins or adjustable shelf hardware.
Check for squareness and make any necessary adjustments before proceeding. Although cabinet carcasses are typically made of wood, they can also be constructed using plastic laminate, metal, and other materials.
5. Build and Install Face Frames:
Construct the face frames using solid wood, taking care to miter the corners for a clean and professional look. Attach the face frames to the cabinet carcass using glue and pocket-hole screws or dowels. Ensure they are level and securely fastened. Leave space for doors or drawers, depending on your design.
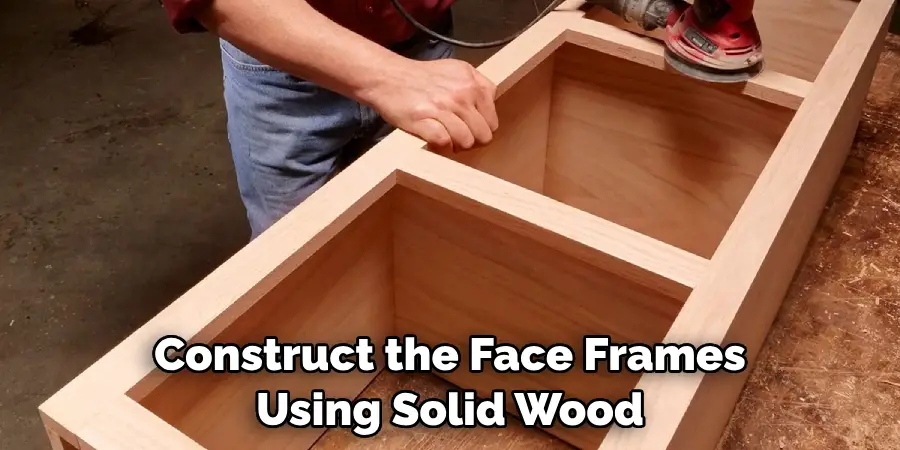
While the face frames are in place, drill holes for adjustable shelf supports. Although optional, adding adjustable shelf supports is highly recommended, as it adds flexibility and strength to the cabinet.
6. Create Doors and Drawer Fronts:
Measure and cut the solid wood pieces for the doors and drawer fronts. Consider using a router to create decorative profiles or edges. Install hinges on the doors and attach them to the face frame. For drawers, use drawer slides that match your design specifications and install them according to the manufacturer’s instructions.
7. Install Hardware and Accessories:
Once the basic structure is complete, it’s time to add hardware and accessories. Install knobs, pulls, or handles on the doors and drawers. Consider adding features such as wire baskets, file holders, or cable management systems to enhance the functionality of your office cabinets. Finally, add any decorative elements you want to customize the look.
If you’re installing new countertops, now is the time to do so. To finish the project, reinstall any displaced wall art or decor items. Once everything is back in place, you can proudly stand back and admire your beautiful new office cabinets. With the right tools and materials, you can build any type of cabinet to suit your office needs.
8. Sand and Finish:
Before applying any finish, thoroughly sand all surfaces to remove any rough edges or imperfections. Start with coarse sandpaper and gradually move to finer grits for a smooth finish. Once sanded, wipe away any dust and apply your chosen finish, such as paint, stain, or clear coat.
Follow the manufacturer’s instructions and apply multiple coats as needed for durability. If you’re using paint, sand between coats with a fine-grit sandpaper. Once complete, lightly sand again to ensure a smooth finish. Allow each coat of finish to dry completely before applying the next.
9. Install the Cabinets:
Carefully position the cabinets in your office space, ensuring they are level and properly aligned. Use screws or brackets to secure them to the wall for stability and safety. Connect any electrical components, such as lighting, if desired.
Use a pencil to mark the location of hinges and handles for easy installation. Although the process of installing cabinets may vary depending on the specific type, most follow a general set of steps.
10. Organize and Enjoy:
Finally, organize your office supplies, documents, and equipment within your newly built cabinets. Utilize storage bins, dividers, and labels to maintain order and maximize efficiency. Step back and admire your craftsmanship as you enjoy the improved functionality and aesthetic appeal of your custom-built office cabinets.
With the right materials and a set of plans, building office cabinets is a simple and rewarding weekend project. However, if you don’t feel confident in your carpentry skills, there are many reputable companies that offer custom cabinet designs and installation services. No matter the
Conclusion
Building office cabinets from scratch can be a fulfilling and cost-effective endeavor. By following these ten essential steps, you can create customized cabinets that perfectly suit your office space and organizational needs. Remember to plan carefully, measure accurately, and pay attention to detail throughout the construction process.
With proper assembly, finishing, and installation, your new office cabinets will enhance productivity, optimize storage, and contribute to a well-organized and visually appealing workspace. Hopefully, this article gave you some helpful tips about how to build office cabinets successfully, so now that you have the proper knowledge on how to get the job done, why not give it a try today?