
Maintaining accurate time settings in CCTV cameras is crucial for ensuring synchronized recording, effective event analysis, and compliance with legal requirements. However, changing the time settings on a CCTV camera may seem intimidating for some users. In this article, we’ll demystify the process and provide step-by-step guidance on how to change time in CCTV camera effortlessly.

Whether you’re a security professional, a business owner, or a homeowner looking to optimize your surveillance system, mastering this skill is essential for maximizing the functionality and reliability of your CCTV setup. From accessing the camera’s settings menu to adjusting time zones and daylight saving settings, we’ll cover everything you need to know to confidently manage and maintain accurate time settings in your CCTV cameras. With our comprehensive guide, you’ll be equipped to ensure precise time synchronization and enhance the effectiveness of your surveillance operations.
Importance of Accurate Time Settings
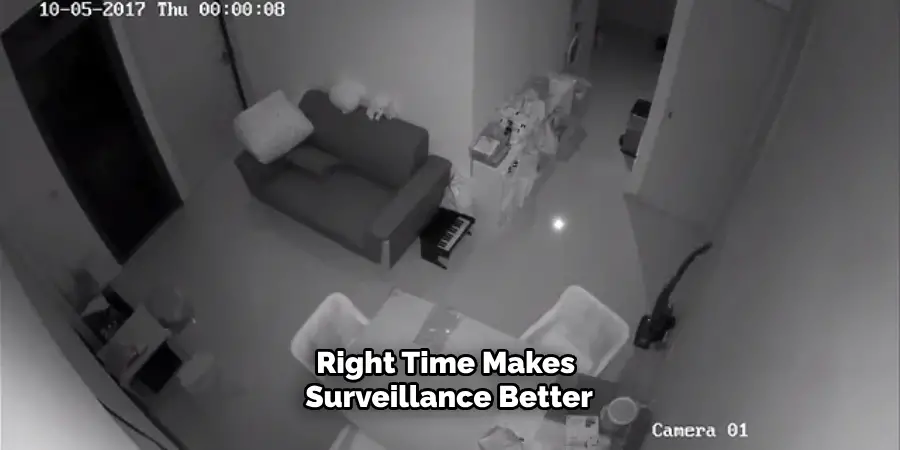
Accurate time settings in CCTV cameras play a pivotal role in the overall effectiveness of a surveillance system. Firstly, they ensure that the footage is correctly timestamped, which is critical when the recordings need to be used as evidence in legal proceedings. Precise time stamps allow for the exact sequencing of events, making it easier to establish timelines or identify suspects.
Secondly, accurate time settings are essential for the synchronization of footage across multiple cameras in a complex surveillance network. This synchronization ensures that all cameras are recording at the same time intervals, which is crucial for analyzing events that occur across different locations within the surveillance area.
Lastly, maintaining correct time settings aids in effectively managing and retrieving footage from the vast amounts of data that CCTV systems generate, especially in systems that rely on motion detection to trigger recording. Accurate timestamps enable users to quickly find specific footage based on the time of occurrence, streamlining investigations and monitoring routines.
Benefits of Synchronizing CCTV Time
Synchronizing the time across all CCTV cameras in a surveillance system offers numerous benefits that enhance both security measures and operational efficiency. A primary advantage is the improvement in investigative accuracy. When all cameras are synchronized, it simplifies the process of compiling and reviewing footage from multiple angles or areas to understand a sequence of events accurately. This is especially crucial in high-security areas or during incidents that require detailed analysis.
Furthermore, synchronized time stamps across cameras facilitate easier and more efficient video management. In large-scale operations, identifying and correlating video segments from different cameras becomes a straightforward task when the times are aligned, saving valuable time during critical monitoring or in the aftermath of security incidents.

Additionally, time synchronization is essential for the functionality of advanced surveillance features, such as motion detection and analytics. These systems rely on precise timing to accurately trigger alerts and record potential security breaches. By ensuring all cameras are operating on the same time, security teams can reduce false alarms and increase the accuracy of threat detection.
Lastly, in the context of legal proceedings, having synchronized time stamps across all CCTV footage can bolster the credibility and reliability of video evidence. It demonstrates meticulous surveillance operations and can be pivotal in reconstructing events as they unfolded, which can be instrumental in legal judgments or law enforcement investigations.
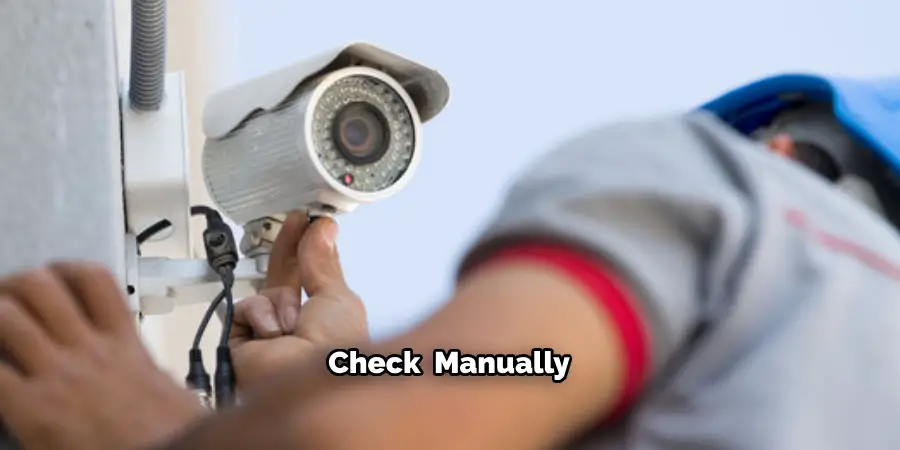
Accessing Time Settings on CCTV Cameras
Accessing the time settings on a CCTV camera is the first crucial step towards ensuring that your surveillance system operates with precise time synchronization. The process for accessing these settings can vary slightly depending on the manufacturer and model of your CCTV system. However, the basic steps are generally as follows:
- Log In to Your Camera or DVR/NVR System: Usually, this involves entering the system’s IP address into a web browser on a computer connected to the same network as your CCTV system, or accessing the system directly using the monitor and controls connected to your DVR/NVR.
- Navigate to the System or Camera Settings Menu: Look for a menu labelled ‘System’, ‘Settings’, or something similar. Within this menu, you should find options related to the system’s operation, including time and date settings.
- Locate the Time and Date Settings: This option may be under a sub-menu labelled ‘General’, ‘Time Settings’, ‘Date/Time’, or something along those lines. Here, you will find options to set the current time and date, time zone, and often daylight saving adjustments.
- Adjust the Settings as Needed: You can now set the correct time, date, and time zone for your location. If your system supports it, enabling automatic synchronization with an internet time server can ensure ongoing accuracy without manual adjustments.
- Save the Changes: Make sure to apply or save the changes before exiting the settings menu. This may involve clicking an ‘Apply’, ‘Save’, or ‘OK’ button.
It’s recommended to check and, if necessary, update these settings periodically to account for changes such as daylight saving time adjustments or any drift that may occur in the system’s clock. Additionally, consult your CCTV system’s user manual for specific instructions related to your model, as this can provide more tailored guidance and help you troubleshoot any issues you encounter during the process.
Navigating Camera Menus and Settings Interface
Navigating the menus and settings interface of your CCTV camera or DVR/NVR system is a crucial skill for maintaining an effective surveillance operation. The user interface may vary between different manufacturers and models, but they are generally designed to be intuitive. Here are some tips to enhance your navigation experience:
- Understand the Layout: Familiarize yourself with the main menu layout as soon as you log in. Most systems divide their settings into logical groups such as System, Camera, Recording, Network, and Maintenance.
- Use the Search Function: Some advanced systems include a search function within the settings menu. Use it to quickly find specific settings such as ‘Time Settings’ or ‘Motion Detection’.
- Shortcut Menus: Look for shortcut menus or quick access icons that might be present on the home screen or dashboard. These can provide rapid access to frequently adjusted settings.
- Hover for Help: If available, hover your cursor over icons or menu items to reveal a brief description or help text. This can be incredibly useful for understanding what a specific setting or feature does.
- Consult the Help Section: Many systems include a built-in help section or digital manual accessible from within the settings menu. This resource can be invaluable for understanding the functionality and configuration options of your system.
- Adjusting Camera Settings: When adjusting camera settings such as image quality, motion detection areas, or alarm settings, take the time to experiment with different configurations. Most systems will offer a preview function to immediately see the effects of your adjustments.
- Save and Confirm: After making any changes within the menus, be sure to save your adjustments. Some systems may require you to confirm changes before they are applied, ensuring accidental modifications are minimized.
By becoming proficient at navigating your CCTV system’s menus and settings, you’ll be better equipped to utilize its full range of features and maintain an optimal surveillance setup. Always remember to periodically review your settings to ensure they continue to meet your needs and adjust as necessary for changes in your surveillance objectives.
10 Methods How to Change Time in Cctv Camera
Method 1: Manual Time Adjustment via Camera Interface
This method is suitable for users with basic CCTV cameras. We’ll provide step-by-step instructions for accessing the camera’s settings menu and manually adjusting the date, time, and time zone settings using the camera’s interface buttons or remote control.
Method 2: Using Configuration Software Provided by Manufacturer
Many CCTV camera manufacturers offer configuration software that simplifies the process of adjusting camera settings, including time settings. We’ll guide users through the installation and usage of manufacturer-provided software to change time settings efficiently.
Method 3: Syncing Time with Network Time Protocol (NTP)
For users with network-connected CCTV cameras, syncing time with NTP servers ensures accurate timekeeping. We’ll explain how to configure NTP settings on the camera to automatically synchronize time with reliable time servers over the internet or local network.
Method 4: Setting Time Remotely via Web Interface
Remote access to CCTV camera settings via a web interface allows users to change time settings from anywhere with an internet connection. We’ll demonstrate the process of accessing the camera’s web interface and adjusting time settings remotely.
Method 5: Utilizing Mobile Apps for Time Adjustment
Many modern CCTV cameras offer companion mobile apps that enable users to control camera settings, including time settings, from their smartphones or tablets. We’ll explore how to download, install, and use mobile apps provided by camera manufacturers for convenient time adjustment.

Method 6: Time Adjustment via Video Management Software (VMS)
Video management software (VMS) provides centralized control and management of multiple CCTV cameras. We’ll discuss how to change time settings for individual or groups of cameras using VMS, streamlining the process for users with large camera installations.
Method 7: Time Adjustment via Command Line Interface (CLI)
For advanced users familiar with command line interfaces, some CCTV cameras offer CLI access for configuration. We’ll provide instructions on accessing the camera’s CLI and using commands to adjust time settings efficiently.
Method 8: Firmware Update for Time Setting Features
In some cases, firmware updates released by camera manufacturers may include improvements or additional features related to time settings. We’ll discuss the importance of regularly updating camera firmware and how to perform firmware updates to access the latest time setting capabilities.
Method 9: Time Adjustment with External Time Source
Integrating CCTV cameras with external time sources, such as GPS or atomic clocks, ensures highly accurate timekeeping. We’ll explore the process of connecting cameras to external time sources and configuring time synchronization for precise timekeeping.
Method 10: Consulting Professional Support for Time Calibration
For users facing challenges or technical complexities in adjusting time settings, seeking assistance from professional CCTV installers or technical support teams can provide expert guidance. We’ll discuss when and how to reach out to professionals for assistance with time calibration and troubleshooting.

Utilizing Network Time Protocols (NTP)
Utilizing Network Time Protocols (NTP) is a highly effective and efficient method for ensuring your CCTV system maintains accurate time settings. This approach leverages the use of NTP servers, which are dedicated devices that synchronize time across all devices on the network, ensuring cohesive timekeeping. When a CCTV camera is configured to sync with an NTP server, it regularly checks in with the server to update its time settings, correcting any drift that may have occurred since the last synchronization.
This process can significantly enhance the reliability of time stamps on recorded footage, which is crucial for evidence in security incidents. To set up NTP synchronization, you typically need to access your camera’s network settings and input the details of your preferred NTP server. Many organizations opt for public NTP servers available on the internet, while others may run their own internal NTP servers to keep network traffic localized and secure.
Time Setting Best Practices and Tips
When ensuring the accuracy of time settings across your CCTV system, adhering to a few best practices and tips can markedly improve your operations. Here are key considerations:
- Regular Updates: To maintain time accuracy, schedule regular checks and updates of time settings across all cameras. This is especially critical following daylight saving time changes and power outages which can reset camera clocks.
- Use NTP Servers: Preferably, synchronize all CCTV cameras with a Network Time Protocol (NTP) server. This ensures all devices on your network display the same, precise time, critical for correlating events across multiple cameras.
- Choose Reliable NTP Servers: Select reliable, preferably local, NTP servers to minimize time lag and potential downtime. Public NTP servers are widely available, but private NTP servers can offer more security and control.
- Backup Time Sources: Establish backup time sources in case the primary NTP server fails. This can include setting up a secondary NTP server or using internal clock settings as a temporary measure.
- Firmware and Software Updates: Regularly update the camera firmware and management software to benefit from improved time management features and bug fixes related to time keeping.
- Time Zone Awareness: Ensure that time settings correctly reflect the time zone of the camera location, including observing daylight saving changes if applicable. This is vital for accurate event timestamping and for systems spread across different time zones.
- Document Time Settings: Maintain a record of time settings and changes for all cameras and systems. This aids in troubleshooting, historical data integrity, and ensuring compliance with legal or operational standards.
- Training: Train relevant personnel on the importance of accurate time settings and how to adjust them. This empowers your team to maintain optimal system performance and assists in swift resolution of time-related issues.

By implementing these best practices, you can ensure that your CCTV system provides reliable and accurate time stamps, enhancing the integrity and usefulness of your security recordings.
Things to Consider
When optimizing your CCTV system for precise timekeeping, several factors can influence the effectiveness of your configurations. Understanding these factors can help you make informed decisions about your system’s time synchronization setup. Here are things to consider:
- Network Stability: The reliability of your network connection can impact the synchronization process. A stable network is essential for consistent communication with NTP servers. Intermittent connectivity may lead to discrepancies in time settings.
- Server Location: The physical distance between your CCTV system and the chosen NTP server can affect the accuracy of time synchronization. Closer proximity to the server usually results in less latency and more accurate time adjustments.
- Security Measures: When configuring your CCTV system to synchronize with external NTP servers, consider the security implications. Ensure that the communication channel is secure to prevent any potential breaches.
- Legal and Compliance Requirements: Depending on your jurisdiction and industry, there may be specific legal and regulatory standards for timekeeping in surveillance systems. Ensure your configuration meets these requirements to avoid penalties.
- Multipurpose Use of Cameras: In environments where CCTV cameras are used not just for security but also for operational purposes, such as time management and attendance, the accuracy of time becomes even more critical.
- Environmental Factors: Physical conditions such as extreme temperatures, humidity, and power fluctuations can impact the internal clocks of CCTV cameras, making regular synchronization with an NTP server even more essential.
- Scalability: Consider how your time synchronization setup will scale with the growth of your CCTV system. Planning for future expansion can save considerable time and resources.
By taking these considerations into account, you can enhance the reliability and accuracy of your CCTV system’s timekeeping capabilities, ensuring that your security measures are robust and effective.

Conclusion
By exploring these ten comprehensive methods for changing time in CCTV cameras, users can ensure accurate timekeeping and reliable surveillance footage. Whether adjusting time settings manually, syncing with network time protocols, or utilizing remote access methods, each approach offers unique benefits suited to different user preferences and technical requirements.
With the knowledge and guidance provided, users can confidently maintain precise time settings in their CCTV systems, enhancing security effectiveness and evidentiary reliability. Be sure to follow all instructions on how to change time in cctv camera carefully, and always consult an expert when in doubt.