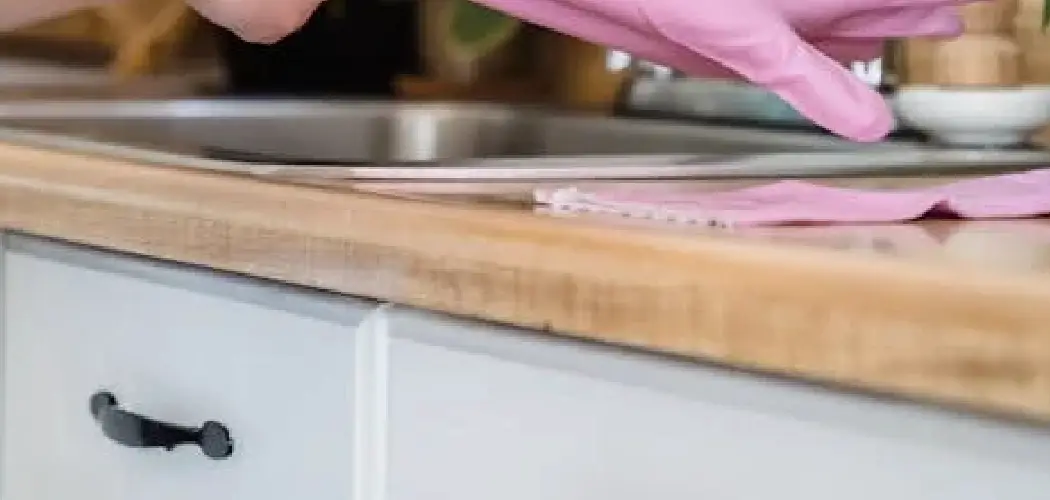
Cabinet pulls are an integral part of kitchen and bathroom décor, but over time, they can accumulate grime and lose their shine due to frequent handling. The constant contact with greasy fingers, exposure to kitchen steam, and the natural buildup of dust contribute to their deterioration. Understanding how to clean cabinet pulls effectively is vital, as the cleaning method largely depends on the material.

Brass pulls may require a gentle polish to maintain their luster, while stainless steel versions may benefit from non-abrasive cleaners to prevent surface scratches. Ceramic pulls, on the other hand, need careful handling to avoid chips or cracks.
The cleaning process typically involves removing the pulls from their fixtures, cleaning them thoroughly using appropriate techniques, and then carefully reinstalling them. This not only restores their appearance but also revitalizes the overall aesthetic of the cabinetry. By following these steps, cabinet pulls can continue enhancing any space’s visual appeal.
Materials Needed
To clean cabinet pulls effectively and preserve their condition, gather the following materials:
- Soft Cloth or Microfiber Cloth: Essential for gentle wiping and polishing of the cabinet pulls without causing scratches or damage.
- Mild Dish Soap: A versatile and safe cleaning agent, mild dish soap effectively removes accumulated dirt, grease, and grime from the pulls’ surfaces.
- Warm Water: Combine with mild dish soap to create a cleaning solution that cleanses without being too harsh.
- Soft-Bristled Brush or Toothbrush: These are perfect tools for scrubbing intricate designs or textured surfaces of the cabinet pulls without harming the material.
- White Vinegar (Optional): A natural cleaner that can enhance the cleaning process by providing extra power to tackle tarnished metal surfaces.
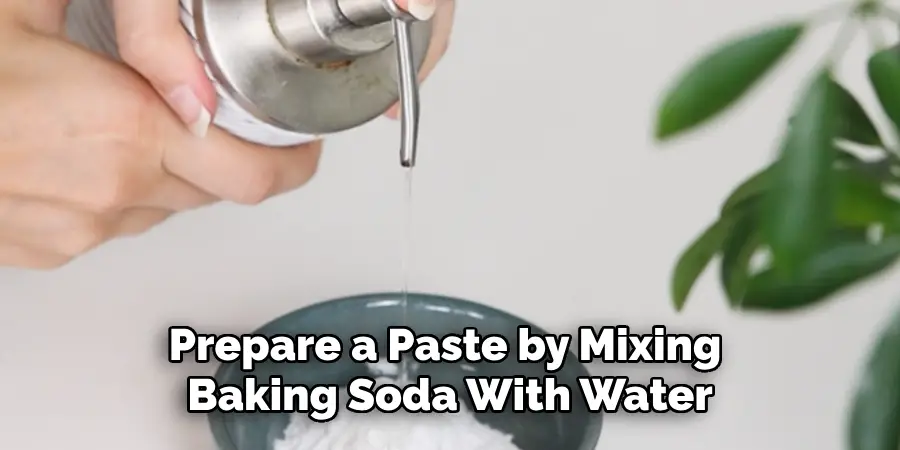
- Baking Soda (Optional): Baking soda helps deal with tougher grime or persistent tarnish on metal cabinet pulls, especially when combined with vinegar or water to form a paste.
- Old Towels or Paper Towels: Necessary for thoroughly drying the cabinet pulls post-cleaning, preventing water spots or additional grime from sticking to the moist surfaces.
Each of these materials plays a crucial role in the cleaning process, ensuring that your cabinet pulls are clean and restored to their original luster and beauty.
Preparing the Cabinet Pulls for Cleaning
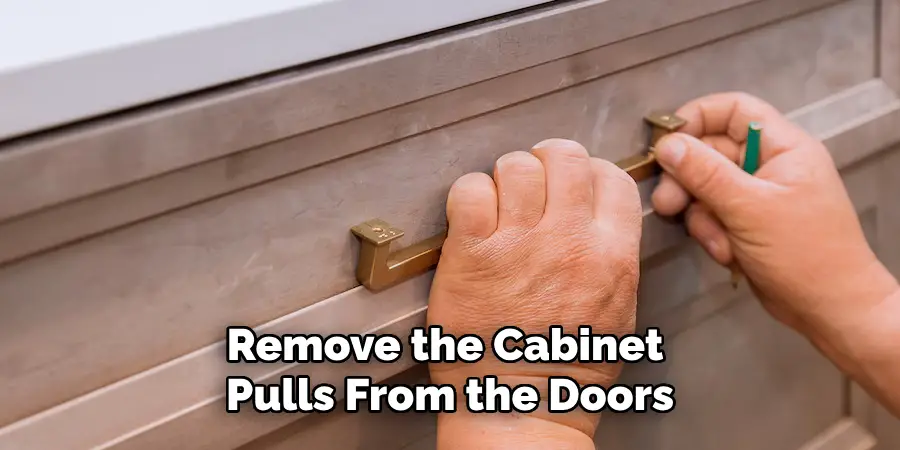
Removing the Cabinet Pulls
Remove the cabinet pulls from the doors or drawers to ensure a thorough cleaning. Use a screwdriver that fits snugly into the screws securing the pulls. Gently turn the screwdriver counterclockwise to loosen and remove the screws, taking care not to strip them. Organize the removed screws by placing them in a small container or resealable bag, which prevents them from getting lost and ensures an easier reinstallation process.
Dusting Off the Pulls
Before washing, use a dry cloth to wipe off any loose dust and dirt from the surface of the cabinet pulls. This step helps prevent scratching and makes the cleaning process more effective. If some pulls remain attached to the cabinetry, take a moment to dust the surrounding cabinet surface as well, ensuring you don’t transfer any extra grime during the cleaning process. Use gentle strokes to avoid dislodging or damaging delicate parts.
Assessing the Material
Understanding the material composition of your cabinet pulls is crucial for selecting the appropriate cleaning method and materials. Common materials include metal, ceramic, and wood, each requiring specific care. For example, metal pulls may need specific polishes, while ceramic ones require caution to prevent chipping.
To identify the material, look for visual cues such as distinct textures or finishes, and check for any manufacturer’s labels or instructions indicating special finishes like lacquer. Knowing these details ensures you choose gentle cleaning options suitable for maintaining the integrity and appearance of your cabinet pulls.
How to Clean Cabinet Pulls: Cleaning Metal Cabinet Pulls
Cleaning with Soap and Water
Mix warm water with a few drops of mild dish soap in a bowl to create a gentle cleaning solution. This mixture is effective at lifting grease, grime, and fingerprints without harming the metal it cleans. Dip a soft cloth into the soapy water, ensuring it is damp but not overly soaked.
Wring it out gently to prevent drips, then wipe down each metal cabinet pull. Use gentle circular motions to ensure the entire surface is cleaned while being careful not to push debris into any crevices or grooves.

Scrubbing Tough Spots with a Toothbrush
For stubborn areas, such as crevices or decorative details, use a soft-bristled toothbrush. Wet the brush with the soapy solution, then gently scrub the difficult spots to release any dirt lodged within. If the grime proves particularly stubborn, sprinkle a small amount of baking soda directly onto the toothbrush before continuing to scrub. Baking soda acts as a mild abrasive that can tackle tougher stains without scratching the metal surface. Be sure to work with care to preserve the finish of the pulls.
Removing Tarnish from Brass or Bronze Pulls
Over time, brass or bronze cabinet pulls may develop tarnish, which dulls their appearance. To address this, create a paste by mixing equal parts baking soda and water. Alternatively, for a more potent clean, you can use white vinegar.
Apply the paste or vinegar onto the tarnished areas using a soft cloth or toothbrush. Scrub gently, ensuring you cover the entire tarnished surface without exerting excessive force that could damage the metal. Allow the paste or vinegar to sit for a few minutes before rinsing.
Rinsing and Drying the Pulls
Finish by rinsing the cabinet pulls under warm running water to remove any soap or baking soda residue. Drying the pulls immediately after rinsing using a soft cloth is crucial. This prevents water spots or streaks from forming on the metal surface, which can dull their shine.
Ensure each pull is completely dry before reinstalling them onto cabinets to maintain their restored appearance. By following these steps, your metal cabinet will look revitalized, enhancing the overall aesthetic of your cabinetry.

How to Clean Cabinet Pulls: Cleaning Ceramic or Porcelain Cabinet Pulls
Washing with Mild Soap and Water
Prepare a mild cleaning solution to clean ceramic or porcelain cabinet pulls effectively. Mix warm water with a few drops of mild dish soap in a bowl. Once the solution is ready, dampen a soft cloth with it, ensuring it is not overly saturated. Use this cloth to gently wipe each cabinet pull, focusing on removing surface dirt, grease, and any visible stains. The combination of warm water and mild soap is sufficient to clean the pulls without causing damage to their glazed surfaces.
Avoiding Harsh Scrubbing
When dealing with ceramic or porcelain pulls, it is crucial to avoid harsh scrubbing or the use of abrasive cleaners. Such methods can scratch or damage delicate surfaces. Instead, opt for a soft-bristled brush to clean any intricate designs or grooved areas. For these spots, lightly brush in circular motions, ensuring you reach into all detailing without applying excessive pressure that might harm the surface.
Removing Stubborn Stains
For stubborn stains after your initial cleaning, prepare a paste by mixing baking soda with water. Apply this paste onto the stained areas with a soft cloth. Gently rub the paste in circular motions over the stains to lift them, being mindful not to exert too much force. Once all stains are treated, rinse the pulls under clean water to wash away any remaining paste.
Immediately dry the pulls thoroughly with a soft, dry cloth to prevent water spots or streaks. Following these steps ensures your ceramic or porcelain cabinet pulls remain pristine and retain their original elegance.
Polishing and Finishing
Polishing Metal Pulls (Optional)
Polishing metal cabinet pulls, especially those made of brass or stainless steel, is a great way to restore their original shine and enhance their appearance. This step is optional but recommended if you desire an extra gleam or have older pulls needing a refreshed look.
To begin, apply a small amount of metal polish onto a soft cloth. Gently buff the pulls using circular motions, ensuring the entire surface receives a consistent polish. Focus on areas that have become dull or tarnished over time, and continue buffing until you achieve the desired luster. This process revitalizes the metal’s shine and adds a layer of protection against future tarnishing or wear.
Wiping Down the Pulls After Polishing
After polishing, wiping down the cabinet pulls is crucial to remove any leftover polish or residue. Use a clean, dry cloth for this task. Carefully pass the cloth over the surface of each pull, ensuring you remove all traces of the polishing product. This step prevents any streaks or build-up that might dull the metal’s shine or attract dust and grime. Ensuring a residue-free finish contributes to your cabinet hardware’s polished look and feel.
Using a Clear Lacquer Spray (Optional)
Consider applying a clear lacquer spray to your metal cabinet pulls after cleaning and polishing for long-lasting protection. This optional step can prevent tarnishes and fingerprints from marring the metal. To apply, ensure the pulls are entirely clean and dry. Spray a thin, even coat of clear lacquer over the surface, maintaining a consistent distance to avoid drips or uneven coverage. Allow the lacquer to dry completely before handling or reinstalling the pulls on your cabinets. This protective layer helps preserve the polished appearance and reduces the need for frequent maintenance.
Reinstalling the Cabinet Pulls
Reattaching the Pulls to Cabinets
Begin reinstallation by positioning the cabinet pull over the pre-drilled holes on the door or drawer front. Utilize a screwdriver to secure each pull with its respective screws, turning them clockwise. Exercise caution to avoid over-tightening, as this can strip the threads or damage the pull, compromising its integrity. Instead, ensure the screws are snugly fit, offering adequate stability without excess force.
Final Inspection
Once all pulls are reattached, conduct a meticulous inspection to confirm each pull is fastened securely and aligned correctly with adjacent hardware. An even, straight alignment contributes to a cohesive and professional appearance.
Finally, gently wipe down the entire cabinet area using a soft, clean cloth to eliminate any fingerprints or smudges gathered during the installation. This step provides a pristine finish, ensuring that your freshly cleaned and polished cabinet pulls enhance the overall look of your cabinetry.

Conclusion
Regularly cleaning cabinet pulls is essential to maintaining their appearance and extending their lifespan. By following the outlined steps on how to clean cabinet pulls, you can ensure that your hardware remains both functional and visually appealing. Cleaning, polishing, and protecting cabinet pulls is straightforward and can be easily integrated into your routine maintenance.
Not only does this help in preserving their elegance, but it also prevents wear and tear that can lead to more significant issues over time. By dedicating some time to this task, you enhance the overall look of your kitchen or bathroom cabinetry, adding to the aesthetic value of your home. Embrace these cleaning practices as part of your routine to enjoy beautiful, long-lasting cabinet pulls that contribute to a polished and upscale environment.