
Are you tired of looking at your dirty and stained wristrest while typing on your keyboard? Cleaning your wristrest is an important step in maintaining a clean and hygienic workspace. Not only will it improve the overall appearance of your setup, but it can also prevent the buildup of bacteria and germs that can lead to skin irritation and other health issues.
How to clean wrist rest for keyboard is essential for maintaining a healthy and comfortable workspace. Over time, wrist rests can accumulate dust, sweat, and oils from your skin, leading to discomfort and even hygiene concerns. Regular cleaning not only extends the lifespan of the wrist rest but also enhances your overall typing experience.

Here, we’ll walk you through the steps to effectively clean various types of wrist rests, ensuring they remain fresh and free from bacteria, allowing you to work efficiently and comfortably.
What Will You Need?
Before starting, gather these materials to clean your wrist rest:
- Mild dish soap or antibacterial soap
- Warm water
- Microfiber cloth or soft-bristled brush (depending on the material of your wrist rest)
- Paper towels
If you have a gel-filled or memory foam wrist rest, you may also need rubbing alcohol and a plastic bag. Now that you have everything ready let’s begin the cleaning process.
10 Easy Steps on How to Clean Wrist Rest for Keyboard
Step 1: Remove Wrist Rest from Keyboard
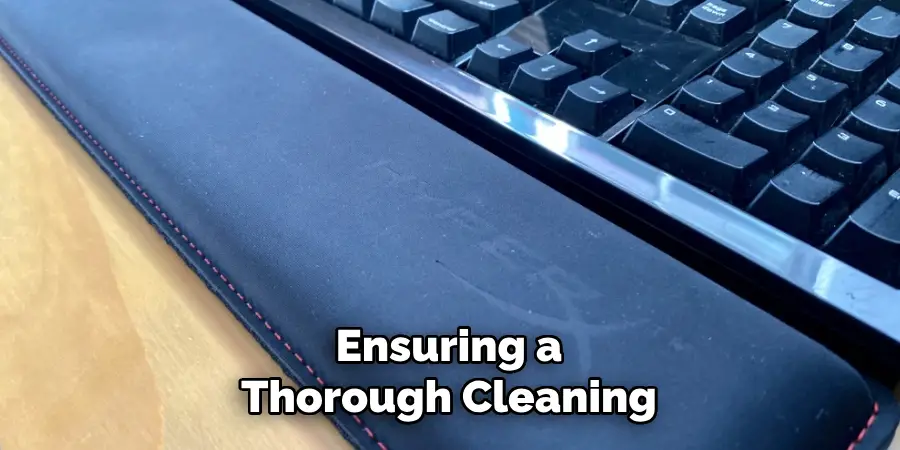
Carefully detach the wrist rest from your keyboard, ensuring that it does not to damage any connectors or parts. If your wrist rest is attached with adhesive or Velcro, slowly peel it away to avoid tearing. Placing it on a clean, flat surface will prepare it for cleaning. Removing the wristrest makes it easier to access all areas, ensuring a thorough cleaning without obstructing your workspace.
Step 2: Prepare the Cleaning Solution
In a bowl, mix a small amount of mild dish soap or antibacterial soap with warm water. The soap will help break down the grease and grime accumulated on the wrist rest, while the warm water enhances its effectiveness. Avoid using harsh chemicals or abrasive cleaners, as these can damage the wrist rest’s material.
Step 3: Dampen the Cloth
Dip your microfiber cloth or soft-bristled brush into the cleaning solution. Ensure that the cloth is damp but not soaking wet, as excess moisture can seep into the wrist rest and potentially damage it. Gently wring out any excess liquid before proceeding. This damp cloth will effectively lift dirt and oils while being gentle enough to protect the surface of the wrist rest from scratches or abrasions.
Step 4: Clean the Wristrest
With the damp cloth in hand, begin wiping down the entire wrist rest surface. Use circular motions to cover all areas, paying special attention to any stained or discolored spots. For textured surfaces, a soft-bristled brush can help to dislodge dirt from crevices that may be harder to reach. It’s essential to clean the wrist rest’s top and bottom surfaces to remove any accumulated grime.

Step 5: Rinse the Cloth and Wipe Again
After thoroughly cleaning the wrist rest, it’s crucial to rinse your cloth in clean water to remove any soap residue. Wring it out well, ensuring it is damp and not soaking, as too much water can cause damage. Gently wipe down the wrist and rest with the rinsed cloth to eliminate any remaining soap and dirt. This step is vital as leftover soap can create a slippery surface or attract more dirt over time.
Make sure to pay attention to the edges and corners, as these areas often trap residue. Once you’ve completed this step, you will have a clean surface ready for the next steps in the cleaning process.
Step 6: Dry the Wrist Rest
Once you’ve wiped down the wrist rest with the rinsed cloth, it’s time to dry it properly. Use a clean, dry microfiber cloth or paper towels to gently pat down the wrist rest, absorbing any remaining moisture. This is important because allowing the wrist rest to air dry could lead to moisture seeping into the material, especially if it’s gel-filled or made of memory foam. Make sure to allow it to dry completely in a safe place away from direct sunlight, which could cause fading or damage to the material. Taking the time to ensure your wrist rest is arid will help maintain its integrity and comfort for future use.

Step 7: Inspect the Wristrest
After the wrist rest has dried thoroughly, take a moment to inspect it for any remaining stains or areas that may need additional attention. Look for stubborn spots that might not have come out during the initial cleaning process. If you find any, repeat the cleaning process on those specific areas, using more pressure or a more concentrated cleaning solution to tackle the dirt. This step ensures that your wrist rest looks clean and is free from any lingering residues that could affect its longevity or your comfort while typing.
Step 8: Reassemble Your Workspace
Once you’re satisfied with the cleanliness of your wrist rest, it’s time to reattach it to your keyboard. Carefully position the wrist rest back in place, ensuring it’s securely connected if it has attachments. Take a moment to reorganize your workspace, ensuring everything is tidy and in its designated spot. A clean and organized area can enhance productivity and comfort while you work.
Step 9: Regular Maintenance
To maintain the hygiene and appearance of your wrist rest, consider establishing a regular cleaning schedule. Depending on your usage, aim to clean it at least once a month or more frequently if you notice dirt accumulation. Regular maintenance helps keep your wrist rest looking fresh and contributes to a healthier workspace by minimizing the buildup of bacteria and allergens over time.
Step 10: Enjoy Your Clean Wrist Rest
Finally, take the time to appreciate your freshly cleaned wrist rest! Enjoy the comfort and the improved aesthetic it brings to your typing experience. A clean wrist rest can significantly improve your overall comfort and productivity, allowing you to focus on your work without distractions from dirt or discomfort. Remember that your workspace reflects your habits, so maintaining cleanliness is essential to fostering a great working environment.

Following these steps regularly ensures that your wrist rest stays clean and in good condition, allowing you to type more comfortably and enjoyably. So don’t neglect this often overlooked piece of equipment—give it the cleaning it deserves!
5 Additional Tips and Tricks
- Use a Soft Cloth: Start by gently wiping down the surface of the wrist rest with a microfiber cloth. This will help remove any dust or grime without scratching the material.
- Avoid Harsh Chemicals: Avoid abrasive cleaners and bleach, as these can damage the wrist rest’s finish. Opt for gentle, non-toxic cleaners instead.
- Use a Toothbrush for Crevices: If your wrist rest has any grooves or textured areas, a soft-bristled toothbrush can help dislodge dirt and particles that are hard to reach.
- Let it Fully Dry: After cleaning, make sure to let your wrist rest and air dry completely before using it again. This will prevent any moisture from getting trapped and potentially causing mold or mildew.
- Rotate Wrist Rest Position: To avoid wear and tear in one specific area of the wrist rest, try rotating its position on your desk every few weeks. This will distribute the pressure and extend the life of your wrist rest.
5 Things You Should Avoid
- Excessive Water Usage: Avoid soaking your wrist rest in water or using excessively wet cloths, as this can damage and deteriorate the material over time.
- Using Paper Towels: Avoid using paper towels for cleaning. They can leave scratches or lint on the surface, detracting from the wrist rest’s appearance.
- Ignoring Manufacturer Instructions: It’s important not to disregard any cleaning guidelines provided by the manufacturer. These instructions are tailored to ensure the longevity of your wrist rest.
- Using Heat Sources: Do not use hair dryers or heaters to speed up the drying process. Direct heat can warp or crack the material, compromising its integrity.
- Applying Too Much Pressure: Avoid pressing too hard on the wrist rest surface when cleaning. This can lead to deformation or other damage that may not be reversible.
Conclusion
Maintaining a clean wrist rest for your keyboard is essential for hygiene and longevity.
Following the tips outlined above, you can effectively remove dirt and grime while preserving the material’s quality. Use gentle cleaning methods, avoid harsh chemicals, and ensure proper drying techniques to prevent damage. Additionally, rotating the position of your wrist rest can help mitigate wear and prolong its life. With these practices in mind, your wrist rest can remain comfortable and visually appealing for extended periods, enhancing your overall typing experience.
Hopefully, this guide has been helpful in learning how to clean wrist rest for keyboard. So, make sure to regularly wipe down your wrist rest, and it will continue to serve you well for a long time to come! Happy typing!