Are you tired of banging your cabinets and drawers whenever you close them? Are you looking for a simple solution to make your kitchen or bathroom quieter and safer? Look no further!
How to convert cabinets to soft close is a straightforward DIY project that enhances the functionality and convenience of your kitchen or any cabinetry space. Soft close hinges and drawer slides prevent slamming, reducing noise and extending the life of your cabinets by minimizing wear and tear. This upgrade improves the aesthetic appeal and adds a touch of luxury to your home.
In the following guide, we will walk you through the steps needed to successfully transform your standard cabinets into soft-close cabinets, ensuring a quieter and more efficient kitchen experience.
What Will You Need?
Before you begin the conversion process, gather all the necessary tools and materials.
- Soft close hinges or dampers
- Soft close drawer slides
- Screwdriver
- Drill
- Measuring tape
- Pencil or marker for marking placement points
- Safety glasses
Once you have everything ready, let’s begin the conversion process.
10 Easy Steps on How to Convert Cabinets to Soft Close
Step 1: Remove Old Hinges and Drawer Slides
To begin the conversion process, you’ll need to remove the existing hinges and drawer slides from your cabinets. Start by completely opening the cabinet doors, granting you full access to the hinges. Using your screwdriver or drill with a screwdriver bit, carefully unscrew the hinges from the cabinet door and frame.

It’s helpful to have a container or small bag to store these removed screws, ensuring none are misplaced during the process. If the hinges are particularly old or difficult to unscrew, applying a little lubricant or using a manual screwdriver for better control may help ease the process.
After the hinges are removed, proceed to the drawer slides. First, pull out the drawers to their full extension and locate the screws holding the slides in place. As with the hinges, use your screwdriver or drill to carefully remove these screws, keeping them separate from the door hinge screws. Ensuring the drawers are supported as you remove the slides will prevent accidental drops or damage.
Step 2: Measure the Cabinet Doors and Drawers
With the old hinges and drawer slides removed, the next step is to measure your cabinet doors and drawers for the new hardware. Use the measuring tape to determine the dimensions of the door frames and drawer cavities where the soft-close hardware will be installed.
It’s essential to mark the precise spots where the new hinges and slides will be attached—take note of any pre-existing holes you may use to avoid drilling additional ones. Use a pencil or marker to clearly mark these positions on both the cabinet frames and the doors or drawers. Measuring accurately ensures that the soft close features will function correctly and that the installation process is smooth and efficient.
Step 3: Install the Soft Close Hinges
Now that you have the measurements and markings, installing the soft-close hinges on your cabinet doors is time. Begin by aligning the new hinge with the marked positions on the door, ensuring that the soft close mechanism is correctly oriented towards the inside of the cabinet. Use the screws that come with the hinges and securely attach them to the door using your drill or screwdriver.
Ensure the hinges are tight and properly aligned to prevent misalignment when reattaching the cabinet door. Once the hinges are firmly on the door, attach them to the cabinet frame, ensuring the door is level and swings smoothly. Test the soft close feature in this step to confirm it works correctly before installing the drawer slides.

Step 4: Install the Soft Close Drawer Slides
Having successfully installed the hinges, it’s now time to focus on equipping the drawers with soft-close slides. Start by aligning the soft-close drawer slides with the marked position inside the drawer cavities. Ensure that they are level and parallel to each other for smooth operation. Secure the slides in place using the provided screws and your screwdriver or drill.
Next, attach the corresponding slide components on the sides of the drawer. Make sure these components fit seamlessly into the ones installed in the cavity. Once both parts of the slides are installed, carefully insert the drawer back into place and check for smoothness and correct engagement of the soft close feature. Adjust if necessary to ensure optimal performance.
Step 5: Test the Soft Close Mechanism
After installing both the soft-close hinges and drawer slides, it’s essential to test the functionality of the soft-close features to ensure everything is working smoothly. Start by gently closing each cabinet door and drawer to observe the soft close mechanism. The doors and drawers should glide smoothly and slowly come to a gentle stop without slamming shut.
If you notice any resistance or the soft close does not engage properly, double-check the alignment and secure attachment of the hardware. Make any necessary adjustments by tightening screws or realigning the components until you achieve the desired soft close effect. Testing and adjusting ensure the long-term durability and effectiveness of the soft close conversion.
Step 6: Make Final Adjustments
With the soft close mechanisms installed and preliminarily tested, it’s time to make final adjustments to achieve the perfect fit and function. Begin by examining each cabinet door and drawer to ensure they close uniformly.
Adjust the hinges or slides accordingly if any component appears misaligned or if there are gaps between the door and the cabinet frame. This may involve loosening the screws slightly to realign the hardware and then retightening them once everything is positioned correctly.
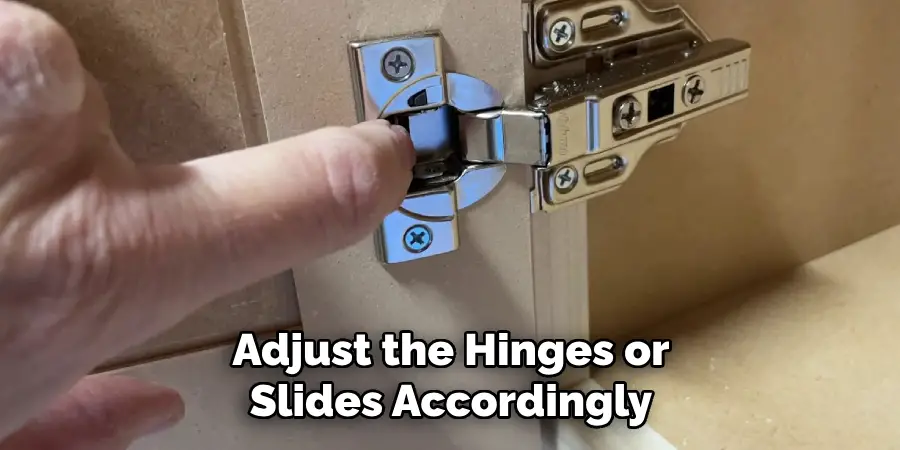
Ensure that all moving parts are free from obstructions and that the soft close mechanisms activate smoothly. Additionally, verify that the drawers pull out easily and retract fully without sticking or excessive force. Following these adjustments, retest the functionality of each soft close feature to confirm the cabinet conversion meets your expectations.
Step 7: Clean Up and Maintain Your Cabinets
After successfully completing your cabinet soft close conversion, cleaning up and maintaining your newly enhanced space is essential. Start by picking up any leftover screws, tools, or packaging materials to ensure a tidy work area and prevent any potential hazards.
Wipe down the cabinet surfaces with a damp cloth to remove dust, fingerprints, or any residue from the installation process. Regular maintenance will keep your cabinets looking pristine and functioning effectively.
To extend the lifespan of the hinges and slides, apply a bit of lubricant periodically to reduce friction and ensure continued smooth operation. Embrace the convenience and elegance of your soft close features, knowing your cabinets are now quieter and more durable than ever.
Step 8: Enjoy Your Upgraded Cabinets
With the installation complete and your cabinet space cleaned and maintained, it’s time to enjoy the benefits of your upgraded soft close cabinets. Notice the quiet elegance as doors and drawers softly glide shut, reducing noise and minimizing wear on the cabinets over time.
The enhanced functionality improves the user experience and adds value to your kitchen or workspace. Celebrate your accomplishment in creating a more modern, efficient, and user-friendly environment. Regularly appreciate the smooth performance and the subtle refinement your newly installed soft close features bring to your daily routine.
Step 9: Troubleshoot Common Issues
Even with a successful installation, you may encounter some common issues with your new soft-close features. If a cabinet door or drawer isn’t closing smoothly or the soft close feature seems too weak or strong, first recheck the alignment and ensure each hinge and slide is securely fastened.
You may need to adjust the tension settings on the soft close mechanisms for optimal performance. For doors that hang unevenly or rub against the frame, verify that the hinges are aligned correctly and make minor adjustments as needed.
Occasionally, debris can interfere with the gliding action, so ensure all mechanisms are clean and lubricated. By troubleshooting and addressing these common issues, you provide the longevity and efficiency of your upgraded cabinets.
Step 10: Share Your Experience and Inspire Others
Now that you’ve successfully installed soft close features on your cabinets, take a moment to share your experience and inspire others to undertake similar projects.
Consider writing a summary of your process, detailing any challenges you faced and how you overcame them. Share your insights on forums, social media platforms, or even with friends and family. Including before-and-after photos can be particularly motivating for others considering a cabinet upgrade.
Not only does sharing your project help others, but it also reinforces your sense of accomplishment. Your firsthand account might encourage someone else to transform their living space into a more efficient and stylish environment.
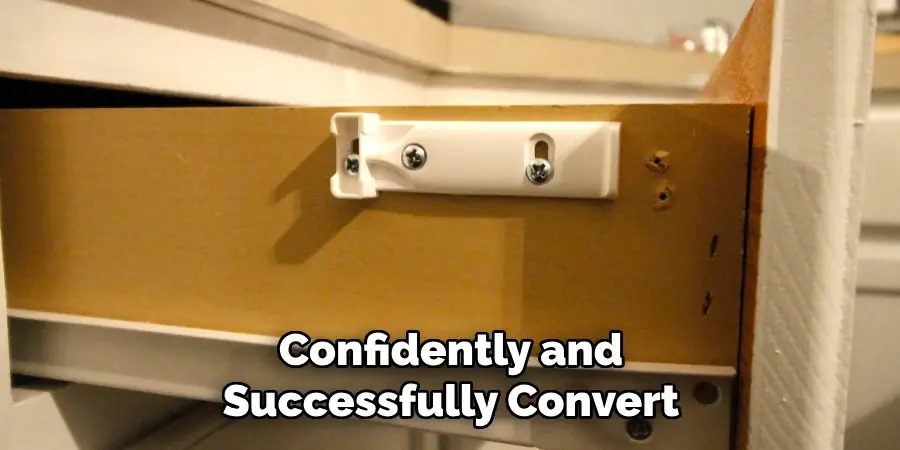
Following these ten steps, you can confidently and successfully convert your cabinets to soft-close features.
Conclusion
How to convert cabinets to soft close is a rewarding project that enhances both the functionality and aesthetic of your space.
Following a step-by-step approach, from gathering the necessary tools and materials to testing the final installations, can achieve a seamless upgrade with minimal hassle.
This process not only promotes a quieter and more elegant environment but also extends the life of your cabinetry by reducing wear from slamming doors and drawers. Investing in soft, close features adds value and modernity to your home, whether for a kitchen, bathroom, or any other area with cabinets.
With patience and attention to detail, you can enjoy improved convenience and inspire others with your successful cabinet transformation.