
Wallpapering a desk offers a unique opportunity to transform a mundane piece of furniture into a vibrant focal point, enhancing a space’s aesthetics and functionality. The benefits of using wallpaper for covering a desk are manifold, including a cost-effective means of redecorating and a vast array of design options that cater to individual tastes.
Wallpaper provides a simple yet effective way to breathe new life into home offices, study areas, or creative spaces, allowing for a personalized touch that reflects one’s style. This article serves as a comprehensive step-by-step guide on how to cover a desk with wallpaper, guiding you through the selection, preparation, and application process.
Whether you seek to uplift a home workspace or craft an inspiring study environment, this guide promises practical tips and creative ideas to transform your desk into a statement piece that aligns with your vision.
Choosing the Right Wallpaper for Your Desk
Types of Wallpaper
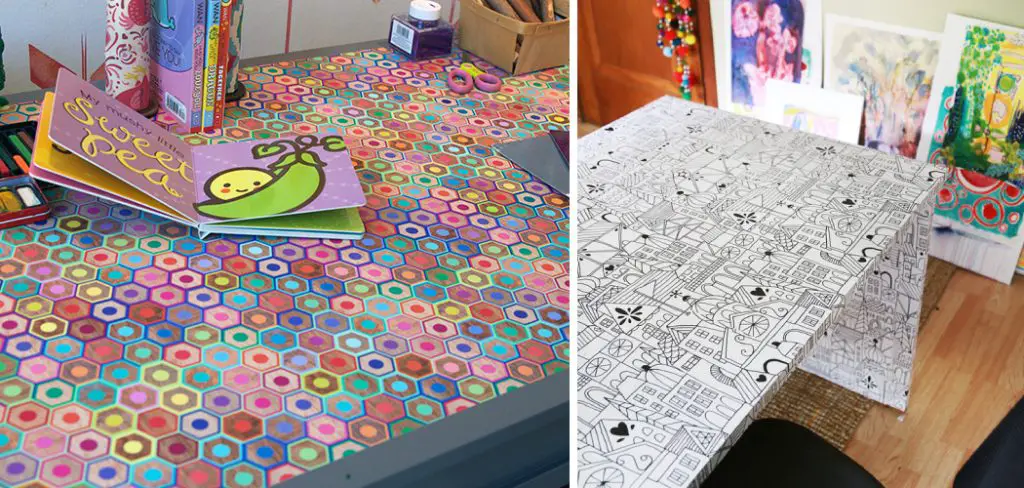
When considering how to cover a desk with wallpaper, understanding the various types available is crucial. Peel-and-stick wallpaper offers a hassle-free option, allowing for easy application and removal without damaging the surface. This is ideal for those who wish to change designs frequently or as trends evolve.
Traditional wallpaper, on the other hand, provides a more permanent solution, ensuring that the design remains intact over time. Washable and durable wallpapers are essential for desks that endure heavy use, as they resist spills and stains, maintaining their charm and functionality.
Factors to Consider
Selecting the perfect wallpaper involves more than just personal preference; it’s important to choose a style and pattern that complements the surrounding space. Consider the desk’s location and how it blends with existing décor. Surface compatibility is also key, especially when dealing with flat or slightly textured desks.
Finally, pay attention to color and design tips that help create a cohesive look, such as sticking to neutral palettes in smaller rooms or opting for bold patterns in airy, well-lit spaces. Balancing these factors ensures that the wallpaper adds aesthetic appeal and harmonizes seamlessly with the entire setup.
Preparing the Desk for Wallpaper Application
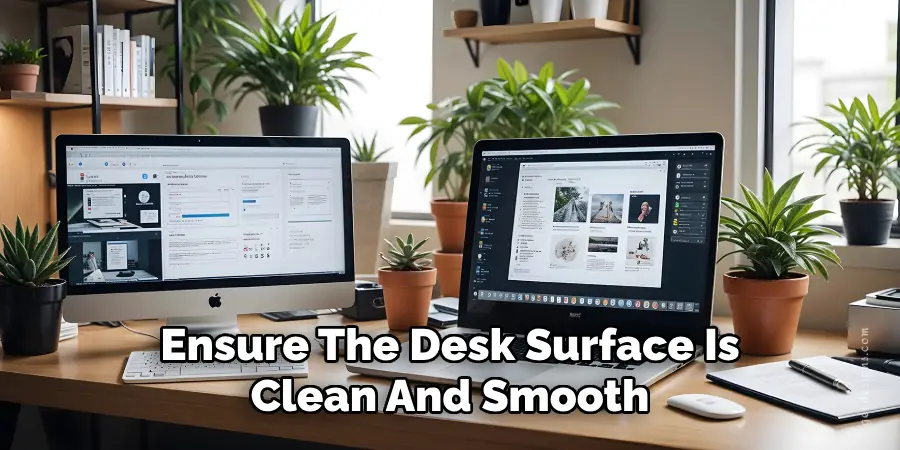
Cleaning and Prepping the Surface
Before applying wallpaper, ensure the desk surface is clean and smooth. Begin by removing any dirt, dust, or old finishes that could compromise the wallpaper’s adhesion. Use a mild cleanser and a damp cloth to wipe down the surface thoroughly. If there are any cracks or holes, fill them with wood filler and sand the area once it’s dry to achieve an even texture, providing a solid base for the wallpaper.
Measuring and Planning
Accurate measurement is crucial for a successful wallpapering project. Carefully measure the desk’s dimensions, considering the surface area and sides where the wallpaper will be applied. Mark your measurements clearly and plan how the wallpaper will align with the desk’s edges. Consider using a straightedge or level to help ensure that the wallpaper is applied straight and precisely, reducing waste and achieving a professional finish.
Cutting and Preparing the Wallpaper
Measuring and Cutting
To ensure a perfect fit, begin by measuring the dimensions of both the desk surface and sides where the wallpaper will be applied. It’s essential to cut the wallpaper slightly larger than the measured area to allow for trimming and adjustments, ensuring complete coverage and a neat finish. Use a sharp utility knife or scissors to make clean,
straight cuts. A cutting mat can be helpful to maintain precision and protect surfaces. Remember, having a little extra material is always better than falling short, as it allows for easier adjustments during application.
Creating Templates for Complex Areas
When dealing with corners, curves, or intricate areas such as drawer fronts, create templates using tracing paper or cardboard. This aids in achieving a precise fit and professional appearance. Lay the template over the wallpaper and trace the shape, carefully examining curves and edges. Cut the wallpaper along these lines, ensuring an accurate fit.
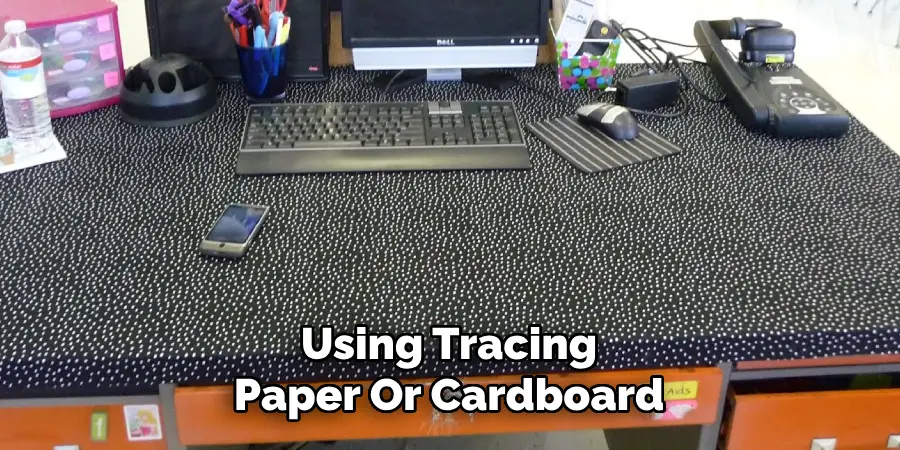
Templates not only help in making precise cuts but also save time and reduce errors when tackling areas that require a more customized approach. Mastering this technique contributes to a seamless wallpapering project that enhances the overall desk appearance.
How to Cover a Desk with Wallpaper: Applying Wallpaper to the Desk
Adhesive Preparation
When working with traditional wallpaper, preparing the adhesive correctly is vital to ensure it adheres smoothly to the desk. Begin by selecting a suitable paste that complements the type of wallpaper you are using. Follow the manufacturer’s instructions carefully, mixing the adhesive to the right consistency; this generally resembles a thick, lump-free batter. Apply the adhesive evenly to the desk surface using a brush or roller, ensuring complete coverage, particularly around the edges and corners where peeling might occur. For those using peel-and-stick wallpaper, the process is even simpler.
Clean the desk thoroughly so the adhesive backing can grip firmly. Peel off a small section of the backing layer initially, press the wallpaper in place, and slowly remove additional backing while pressing the paper down. This method allows for necessary correction without damaging surfaces, making it ideal for new projects or changing styles.
Smoothing and Securing
Achieving a flawless appearance when wallpapering involves removing all air bubbles and ensuring the paper lays flat on the desk. Start from the center of the wallpapered section, smoothing outward toward the edges to drive out air bubbles. Using a wallpaper smoother or a rigid, straight-edged tool like a credit card, gently press down on the wallpaper while sliding it across the surface.
This technique helps achieve a smooth, wrinkle-free finish, preventing any areas from lifting or bubbling over time. Be gentle to avoid tearing the paper, particularly if using peel-and-stick types, which can stretch if too much pressure is applied. As you work, periodically check alignment to ensure the design stays straight and consistent across the desk surface.
Trimming and Finishing Edges
For neat and professional-looking edges, proper trimming is essential. Allow the wallpaper to dry slightly if applied with adhesive, as this allows for easier and cleaner cuts. Using a sharp utility knife or scissors, carefully trim any excess paper along the desk’s edges.
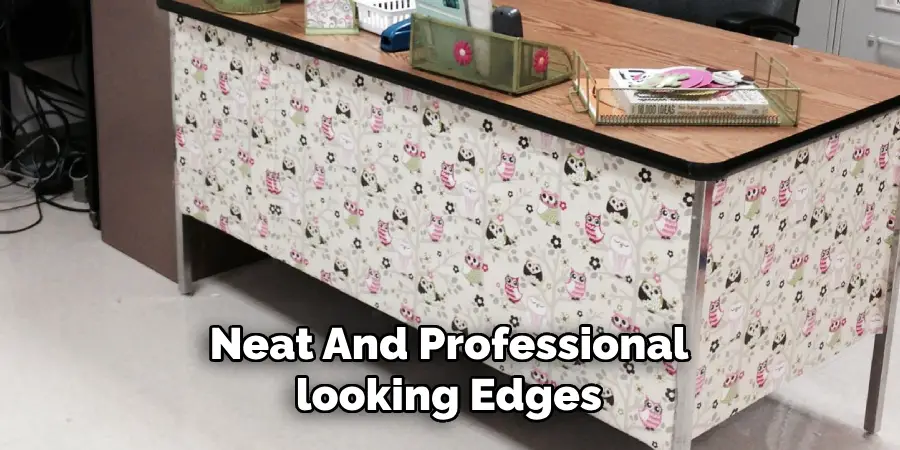
Hold the blade against a metal ruler or straightedge to guide your cuts and avoid any jagged edges. Once trimmed, secure the edges with a bit of extra adhesive or a protective sealant, particularly in high-use areas, to prevent peeling in the future. This final step reinforces the wallpaper’s placement, ensuring it remains intact and beautiful over time.
Adding Protective Finishes
Sealing the Surface
To prolong the lifespan of your newly wallpapered desk and enhance its durability, consider applying a clear coat or polyurethane finish. This step serves as a protective barrier, safeguarding the surface against scratches, stains, and moisture, which can compromise both the desk and its appearance.
Choose a clear coat finish suitable for the type of wallpaper used, ensuring that it dries clear and does not alter the design or color. Use a high-quality brush or foam applicator to apply the coating in thin, even layers. Allow the first layer to dry completely before applying a second coat to bolster the protective layer, ensuring comprehensive coverage and resilience against everyday wear and tear.
Optional Glass or Acrylic Cover
Adding a protective layer of glass or acrylic can be a prudent choice for desks that endure heavy use. This option not only preserves the beauty of the wallpaper underneath but also provides an additional shield from physical damage and spills. When selecting a glass or acrylic sheet, measure the desk accurately to ensure a snug fit.
Opt for materials with polished edges to prevent accidental scratches and injuries. Secure the cover with discreet rubber pads or clips, which prevent movement and protect the wallpaper underneath from direct contact and potential moisture accumulation. This added measure offers peace of mind and extends the longevity of the wallpapered desk in environments where durability is paramount.
Styling and Using Your Wallpapered Desk
Decorating Ideas
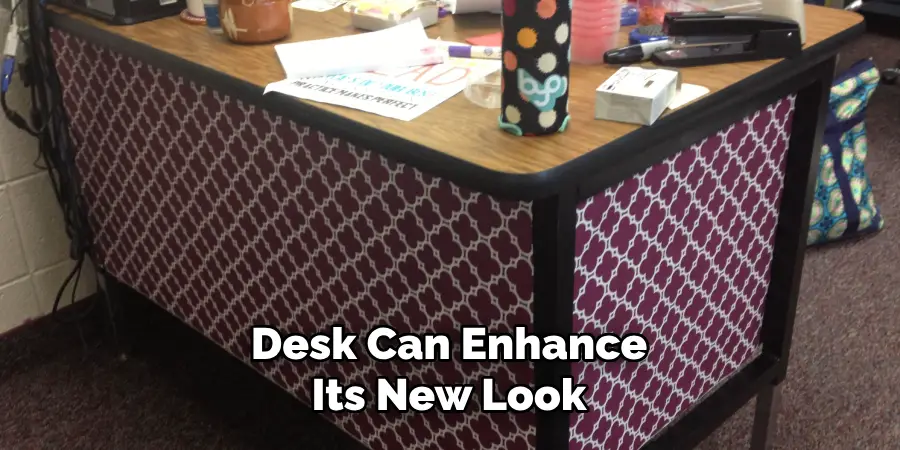
Accessorizing your wallpapered desk can enhance its new look and harmonize your room’s decor harmoniously. Consider adding a stylish lamp that complements the wallpaper’s colors or patterns. A small vase with fresh flowers or a potted plant can bring a touch of nature while matching stationery holders add an organized and cohesive feel to the workspace.
Maintenance Tips
Regularly dust the desk with a soft, dry cloth to maintain the wallpapered surface and prevent dirt buildup. For spills or stains, gently wipe the area with a damp cloth and mild soap, avoiding harsh chemicals that may damage the wallpaper. Ensure the surface is kept dry to prevent moisture-related issues. Periodically check edges for signs of peeling, applying a small amount of adhesive if necessary to keep the wallpaper securely in place.
Conclusion
Customizing your workspace with wallpaper offers a unique and personalized touch, transforming an ordinary desk into a statement piece. Learning how to cover a desk with wallpaper involves careful preparation, application, securing, and finishing touches that ensure durability and aesthetics. This DIY project enhances your desk’s appearance and reflects your style, making the space uniquely yours. You can discover the perfect look that matches your vision by experimenting with various patterns and styles. The satisfaction of creating a personalized workspace is unparalleled, making it a rewarding and inspiring endeavor.
you can also check it out Remove Scratches From Laptop Surface