
Disassembling a roll top desk can seem like a daunting task, but with a clear plan and the right tools, it can be accomplished smoothly. These classic pieces of furniture, with their elegant rolling tambour doors, are both functional and stylish, often serving as the focal point of an office or study. Whether you’re looking to transport your desk to a new location, conduct repairs, or refurbish it entirely, disassembly is a crucial first step.

This guide on how to disassemble a roll top desk will walk you through the essential steps to take apart your roll top desk safely and efficiently, ensuring all parts remain intact and ready for reassembly.
Why Disassemble a Roll Top Desk?
There are several reasons you might choose to disassemble a roll top desk. One common reason is to facilitate transportation, especially when moving to a new home or office. Due to their size and weight, roll top desks can be challenging to move in one piece, necessitating disassembly to prevent damage and ease handling. Another reason might be for repairs or restoration. Over time, the rolling mechanism or other components of the desk may require maintenance or replacement, and disassembly allows for easy access to these areas.
Additionally, if you’re looking to refurbish the desk, perhaps updating its finish or making structural modifications, taking it apart is often the first step. Whatever the reason, understanding the process of disassembly will help ensure that the desk remains in pristine condition and is ready for reassembly when the time comes.
Tools Required
Before beginning the disassembly process, it’s important to gather all necessary tools and materials. Having everything on hand will save you time and frustration later on. Here are some essential items you’ll need:

Screwdriver:
A screwdriver is a must-have for any furniture disassembly project. Make sure to have both Phillips and flathead screwdrivers in various sizes, as different parts of the desk may require different types.
Hammer:
A hammer will come in handy for removing stubborn or stuck pieces. It’s also useful for lightly tapping in pieces for a more secure fit during reassembly.
Pliers:
Pliers are necessary for gripping and twisting small screws or loosening tight bolts. They can also help remove delicate components without damaging them.
Allen wrench:
An Allen wrench, also known as a hex key, is necessary for removing bolts and screws with hexagonal heads. Check the desk beforehand to see if any of these types of fasteners are present.
Protective gear:
Lastly, it’s essential to have protective gear, such as gloves and safety glasses, to prevent injury while disassembling the desk.
Keep all tools in one place or in a toolbox for easy access during the process.
8 Step-by-step Disassembly Guides on How to Disassemble a Roll Top Desk
Step 1: Clear the Desk and Surrounding Area
Before you begin disassembling your desk, clear off all items and clutter from the top and drawers. This will make it easier to access all parts of the desk and minimize the risk of damaging or losing small components.

Ensure there is enough space around the desk for you to move freely while working. It’s also a good idea to protect the floor with a drop cloth to prevent any scratches or dings.
Step 2: Remove Drawers and Contents
Remove all drawers from the desk, taking care not to force them out if they seem stuck. Empty their contents and set them aside in a safe place. If there are any small pieces of hardware or other items inside the drawers, make sure to keep them together for reassembly.
The drawers may need to be disassembled separately, depending on their construction. In this case, refer to the manufacturer’s instructions.
Step 3: Remove the Desktop and Hutch
The desktop is usually attached to the hutch by screws or brackets. Use a screwdriver or pliers to remove these fasteners carefully. Once detached, set aside both pieces in a secure location. The hutch may have additional shelves or compartments that can be removed separately, depending on the design.
You may find that the desktop is too large to remove in one piece. In this case, try disassembling it into smaller sections for easier handling. Be careful not to damage any delicate components.
Step 4: Remove the Roll Top
The rolling mechanism of a roll-top desk can vary, but it usually consists of tracks and slats that allow the tambour door to slide open and close. To remove the roll top, start by opening the door completely. Then, look for any screws or bolts attaching to the desk frame and unscrew them with a screwdriver or pliers.
Once detached, gently lift out the roll top and set it aside in a safe place.

Step 5: Disassemble Pedestals
The pedestals are often attached to the bottom of the desk with screws or bolts. Use a screwdriver or pliers to remove these fasteners and detach the pedestals from the desk. If there are any drawers within the pedestal, make sure to empty them before disassembling them.
Some desks may have removable feet or casters attached to the bottom of the pedestals. If so, these can be removed separately by unscrewing or pulling them off.
Step 6: Remove Legs
If your desk has legs, they will need to be removed next. Look for any screws or bolts attaching them to the desk frame and use a screwdriver or pliers to remove them. Once detached, set aside in a safe location.
The legs may be removable in one piece or may need to be disassembled into smaller sections, depending on their construction. Refer to the manufacturer’s instructions for guidance if necessary.
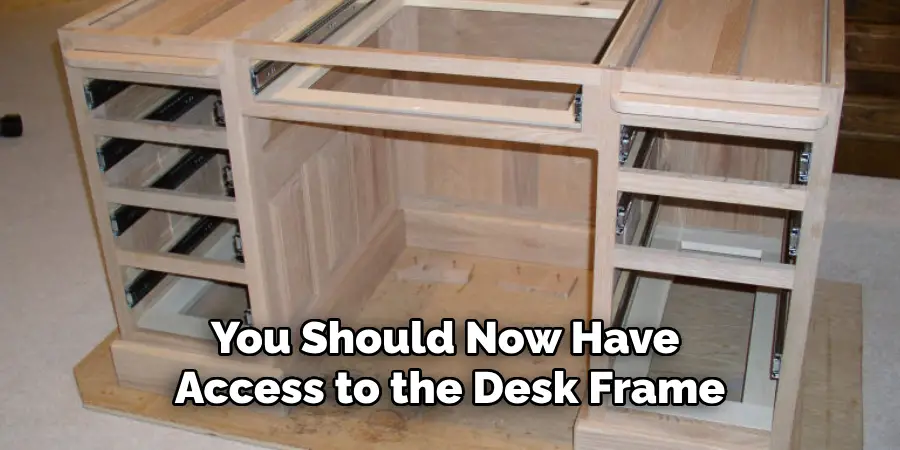
Step 7: Disassemble the Desk Frame
With all other components removed, you should now have access to the desk frame. It may still be attached to the base or back panel of the desk with screws or bolts. Carefully remove these fasteners and detach the frame from its supports.
If your desk has a drawer support system, this can also be removed at this stage by unscrewing any brackets or bolts securing it in place.
Step 8: Label and Store Parts
As you disassemble each component, label them clearly with their corresponding location or part number. This will make it easier to reassemble the desk later on.
Store all small hardware and components in a labeled bag or container to keep them organized and easily accessible during reassembly.
Following these step-by-step disassembly guides on how to disassemble a roll top desk will help you safely and efficiently take apart your roll top desk. Remember to keep all parts organized and labeled for an easier reassembly process. Once disassembled, you can clean and repair any worn or damaged components before storing them or preparing them for reassembly. Happy DIY-ing!
Frequently Asked Questions
Q: Is It Necessary to Disassemble a Roll Top Desk for Moving or Storage?
A: It depends on the size and design of the desk. Some desks can be moved or stored as one piece, while others may need to be disassembled for easier handling. The disassembly process also allows for easier cleaning and repair of individual components before storage.
Q: Can I Disassemble a Roll Top Desk Without Any Tools?
A: It’s highly recommended to use tools such as screwdrivers, pliers, and allen wrenches during the disassembly process. Using improper tools or attempting to force pieces apart without the proper equipment can damage delicate components or cause injury to yourself.
Q: How Do I Reassemble a Disassembled Roll Top Desk?
A: Start by referring to your labeled parts and following the instructions in reverse order. Begin with the desk frame, then attach drawers, legs, pedestals, hutch, and finally the desktop. Take care not to over-tighten screws or bolts, as this can damage the wood or strip the threads. If you encounter any issues, refer to the manufacturer’s instructions or seek assistance from a professional. Remember, take your time and be patient during reassembly to ensure a successful outcome.
Q: Can I Disassemble and Reassemble My Roll Top Desk Multiple Times?
A: It is possible, but frequent disassembly and reassembly can weaken joints and cause wear on components, leading to potential damage over time. If you plan on moving or storing your desk frequently, consider investing in a professional packing service for safe transportation. However, if done correctly and with care, disassembling and reaasembling a roll top desk should not cause significant damage or wear. Always follow manufacturer’s instructions and handle components gently to minimize any potential damage.
Conclusion
Disassembling a roll top desk may seem daunting, but with the right tools and techniques, it can be a straightforward process. Remember to take your time and be careful not to damage any parts during disassembly. Properly labeling and storing components will also make the reassembly process much smoother.
Whether you’re looking to refurbish, repair, or relocate your desk, following these step-by-step guides will ensure that the job is done effectively and efficiently. So, go ahead and tackle that roll top desk with confidence! Thanks for reading this article on how to disassemble a roll top desk.