Are you looking to buy a round table but unsure of how to measure it? Well, look no further! This guide will provide you with step-by-step instructions on how to measure a round table.
When it comes to furnishing a dining room or any space with a round table, precise measurement is essential to ensure that it fits perfectly in the designated area. Measuring a round table not only helps in selecting the appropriate tablecloth size but also aids in determining the overall space availability and room layout adaptability. Understanding the diameter and circumference of a round table is crucial as these dimensions influence both seating capacity and coordination with surrounding furniture.
This guide explains how to accurately measure a round table, ensuring an ideal fit for your home or office.
What Will You Need?
- Measuring tape or ruler
- Paper and pencil to jot down measurements
- Optional: Round table cover or tablecloth for reference (if available)
Once you have gathered these materials, you can begin measuring your round table.
10 Easy Steps on How to Measure a Round Table
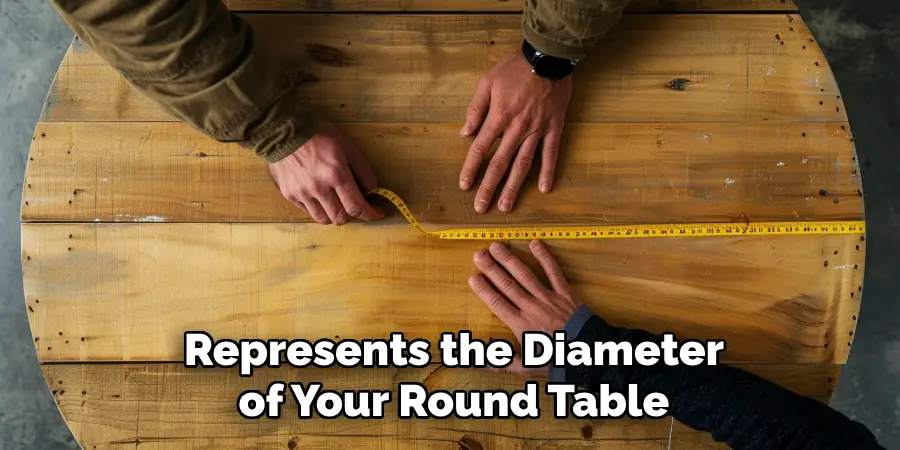
Step 1: Measure the Diameter
To begin, locate the center of your round table. If you have a lazy Susan turntable on top of your table, remove it to access the center point. Place one end of your measuring tape or ruler at the center point and stretch it until it reaches the opposite side. Note down this measurement as it represents the diameter of your round table.
Step 2: Measure the Table Height
Next, determine the height of your round table, which is essential for ensuring comfortable seating arrangements and matching with other furniture pieces. To do this, place your measuring tape or ruler at the base of one of the table legs, ensuring it is perfectly vertical. Extend the tape or ruler upwards until it reaches the top edge of the table surface. Record this measurement as the table height. Measuring the height allows you to assess whether the table will fit comfortably within your space and align appropriately with existing chairs or seating options.
Step 3: Measure the Circumference
To calculate the circumference of your round table, you can use a flexible measuring tape. Starting at any point along the edge of the table, wrap the measuring tape around the perimeter until you return to the starting point. Make sure the tape is snug and level with the table’s edge throughout the process to ensure accuracy. Record this measurement as the circumference. This step is beneficial for seating arrangement considerations and when choosing the right size tablecloth to cover the table adequately.
Step 4: Measure the Distance Between Legs
If your round table has legs that extend beyond the circular edge, it is essential to measure the distance between them. This measurement helps determine the available legroom and how the table will fit with existing chairs. To do this, measure from the insides of the adjacent legs, moving around the table in a straight line. Make sure to capture measurements between all adjacent legs to get a complete understanding. Jot down these distances, as they can influence chair placement and the comfort of those seated around the table.
Step 5: Measure the Table Edge Thickness
The table edge’s thickness can significantly impact the table’s appearance and functionality, particularly when selecting tablecloths or considering the table’s overall aesthetic appeal and stability. To measure the table edge thickness, take your measuring tape or ruler and place it perpendicularly against the table’s edge. Measure from the bottom of the edge to the top surface of the table.

This dimension is crucial if you plan to use slipcovers or if your seating arrangement has armchairs, ensuring that armrests fit snugly underneath the table without obstruction. Additionally, knowing the edge thickness can help pair the table with other furniture pieces, as it may affect how chairs tuck under or how decorative items sit on the surface. Record this measurement carefully, as it contributes to the detailed understanding of your table’s dimensions and the cohesion of your room’s décor.
Step 6: Measure the Overhang
If the tabletop overhangs the base or legs, knowing the overhang measurement is essential for evaluating stability and ensuring there’s adequate space for chairs. Identify how far the tabletop extends beyond the base or supporting legs to measure this. Stand at one edge and employ a ruler or measuring tape to determine the distance from the outermost edge of the table to the nearest part of the base or legs directly below. Record this distance as the overhang size. This information is valuable for both aesthetic decisions and practical layout arrangements in the space surrounding the table.
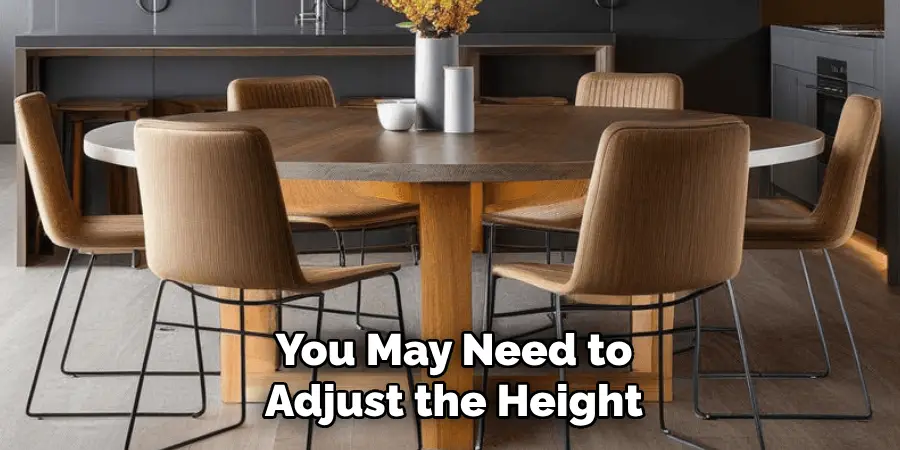
Step 7: Check for Levelness
Ensuring your round table is level contributes to its stability and functionality, preventing uneven table settings or wobbling. Use a level tool to assess whether the tabletop is even. Place the level across the table’s surface at several points, such as the center, edges, and diagonals. Your table is balanced if the bubble on the level remains centered at each point. If not, you may need to adjust the height of the legs or base.
Awareness of the table’s levelness can help identify any necessary adjustments to maintain a well-balanced appearance and usability, contributing to a more comfortable and visually appealing dining or workspace environment.
Step 8: Verify the Support Structure
Evaluating the support structure of your round table is essential for determining its stability and capacity to hold weight. Begin by inspecting the table’s base to understand if it features a pedestal or multiple legs. For a pedestal base, check if it is centered and robust enough to support the tabletop without wobbling. If your table has various legs, ensure they are securely attached and equally spaced.
Test the table’s sturdiness by gently pressing down on different areas of the tabletop and observing any significant movements or shifts. Noting these aspects can prevent accidents and enhance the table’s longevity, ensuring it’s safe and capable of withstanding daily use in your designated area.
Step 9: Clean the Table Surface
Maintaining the cleanliness of your round table is vital for preserving its appearance and longevity. Begin by dusting the surface with a soft, dry cloth to remove loose particles. For deeper cleaning, use a slightly damp cloth with a mild detergent or specialized cleaner suited to the table’s material, whether wood, glass, or another surface. Gently wipe down the entire tabletop, following the grain on wooden surfaces to avoid scratches.
Dry the surface thoroughly with a clean, dry cloth to prevent water spots or damage. Regular cleaning keeps your table looking pristine and prolongs its lifespan, ensuring it remains a centerpiece of your dining or living space.
Step 10: Apply Protective Finishes
Applying a protective finish to your round table can enhance its durability and maintain its aesthetic charm. Depending on the material of your table, choose an appropriate finish, such as a sealant for wood, polish for metal, or a glass cleaner with protective properties. For wooden tables, consider using a varnish or wax that highlights the natural grain and guards against scratches, moisture, and spills.
For metal surfaces, a corrosion-resistant polish can prevent rust while adding shine. Glass tables benefit from a protective cleaner that reduces streaks and repels fingerprints. Using these treatments regularly will safeguard your table against wear and tear, keeping it in excellent condition for years to come. Always follow the manufacturer’s instructions for applying any protective product to ensure the best results and preserve the table’s material integrity.
Following these steps ensures that your round table is measured, cared for, and maintained properly, maximizing its functionality and aesthetic appeal in any setting.
5 Things You Should Avoid
- Misusing a Flexible Measuring Tape: Avoid stretching or bending the measuring tape too much, as this can lead to inaccurate measurements and potentially compromise your calculations.
- Measuring Diameter with Obstacles: Ensure the path across the broadest part of the table is transparent. Obstacles like decorative items or table settings can lead to errors in determining the proper diameter.
- Guessing Instead of Measuring: Estimating the table size without a measuring tool can lead to errors, especially when precision is required for tablecloths or furniture arrangements.
- Neglecting to Measure Table Height: While focusing on the diameter is essential, forgetting to measure the table’s height can be a mistake if the table’s fit in a particular space or its accessibility is of concern.
- Ignoring the Table’s Thickness: The thickness of the tabletop can impact how tablecloths hang or how comfortable leg room will be. Always include it in your measurements for comprehensive planning.
Conclusion
In conclusion, how to measure a round table involves a combination of careful attention to detail and avoiding common pitfalls.
Crucial steps include using your measuring tape correctly, clearing obstacles from the path of measurement, and relying on precise tools rather than estimations. Additionally, consider the table’s height and thickness to ensure it fits appropriately within your intended space and meets your functional and aesthetic needs.
By following these guidelines, you can accurately understand your round table’s dimensions, enabling better planning for space utilization, table coverings, and overall decor.