Painting a laminate desk can be a daunting task, but with the right supplies and methodical approach it can also be an incredibly rewarding process when done correctly. Whether you’re looking to give your workspace a much-needed facelift or simply want to make something entirely unique for yourself, you won’t regret taking the time to properly prep and paint your laminate desk.

In this blog post, we will guide you through the steps of the process of how to paint a laminate desk; from prepping the surface to applying coats of paint and adding sealant, this guide will provide you with all the information you need to transform a laminate desk into an attractive piece of furniture. Let’s get started!
Tools and Materials You Will Need to Paint a Laminate Desk
- Sandpaper
- Primer
- Paintbrush/Roller
- Paint in your desired color (latex is highly recommended)
- Sealant or varnish of your choice (to preserve the finish and prevent wear)
Step-by-Step Guidelines on How to Paint a Laminate Desk
Step 1: Prep the Surface
Start by removing any hardware or accessories from your desk and wiping down the surface thoroughly with a damp cloth. Once dry, use medium-grit sandpaper to lightly scuff up the laminate surface in order to give the primer something to adhere to. Preparing the surface is essential for a successful paint job; if you skip this step, your paint won’t adhere properly and will likely start to chip.
Step 2: Apply Primer
Once you’ve prepared the surface, it’s time to apply primer. When choosing a primer, be sure to select one specifically formulated for laminate surfaces. Apply a thin layer of primer with a paintbrush or roller, focusing on any areas that need extra attention. Allow the primer to fully dry before moving on to the next step. Applying primer before painting will ensure that your paint adheres properly and has a longer-lasting finish.
Step 3: Paint the Desk
Using your desired color of latex paint, begin painting by covering the entire surface of your desk. For a professional-looking finish, apply two even coats and allow each one to dry completely before starting on the next. While painting your desk, be sure to pay close attention to the edges and corners. Take your time and use a brush or roller that is specifically designed for painting these areas.

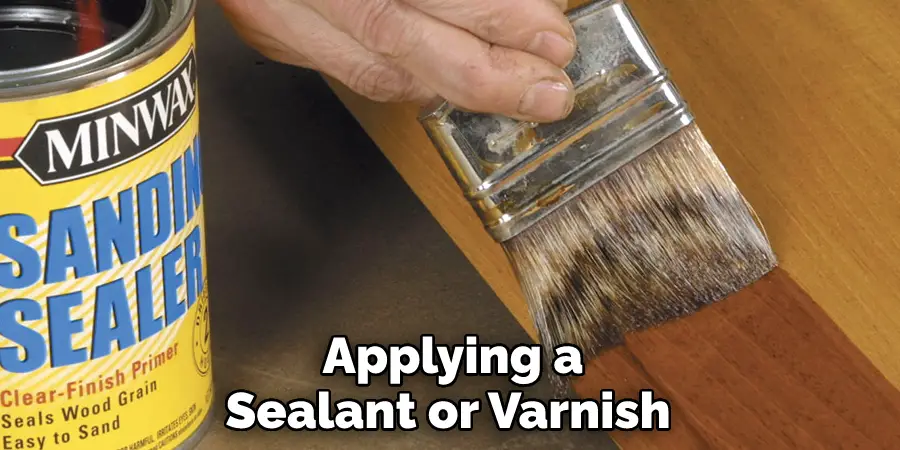
Step 4: Sealant/Varnish
Once your paint is fully dry and you’ve achieved the desired look, it’s time to add sealant or varnish for protection and to preserve the finish. Again, it’s important to select a sealant or varnish specifically formulated for laminate surfaces. Apply a thin layer using either a brush or roller, making sure to cover all of the painted surfaces. Allow it to dry completely before re-attaching any hardware or accessories you may have removed prior.
You’re done! Now you have a beautifully painted laminate desk that will last for years to come with proper care. Enjoy your newly refreshed workspace and bask in the satisfaction of completing such an impressive project. Congratulations!
Additional Tips and Tricks to Paint a Laminate Desk
1. Before painting, make sure to clean the deck thoroughly with soap and water or a degreaser. This will ensure that you get a smooth finish when painting.
2. If you are using spray paint, hold the can at least 12-18 inches away from the surface of your desk while spraying in long even strokes. Make sure to check for any drips or runs in the paint and reapply as needed.
3. If you are using a brush, work in small sections and move the brush in an up-and-down motion rather than side to side. This will help create smooth lines with minimal streaking.
4. After painting, make sure to let the desk dry completely before adding any sealant or varnish. If you apply it too soon, you may end up trapping air bubbles in the paint and ruining your work
5. When applying a sealant or varnish, use a high-quality brush rather than a foam applicator or paint roller. The bristles will help to ensure an even application and a smooth finish.

6. Finally, make sure to give the desk enough time to dry before placing any items on it or using it for everyday activities. Allow at least 24 hours for drying time before use.
7. If you want extra protection, consider applying a few coats of sealant or varnish after the paint has dried. This will help keep your desk looking new for longer.
8. Lastly, don’t forget to enjoy your newly painted laminate desk! With a bit of patience and some hard work, you can transform an old and worn piece of furniture into something beautiful and unique.
With the tips and tricks outlined above, you can easily paint a laminate desk with the confidence that you will achieve a professional-looking finish. Good luck and happy painting!
Things You Should Consider to Paint a Laminate Desk
1. Learn About the Surface Finish:
Before you begin any painting project, it is important to know what type of surface you are dealing with in order to choose the right paints, primers, and topcoats for your project. Laminate surfaces can range from glossy to matte finishes and require different preparation techniques depending on the type of finish.
2. Prepare the Desk:
It is essential to clean and prepare the laminate surface prior to painting. Start by wiping down the desk with a damp cloth and then use sandpaper or a scouring pad to lightly scuff up the surface in order for the paint to adhere better. Wipe away any dust particles left behind before moving on to the next step.
3. Choose the Right Primer:
Using a specifically formulated primer for laminate surfaces is necessary in order to ensure a successful paint job. Make sure to choose one that is oil-based and suitable for glossy or matte finishes, depending on the type of surface you have. Applying two coats of primer will help ensure that the paint adheres properly.
4. Paint the Desk
After the primer is completely dry, you can start applying multiple thin coats of acrylic-based paint to your laminate desk. Allow each coat to dry before applying additional layers. Be sure to use even strokes when painting in order to get a seamless finish and avoid streaks or brush marks.

5. Seal the Desk:
Finally, you will need to seal the desk with a coat of polyurethane or other clear topcoat that is appropriate for laminate surfaces. This step is important as it will help protect your paint job from chips and scratches. Make sure to wait until the paint is completely dry before applying the sealant. Allow the sealant to dry overnight and then you will be finished!
With these steps, your laminate desk should look better than ever! Painting a piece of furniture can be a fun and rewarding project if done properly. With the right tools and knowledge, you can give any laminate desk a makeover with ease. Have fun and get creative!
Frequently Asked Questions
What Type of Paint is Best for Painting Laminate?
Latex paint and spray paint are the two most popular types of paints to use when painting a laminate desk. If you are looking for an easy application, then spray paint is your best option. If you prefer more control over the finished product, then use a brush or roller and latex paint.
Do I Need to Prime the Laminate Before Painting?
Yes, you should always prime the laminate before painting. Primer helps ensure that the paint adheres properly and will not chip or peel off in the future. It also helps provide an even base layer for your paint color.
Do I Need to Sand the Laminate Before Painting?
No, you do not need to sand the laminate before painting. However, it is recommended that you lightly sand the surface before applying primer and paint. This will ensure a smoother finish and help prevent any imperfections in your finished product.
Can I Use Any Type of Primer on Laminate?
Yes, you can use any type of primer that is suitable for laminate surfaces It is recommended that you purchase high-quality primer specifically designed for laminate surfaces to ensure the best possible results.
What Type of Paint Brush Should I Use?
When painting a laminate desk, it is best to use a synthetic brush. Natural bristle brushes tend to leave marks and may be difficult to clean after painting. Synthetic bristles are better able to hold the paint and will provide a smoother finish.

Conclusion
Whether you’re giving a desk a fresh coat of paint for a new home project or attempting to refinish an old piece of furniture, this guide will provide you with the steps needed on how to paint a laminate desk look its best. If done properly, you can enjoy a professional quality finish without needing to buy a new desk.
With these easy steps, anyone can get started on their DIY painting journey and make their space that much more special. Remember, proper preparation is essential when it comes to any type of paint job—so take your time and be sure to put in the extra effort. With patience and the right supplies, you’ll have the beautiful new look that you’ve been wanting in no time!

