In a world where presentations and visual displays are integral to both professional and personal interactions, the ability to project your laptop screen onto a wall can be instrumental.
However, only some have access to a traditional projector, leaving many to wonder how to share their screen with a larger audience effectively. Fortunately, several creative methods can achieve similar results without the need for expensive equipment.

This guide will explore various techniques on how to project laptop screen to wall without projector, transforming any space into an engaging visual environment for sharing ideas, photos, or videos. Whether for a business meeting, a movie night, or simply sharing memories with friends, projecting your laptop screen can enhance your presentation and improve connectivity with your audience.
What Will You Need?
Before diving into the different methods, you must understand what tools and materials you will need for this task. Here are some everyday items that may come in handy:
- A laptop or computer with a functioning display screen
- Wall or flat surface to project onto
- HDMI cable (varies depending on laptop/computer)
- Adapter (if necessary)
- Projector app or software (optional)
Once you have all the necessary items, you can explore the different methods of projecting your laptop screen onto a wall without a projector.
10 Easy Steps on How to Project Laptop Screen to Wall Without Projector
Step 1. Check Your Laptop’s Ports
To successfully project your laptop screen onto a wall, the first step is to assess the available ports on your laptop. Most laptops come equipped with HDMI, USB-C, or VGA ports, which can be crucial for connecting to other devices. Identifying your laptop’s ports will help determine the appropriate cable or adapter needed for your setup. For instance, if your laptop only has a USB-C port but your wall output device uses HDMI, you will need a USB-C to HDMI adapter.
Additionally, ensure that your laptop’s display is functioning optimally, checking for any software updates or display settings that might affect video output. This initial step lays the groundwork for a seamless projection experience, ensuring you can connect your equipment without encountering compatibility issues later.
Step 2. Choose Your Projection Method
Once you’ve identified the ports on your laptop, the next step is to select the method you want to use for projecting your screen. Several options are available, each catering to different needs and available resources.
- Using a Smartphone Camera: A quick and accessible way to project your laptop screen is to use a smartphone camera placed at an optimal angle to capture the screen. Then, using apps that share the camera feed, you can display it on a larger screen.
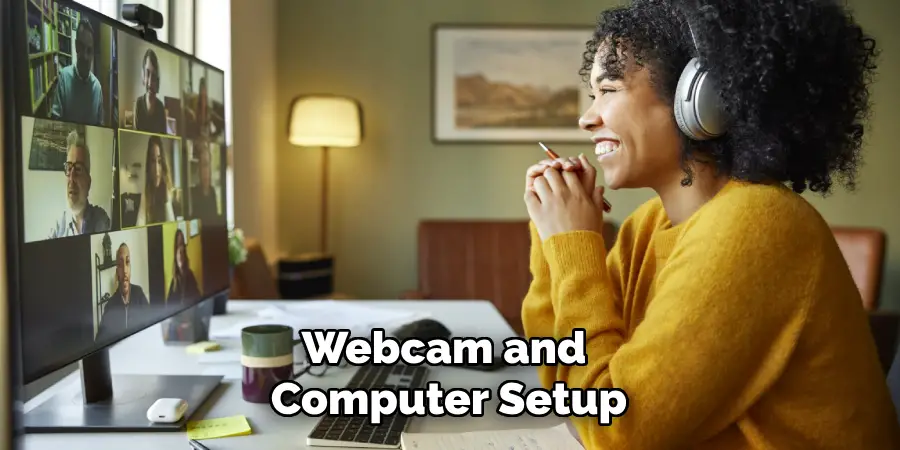
- Webcam and Computer Setup: If you have an external webcam, you can set it up to face your laptop screen and connect it to another computer or smart device to share the feed.
- DIY Lens Projector: Consider creating a DIY projector with a magnifying glass and cardboard for a more hands-on approach. Position the lens at an ideal distance from the wall to project an enlarged image of your laptop screen.
Choosing the suitable method will depend on factors such as the available equipment, the nature of your presentation, and the size of the space you will use.
Step 3. Prepare Your Projection Surface
The next step involves preparing the wall or flat surface onto which you intend to project your laptop screen. This surface should be clean, flat, and light-colored to enhance visibility. If you have the option, consider using a projector screen or a large piece of white paper or fabric to improve image quality.
Ensure the surface is free from obstructions or clutter, as distractions can detract from your presentation. If you’re using a smartphone or webcam to capture the laptop screen, adjust the distance and angle of your camera to ensure a clear and focused image on your chosen projection surface. A well-prepared backdrop will significantly enhance the overall impact of your visual presentation.
Step 4. Set Up the Lighting
Lighting plays a crucial role in the clarity of your projected image. To ensure the best possible display, adjust the lighting in the room where the presentation will occur. Consider reducing ambient light by closing curtains or turning off overhead lights.
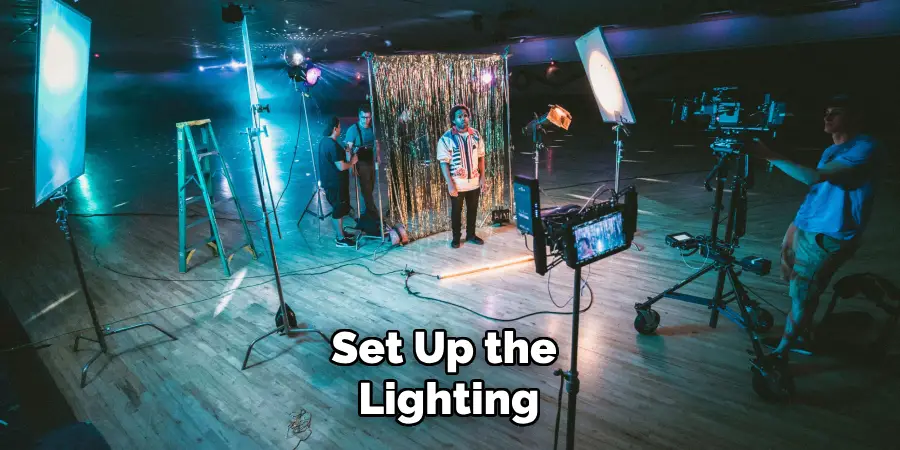
If natural light is unavoidable, consider using dimmable lamps or adjusting your projection setup’s position to minimize glare on the projection surface. Striking the right balance in lighting conditions helps to enhance visibility and color vibrancy, making your presentation more effective.
Step 5. Connect Your Devices
Now that you have prepared your projection surface and optimized the lighting, it’s time to connect your devices. This process will vary depending on the method you chose in Step 2. For methods using cables, connect your laptop to the respective output device or camera using the appropriate adapters. Ensure all connections are secure, and double-check that your computer recognizes the connected device.
If you’re using a smartphone or webcam, follow the necessary setup steps for the respective app or software, ensuring both devices are ready for the projection.
Step 6. Adjust Display Settings
Before starting your presentation, it’s essential to adjust your display settings on the laptop to ensure the best output. Go to your display settings and select the appropriate mode for your projection method. For example, if you use an external device, you may need to set the display mode to “Duplicate” or “Extend” depending on how you want the images to appear.
Adjusting the resolution settings can help achieve a more transparent and defined image, which is especially important when projecting onto larger surfaces.
Step 7. Test the Setup
Conduct a test run of your projection setup before the actual presentation. Open the content you wish to share and project it onto the wall or surface to assess image quality, clarity, and visibility. Ensure the colors are vibrant and the text is readable from different distances. This trial run will allow you to adjust lighting, camera angles, or display settings to ensure everything runs smoothly during your presentation.
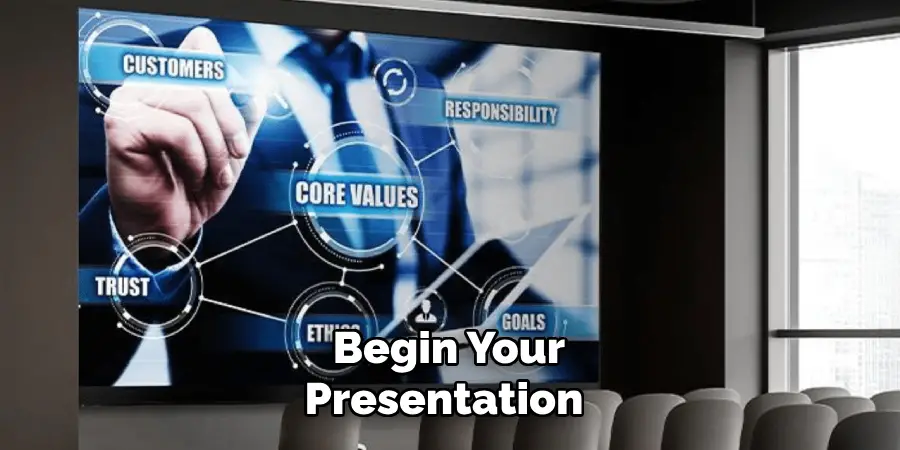
Step 8. Begin Your Presentation
With everything set up and tested, you’re ready to begin your presentation. Start by introducing your topic and engaging your audience. Use the visual aid you’ve projected to enhance your storytelling or information sharing. Maintain eye contact with your audience instead of solely focusing on the projected image; this will help foster a connection and keep them engaged throughout your presentation.
Step 9. Monitor Feedback and Adjust
While presenting, be vigilant about your audience’s engagement and feedback. If you notice confusion or lack of interest, be ready to adapt your presentation style, pace, or even the content. Encouraging questions or discussions during the presentation allows for a more interactive experience, which can further enhance understanding and engagement.
Step 10. Conclude and Follow Up
After concluding your presentation, take a moment to summarise key points and invite any final questions from your audience. This is an opportunity to clarify any doubts and reinforce important messages. Additionally, consider allowing your audience access to the materials shared, whether through email, a shared drive, or printed handouts, to allow them to revisit the information at their convenience.
By following these steps and utilizing the right equipment and techniques, you can effectively share your laptop screen with an audience for a more engaging and impactful presentation experience.
5 Things You Should Avoid
- Neglecting the Quality of Your Projection Surface: Avoid using surfaces that are textured, dark, or cluttered, as these can distort the image and make it difficult for your audience to see the content. Instead, opt for a smooth, light-colored wall or dedicated projection material.
- Using Inadequate Lighting: Don’t ignore the lighting conditions of your presentation space. Avoid overly bright environments that cause glare on the projection surface. Ensure you minimize ambient light to enhance image clarity and vibrancy.
- Overlooking Connection Stability: Avoid flimsy or poorly fitting adapters and cables, which can lead to disconnections during your presentation. Always check connections beforehand to ensure a stable and secure setup.
- Skipping the Test Run: Don’t skip testing your setup before the presentation. Failing to perform a trial run can result in unexpected issues with display settings, image quality, or visibility that could disrupt your presentation flow.
- Ignoring Audience Engagement: Avoid focusing solely on the projected image while neglecting your audience. Maintaining eye contact and engaging with your listeners throughout the presentation is essential to keep them interested and involved in your message.

By avoiding these common mistakes, you can ensure a smooth and practical laptop screen projection experience for yourself and your audience.
Conclusion
In conclusion, how to project laptop screen to wall without projector is entirely feasible with the right tools and techniques.
By utilizing smart devices, such as streaming devices, television screens, or portable projectors, you can create an engaging visual experience for your audience. Ensure proper setup by following the outlined steps, from preparing your projection surface and optimizing lighting conditions to connecting your devices and testing everything beforehand. Remember to engage your audience throughout the presentation and be ready to adapt based on their feedback.
By incorporating these best practices, you can effectively share your content and deliver a memorable presentation, even without a conventional projector.