
A vintage enamel top table can add a touch of nostalgia and charm to any home. However, with the passage of time, these tables may lose their appeal due to wear and tear. When this happens, it may be necessary to restore the table to its former glory.

In this guide, we will discuss how to restore vintage enamel top table. Whether you have inherited one from your grandmother or found one at a flea market, by following these steps, you can bring life back to your beloved piece of furniture.
What Is a Vintage Enamel Top Table?
A vintage enamel top table is a charming piece of furniture that dates back to the early to mid-20th century. These tables are typically characterized by their durable, glossy, enamel-coated tops that come in a variety of colors and patterns. The enamel surface, often made from fired-glass fused to metal, provides a smooth, resilient finish that resists stains and scratches, making it highly practical for use in kitchens and dining areas.
The base of the table is usually constructed from metal or wood, lending additional stability and style. These tables were a staple in many households during their time and continue to be cherished for their nostalgic aesthetic and functional appeal.
Why Restore a Vintage Enamel Top Table?
Restoring a vintage enamel top table is a worthwhile endeavor for several reasons. First and foremost, these tables offer a unique aesthetic that is difficult to find in modern furniture, with their vibrant colors and retro charm adding character and warmth to any space. Moreover, these tables are crafted from high-quality materials, ensuring their longevity and durability, which can outlast many of today’s mass-produced pieces.
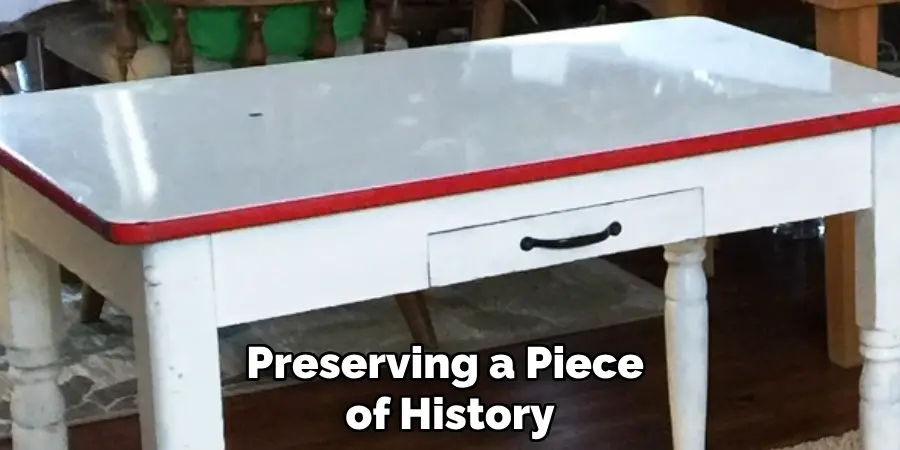
By restoring a vintage enamel top table, you are preserving a piece of history, celebrating craftsmanship from a past era, and contributing to sustainable practices by repurposing existing furniture rather than purchasing new. Additionally, restoring such a table can add sentimental value, especially if it is a family heirloom or a cherished find. The restoration process allows you to create a personalized piece that aligns with your stylistic preferences while retaining its vintage allure.
10 Methods How to Restore Vintage Enamel Top Table
1. Assess the Table’s Condition
Before diving into the restoration process, carefully assess the condition of your vintage enamel top table. Inspect both the enamel surface and the underlying structure, including the legs and frame. Look for chips, scratches, rust, and any signs of damage or weakness.
Understanding the extent of the wear will help you determine which restoration methods are necessary. Take notes or photographs to track the areas that need attention, as this will guide your restoration process and help you keep focused on critical areas that require more work.
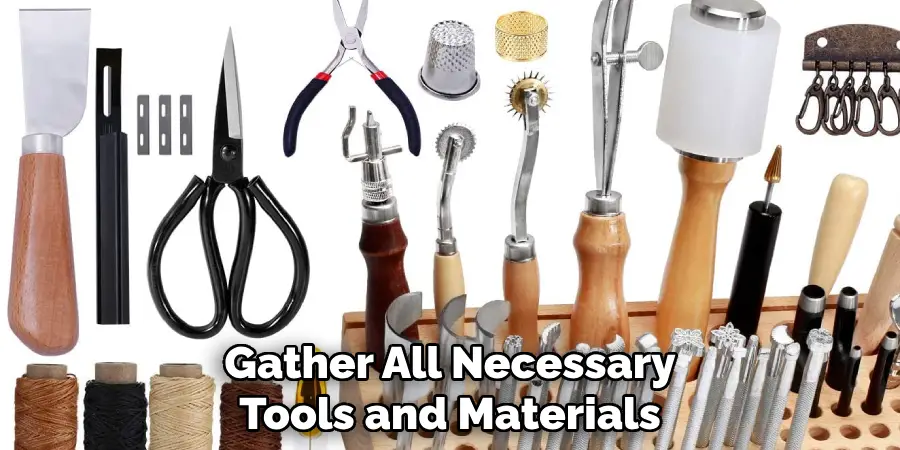
2. Gather Necessary Tools and Materials
Once you’ve assessed the table, gather all necessary tools and materials for the restoration. Common supplies include soft cloths, mild soap, a sponge, fine-grit sandpaper, enamel touch-up paint, primer, and a clear coat for protection. For rusted areas, you may need a rust remover or a wire brush. Additionally, have gloves, a mask, and safety goggles on hand for personal protection during the restoration process. Having everything prepared beforehand ensures that you can work efficiently and effectively without interruptions.
3. Clean the Enamel Surface
Cleaning is a crucial first step in restoring your vintage enamel top table. Begin by using a soft cloth or sponge dampened with warm, soapy water to wipe down the enamel surface. Avoid abrasive cleaners that could scratch the enamel. Focus on removing grease, dirt, and any old wax buildup.
For stubborn stains, consider using a non-abrasive cleaner or baking soda mixed with water to create a gentle paste. After cleaning, rinse the surface with clean water and dry it thoroughly with a soft cloth. A clean surface is essential for achieving good adhesion during touch-ups and refinishing.
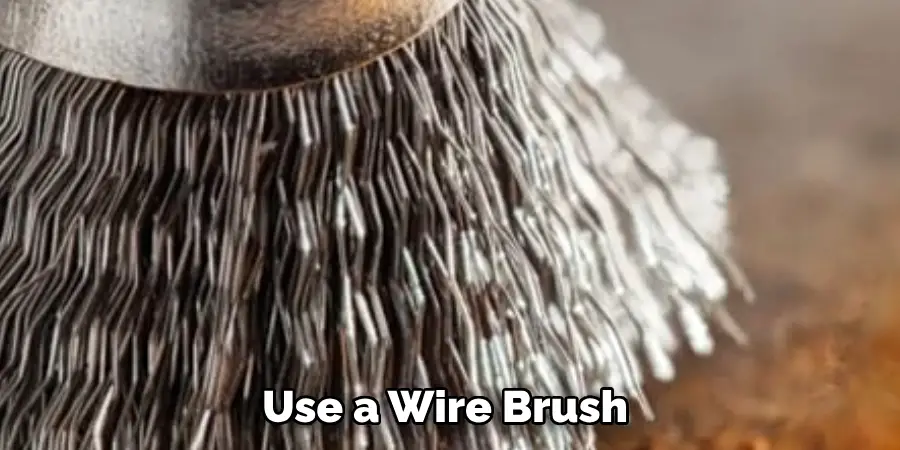
4. Remove Rust and Stains
If your table has rusted areas or stains that cleaning couldn’t remove, it’s time to address those. For rust, use a wire brush or rust remover to scrub away the corrosion, ensuring you wear gloves and goggles to protect yourself.
Once the rust is removed, sand the area lightly with fine-grit sandpaper to smooth any rough edges and create a clean surface for painting. For stains, you may need to use specialized enamel cleaner or a mixture of vinegar and baking soda to lift discoloration. Be thorough in this process to ensure that the enamel top is restored to its original beauty.
5. Touch Up Chipped or Damaged Areas
After cleaning and rust removal, focus on any chipped or damaged areas of the enamel. Use enamel touch-up paint that matches the original color of your table. Before applying the paint, ensure the area is clean and dry. Carefully apply the touch-up paint using a small brush, filling in the chipped areas.
For deeper chips, you may need to layer the paint, allowing each layer to dry before applying the next. Once you’ve touched up the damaged areas, let the paint cure fully according to the manufacturer’s instructions. This step is crucial for achieving a seamless finish.
6. Prime the Surface
If the enamel top has extensive damage or if you’ve made significant repairs, consider applying a primer before the final coat of paint. Choose a primer designed for enamel surfaces to ensure compatibility and durability. Apply a thin layer of primer over the entire enamel surface or just the areas that have been repaired. Using a high-quality brush or roller can help achieve an even application. Allow the primer to dry completely, following the manufacturer’s recommendations. Priming will enhance the adhesion of the top coat, ensuring a smoother finish and a longer-lasting restoration.
7. Apply a New Coat of Enamel Paint
Once the primer is dry, it’s time to apply a fresh coat of enamel paint. Select a high-quality enamel paint in the desired color that complements the original design of the table. Using a clean brush or roller, apply the paint in thin, even coats to avoid drips and runs.
Depending on the color and coverage of the paint, you may need two or more coats. Allow each coat to dry completely before applying the next, following the manufacturer’s instructions for drying times. This process will help restore the table’s vibrant appearance and protect the surface.
8. Protect with a Clear Coat
To ensure the longevity of your restored enamel top table, consider applying a clear protective coat after the final layer of paint has dried. A clear coat adds an extra layer of protection against scratches, stains, and fading. Choose a clear acrylic or polyurethane finish suitable for enamel surfaces.
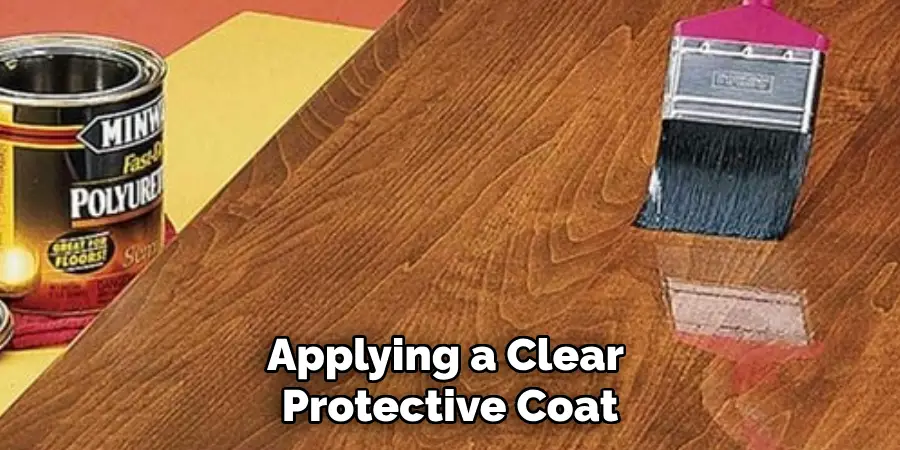
Apply the clear coat using a clean brush, ensuring an even application without pooling. Let the clear coat dry completely, and follow up with a light sanding between coats if you opt for multiple layers. This step will enhance durability while maintaining the table’s beautiful appearance.
9. Inspect and Make Final Adjustments
Once the clear coat has dried, inspect the entire table for any areas that may need touch-ups or adjustments. Look for uneven spots in the paint, missed areas, or imperfections in the finish. If necessary, touch up those areas with enamel paint or a small brush. Additionally, check the stability of the table’s legs and frame. If there are any loose joints or wobbly legs, consider tightening screws or applying wood glue to ensure stability. This final inspection ensures that your vintage enamel top table not only looks great but is also structurally sound.
10. Maintain Your Restored Table
After successfully restoring your vintage enamel top table, regular maintenance is key to keeping it in excellent condition. Clean the surface with a soft, damp cloth and mild soap regularly to prevent dirt and grease buildup. Avoid using abrasive cleaners or scouring pads that could scratch the enamel. Additionally, consider using coasters and placemats to protect the surface from heat and scratches. By taking care of your restored table, you’ll not only enjoy its beauty but also extend its life, allowing future generations to appreciate its charm.
Common Mistakes to Avoid
When restoring a vintage enamel top table, several common mistakes can compromise the quality and durability of your work. One major error is neglecting to thoroughly clean and dry the surface before beginning restoration, which can lead to poor paint adhesion and an uneven finish.
Additionally, using the wrong types of cleaners or abrasives can damage the enamel, resulting in scratches or discoloration. It’s crucial to select the correct touch-up paint and primer specifically designed for enamel surfaces to ensure a seamless repair. Skipping primer application can also impact the longevity of the paint job, leading to chipping or peeling over time.
Conclusion
Restoring a vintage enamel top table is a rewarding project that can transform a worn piece into a stunning centerpiece. By following these 10 methods, you can successfully restore and maintain your table, preserving its history and enhancing its beauty for years to come. Each step in the restoration process is crucial for achieving a high-quality finish that reflects the charm and character of vintage furniture. Thanks for reading, and we hope this has given you some inspiration on how to restore vintage enamel top table!