Do you have an old chair that looks a little worse for wear and needs some tender love and care? If so, why not try your hand at reupholstering it with piping? Not only will this bring new life to even the most tired furniture piece, but it can also save time and money compared to purchasing a new chair. Learning how to reupholster a chair with piping gives you creative control over the design, allowing you to choose from any fabric or color combination that suits your style.
In this article, we’ll explore everything you need to know about transforming an aging armchair into something unique with just a few tools. Keep reading for expert tips on choosing fabrics, friendly advice on sewing techniques – plus video tutorials showing exactly how it’s done.
Necessary Items
Before you begin, it’s essential to gather all the necessary items that you will need for reupholstering with piping. These include:
- A chair in need of reupholstering
- Fabric of choice for the chair’s covering
- Piping cord (available at most fabric stores)
- Sewing machine and thread
- Scissors and pins
- Upholstery staple gun and staples
- Screwdriver (if applicable for removing chair legs)
10 Tips on How to Reupholster a Chair With Piping
Tip 1: Choosing the Right Fabric
When choosing fabric for your reupholstering project, it’s essential to consider both function and style. For a high-use piece of furniture like a chair, you’ll want a durable fabric that withstands everyday wear and tear. Fabrics like cotton, linen, or synthetic blends are good options. Additionally, consider the style of your chair and choose a fabric that complements it well.
Tip 2: Measuring Your Fabric
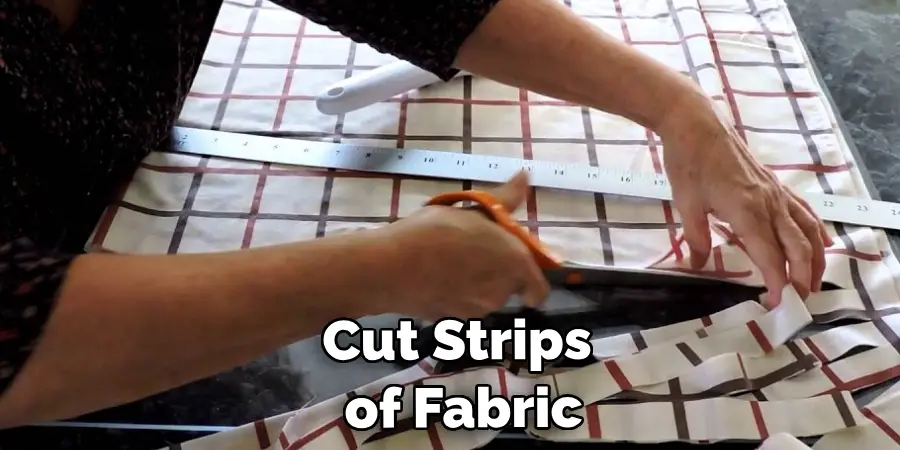
When measuring your fabric for the chair’s covering, leave enough extra material on all sides to allow for trimming and securing with staples. Adding 6-8 inches on each side is a good rule of thumb.
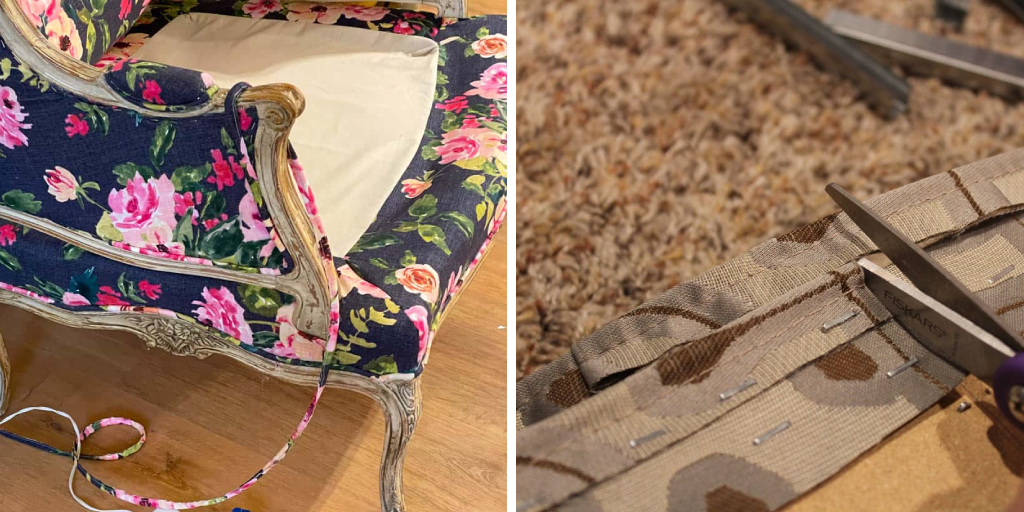
Tip 3: Preparing the Piping
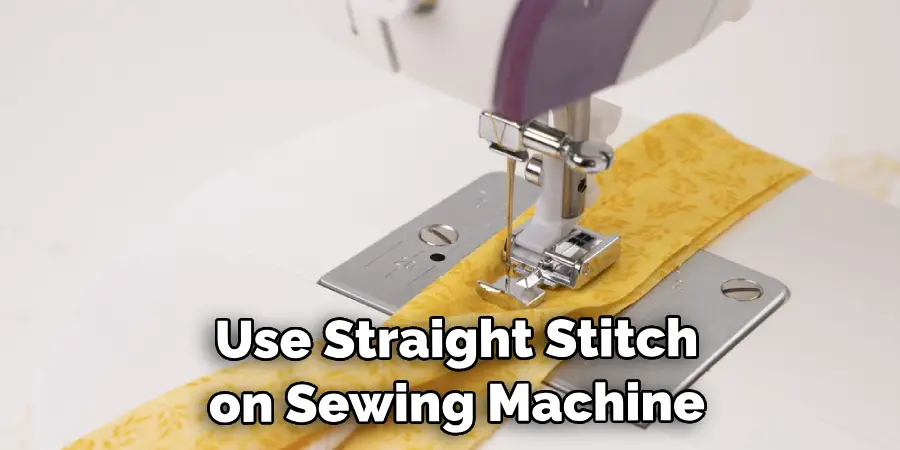
To create beautiful piping, cut strips of fabric (typically around 1 inch wide) and fold them over the piping cord. Sew along the edge of the cord using a zipper foot attachment on your sewing machine. This will create a neat and tight finish to your piping.
Tip 4: Adding the Piping
Once the piping is ready, it’s time to add it to your fabric. Lay the fabric on a flat surface with the right side facing down. Place the piping along the edge of the fabric and use pins to secure it in place. Make sure that the raw edges of both fabrics are aligned. Sew the piping onto the fabric using a zipper foot with a straight stitch.
Tip 5: Preparing the Chair
Before upholstering your chair, remove any existing fabric and padding. Use a screwdriver to detach any legs or screws that may be holding the chair together. This will make it easier to work on and ensure a smooth finish. Take note of how the old fabric was attached and use it as a guide for reupholstering.
Tip 6: Cutting the Fabric
Lay out your chosen fabric on a flat surface and place the chair’s pieces on top, leaving enough room for seam allowances. Use chalk or a fabric marker to trace around each piece, adding an extra 1-2 inches for seam allowances. Cut out the pieces and label them to ensure they are reattached correctly.
Tip 7: Sewing the Fabric Pieces Together
Once all your fabric pieces are cut, it’s time to start sewing them together. Use a straight stitch on your sewing machine and sew along the traced lines, leaving an opening for stuffing or attaching the fabric to the chair frame.
Tip 8: Attaching the Fabric to the Chair
With all your pieces sewn together, it’s time to start attaching them to the chair. Begin by securing the main piece of fabric onto the back of the chair with staples using an upholstery staple gun. Use pulling and stapling techniques to ensure a smooth and tight finish.
Tip 9: Adding the Piping
Next, it’s time to add the piping to your fabric-covered chair. Place the piping along the edges of the fabric, using pins to secure it in place. Use a zipper foot on your sewing machine to sew the piping onto the cloth with a straight stitch. Trim off any excess piping cord. Repeat this process for all edges of the chair.
Tip 10: Finishing Touches
Once all pieces are attached, and the fabric is secure, it’s time to finish your reupholstered chair. Trim any excess fabric and use a hot glue gun to cover any visible staples or raw edges with trim or decorative upholstery tacks. Finally, reattach any legs or screws and stand back to admire your new and improved chair!
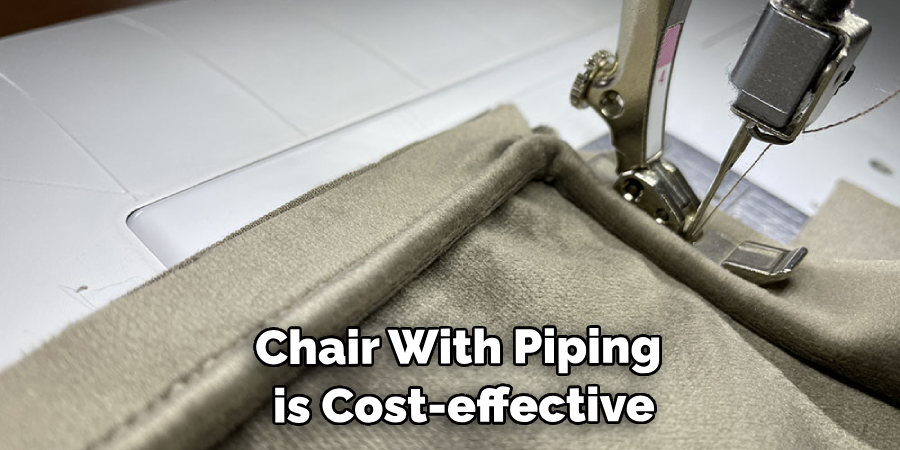
Reupholstering a chair with piping is not only a cost-effective way to bring new life to old furniture but also lets you get creative and showcase your style. With these ten expert tips, you can confidently take on this DIY project and transform any chair into a stunning piece that will be the envy of all.
So give your old chair a makeover with piping, and enjoy the satisfaction of creating something beautiful with your hands! Keep exploring different fabric options and techniques to make each reupholstering project unique.
8 Things to Avoid When Reupholstering a Chair with Piping
While reupholstering a chair with piping can be a fun and rewarding DIY project, some common mistakes should be avoided. Here are eight things to keep in mind when tackling your next upholstery project:
1. Forgetting to Measure Twice Before Cutting Fabric
One of the most critical steps in reupholstering with piping is measuring your fabric correctly. Be sure to measure twice and double-check before cutting, as any mistakes can be costly and affect the overall look of your chair.
2. Using Low-Quality Materials
For your reupholstered chair to withstand everyday use, it’s essential to use high-quality materials. This includes the fabric and piping cord, sturdy staples, and a reliable staple gun.
3. Not Taking Note of How the Old Fabric Was Attached
Before removing the old fabric from your chair, note how it was attached. This will serve as a guide for reupholstering and ensure that your new covering is connected correctly.
4. Not Allowing Enough Extra Fabric for Trimming and Stapling
When measuring your fabric, add an extra 6-8 inches on each side to allow for trimming and securing with staples. This will prevent any shortage of fabric and ensure a smooth finish.
5. Rushing Through the Piping Process
Piping can be time-consuming, but it’s an important detail that adds a professional touch to your reupholstered chair. Take time and ensure the piping is sewn on neatly and securely.
6. Using the Wrong Type of Fabric for Your Chair
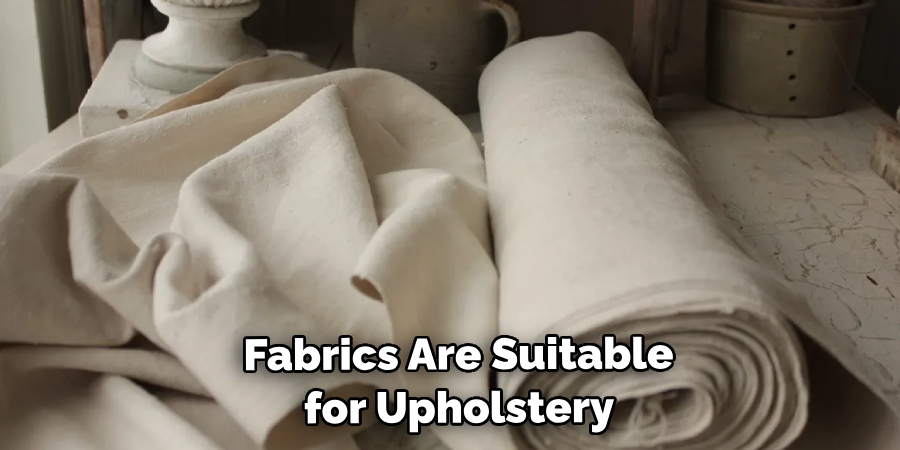
Not all fabrics are suitable for upholstery projects, so be sure to choose a durable, thick fabric that can withstand everyday use. Avoid using delicate or stretchy fabrics, as they may not hold up well over time.
7. Over- or Under-Stuffing the Chair
When adding padding to your chair, it’s essential to strike a balance between too much and too little. Over-stuffing can lead to a lumpy and uncomfortable chair, while under-stuffing may result in a saggy and unappealing look.
8. Neglecting the Finishing Touches
The final touches, such as trimming visible staples or using decorative upholstery tacks, can make all the difference in the appearance of your reupholstered chair. Take your time with these small details, as they can truly elevate the overall look of your project.
So take your time and enjoy the process! With proper techniques and attention to detail, reupholstering a chair with piping can be a fun and rewarding experience. Avoid these common mistakes, and you’ll have a beautiful new piece of furniture to display in your home proudly.
Frequently Asked Question
Can I Reupholster a Chair With Piping if I’ve Never Done It Before?
Yes, reupholstering a chair with piping can be a beginner-friendly project. Just make sure to follow instructions and take your time carefully.
How Much Fabric Do I Need for My Chair?
The amount of fabric needed will depend on the size and shape of your chair and your chosen fabric. Measuring twice, adding extra inches for seam allowances, and securing with staples is always best.
Is Piping Necessary for Reupholstering a Chair?
Piping is unnecessary, but it adds a professional and finished look to your chair. It also helps to cover any visible staples or raw edges.
Can I Reupholster a Chair With Piping Using a Regular Sewing Machine?
Yes, you can use a regular sewing machine for reupholstering with piping. Make sure to use a zipper foot to attach the piping and a heavy-duty needle for thicker fabrics.
How Long Does it Take to Reupholster a Chair with Piping?
The time it takes will vary depending on your experience level and the complexity of your chair. However, on average, it can take anywhere from 2-6 hours to complete this project.
Conclusion
Reupholstering a chair with piping is a great way to give new life to old furniture and add a personal touch to your home decor. With suitable materials and techniques on how to reupholster a chair with piping, this DIY project can be easily accomplished by beginners and experienced crafters alike.
Remember to measure carefully, choose high-quality materials, and take your time. And most importantly, have fun and let your creativity shine! So go ahead and give your old chair a makeover with piping – you won’t regret it.
You Can Check It Out to Cover Office Chair