Are you tired of dealing with camera jammers? These devices are becoming more common and can cause a lot of frustration, especially if you rely on security cameras for your home or business. Fortunately, there are ways to stop a camera jammer from disrupting your surveillance system.
In an era where surveillance and security are paramount, the presence of a camera jammer can present significant challenges. These devices, designed to disrupt or disable the recording capabilities of surveillance equipment, can compromise the safety and security of individuals and property. However, there are effective methods to counteract these jammers, ensuring that your surveillance system remains operational.
This guide outlines practical steps on how to stop a camera jammer. Whether you’re responsible for the security of a commercial property, a public space, or your personal residence, understanding how to stop it is crucial for maintaining the integrity of your surveillance efforts.
What are the Benefits of Stopping a Camera Jammer?
The presence of camera jammers can pose a considerable threat to the safety and security of individuals and property. By being able to stop these devices, you can enjoy several benefits, including:
- Maintaining Surveillance Capabilities: A jammed camera is as good as a non-functional one. With effective measures in place to counteract jammers, you can ensure that your surveillance system remains fully operational, providing reliable footage when needed.
- Preventing Unauthorized Access: Camera jammers can be used for nefarious purposes, such as disabling security cameras to facilitate break-ins or other criminal activities. By stopping these devices, you can prevent unauthorized access and potential harm to individuals and property.
- Protecting Privacy: In some cases, camera jammers may be used to invade privacy by disrupting cameras in private spaces. By stopping these devices, you can protect your privacy and that of others.
- Promoting Safety: Camera jammers can interfere with emergency response systems, such as security alarms and fire alarms. By stopping these devices, you can ensure that these crucial safety measures remain functional.

Now that we understand the importance of stopping camera jammers let’s explore some practical steps you can take to counteract these devices.
What Will You Need?
Before taking any action, it’s essential to gather the necessary tools and equipment. These may include:
- A Handheld Radio Frequency (RF) Detector: This device can detect RF signals emitted by camera jammers.
- A Surveillance System With Multiple Cameras: Having multiple cameras in your surveillance system can provide better coverage and increase the chances of capturing footage even if one camera is jammed.
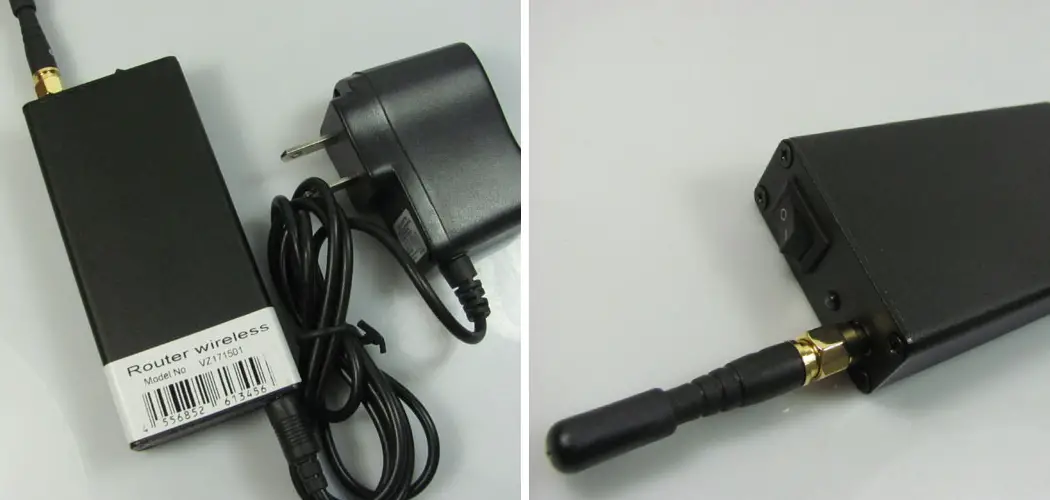
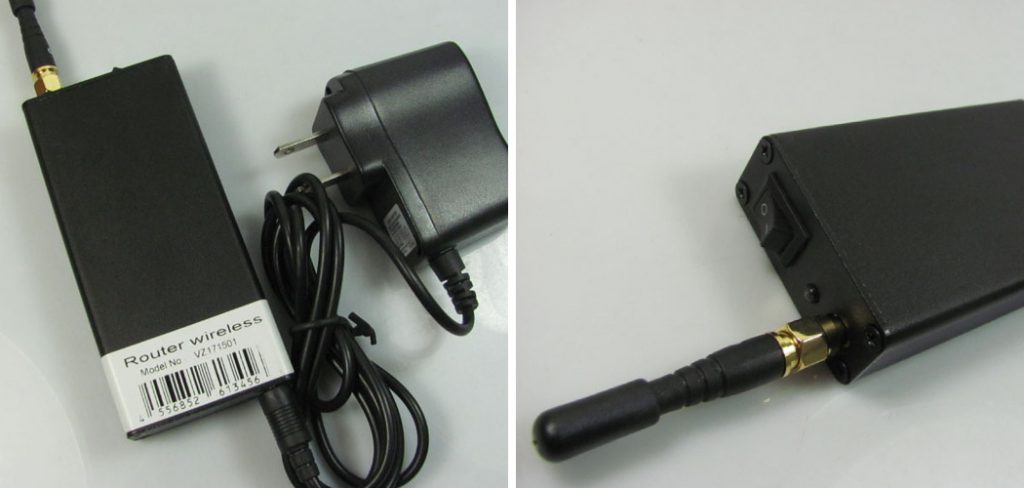
- Crowbar or Hammer: In some cases, camera jammers may be physically attached to the cameras. To remove them, you may need a crowbar or hammer. Make sure to use these tools carefully and only if necessary.
Once you have the necessary equipment, you’re ready to start taking action.
9 Easy Steps on How to Stop a Camera Jammer
Step 1. Identify the Presence of a Camera Jammer:
Detecting the presence of a camera jammer is the first critical step in addressing the problem. Camera jammers typically interfere with the wireless signals that your cameras use to operate. Signs of jamming can include sudden loss of camera functionality, static interference on the camera feed, or an inability to access the camera remotely.
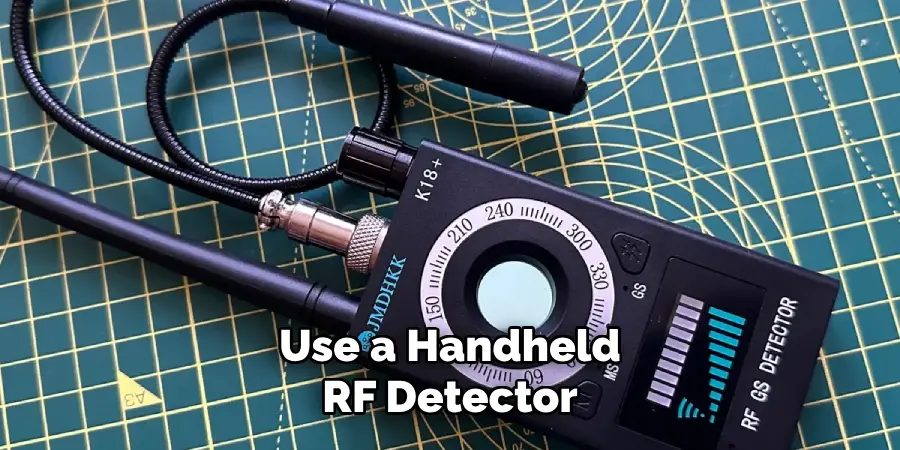
To confirm the presence of a jammer, you can use a handheld RF detector. Move the detector around the area where you suspect the jammer might be located. A significant increase in RF signal strength on the detector will indicate the close presence of a jamming device. Pay close attention to areas where the signal spikes, as this can guide you to the physical location of the jammer.
Step 2. Locate the Camera Jammer:
Once you have detected the presence of a camera jammer using the RF detector, the next step is to pinpoint its exact location. Camera jammers can be small and discreetly placed, making them challenging to find. Look for unusual devices or objects in the vicinity where the RF signal strength was highest.
Jammers often have antennas or emit a slight humming noise, which can be clues to their location. In some scenarios, the jammer may be hidden within common objects to remain inconspicuous. Methodically search the area, checking in and around all possible hiding spots, including on shelves, behind furniture, or in decorative items. Locating the jammer is essential for the next steps to be effective.
Step 3. Disable the Camera Jammer:
After successfully locating the camera jammer, the immediate next step is to disable it. This can often be done by simply turning off the device. Most jammers have a power switch or button that can be used to deactivate them. If the device does not have a visible off switch or if it is password protected, removing its power source may be necessary.

This could involve unplugging the jammer from its power supply or removing any batteries that operate it. In cases where the jammer is securely attached to another object or built into a larger system, caution should be exercised to avoid damage to surrounding equipment. If you are unsure about how to proceed, consulting with a professional may be the best course of action to prevent further issues.
Step 4. Confirm the Jammer is Disabled:
After attempting to disable the camera jammer, it’s crucial to verify that the jammer is indeed no longer operational. Re-activate your surveillance system and monitor the performance of your cameras closely. If the cameras resume normal operation and no interference is observed, it’s a strong indication that the jammer has been successfully disabled.
You can also use the handheld RF detector to scan the area again. If the previously detected high RF signal levels have dropped significantly or are no longer present, this confirms that the jammer has been effectively neutralized. This step ensures that your surveillance system’s integrity is restored and that the efforts taken to disable the jammer were successful.
Step 5. Secure the Area to Prevent Future Jamming Attempts:
With the camera jammer disabled and your surveillance system’s functionality restored, the next vital step is to secure the area against future jamming attempts. This includes evaluating and enhancing the physical and technical security measures in place.
Physically, ensure that all potential entry points for unauthorized individuals are secured with locks, surveillance cameras, and motion sensors. Consider upgrading your surveillance system to one that operates on a more secure, encrypted wireless network, reducing the chances of jamming.
Additionally, implementing regular security audits can help identify vulnerabilities in your current setup. It’s also recommended that you and your team, if applicable, educate yourself on the signs of jamming and the importance of swift action should it occur again. This proactive approach not only deters potential threats but also strengthens the overall security posture of your premises.
Step 6. Report the Incident to Authorities:
Reporting the use of a camera jammer to the appropriate authorities is an essential step following its disablement. In many jurisdictions, the use of camera jammers is illegal, as it can interfere with security measures and emergency communications. Contact your local law enforcement agency to report the incident.

Provide them with all relevant details, including the time and location of the jamming, a description of the device, and any evidence collected during the process of disabling the jammer.
Law enforcement can use this information to investigate the incident further and possibly prevent future attempts not only at your location but in the wider community. Reporting also helps in creating a record of such activities, which can be vital for legal proceedings or insurance claims.
Step 7. Review and Update Security Protocols Regularly:
With the camera jammer incident resolved and reported, it’s imperative not to become complacent regarding security. Regularly reviewing and updating your security measures and protocols is crucial in staying ahead of potential threats. Consider conducting periodic security assessments to identify any new vulnerabilities and to ensure that all security equipment is functioning optimally.
Staying informed about the latest security technologies and jamming methods can also equip you with the knowledge needed to fortify your defenses. Engaging with security professionals for advice and updates on best practices can further enhance your preparedness. Remember, a proactive stance on security is your best defense against future jamming attempts and other security challenges.
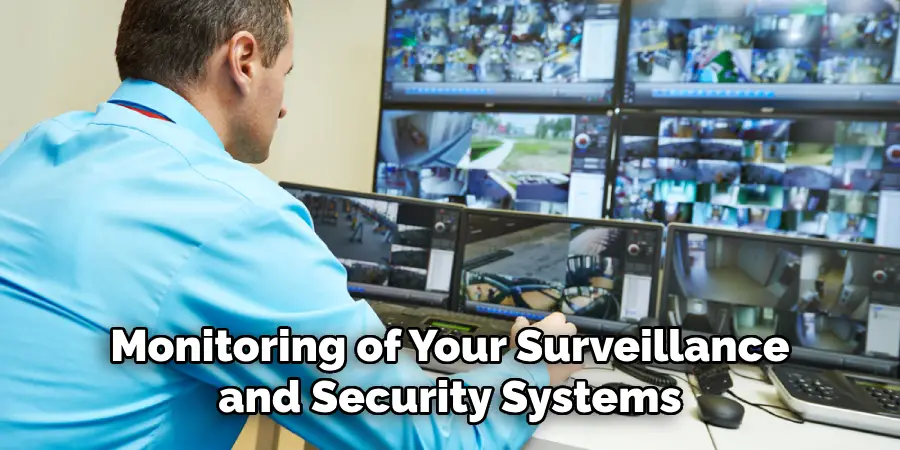
Step 8. Continuous Monitoring and Response Plan Development:
After updating security protocols, establishing a routine for continuous monitoring of your surveillance and security systems is paramount. Continuous monitoring helps in the early detection of any malicious activity or technical faults, enabling prompt responses to potential threats.
Develop a comprehensive response plan that outlines specific actions to be taken in the event of future jamming attempts or other security breaches. This plan should include contact information for key personnel, step-by-step procedures for identifying and disabling jammers, and guidelines for coordinating with law enforcement.
Training employees or household members on this plan ensures that everyone knows their role in maintaining a secure environment. This proactive approach not only mitigates risks but also reinforces the resilience of your security infrastructure against future challenges.
Step 9. Documentation and Feedback Collection:
The final step in managing and preventing future camera jamming incidents involves thorough documentation and feedback collection. Documenting every aspect of the incident, from initial detection to resolution, creates a valuable record that can be used for future reference and legal protection.
It’s important to include dates, times, actions taken, and individuals involved. After the situation has been fully resolved, it’s beneficial to gather feedback from all parties involved in the process. This feedback can provide insights into the effectiveness of the response, highlight areas for improvement, and inform future training and protocol adjustments.
Encouraging an environment where feedback is openly exchanged can lead to stronger security measures and a more cohesive response strategy for potential future incidents. Regularly revisiting and refining your documentation and feedback processes ensures that your security protocols evolve in line with emerging threats and technologies.
By following these steps, you can effectively neutralize a camera jammer and safeguard your surveillance system against future attempts.
5 Additional Tips and Tricks
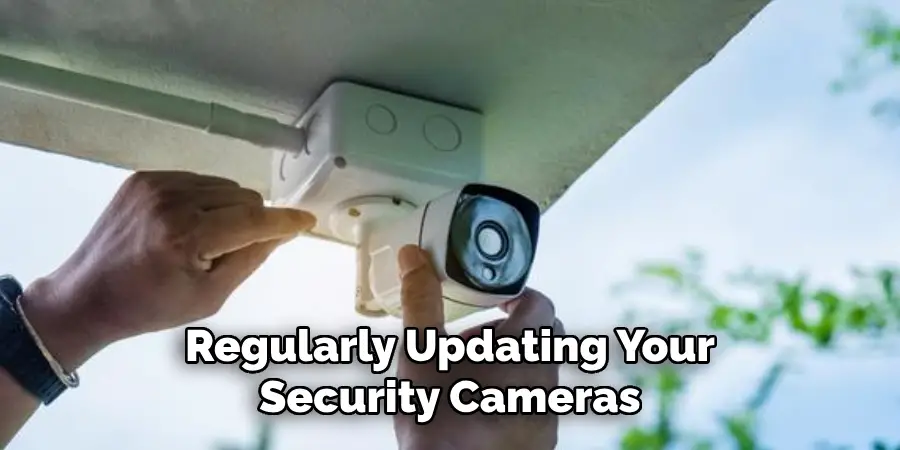
- Firmware Updates: Regularly updating your security cameras and network devices’ firmware can provide crucial patches that enhance resistance against jamming attacks. Manufacturers often release updates to bolster security features. So, make sure to check for updates frequently and install them as soon as they become available.
- Change Default Settings: Hackers can easily locate devices with default settings and exploit security vulnerabilities. Make sure to change the default username, password, and other network settings on your cameras and routers. Use complex passwords that are difficult to guess or brute-force.
- Physical Barriers: You can also use physical barriers to prevent access to your security cameras and network devices. For example, you can install mesh covers or enclosures around your cameras to protect them from tampering.
- Encryption: Encrypting your Wi-Fi network with a strong encryption protocol such as WPA2 can significantly improve the security of your wireless cameras. This prevents hackers from gaining unauthorized access to your network and disrupting the signals.
- Network Segmentation: Segmenting your network into different zones can help prevent a single point of failure in case of a jamming attack. You can isolate your security cameras on a separate network, so even if one network is compromised, other devices will remain secure.
With these additional tips and tricks, you can take proactive measures to prevent camera jamming attacks and keep your security cameras functioning properly.
5 Things You Should Avoid
- Ignoring Software Updates: Neglecting to update the software of your security devices leaves you vulnerable to exploits that jammers and other hacking tools can capitalize on. Always apply the latest firmware and software updates without delay.
- Using Weak Passwords: Avoid using simple or default passwords. Weak passwords are an open invitation for hackers to access your security system. Instead, opt for strong, unique passwords and change them regularly.
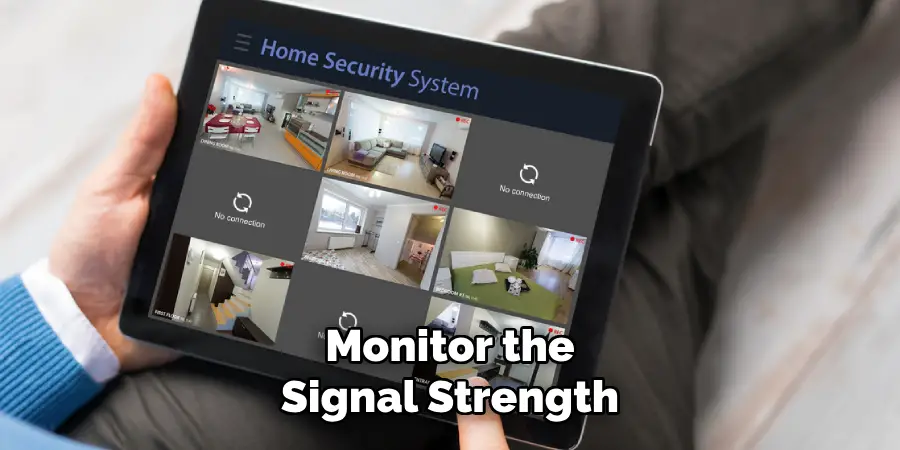
- Overlooking Signal Strength: Failing to monitor the signal strength of your wireless security cameras can make it easier for jammers to disrupt them. Regularly check signal strength and take steps to boost it if necessary, ensuring your cameras are less susceptible to jamming.
- Disregarding Physical Security: It’s not enough to focus solely on digital protection. Neglecting the physical security of your cameras can lead to tampering or damage that makes them ineffective. Secure your cameras in locations that are out of reach and protect them with physical barriers.
- Failing to Segment Your Network: Keeping all your devices on a single network is risky. If a jammer targets your network, it can potentially disable all connected devices. Segmenting your network ensures that even if one segment is compromised, the other segments, including your security cameras, remain operational.
By avoiding these common mistakes, you can significantly reduce the risk of camera jamming attacks and maintain the security of your surveillance system.
What are the Causes of Camera Jamming Attacks?
Camera jamming attacks can occur due to various factors, including:
- Intentional Interference: Hackers or intruders deliberately use jamming devices to disrupt the signals of your security cameras and gain unauthorized access. This is often done as part of a larger hacking attack.
- Interference From Other Devices: Sometimes, other electronic devices operating on the same frequency can unintentionally interfere with your camera signals, causing them to malfunction.
- Physical Obstructions: Thick walls, metal objects, or large structures between your cameras and routers can weaken the Wi-Fi signal, making it easier for jammers to disrupt it.
- Weak Encryption Protocols: If your network is not encrypted or uses outdated encryption protocols, it can be more susceptible to jamming attacks.
- Vulnerable Firmware or Software: Outdated or vulnerable firmware and software on your cameras and network devices can make them easier targets for hackers.
By understanding the causes of camera jamming attacks, you can take steps to mitigate these factors and prevent potential disruptions to your security system. Regularly updating firmware and software, using strong encryption, and implementing physical barriers are all important measures to protect against camera jamming attacks.
Can Jammer Block CCTV?
The short answer is yes, a jammer can block CCTV cameras. A jamming device emits radio frequency signals that interfere with the wireless signals used by cameras to transmit data to the connected devices. This causes disruptions in the camera’s functionality, making it unable to capture or transmit images and video.
However, it’s important to note that not all jammers can block CCTV cameras. Some jammers may only affect specific frequencies used by the camera, while others may block all wireless signals in a particular range, including those of the camera. Additionally, not all CCTV cameras are susceptible to jamming attacks, as some use wired connections instead of wireless.
Overall, it’s crucial to take preventative measures against camera jamming attacks and regularly monitor your security system to ensure its proper functioning.
Conclusion
In conclusion, how to stop a camera jammer requires a multi-faceted approach that includes both technical and physical security measures. By implementing strong passwords, keeping firmware and software updated, employing encryption, and segmenting your network, you can significantly enhance the resilience of your cameras against electronic interference. Physical barriers and careful placement of cameras further mitigate the risk of tampering and signal disruption.
Regular monitoring of signal strength and the environment around your cameras is essential in identifying and addressing potential vulnerabilities early on. Understanding that no system is impervious to attacks, a combination of these strategies, along with a heightened awareness of the evolving nature of security threats, will equip you with a robust defense mechanism against camera jamming attempts.
Employing a dynamic and proactive security strategy is paramount in ensuring the integrity and effectiveness of your surveillance system in the face of such challenges.