Weaving a chair seat with fabric strips is a creative and practical way to update an old chair or enhance a new one. This process involves interlacing strips of fabric to form a strong and stylish seat that is both comfortable and durable. One main benefit of fabric strips is their cost-effectiveness, as they often allow you to repurpose old or unused fabrics instead of purchasing new materials.
Additionally, this technique provides endless possibilities for customization, enabling you to design a chair that matches your personal style and home décor. Whether you prefer vibrant patterns or muted tones, fabric strips can make your chair unique while adding a handcrafted touch. This article will guide you through the step-by-step process of how to weave a chair seat fabric strips, ensuring your chair is both functional and aesthetically pleasing.
Materials and Tools Needed
Materials Overview
To weave a chair seat with fabric strips, you will need a selection of materials to ensure durability and achieve the desired look. Fabric strips are the primary material and should ideally be made from cotton, linen, or durable upholstery fabric. These types of fabrics are strong enough to support weight and are comfortable for seating. Additionally, you need a sturdy chair seat frame, which can either be wooden or wicker, serving as the base for your weaving project.
Scissors are essential for cutting fabric strips into the desired size, while a staple gun or nails may be used to secure the ends of the fabric strips to the chair frame if needed. A needle and strong thread can be used to stitch sections together for added reinforcement. Lastly, measuring tape or a ruler is crucial to ensure accurate dimensions and even spacing during the weaving process.
Tools Overview

A few tools will make the weaving process easier and more precise. Start with a solid chair frame, an old chair needing reupholstery, or a new frame designed for custom weaving projects. For actually weaving the fabric strips, you can simply use your hands, but for more advanced techniques, a weaving shuttle is highly effective. Clamps are another optional tool that can hold fabric strips taut, helping maintain tension while you work. With the right materials and tools, the weaving process can be a smooth and enjoyable experience, resulting in a beautifully handcrafted chair seat.
Preparing the Chair Frame
Cleaning and Sanding the Frame
Before you begin weaving, it is essential to prepare the chair frame to ensure the best results. Start by cleaning the frame thoroughly using a damp cloth to remove dirt, dust, and debris. This step is particularly important if you are repurposing an old chair, as accumulated grime can affect the quality of your finished seat. If the frame has any rough or splintered areas, use sandpaper to smooth them out. Sanding not only enhances the chair’s overall appearance but also ensures the fabric strips will not snag or tear during the weaving process. For those working on a reupholstery project, remove any old seat material or remnants carefully, ensuring the frame is completely bare and ready for customization.
Measuring the Seat Area

Accurately measuring the seat area is a key step in preparing for the weaving process. Use a measuring tape or ruler to determine the dimensions of the seat frame, including its width and depth. These measurements will guide you in cutting your fabric strips to the correct length and help you estimate how many strips you will need. Once measured, lightly mark the seating area using chalk or pencil to create a visual framework for the pattern you wish to weave. Planning ahead in this way allows you to maintain consistent spacing and achieve an even, polished design when weaving the fabric strips.
Cutting and Preparing the Fabric Strips
Choosing the Right Fabric
Selecting the right fabric is crucial to ensure your woven chair seat’s durability and aesthetic appeal. Opt for materials like cotton, canvas, denim, or upholstery fabric, as they are strong, resilient, and capable of withstanding daily use. These fabrics also offer various patterns and colors to suit any personal style or home décor. When choosing your fabric, consider its width and how it will influence the final appearance and comfort of the seat. Wider strips can create a bold, textured look, while narrower strips produce a more intricate pattern. Additionally, remember that thicker fabrics may provide more support, making them ideal for chairs that will see frequent use.
Cutting the Fabric Strips
To prepare your fabric for weaving, start by measuring and cutting strips of uniform width, typically about 2-3 inches wide. Use a measuring tape and ruler to ensure precision, marking the fabric with chalk or a washable fabric pen before cutting.
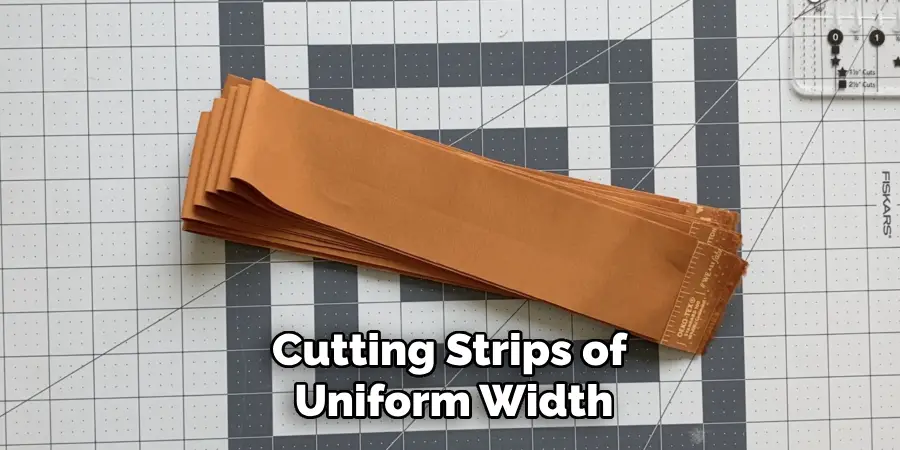
Straight, even strips are essential for a neat and professional finish, so consider using a rotary cutter or sharp fabric scissors for clean cuts. To prevent the edges from fraying, use pinking shears to create zigzag edges or treat the cut edges with fabric glue or Fray Check. For an even more durable option, you can fold over the edges of each strip and sew along the fold to create a finished hem. Properly prepared fabric strips will look polished and make the weaving process much smoother.
Setting Up the Weaving Pattern
Deciding on the Weaving Pattern
Choosing the right weaving pattern is important in creating a unique and stylish chair seat. The basic over-and-under pattern is a simple yet classic choice that is easy to accomplish and works well with most fabric types. For a more dynamic look, consider a diagonal or herringbone pattern, which adds visual interest and sophistication.
Checkerboard designs are another popular option, ideal for creating bold contrasts with alternating colors or textures. If you feel adventurous, explore more intricate patterns like twill or diamond weaves, which offer a textured and artisan appearance. Select a pattern that not only suits the style of the chair but also complements the aesthetic of the room where the chair will be placed. A well-chosen pattern ensures the chair becomes both functional and a design centerpiece.
Preparing the Fabric for Weaving
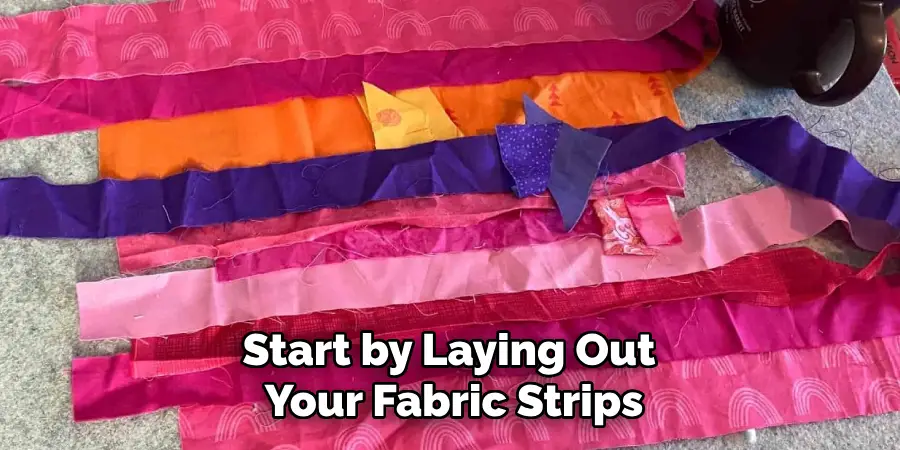
Start by laying out your fabric strips in an organized and systematic manner to streamline the weaving process. Place the first set of strips across the seat frame horizontally to establish a sturdy base layer for the weave. Ensure the strips are evenly spaced and aligned with the frame’s dimensions, temporarily securing the ends with clamps or tape if necessary. This base layer will act as the foundation for weaving the vertical strips, allowing you to create a uniform and balanced pattern as you proceed. Positioning these strips carefully ensures a smooth and efficient weaving session and a polished final look.
How to Weave a Chair Seat Fabric Strips: Weaving the Chair Seat
Starting the Weaving Process
Place the first set of fabric strips tightly across the seat frame horizontally to begin the weaving process. These strips will form the base layer for your design. Ensure each strip is pulled taut and evenly spaced so the seat remains sturdy and balanced. Secure the ends temporarily using clamps, tape, or small nails to prevent them from moving while you work. Consistent tension across all strips is vital for achieving a smooth, uniform appearance and preventing any sagging or gaps in the final product. This initial setup is crucial for a successful weaving process.
Weaving the Vertical Strips
Once the horizontal base layer is secure, begin weaving the vertical strips through it to create your chosen pattern. Take one vertical strip and start from one side of the frame, weaving it alternately over and under each horizontal strip. Pull the vertical strip taut after each pass to maintain uniform tension. Repeat this process for additional vertical strips, ensuring they are evenly spaced and aligned. Adjust the fabric as needed to keep the pattern consistent and smooth. A steady and methodical approach will help you achieve a sturdy structure and an aesthetically pleasing design.
Finishing the Weaving
After completing the weaving, secure the last fabric strip by tucking its ends neatly into the frame for a clean finish. Use a staple gun or small nails to fasten all fabric strips at the edges of the seat frame, ensuring they are tightly secured. Trim any excess fabric for a polished look. Double-check the tautness of the strips and make any necessary adjustments before finalizing. The end result will be a durable, attractive chair seat that showcases your craftsmanship and enhances your chair’s aesthetic appeal.
Securing and Reinforcing the Fabric
Attaching and Reinforcing the Ends
To securely attach the fabric strips to the frame, use a staple gun, nails, or a combination of both, depending on the type of chair frame. Begin by folding the ends of each strip neatly around the frame and fastening them in place. Staples are ideal for wooden frames, as they provide a firm hold, while small nails can work well for frames made of harder materials. Position staples or nails evenly to distribute tension and prevent sections from loosening over time. For added security, double back the fabric at the ends, folding it over itself before fastening to create a stronger grip.
To prevent fraying, reinforce the edges of the fabric strips with either a row of stitching along the raw edges or an additional layer of fabric. Sew a hem or apply fabric glue to cover exposed edges, ensuring long-term durability. Another option is to wrap an additional coordinating fabric over the frame edges, securing it together with staples or stitching to further protect the strips and elevate the chair’s overall design.
Checking for Stability and Adjustments
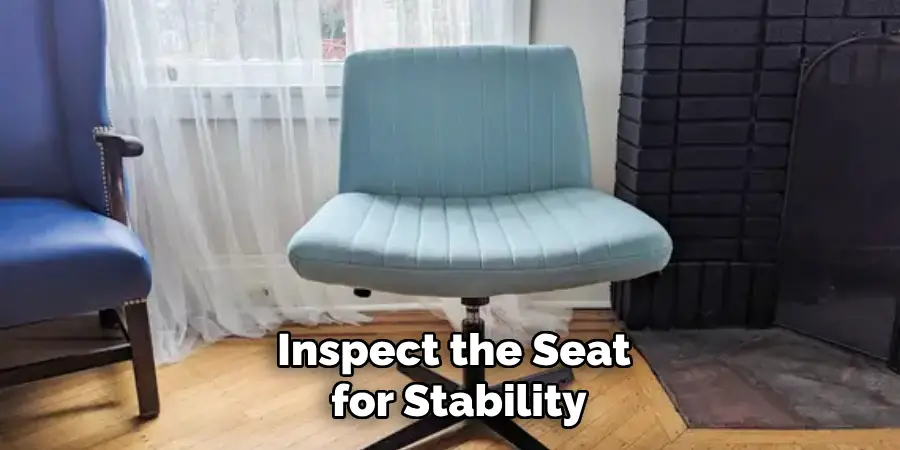
Once all strips are securely attached, inspect the seat for stability and uniformity. Check each strip to ensure it is evenly spaced and tightly fastened, making adjustments to correct any sagging or uneven areas. Run your hands over the seat to evaluate its texture and comfort, ensuring no rough edges or loose ends are present. If any weak points are found, reinforce them with additional staples, nails, or stitching. Finally, the chair was tested by applying gentle pressure to confirm the strength and balance of the woven seat before using it. This final check guarantees a durable and professional result.
Adding the Finishing Touches
Smoothing and Cleaning the Fabric
Before finalizing your project, ensure the woven fabric is smooth and wrinkle-free. Gently press out any creases using your hands, or, if the material allows, use a steam iron on a low setting for a more refined appearance. Pay special attention to the edges and corners to maintain a clean, uniform look. Additionally, clean the fabric strips thoroughly before or during the weaving process to remove any dirt or dust. This step ensures the seat looks polished and professional while extending the fabric’s lifespan.
Sealing and Protecting the Fabric
To keep your newly woven chair seat in excellent condition, apply a fabric protector or sealant to shield it from stains and damage. These protective coatings add a barrier against spills and dirt, making maintenance easier. Regularly clean the seat to remove dust, and re-tighten any loose fabric strips to maintain the seat’s sturdiness and appearance. With proper care, your chair will remain functional and visually appealing for years.
Conclusion
Learning how to weave a chair seat fabric strips is a rewarding DIY project combining creativity and functionality. The process involves preparing the frame, cutting and weaving the fabric strips with care, securely attaching them, and adding finishing touches for durability and style. Each step allows you to refine your craftsmanship while personalizing the design to match your preferences. Experiment with different fabric types and weaving patterns to create a unique piece that enhances your chair’s comfort and aesthetic appeal. With patience and attention to detail, you can transform an ordinary chair into a standout feature of your space.