Are you looking for a way to monitor your home or office while you’re away? Lightbulb cameras may be the solution you’ve been looking for.
Light bulb cameras, an innovative blend of surveillance technology and everyday utility, offer a discreet and convenient method for monitoring spaces. These devices integrate a camera within a standard light bulb design, allowing them to be screwed into any existing light fixture.
Utilizing Wi-Fi or a wired connection, they capture video footage, often in high-definition, which can be viewed in real-time or stored for later review. In addition to providing illumination, many models feature motion detection, night vision capabilities, and two-way audio communication.
This guide on how do light bulb cameras work will explore the various components and features of these devices, as well as their benefits and potential drawbacks.
What are the Benefits of Light Bulb Cameras?
One of the primary benefits of light bulb cameras is their discreet and inconspicuous design. Unlike traditional security cameras, which can be easily spotted and tampered with, light bulb cameras blend seamlessly into their surroundings.
This makes them ideal for monitoring spaces without drawing unwanted attention or altering the aesthetic of a room. Additionally, since they do not require any additional wiring or installation, they are a cost-effective option for those looking to add surveillance to their home or office.
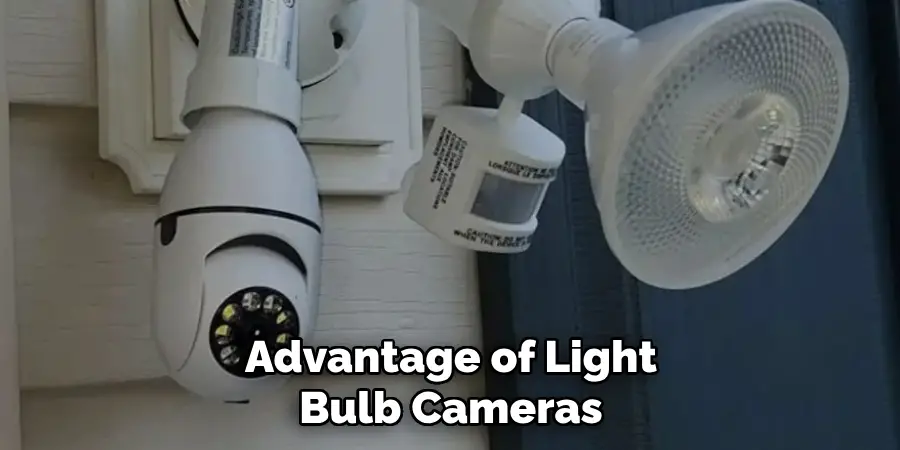
Another advantage of light bulb cameras is their versatility. Due to their small size and wireless capabilities, they can be placed in various locations, such as ceilings, walls, or lamps. This allows for customizable coverage of different areas within a space. Additionally, many models offer remote access through a mobile app, allowing users to monitor their space from anywhere at any time.
What Will You Need?
In order to set up a light bulb camera, you will need a few basic items:
- A light fixture with an E26 base (standard for most light bulbs)
- A Wi-Fi connection or ethernet cable
- A smartphone or device for remote access and control
Some models may also require additional tools for installation, such as a ladder or screwdriver. Before beginning the setup process, it is important to read the instructions and gather all necessary items.
10 Easy Steps on How Do Light Bulb Cameras Work
Step 1. Choose the Right Location:
Select a location for your light bulb camera that offers a comprehensive view of the area you wish to monitor. Ensure it is placed high enough to cover the desired space effectively, avoiding any obstacles that may block the view. As a bonus, you can also choose to replace existing light bulbs in high-traffic areas for more inconspicuous surveillance.
Step 2. Turn off the Power:
Before installing your light bulb camera, ensure that the power to the light fixture is completely turned off. This is a crucial safety step to prevent any risk of electrical shock. You can turn off the power at the main circuit breaker of your home or at the switch controlling the specific light fixture.
It’s advisable to use a voltage tester to confirm that there is no electrical current flowing to the light fixture before proceeding with the installation. This step not only ensures your safety but also protects the camera from any potential damage during the setup process.
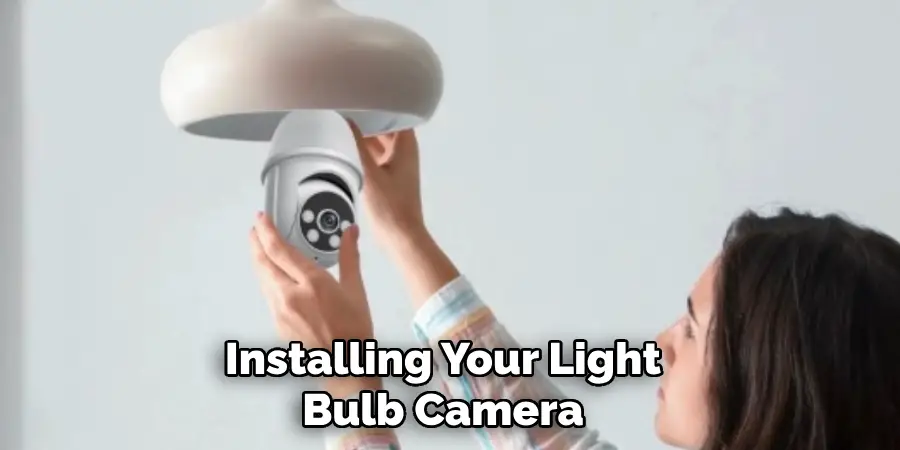
Step 3. Install the Light Bulb Camera:
Carefully screw the light bulb camera into the socket of the selected light fixture, just as you would with a regular light bulb. Make sure it is securely in place, but avoid over-tightening, which could damage the camera. If your camera comes with an adjustable angle feature, adjust it to ensure the camera covers the desired area effectively.
Step 4. Turn the Power Back On:
Once the light bulb camera is securely installed, it’s time to restore power to the light fixture. Flip the switch on your main circuit breaker or the switch controlling the specific light fixture back to the “on” position.
This action will provide the necessary power for the camera to start operating. Keep an eye on the camera for any initial indicators that it is receiving power, such as LED lights turning on or a sound notification, which varies depending on the model of the camera.
Step 5. Connect to Wi-Fi or Ethernet:
After powering on the light bulb camera, the next crucial step is to establish a connection between the camera and your home’s Wi-Fi network or via an Ethernet cable if your model supports this feature. This connection is essential for transmitting the video footage captured by the camera to your smartphone, tablet, or computer.
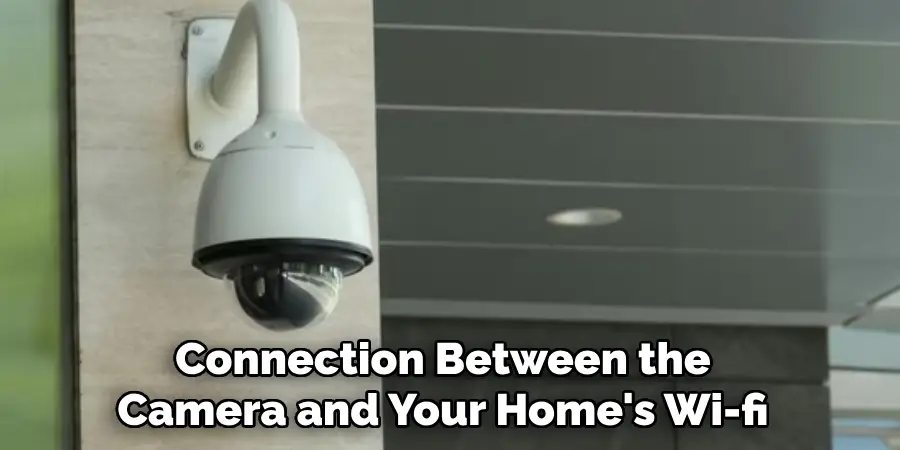
To connect the camera to Wi-Fi, download and install the dedicated mobile app associated with your light bulb camera brand. Open the app and follow the on-screen instructions to find and connect to your camera using Wi-Fi. This typically involves selecting your home Wi-Fi network from a list and entering its password.
If your camera supports Ethernet connections and you prefer a wired connection, connect an Ethernet cable from your router to the camera. This may provide a more stable and faster connection than Wi-Fi, which can be beneficial for streaming high-definition video footage.
Step 6. Configure Your Camera Settings:
Once your light bulb camera is connected to your Wi-Fi or Ethernet, access the camera’s settings through the mobile app to configure it according to your needs. Most apps offer a variety of settings, such as motion detection sensitivity, notification preferences, and night vision activation.
You can also adjust the video quality and set up specific zones within your camera’s field of view for monitoring. Take this time to explore the app’s features and customize your camera for optimal performance and efficiency. This step is crucial for tailoring the security device to your specific surveillance requirements and ensuring you receive relevant alerts.
Step 7. Test Your Camera’s Live Feed:
After configuring your camera settings to your liking, it’s important to test the live feed to ensure everything is working correctly. Navigate to the live view section of your mobile app to check the camera’s video quality and ensure it is capturing the desired area effectively.
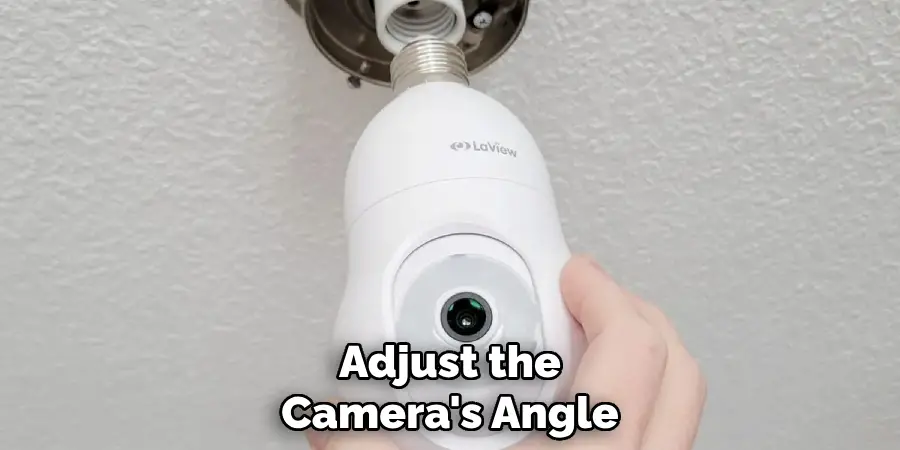
This is also a good opportunity to adjust the camera’s angle if necessary to optimize your view. The live feed will allow you to monitor your space in real time, so ensuring a clear and stable image is crucial. Testing during both day and night conditions is advisable to confirm that the camera’s night vision is functioning properly and provide clear footage after dark.
Step 8. Enable Motion Detection Alerts:
After you are satisfied with the live feed’s video quality and coverage, the next step is to enable motion detection alerts on your light bulb camera. This feature is crucial for security surveillance, as it notifies you of any movement within your camera’s field of view. To set up motion detection, go back to the camera settings in the mobile app and look for the motion detection option.
Here, you can enable alerts and adjust the sensitivity level to avoid false alarms from minor movements, like a pet walking in the room. You can also schedule when you want the motion detection to be active, providing flexibility for monitoring your home only during the hours you choose. This feature ensures you are immediately informed of any unexpected activity, allowing for a quick response.
Step 9. Review and Manage Recorded Footage:
Once your light bulb camera is fully set up and operational, it’s important to regularly review and manage the footage it captures. Most light bulb cameras offer the capability to store recorded video footage either on a cloud service or directly onto a microSD card, depending on your model and preferences.
To review your footage, access the camera’s mobile app and locate the playback or history section. Here, you can view past recordings, download important clips, and delete unnecessary footage to free up storage space.
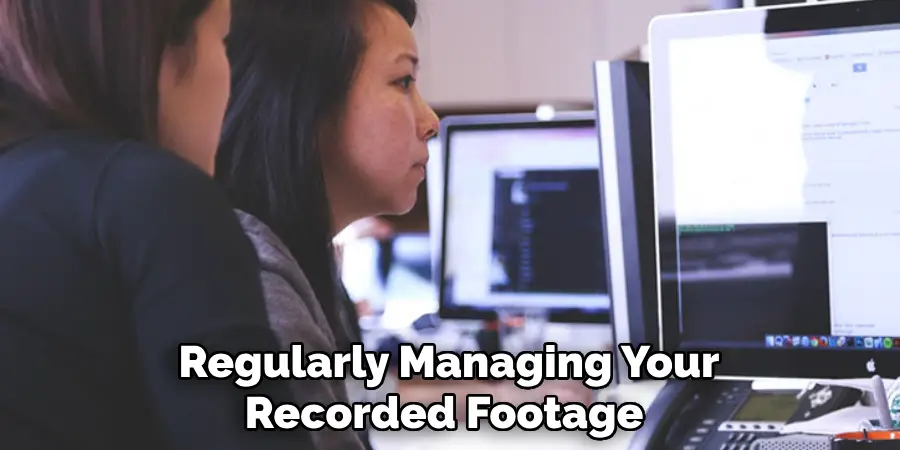
Regularly managing your recorded footage will help you keep track of any events or incidents and ensure that your camera’s storage does not become full, which could prevent further recording. Additionally, familiarize yourself with the app’s features for organizing and searching through the footage to quickly find specific events when needed.
Step 10. Maintain Your Camera for Longevity:
After successfully setting up and operating your light bulb camera, ongoing maintenance is essential to ensure its longevity and optimal performance. Periodically, check the physical condition of the camera and its mounting to ensure it remains securely in place and free from obstructions like dirt or spider webs that could impair camera quality.
Additionally, keep the light fixture and camera lens clean for the clearest video feed. Software and firmware updates are also crucial; regularly check the manufacturer’s app for updates that provide new features or security enhancements. This proactive approach to maintenance will not only extend the life of your light bulb camera but also ensure it continues to provide reliable home security.
By following these steps, you can successfully set up and maintain your light bulb camera for effective home security surveillance.
5 Additional Tips and Tricks
- Optimal Placement: Ensure you install your light bulb camera in a strategic location that maximizes its field of view. Ideally, it should be placed at a height and in an area that covers critical points of entry or spaces you wish to monitor closely.
- Wi-Fi Connectivity: For smooth operation, make sure your light bulb camera is within a strong Wi-Fi signal range. Poor connectivity can lead to interruptions in live streaming or footage storage, compromising your home security.
- Adjustable Settings: Familiarize yourself with the camera’s app or software to customize settings such as motion detection sensitivity and recording schedules. This will help reduce false alarms and ensure that the camera records during periods of interest.
- Regular Updates: Keep the camera’s firmware and associated app updated. Manufacturers often release software updates that enhance security features, introduce new functionalities, and fix any known issues.
- Lighting Conditions: Although light bulb cameras are designed to work in low-light conditions, the illumination they provide can sometimes be insufficient for clear recordings. Consider adding external light sources or selecting a model with enhanced night vision capabilities for better nighttime surveillance.

With these additional tips and tricks, you can further optimize the performance of your light bulb camera and ensure efficient home security monitoring.
5 Things You Should Avoid
- Ignoring Privacy Laws: When installing your light bulb camera, it’s crucial to understand and comply with local privacy laws. Avoid positioning cameras in areas that could intrude on your neighbor’s privacy or in private spaces without consent, as this can lead to legal issues.
- Poor Password Practices: Failing to secure your camera’s app or cloud account with a strong, unique password can leave your surveillance system vulnerable to unauthorized access. Avoid using default passwords or easily guessable combinations.
- Overlooking Weather Resistance: If your light bulb camera is to be installed outdoors, neglecting to check for weather resistance features can lead to device failure. Avoid installing non-weatherproof cameras in exposed areas where rain, snow, or extreme temperatures can damage the unit.
- Neglecting Power Backup Systems: Power outages can render your light bulb camera inoperative when it’s most needed. Avoid this risk by not having a power backup solution, such as a UPS (Uninterruptible Power Supply), especially in areas prone to frequent power interruptions.
- Skimping on Quality for Price: Opting for the cheapest available light bulb camera can often mean compromising on video quality, reliability, and security features. Avoid basing your purchase decision solely on price; consider investing in a camera that offers good image quality, secure data encryption, and reliable performance to ensure effective home security monitoring.
By avoiding these common mistakes, you can ensure that your light bulb camera operates smoothly and effectively to provide optimal home security.
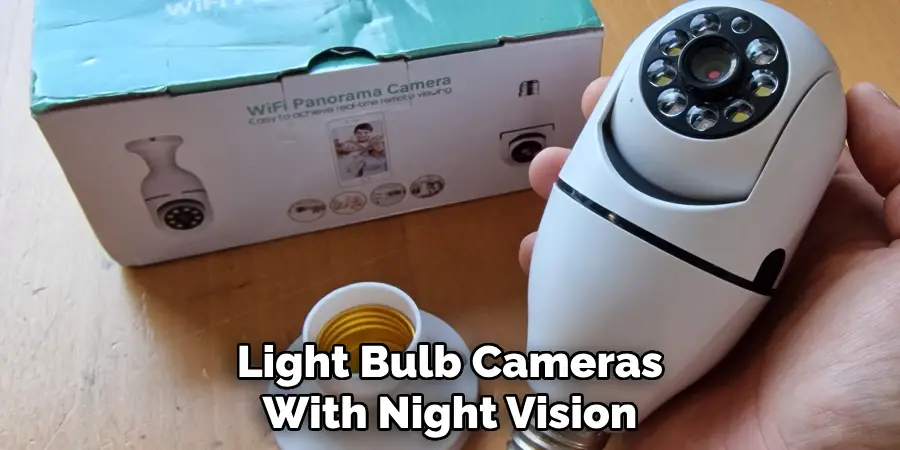
Does Bulb Camera Have Night Vision?
Yes, some light bulb cameras have night vision capabilities. They use infrared technology to capture high-quality images and videos in low-light or dark environments. However, the range and clarity of night vision can vary between different models of light bulb cameras.
It is important to review the specifications and features of a light bulb camera before purchasing to ensure it meets your specific needs for nighttime surveillance. Additionally, proper lighting conditions and placement of the camera can also impact the effectiveness of its night vision feature.
Overall, light bulb cameras with night vision capabilities can provide an added layer of security for your home, especially during nighttime hours when visibility may be limited.
How Does the Light Bulb Camera Record?
Light bulb cameras typically record footage using either local storage or cloud storage. Local storage involves saving recorded videos and images onto a memory card inserted into the camera itself, while cloud storage utilizes an online server to store data remotely. Some light bulb cameras offer both options for added flexibility.
Depending on the model, light bulb cameras can also include features such as motion detection, which triggers recording when activity is detected. This helps to conserve storage space by only recording when necessary and also enables users to review specific events rather than sifting through hours of footage. The recorded footage can then be accessed through the camera’s app or software for viewing, downloading, or sharing.
Overall, light bulb cameras offer a convenient and effective way to monitor your home and keep it safe.
What Are the Disadvantages of Light Socket Security Cameras?
While light bulb cameras offer many benefits, there are also some potential disadvantages to consider:
- Limited Field of View: Light socket security cameras may have a narrower field of view compared to traditional CCTV or outdoor cameras. This can result in blind spots or gaps in coverage, making it important to strategically place the camera for optimal surveillance.
- Dependent on Wi-Fi: As mentioned earlier, it’s crucial to ensure your light bulb camera is within range of a strong Wi-Fi signal. Any disruptions or connectivity issues can affect the camera’s performance and compromise home security.
- Power Supply: Light socket cameras require a power source to function, so if the light switch controlling the socket is turned off or there is a power outage, the camera will not record.
- Susceptible to Tampering: Due to their compact and inconspicuous design, light bulb cameras may be more susceptible to tampering or vandalism compared to larger, more visible security cameras.
- Privacy Concerns: As with any surveillance system, there are potential privacy concerns when using light bulb cameras in a residential setting. It’s important to communicate with household members and ensure proper consent is given before installing the camera.
Despite these potential drawbacks, light bulb cameras can still be a valuable addition to your home security system when used appropriately and in combination with other security measures.
Conclusion
In conclusion, light bulb cameras merge the practicality of everyday lighting with sophisticated surveillance capabilities to offer an innovative solution for home security monitoring. These cameras are easy to install, requiring only a simple replacement of a standard light bulb.
This allows for discreet monitoring without the need for complex wiring or professional installation services. The integration of features such as motion detection, night vision, and the option for local or cloud storage enhances their functionality, ensuring comprehensive security coverage.
Despite potential challenges like limited fields of view, dependence on Wi-Fi, and concerns over privacy and tampering, light bulb cameras remain a versatile and effective choice for bolstering home security.
Hopefully, this guide has provided valuable insights into the benefits and considerations on how do light bulb cameras work, helping you make an informed decision when it comes to choosing the right security solution for your needs.