Switching from fluorescent light tubes to LED (Light Emitting Diodes) is an increasingly popular decision for both residential and commercial spaces. This transition is not just about keeping up with the latest in lighting technology; it’s about reaping the myriad benefits LED offers over traditional lighting solutions. These benefits include a longer lifespan, better energy efficiency, and reduced environmental impact, among others.
In this guide on how to change fluorescent light tube to led, we will walk you through the simple steps of replacing your outdated fluorescent light tubes with modern, efficient LED lights, ensuring a smooth and successful transition.
What is LED?
Before we delve into the steps of changing fluorescent light tubes to LED, let’s first understand what LED is and why it has become a preferred lighting option.
LED (Light Emitting Diodes) is a solid-state lighting technology that converts electrical energy directly into light without using any filament or gas. Unlike traditional fluorescent lights, which use mercury vapor to produce ultraviolet light, LED lights use tiny semiconductors that emit photons when an electrical current passes through them. This process produces bright, energy-efficient light without the need for any warm-up time.
Why Switch to LED?
There are several reasons why you should consider switching from fluorescent light tubes to LED. These include:
Energy Efficiency:
LED lights consume significantly less energy than traditional fluorescent lights, leading to a significant reduction in energy bills. A typical LED light uses 75-80% less energy than an incandescent light and lasts up to 25 times longer.
Longer Lifespan:
LED lights have a much longer lifespan compared to traditional fluorescent lights, with some models lasting up to 50,000 hours or more. This means that you will not have to replace your LED lights as frequently, saving you both time and money in the long run.
Eco-Friendliness:
LED lights do not contain any hazardous materials like mercury found in fluorescent lights, making them a more environmentally friendly lighting option. Additionally, their longer lifespan means fewer light bulbs end up in landfills, reducing environmental impact.
Versatility:
LED lights come in a wide range of shapes, sizes, and colors, making them suitable for various lighting applications. They can be used for general room lighting or for spotlights and decorative lighting.
Cost Savings:
While LED lights may cost more upfront than traditional fluorescent lights, their energy efficiency, longer lifespan, and reduced maintenance costs ultimately result in significant cost savings over time.
Necessary Tools and Materials
Before you begin the process of changing fluorescent light tubes to LED, make sure you have the following tools and materials on hand:
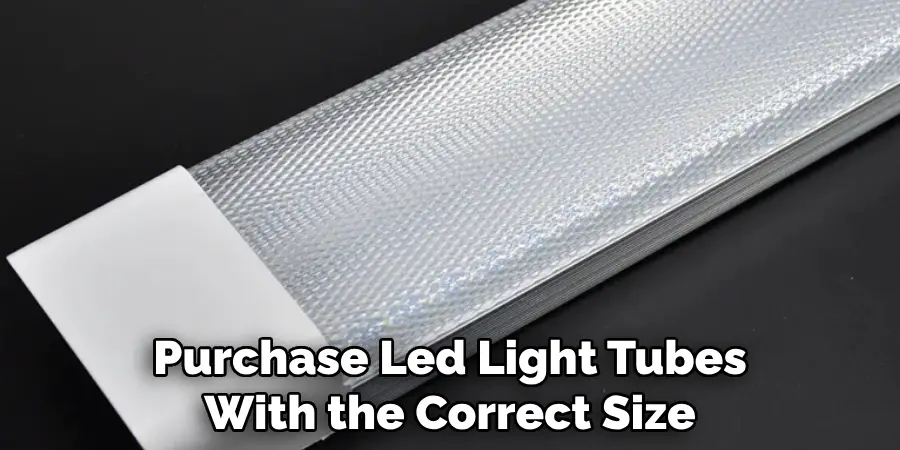
New LED light tubes:
Make sure to purchase LED light tubes with the correct size and wattage for your fixture.
Step ladder:
A step ladder or a sturdy stool will be necessary if you cannot reach the light fixture easily.
Latex gloves:
Wearing latex gloves will protect your hands from any glass shards in case the old fluorescent tube breaks during the removal process.
Safety glasses:
To protect your eyes from any debris or glass fragments.
Screwdriver:
You will need a screwdriver to remove the old fluorescent light fixture cover and to install the new LED tubes.
Cleaning supplies:
Some cleaning supplies, such as a mild detergent and a clean cloth, may be needed to clean the fixtures before installing the new LED tubes. This ensures that there is no dirt or grime to hinder the LED light’s performance.
10 Simple Step-by-step Guidelines on How to Change Fluorescent Light Tube to Led
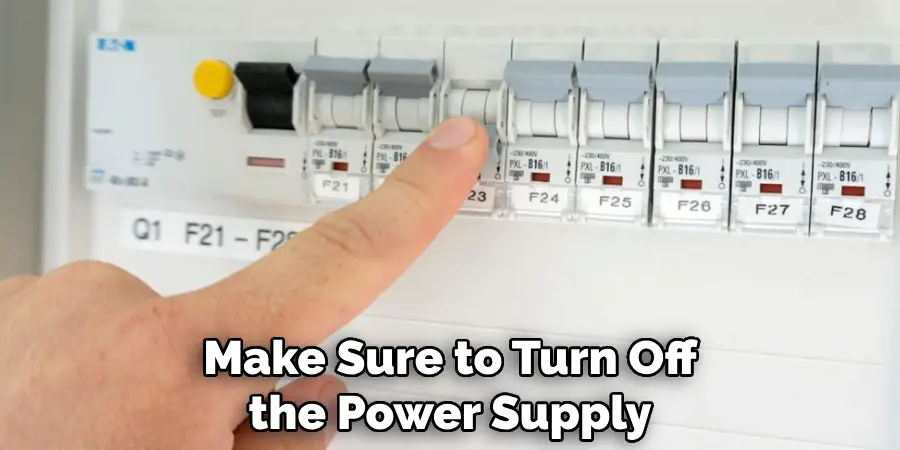
Step 1: Turn off the Power Supply
Before you begin, make sure to turn off the power supply to the light fixture. This can be done by flipping the switch on your circuit breaker. It is crucial to take this safety precaution to avoid potential electrical hazards. You can also use a voltage tester to double-check that the power is off. But, if you are not confident in handling electrical wiring, it is best to hire a professional electrician. The safety of yourself and your home should always come first.
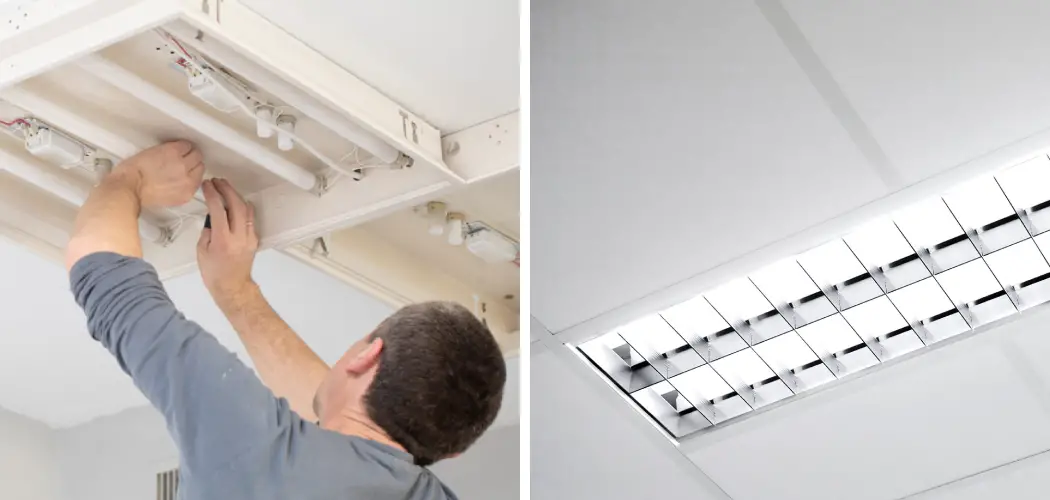
Step 2: Remove the Old Fluorescent Tube
Put on your latex gloves for protection and carefully remove the old fluorescent tube from its sockets. Twist the tubes gently to loosen them, then pull them straight out. If the tubes are hard to remove, try twisting them in different directions until they come out. But, if the tube breaks during removal, carefully dispose of it in a sealed plastic bag. It is best to avoid contact with any broken glass. You can also use a broom or vacuum cleaner to clean up any shattered glass.
Step 3: Remove the Ballast Cover
Locate the ballast cover, which is usually a small metal plate attached to the light fixture. Use your screwdriver to remove the screws holding it in place and then slide off the cover. It would be best to place the screws in a safe spot so you can easily find them when reinstalling the cover. You can also use this opportunity to clean the cover and the inside of the fixture. There may be some dust and debris accumulated over time, which can affect the LED light’s performance. You can use a mild detergent and a clean cloth to wipe them down.
Step 4: Disconnect the Ballast Wires
After removing the ballast cover, you will see several wires connected to it. Use your screwdriver to unscrew the wire nuts holding these wires together. Once they are unscrewed, gently pull apart the wire connections. These are usually color-coded, and you will need to reconnect them for the LED light installation. But, if you are unsure of how to reconnect them, take a picture before disconnecting them.
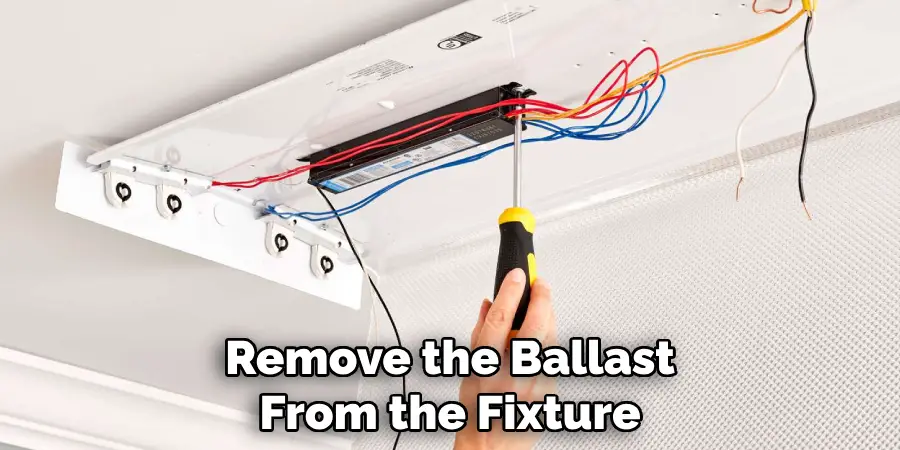
Step 5: Remove the Ballast
Once the wires are disconnected, use your screwdriver to unscrew and remove the ballast from the fixture. The ballast is no longer needed for LED lights since they operate differently. It is best to dispose of the ballast properly. You can either recycle it or take it to a hazardous waste disposal site.
But if you are unsure of how to dispose of it correctly, consult your local waste management company. The ballast may contain hazardous materials, so it is essential to dispose of it properly. Although LED lights do not contain any hazardous materials, it is still important to dispose of them correctly to minimize environmental impact.
Step 6: Install the New LED Tubes
Once the ballast is removed, you can now install the new LED tubes. Make sure they are aligned with the sockets before gently pushing them in and twisting them to lock them in place. You may need to refer to the manufacturer’s instructions for specific installation steps. It is crucial to handle LED tubes with care, as they are fragile and can break if mishandled. You can also take this opportunity to clean the tubes with a clean cloth to remove any dirt or fingerprints.
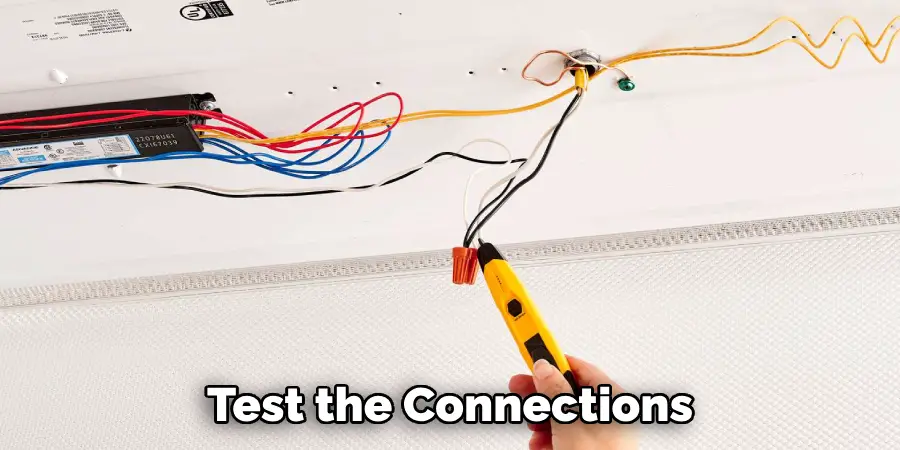
Step 7: Connect the Wires
Using your screwdriver, reconnect the wires according to their color coding. Make sure all connections are secure before moving on to the next step. But, if you took a picture of the connections before disconnecting them, refer to it to ensure proper reconnection. The wire nuts should be tight and secure, with no exposed wires. It is crucial to double-check the connections, as they can affect the LED light’s performance.
Step 8: Reinstall the Ballast Cover
Once all wires are connected, you can now reinstall the ballast cover. This time, make sure it is positioned correctly before securing it with the screws. Once in place, give it a gentle tug to ensure it is secure. You can also test the connections by gently wiggling the cover to see if it moves. Although the ballast is no longer in use, it can serve as an extra layer of protection for your LED lights. The cover also helps to keep the wires and connections tidy. There may be some excess wires, and you can use wire ties to secure them in place.
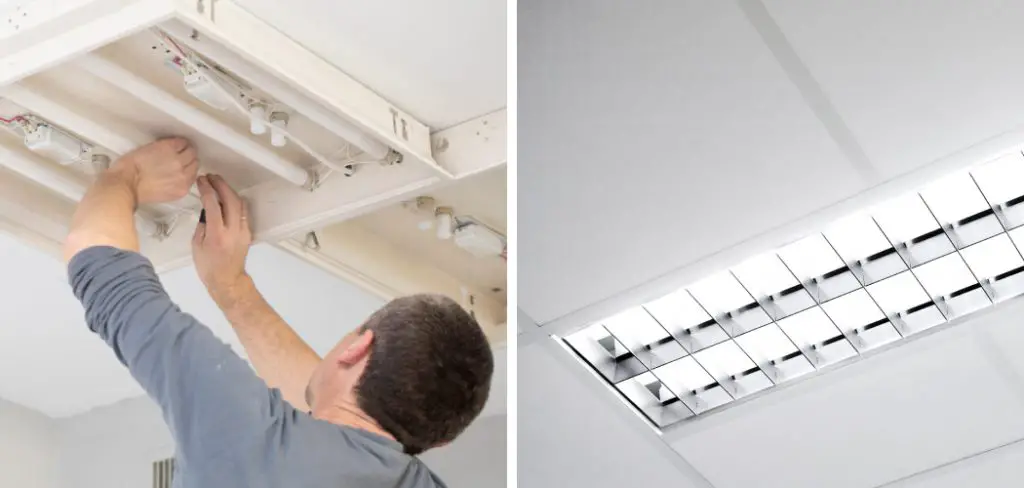
Step 9: Turn on the Power
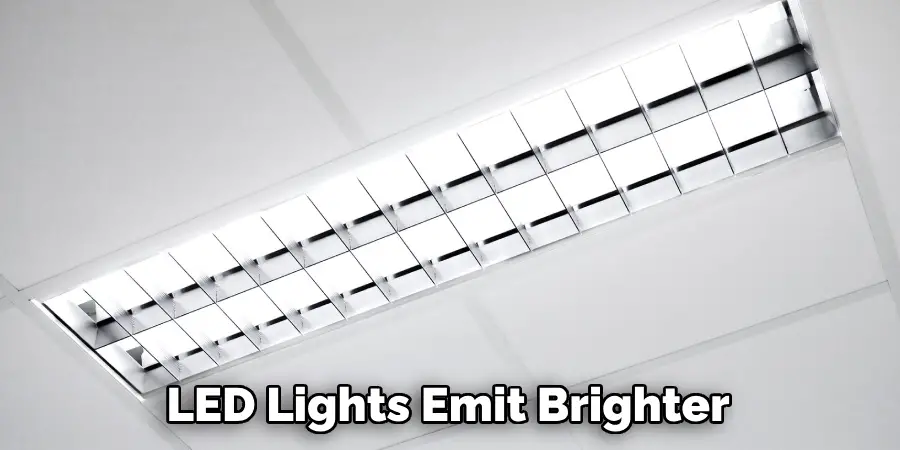
Before testing the LED lights, turn on the power supply and make sure all fixtures are secured and in place. If everything looks good, you can now turn on your LED lights by flipping the switch or pressing the button. Thoroughly check each light to ensure they are working correctly. You may also want to compare the brightness of your new LED lights with the old fluorescent tubes. It is normal for LED lights to appear brighter as they are more energy-efficient. You can also adjust the brightness level by using a dimmer switch.
Step 10: Dispose of Old Fluorescent Tubes Properly
After successfully changing your fluorescent light tubes to LED, make sure to dispose of the old tubes properly. As mentioned earlier, broken glass can be hazardous, so it is best to handle them with care. You can take them to a recycling center or a hazardous waste disposal site. It is essential to follow proper disposal guidelines on how to change fluorescent light tube to led to minimize environmental impact and ensure everyone’s safety. You can also check with your local waste management company for specific disposal guidelines in your area.
Additional Tips for Changing Fluorescent Light Tubes to LED
- Make Sure to Choose Led Tubes With the Same Length as Your Old Fluorescent Tubes for Easy Installation.
- It is Best to Turn Off the Power Supply at the Circuit Breaker, Not Just the Light Switch, Before Starting the Installation Process.
- LED Lights Have a Longer Lifespan, So You Will Save Money in The Long Run by Making The Switch.
- Check for Any Government Rebate Programs or Energy Efficiency Programs That May Offer Incentives for Changing to LED Lights.
- Regularly Clean Your LED Tubes and Fixtures to Maintain Optimal Performance.
- If You Encounter Any Difficulties During the Installation Process, Consult a Professional Electrician for Assistance.
- LED Lights Produce Less Heat, Which Can Help Reduce Cooling Costs in The Summer Months.
- Consider Installing Dimmer Switches to Adjust the Brightness of Your LED Lights and Save Even More Energy.
- LED Lights Come in Different Color Temperatures, So Choose the One That Best Suits Your Needs and Preferences.
- By Making the Switch to LED Lights, You Are Contributing to A Greener Environment by Reducing Energy Consumption and Waste Production. So, make the switch today and start enjoying the numerous benefits of LED lighting!

So remember, with a few simple steps, you can easily change your fluorescent light tubes to LED and enjoy brighter, more energy-efficient lighting in your space. Just make sure to handle all materials with care and dispose of them properly to minimize environmental impact. Follow the additional tips provided for a smooth installation process and optimal performance of your LED lights. Don’t forget to spread the word and encourage others to make the switch as well for a greener, more sustainable future. Happy lighting!
Maintenance and Troubleshooting
Once your LED lights are installed, it is essential to perform regular maintenance to ensure optimal performance and longevity. Here are a few tips for maintaining and troubleshooting LED lights:
- Regularly clean the tubes and fixtures with a clean, soft cloth to remove dust and dirt buildup.
- Check for any loose or damaged connections, wires, or screws that may affect the performance of your LED lights.
- Monitor the brightness of your LED lights and replace any dim or flickering tubes as soon as possible to prevent further issues.
- If you encounter any difficulties with installation or experience any problems with your LED lights, consult a professional electrician for assistance.
- Keep track of the lifespan of your LED tubes and replace them as needed to maintain optimal performance.
- Know and understand the warranty of your LED lights and contact the manufacturer for any defects or issues covered under the warranty.
By following these maintenance tips, you can ensure your LED lights continue to provide bright, energy-efficient lighting for years to come.
Benefits and Considerations
There are numerous benefits to changing your fluorescent light tubes to LED. Here are a few to consider:
Benefits:
Energy Efficiency:
LED lights use significantly less energy than fluorescent lights, resulting in lower electricity bills and reduced carbon footprint.
Long Lifespan:
LED lights have a longer lifespan compared to fluorescent lights, meaning fewer replacements and cost-saving in the long run.
Brighter Lighting:
LED lights emit brighter, more natural-looking light compared to the yellowish tint of fluorescent lights. This can improve visibility and productivity in work or living spaces.
More Environmentally Friendly:
LED lights do not contain any hazardous materials like mercury found in fluorescent lights, making them safer for the environment and easier to dispose of properly.
Considerations:
While there are many benefits to LED lights, here are some considerations to keep in mind:
Initial Cost:
LED lights may have a higher upfront cost compared to fluorescent lights, but the long-term savings and benefits outweigh the initial investment.
Color Temperature:
As mentioned earlier, LED lights come in different color temperatures. Consider your needs and preferences when choosing the right color temperature for your space.
Compatibility:
LED lights may not be compatible with some fixtures, so it is essential to check before making the switch.
Frequently Asked Questions
Q: Is It Necessary to Turn Off the Power Supply at the Circuit Breaker Before Changing Fluorescent Tubes to LED?
A: Yes, it is recommended to turn off the power supply at the circuit breaker for safety purposes. The installation process may involve handling wiring and electrical components, so it is best to take precautions.
Q: Can I Use LED Tubes in Any Fixture?
A: No, not all fixtures are compatible with LED tubes. It is important to check the compatibility of your fixtures before making the switch.
Q: How Often Should I Replace My LED Tubes?
A: The lifespan of LED tubes varies depending on usage and quality, but on average, they can last anywhere from 5-10 years. Keep track of the lifespan of your LED tubes and replace them as needed to ensure optimal performance.
Q: Will Changing to LED Lights Save Me Money?
A: Yes, LED lights have a longer lifespan and use less energy, resulting in lower electricity bills and long-term cost savings. The initial investment may be higher, but the savings over time make it worth it.
Conclusion
Making the switch from fluorescent light tubes to LED is a wise decision that aligns with both economic and environmental goals. By following the simple steps outlined in this guide, you can enjoy a lighting solution that is not only more efficient and longer-lasting but also considerably more eco-friendly.
Remember, the initial effort and investment in converting to LED lighting pay off in the long term through reduced energy bills and lower replacement costs. Transitioning to LED is a bright choice for a sustainable future. Thanks for reading this article on how to change fluorescent light tube to led.