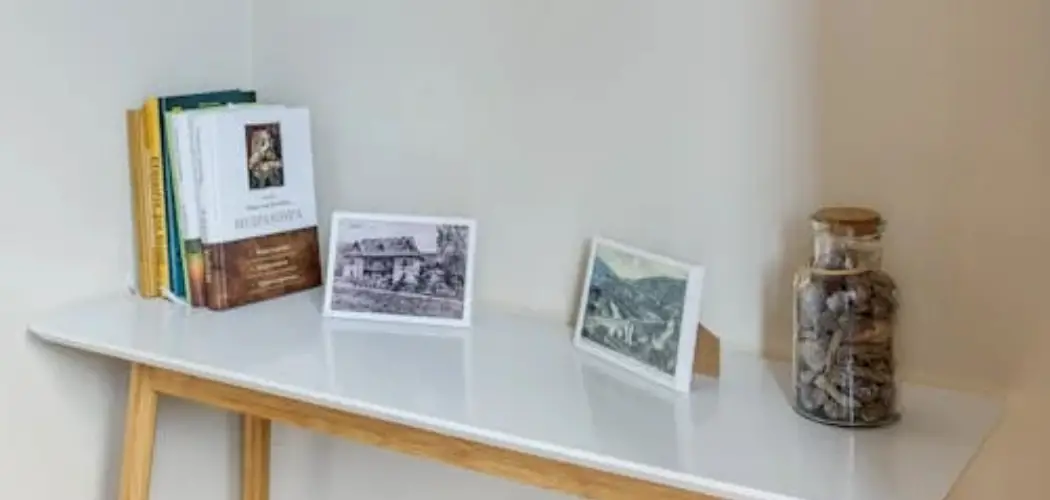
Displaying framed photos on a table is a wonderful way to personalize your living space and showcase cherished memories. Whether it’s a family portrait, a snapshot from a favorite vacation, or an artistic photograph, these framed pieces can add warmth and character to any room. Arranging them on a table offers versatility, allowing you to easily update the collection or reposition the frames to adjust to seasonal decorations or new acquisitions. In this guide, we’ll explore how to display framed photos on a table, ensuring they enhance your home’s decor while preserving their sentimental value.
The Importance of Displaying Framed Photos
Displaying framed photos in your home serves more than just an aesthetic purpose; it plays a crucial role in fostering emotional well-being and maintaining personal connections. These visual reminders of cherished moments can evoke positive emotions and nostalgia, helping to rekindle fond memories of past experiences and loved ones. Moreover, framed photos serve as conversation starters, offering guests a glimpse into your life story and personal values. This display not only personalizes your living space but also reaffirms your identity and history within the home. By prominently placing these memories, you create a welcoming and comforting environment that reflects the essence of your experiences and relationships.
Choosing the Right Table for Framed Photos
Selecting the appropriate table for showcasing your framed photos is crucial for creating a harmonious and aesthetically pleasing display. When choosing a table, consider its size, style, and placement within the room. A table that is too large may overwhelm the space, while one that is too small might not provide adequate support for multiple frames.
Look for a table that complements the existing decor of the room, such as matching wood tones or similar design elements. Additionally, consider the location of the table to ensure it has sufficient lighting and is easily accessible. A well-chosen table not only supports and highlights your framed photos but also enhances the overall ambiance of the room, creating a cohesive and inviting atmosphere.
10 Methods How to Display Framed Photos on a Table
1. Create a Layered Display

To add depth and dimension to your table, arrange framed photos in a layered fashion. Start with the largest frames at the back and progressively smaller ones in front. This arrangement allows each photo to remain visible without overwhelming the table. Layering works especially well on console or sofa tables against a wall, as the backdrop provides additional support for larger frames. For added interest, stagger the frames slightly to create a cascading effect, avoiding the rigidity of a perfectly linear arrangement.
2. Incorporate Varying Frame Sizes and Orientations
Displaying frames of different sizes and orientations can create a dynamic and visually appealing setup. Mix portrait and landscape frames to break the monotony, and include a few smaller frames to complement larger, statement pieces. For instance, a central 8×10 frame can be flanked by two smaller 4×6 frames. This method works well on end tables or coffee tables, where a variety of frame dimensions can be used to create an engaging display without dominating the space.
3. Use a Decorative Tray for Grouping

Grouping framed photos on a decorative tray adds cohesion and structure to your display. A tray acts as a visual boundary, making the arrangement appear intentional and organized. Choose a tray that complements your decor—wood for a rustic feel, mirrored for elegance, or metal for modernity. Arrange the frames alongside small decorative objects like a vase, a candle, or a plant to enhance the overall aesthetic. This technique is especially useful for large tables where items can otherwise feel scattered.
4. Add Height with Stands or Risers
To create a visually interesting display, add height by using photo stands, small risers, or stacked books as pedestals for some of the frames. Elevating certain photos ensures that all frames are visible, even from a distance. For instance, a tabletop easel can hold a single statement photo, while smaller frames sit directly on the surface. Mixing heights adds a sense of rhythm and movement to the arrangement, making it more dynamic and eye-catching.
5. Incorporate Other Decorative Elements
Enhance your photo display by mixing in decorative elements that complement the frames. Add items like candles, potted plants, figurines, or a small sculpture to create a curated look. These accents can break up the uniformity of the frames while adding texture and color to the arrangement. For example, a family photo might sit next to a small vase of fresh flowers, creating a warm and inviting atmosphere.
6. Stick to a Theme or Color Palette

For a cohesive look, select frames and decor that adhere to a specific theme or color palette. For instance, if your table is part of a coastal-themed room, choose light wood or white frames and pair them with seashells or driftwood accents. Alternatively, black and white photos in matching black frames can create a modern, minimalist aesthetic. A unified theme ties the display together, making it feel intentional and stylish.
7. Use Symmetry for a Formal Look
Symmetry brings a sense of order and elegance to your photo display. Arrange frames in pairs or mirror images, ensuring the left and right sides of the table are balanced. For example, place two matching 5×7 frames on either side of a centerpiece, such as a vase or candle holder. Symmetry is especially effective on entryway tables or dining room sideboards, where a formal and polished appearance is desirable.
8. Create a Gallery-Like Arrangement
Transform your table into a mini gallery by arranging framed photos in a grid or linear layout. Use uniform frames and space them evenly for a clean and organized appearance. This method works well for showcasing related photos, such as a series from a family vacation or a set of black-and-white portraits. A gallery-style display pairs nicely with minimalist decor, allowing the photos to take center stage.
9. Highlight One or Two Statement Pieces
Instead of overcrowding the table, focus on highlighting one or two statement photos in bold, decorative frames. Center these on the table and keep the surrounding area relatively clear, adding only a few complementary accents. This approach draws attention to the featured photos and works particularly well in small spaces or on narrow tables. Choose high-quality frames with intricate details or unique materials to make the statement pieces stand out.
10. Rotate Photos Regularly
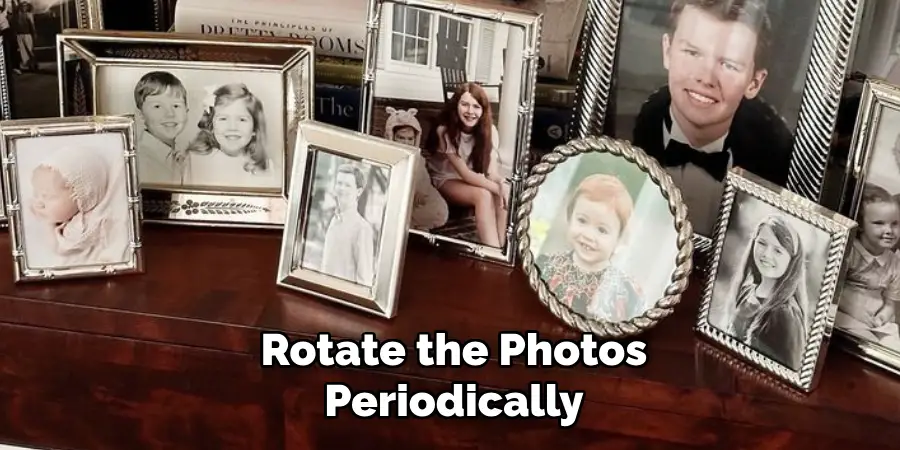
To keep your table display fresh and interesting, rotate the photos periodically. Changing the photos every few months allows you to showcase new memories or highlight seasonal themes. For example, display family portraits during the holiday season and vacation snapshots in the summer. Rotating photos also prevents the display from becoming stagnant, ensuring it remains a lively and engaging focal point in your home.
Maintenance and Upkeep
Maintaining your framed photo display on a table involves a few simple steps to ensure the arrangement remains attractive and in good condition. Regularly dust the frames and the table surface to keep them free of grime and ensure the photos remain clear and visible. Use a soft cloth or a microfiber duster to gently clean the frames and any additional decorative elements. Periodically check the frames and stands for stability, especially if they are elevated on risers or books.
Adjust any frames that have shifted or become unbalanced to maintain a tidy appearance. If you have opted for a rotating display, schedule a regular time to refresh your photos, ensuring that the display evolves with the changing seasons or personal events.
Common Mistakes to Avoid
When creating a framed photo display on a table, several common mistakes can detract from the overall aesthetic. First, avoid overcrowding the table with too many frames or decorative items, as this can create a cluttered and chaotic look. Instead, choose a few meaningful pieces that allow each photo to be appreciated.
Secondly, failing to consider the varying sizes of frames or misaligning them can result in an unbalanced appearance. Take the time to arrange frames in a way that complements their sizes and shapes. Another mistake is neglecting the color and style coherence between frames and the surrounding decor. Selecting frames that clash with your room’s theme or color palette can make your display appear disjointed. Lastly, overlooking lighting can significantly impact the visibility and appeal of your photos.
Conclusion
Creating a framed photo display on a table is not only a way to showcase cherished memories but also an opportunity to enhance your interior décor. By thoughtfully arranging your photos, incorporating decorative elements, and maintaining a cohesive theme, you can transform any table into a personal gallery that reflects your style. Remember to balance the visual elements by avoiding clutter, ensuring symmetry when appropriate, and considering the impact of lighting to create an inviting and aesthetically pleasing display. Thanks for reading, and we hope this has given you some inspiration on how to display framed photos on a table!