
Jumping a power supply unit (PSU) is a useful technique that often comes into play during troubleshooting or testing scenarios. Whether you’re a PC enthusiast or a technician addressing hardware issues, understanding how to jump a PSU is a valuable skill.
This process involves manually activating the PSU to test its functionality without a motherboard. In this guide, we’ll explore the step-by-step process of safely jumping a PSU, emphasizing the precautions to take and the tools required.
From locating the appropriate pins to using a jumper wire or a paperclip, this article provides comprehensive insights for anyone navigating the intricacies of power supply units. Whether you’re seeking to diagnose hardware problems or testing a newly acquired PSU, mastering the art of jumping a PSU is an essential skill for any tech-savvy individual.
Definition of PSU
Before we proceed further into the intricacies of jumping a PSU, it’s crucial to understand what a PSU (Power Supply Unit) really is. In the simplest terms, a PSU is a vital component of any computer system that converts power from the wall outlet into manageable currents that the computer’s components can use.
It distributes this power through a series of cables and connectors, feeding diverse parts of the computer such as the motherboard, hard drives, and graphics cards. The PSU must also regulate this power to prevent fluctuations that could damage the computer’s components.
Essentially, it acts as the heart of a computer, providing the energy necessary for it to function. Understanding the role and operation of a PSU is fundamental in troubleshooting hardware issues or conducting maintenance tasks.
Importance of Jumping a PSU
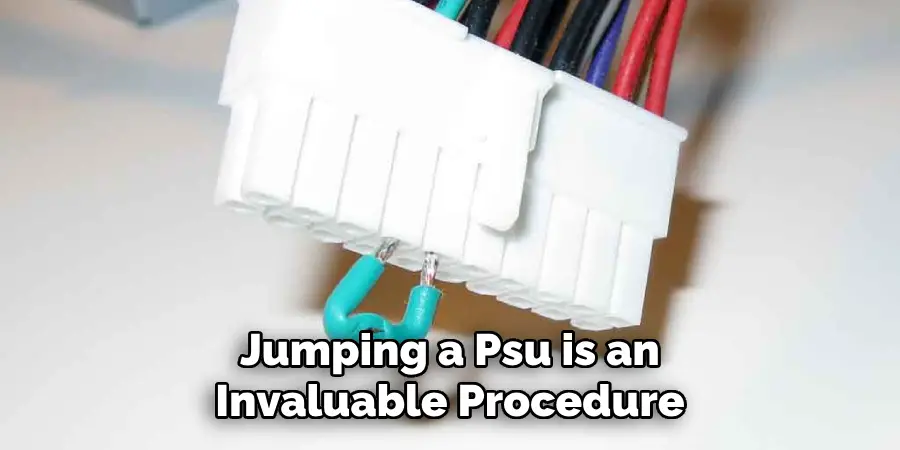
Jumping a PSU is an invaluable procedure for anyone dealing with computer hardware, serving multiple purposes that extend beyond mere troubleshooting. This technique is primarily used to ensure the functionality of the PSU before it is connected to the components of a computer, safeguarding against potential damage from a faulty power supply.
Additionally, for hobbyists and professionals working on custom PC builds or modifications, jumping the PSU allows for the testing of cooling fans, LED lights, and other peripherals without the need for a fully assembled system.
Furthermore, it offers a safe and straightforward method to perform a “paper test” which can diagnose whether the PSU is capable of turning on and off as it should, prior to integrating it into a complex computer setup. In essence, jumping a PSU greatly reduces the risk of hardware failure, ensuring that all components receive a steady and reliable power supply from the outset.
Purpose of Jumping a PSU
The primary purpose of jumping a PSU is to verify its operational status without connecting it to a computer’s motherboard or other components. This preemptive test is crucial for identifying any potential issues with the power supply unit before it’s integrated into a computer system, therefore minimizing the risk of damaging sensitive hardware.
By simulating the power-on process in a controlled environment, technicians and enthusiasts alike can ensure the PSU functions correctly, delivering the correct outputs before applying it to a full build. This step is particularly important when dealing with used or unverified PSUs, where the reliability is unknown.
Jumping a PSU, thus, acts as a fundamental safety measure and diagnostic tool in the toolkit of anyone involved in computer assembly, maintenance, or repair.
Risks and Precautions Associated with Jumping a PSU
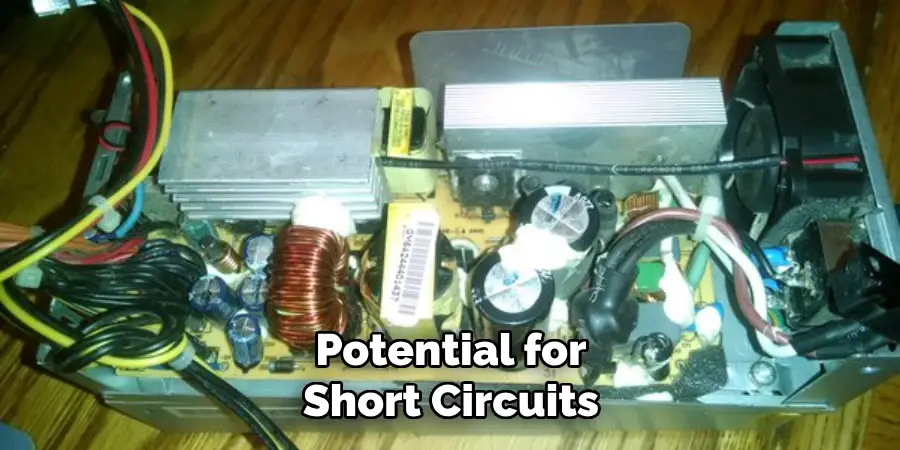
While jumping a PSU is a critical and informative procedure, it’s not without its risks. These risks mainly stem from the handling of electrical components and the potential for short circuits, which could lead to hardware damage or personal injury. It’s therefore essential to exercise caution and adhere to safety protocols to minimize these risks.
Before attempting to jump a PSU, ensure that you’re working in a well-ventilated, dry area to prevent any accidents due to moisture. Always disconnect the power supply from any electrical outlet before making or changing any connections. Using only insulated tools and wearing protective equipment, like safety glasses, can also mitigate risks.
Furthermore, accurately identifying the correct pins on the power supply is crucial. Mistakenly shorting the wrong pins can cause damage to the PSU or create a hazard. It’s advisable to consult the PSU’s manual or look for reliable sources to correctly identify the pin layout.
Lastly, never leave a jumped PSU unattended, and once testing is complete, ensure to remove the bridge (jumper wire or paperclip) before plugging the PSU back into any electrical outlet or connecting it to computer components.
By adhering to these precautions, you can safely and effectively jump a PSU without risking damage to your equipment or yourself.
Components Involved in the Process
Jumping a PSU requires only a handful of components to safely and efficiently complete the process. The primary component is, of course, the power supply unit itself. Besides the PSU, a small piece of conductor, typically a paperclip or a specialized jumper wire, is used to bridge the necessary pins to initiate the PSU’s operation.
It’s essential to ensure that the conductor is metal and conducts electricity well. In terms of safety and precaution, using insulated gloves offers an extra layer of protection, preventing any accidental shocks. Additionally, having a multimeter on hand can be extremely beneficial. A multimeter allows for the measurement of voltage output by the PSU, ensuring it operates within the correct parameters.
Lastly, protective eyewear should be considered to safeguard against any unexpected sparks or debris that might occur during the process. Together, these components facilitate a safe environment for jumping a PSU, allowing users to test its functionality without connecting it to a computer’s motherboard.
10 Methods How to Jump a PSU
1. Locating the PSU Pins:
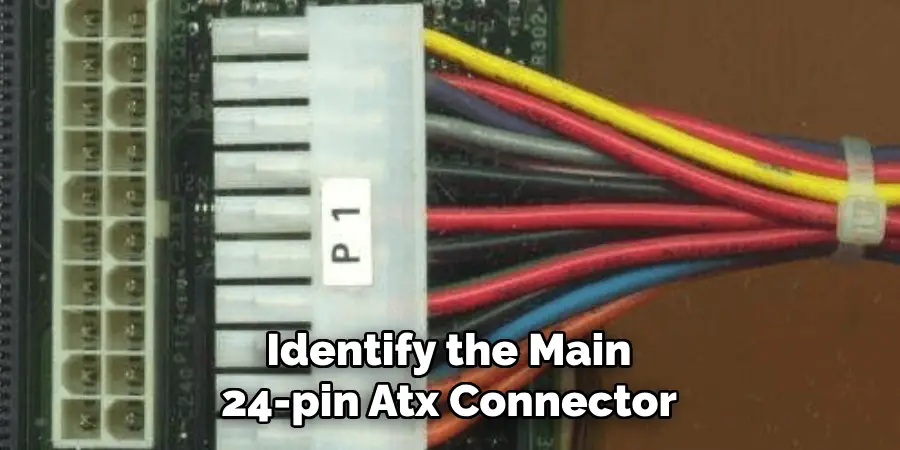
Identify the main 24-pin ATX connector on the PSU. This connector powers the motherboard and is crucial for jumping the PSU. Additionally, some PSUs may have a 4-pin or 8-pin CPU connector, which may also need to be considered based on the specific PSU model. While locating the PSU pins, it is important to be mindful of electrostatic discharge (ESD) and handle all components with care.
Another crucial pin to locate is the 6-pin or 8-pin PCIe connector, which powers graphics cards. This connector may also need to be connected depending on the type of GPU being used and its power requirements. Additionally, some PSUs may have SATA power connectors for connecting storage drives and Molex connectors for peripheral devices. These pins can usually be found on the same side as the ATX connector but may vary depending on the PSU model.
It is recommended to consult the PSU manual or research online for specific pin locations and configurations based on your unique build. Once all necessary PSU pins are located, make sure to securely plug them into their respective components. This will ensure proper power delivery and prevent any potential damage to the system.
2. Understanding Pin Layout:
Familiarize yourself with the pin layout of the 24-pin ATX connector. The layout typically includes a green wire (PS_ON) and a black wire (COM). The green wire is the one that needs to be connected to another wire to activate the PSU. This setup allows the motherboard to send a signal to the PSU, telling it when to turn on and off.
Some motherboards may have additional pins or different colored wires for specific features such as power/reset buttons, CPU fan control and temperature monitoring. Refer to your motherboard’s manual for more information on these additional pins and their functions.
It is important to note that not all PSUs have the same pin layout, so always refer to the manual or label on your PSU to ensure correct connections. Additionally, some modular PSUs allow for customization of the pin layout depending on your system’s needs. This allows for a cleaner and more organized cable management.

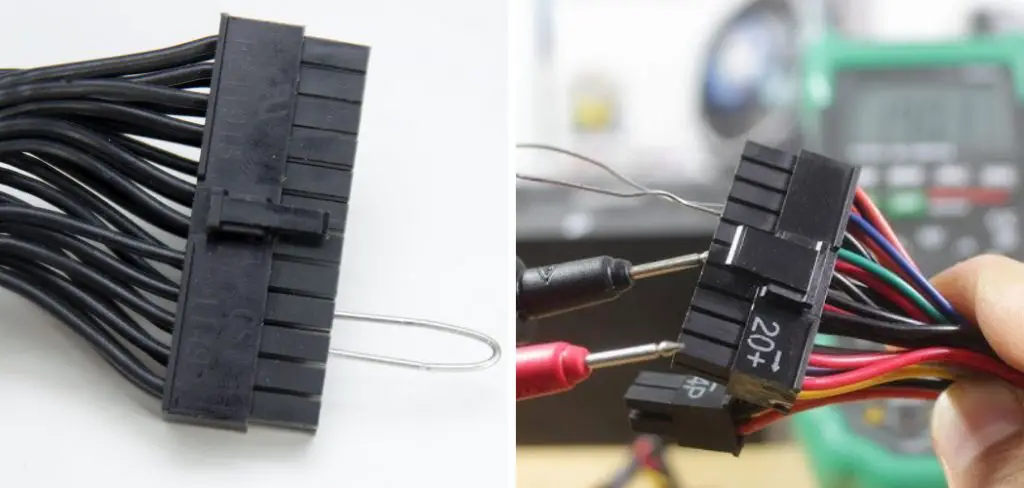
3. Using a Paperclip:
One of the simplest methods involves using a paperclip to bridge the PS_ON (green) wire and any COM (black) wire on the 24-pin ATX connector. Carefully insert one end of the paperclip into the green wire’s pin and the other end into any black wire’s pin to complete the circuit.
Once you have successfully bridged the PS_ON wire and any COM wire, your power supply will turn on. However, this method should only be used as a temporary solution or for diagnostic purposes.
It is important to note that using a paperclip can be dangerous and should be done with caution. Make sure to unplug the power supply before attempting this method and handle the paperclip carefully to avoid any electrical shocks.
4. Utilizing a PSU Jumper:
A dedicated PSU jumper is a purpose-built tool designed for jumping power supplies. These jumpers often come in the shape of a small clip with connectors that easily fit onto the PSU’s 24-pin ATX connector, making the process more straightforward. PSU jumpers are commonly used in situations where a power supply needs to be tested or turned on without being physically connected to a motherboard.
Using a PSU jumper is relatively simple. First, make sure the power supply is disconnected from any power source. Then, locate the 24-pin ATX connector on the power supply and attach one end of the PSU jumper to the green wire and the other end to any black wire on the same connector. This will simulate a power switch being pressed, turning on the power supply.
5. Crafting a Jumper Wire:
If a PSU jumper isn’t available, you can create a makeshift jumper wire using a piece of insulated wire. Ensure that the wire is long enough to reach both the PS_ON and COM pins on the 24-pin ATX connector. Use caution to prevent short circuits. Although this method is not recommended for beginners, it can be an effective solution if you don’t have access to a PSU jumper or need one in a pinch.
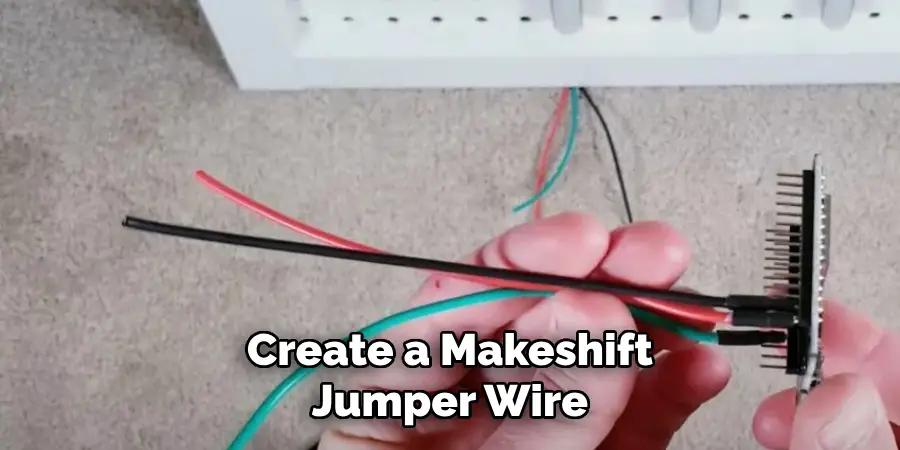
To create the jumper wire, strip about 1 cm of insulation from each end of the wire. Then, insert one end into the PS_ON pin and the other into the COM pin on the connector. Be careful to not let the exposed ends of the wire touch each other or any other metal components. Once inserted, use electrical tape to secure the wire in place and prevent any accidental movements.
6. Using a Switch:
For those looking to add a bit of convenience to the process, installing a switch can be beneficial. Connect one end of the switch to the PS_ON (green) wire and the other end to any COM (black) wire, allowing for easy activation and deactivation of the PSU. This is especially useful for those who frequently work on their computer, as it eliminates the need to unplug and plug back in the PSU every time.
Another option for controlling the power supply is using a Raspberry Pi or Arduino board. These small computers can be programmed to turn on or off the PSU with just a few lines of code. With this method, users can even schedule when the computer should turn on and off, making it ideal for those who want to save energy or have their computer ready and waiting for them at a specific time.
7. Testing with a Multimeter:
Before jumping the PSU, consider testing its voltage with a multimeter. This ensures that the PSU is functioning correctly and helps identify potential issues before proceeding with the jumping process. However, it is essential to note that multimeters can be dangerous if not used correctly. Hence, it is crucial to follow safety precautions and read the user manual before performing any tests.
To begin with, make sure that the PSU is unplugged from all power sources and disconnected from the computer. This step helps prevent electrical shocks or damage to the computer’s components. Next, set the multimeter to measure DC voltage and select a range that is higher than the PSU’s output. For example, if the PSU has a maximum output of 500 watts, select a range above 12 volts.

8. Jumping Additional Connectors:
Some PSUs may require jumping additional connectors, such as the 4-pin or 8-pin CPU connector. Understand the specifications of your PSU and motherboard to determine if these connectors need to be addressed during the jumping process. If so, consult the motherboard manual to locate these connectors and follow the same steps as mentioned for other connectors.
In some cases, you may also need to jump additional connectors for peripherals such as graphics cards or storage devices. Again, refer to the specifications of your PSU and devices to determine if this is necessary. If so, carefully locate and connect the appropriate cables according to the manufacturer’s instructions.
It is important to note that not all PSUs and devices require jumping of additional connectors. However, it is always best to consult the manuals and specifications to ensure proper installation and functionality.
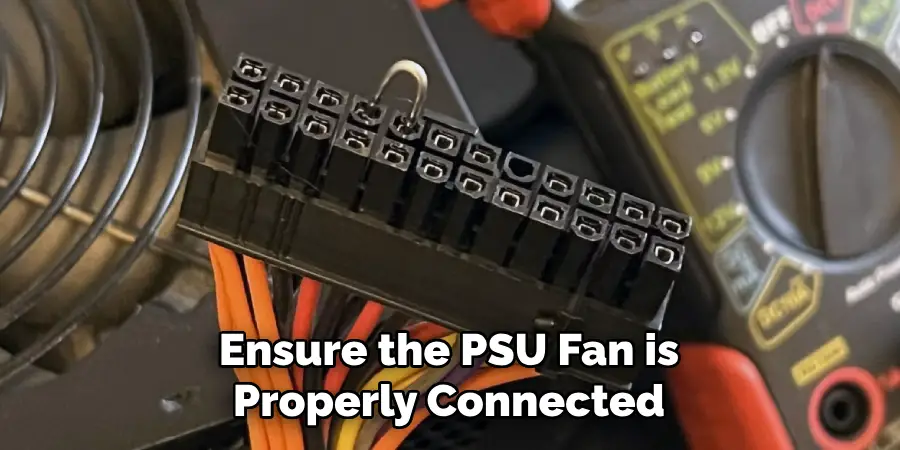
9. Checking PSU Fan Activation:
Once the PSU is jumped, observe whether the PSU fan starts spinning. This is an indication that the PSU is operational. If the fan remains inactive, it may signal a problem with the PSU or the jumping process.
To troubleshoot, try jumping the PSU again or replacing it with a known working one. To ensure the PSU fan is properly connected, check for any loose connections or cables. If everything looks good and the PSU fan still does not spin, it may be time to replace the PSU.
In addition to checking the PSU fan activation, it is important to also monitor the temperature of the PSU while in use. Overheating can cause damage to components and reduce overall performance. Utilizing tools such as thermal monitoring software can help track and alert of any potential issues with the PSU temperature.
If the PSU is consistently running at high temperatures, it may be a sign of poor ventilation in the system or an insufficient power supply for the workload.
10. Practicing Safety Measures:
Prioritize safety by ensuring the PSU is unplugged from the wall before attempting to jump it. Exercise caution when handling paperclips or wires to prevent electric shocks or short circuits. If uncertain, consult the PSU and motherboard manuals for specific guidance. Make sure to also discharge any static electricity by touching a grounded surface before handling components.
Conclusion
In conclusion, mastering the technique of jumping a PSU is a valuable skill for troubleshooting and testing computer hardware. By understanding the purpose, risks, and methods involved in PSU jumping, users can confidently diagnose power-related issues and ensure the proper functioning of their systems.
Whether employing the paperclip method or dedicated PSU jumper cables, adherence to safety precautions and best practices is paramount to prevent damage to components and ensure personal safety. Performing the jump accurately and verifying its success through careful observation helps users identify potential faults and address them effectively.
Hopefully, this article gave you some helpful tips about how to jump a psu successfully, so now that you have the proper knowledge on how to get the job done, why not give it a try today?