
When striving for a professional quality mix, many focus on the latest gear or invest heavily in top-tier studio monitors. However, few realize that even the highest-end monitors cannot compensate for poor placement. Learning how to position studio monitors is a game-changer that can elevate your entire production, ensuring what you hear is an accurate representation of your audio. Monitor placement directly influences stereo imaging, frequency response, and the critical details you rely on for mixing and mastering. This guide provides clear, actionable advice on how to position studio monitors so your space helps—rather than hinders—your mixing decisions.
The Foundation: Understanding the Equilateral Triangle Rule
Why Monitor Placement Shapes Your Mix
Before plugging in cables or sliding gear across your desk, it’s crucial to grasp the principle that forms the backbone of nearly every successful mixing setup: the equilateral triangle rule. This rule underscores the importance of spatial geometry in your studio.
Implementing the Triangle
Imagine your two monitors and your head as the three points of an equilateral triangle. The idea is simple: measure the distance between the centers of both monitors, then replicate that exact distance from each monitor to your normal listening position. For example, if your monitors are three feet apart (from center to center), place your chair so your head is also three feet from each monitor. This setup helps create precise stereo imaging, allowing you to hear spatial cues and panning decisions exactly as intended.

Fine-Tuning for Your Room
While the equilateral triangle offers a solid foundation, take note of the room’s dimensions and your workflow preferences. Adjust as necessary, but always strive to maintain equal distances wherever possible. Small tweaks—angling the monitors slightly inward or repositioning your chair—can further refine imaging without introducing acoustic issues.
Setting the Height and Angle: Tweeters at Ear Level
The Importance of Vertical Placement
Once your monitor positions are mapped out horizontally, vertical setup is your next focus. The tweeters, often the smallest drivers in your speaker, should align directly with your ears when you are seated in your usual working position. High frequencies are highly directional, so even slight misalignments can skew your perception, making the mix sound dull, harsh, or simply inaccurate.
Toe-In for Precision
After adjusting height, turn your attention to the angle, or “toe-in,” of the monitors. Rather than having your monitors face straight ahead, angle them inward so that they are pointing directly at your ears—not behind your head or too far forward. The goal is to create a sweet spot where the stereo image is at its sharpest and most reliable.

Real-World Setup Tips
If you have adjustable monitor stands, use them to achieve this alignment. If not, elevate your monitors safely using books or foam platforms, but ensure they’re stable. Mark the ideal spot on your chair and desk so you maintain consistency from session to session.
How to Position Studio Monitors: Managing Distance from Walls and Corners
The Overlooked Role of Room Boundaries
Your next challenge is the distance between your monitors and the room’s boundaries, particularly walls and corners. These surfaces can boost or reduce certain frequencies, impacting the clarity and honesty of your mix.

Understanding Speaker Boundary Interference Response (SBIR)
SBIR describes the acoustic phenomena that occur when low-frequency sound waves bounce off walls and interact with the output from your monitors. Placing monitors too close to the rear wall can produce a “bass bump”—an artificial boost at certain low-end frequencies. Alternatively, certain frequencies may cancel each other out, leaving your mix sounding thin or uneven.
Avoiding the Corner Trap
Placing monitors in corners will often exaggerate bass frequencies unevenly, making it nearly impossible to mix the low end accurately. Corners serve as natural amplifiers for bass energy, so avoid stationing your speakers where two walls meet.
Recommendations for Optimal Placement
If your room permits, start by positioning your monitors between one and three feet away from the wall behind them. This often provides a reasonable balance between manageable bass response and space efficiency. Move your setup in small increments and listen to the changes—a slight repositioning can remove muddiness or decrease booming bass.

Addressing Small Room Headaches
In compact studios, you may be limited in how far speakers can be placed from walls. In such cases, experiment with minor tweaks and consider adding acoustic treatment (explored below). Above all, keep your monitors out of corners and avoid pushing them flat against any wall.
Decoupling and Isolation: Stands and Isolation Pads
Why Decoupling Matters
Monitors that rest directly on a desk or shelf can transmit vibrations into those surfaces. These vibrations create secondary resonances that color the sound you hear, often causing muddiness or exaggerated low-end frequencies.
Solutions for Reducing Vibrations
Isolation Pads: The Accessible Fix
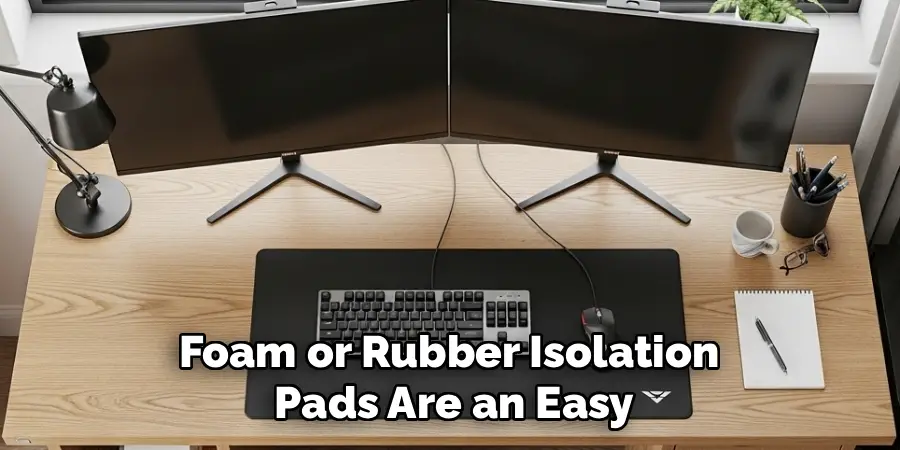
Foam or rubber isolation pads are an easy and affordable way to decouple your monitors. Placing a pad beneath each monitor absorbs vibrations before they reach your desk, reducing unwanted resonance and clarifying your sound.
Monitor Stands: The Professional Choice
For maximum isolation, monitor stands are ideal. Heavy-duty, mass-loaded stands support the monitors at the proper height and decouple them from any surface. If your budget allows and your room can accommodate them, stands almost always yield the clearest results.
Choosing the Right Solution
For most home and project studios, isolation pads offer a practical improvement. However, whenever possible, invest in monitor stands or a combination of both for the most faithful monitoring experience.
Taming the Room: Introduction to Acoustic Treatment
Acoustic Treatment Versus Soundproofing
It’s essential to distinguish between making your room sound better (acoustic treatment) and keeping sound from leaving the room (soundproofing). Here, our goal is to treat the room so it reveals an accurate, uncolored mix.
Identifying First Reflection Points
What Are First Reflection Points?
After sound leaves your monitors, it bounces off nearby walls and ceiling surfaces, then reflects back toward your listening position. These initial points of reflection can smear the stereo image and mask important mix details.
The Mirror Trick
Sit in your listening position and have a friend move a mirror along the wall. Wherever you can see either speaker in the mirror, that’s a first reflection point. Place absorption panels (such as dense foam or fiberglass panels) at these locations to dampen those early reflections and tighten your soundstage.
Using Bass Traps for Low-Frequency Control
Corners are notorious for accumulating excess bass energy. Bass traps—thick, absorptive panels placed in vertical and horizontal corners—can absorb low frequencies, leading to a more controlled, neutral low end. Even two or four traps can make a discernible difference in a small room.
Integrating Treatment with Placement
Even the best-positioned monitors need a well-treated room. Balancing monitor placement and room treatment provides the most honest and reliable mixing environment possible.
The Desk Problem: Minimizing Surface Reflections
How Desks Affect Mixing Accuracy
Every studio has a desk, and unfortunately, large flat surfaces between your ears and the monitors can reflect and distort sound. When audio bounces off your desk before reaching your ears, it forms “comb filtering”—interfering patterns that muddle vocals and certain instruments.
Practical Solutions
If possible, use a smaller desk or one with acoustically transparent features (wire mesh or minimal surfaces). Alternatively, angle your monitors slightly upward so their sound bypasses the desk and travels directly to your ears. For mix engineers working with a console, keep the speakers just above and behind it, using stands when feasible.
Fine-Tuning for Your Workflow
Consistency is key. Once you find a setup that minimizes desk reflections without sacrificing workflow, mark those positions so you can return to them easily.
Integrating a Subwoofer: Achieving Seamless Low-End
The Role of a Subwoofer in Your Monitoring System
If your setup includes a subwoofer, integrating it with your monitors requires additional care. The crossover frequency—the point where the sub takes over from the main monitors—should typically be set around 80Hz.
The Subwoofer Placement Trick
Try the “sub crawl”: temporarily place your subwoofer on your primary listening seat, then play a steady bass tone through your system. Walk around the room and note where the bass response is smoothest and most even. Place the subwoofer in that spot—it’s where the frequencies combine most favorably in your room.
Balancing the System
After positioning, adjust the sub’s level and phase until the bass integrates naturally with your monitors. Avoid localizing the bass source; it should sound as if it comes from both monitors, not just the sub.
Calibration and Verification: Trust, but Verify
Why Calibration Matters
Even after careful setup, it’s vital to verify that your monitors are accurately representing your audio. Calibration involves ensuring every element—from balance to frequency response—is dialed in.
Using an SPL Meter
A simple SPL meter, or even a well-reviewed smartphone app, can check that both monitors are producing equal output at your listening position. Play a mono pink noise track and measure the sound level, adjusting levels to match as needed for a consistent stereo image.
Turning to Room Correction Software
For further optimization, room correction software, such as Sonarworks SoundID Reference, uses a measurement microphone to analyze your room’s acoustic response. The software can then process audio signals, flattening out troublesome peaks and dips so your monitors provide studio-grade accuracy.
Making Adjustments Over Time
Rooms shift, furniture moves, and tastes change. Revisit your setup periodically, especially after adding new gear, treating more surfaces, or making significant room changes.
Common Mistakes to Avoid
Spacing and Geometry Errors
It’s easy to inadvertently place monitors too far apart, breaking the equilateral triangle concept and producing a hole in the stereo center. Likewise, placing them too close narrows the image. Always double-check your measurements.
Positioning Monitors Incorrectly
Monitors should almost always be placed upright. Only if a model specifically allows horizontal placement should you consider laying them on their side, as this can adversely affect their dispersion characteristics.
Ignoring Wall and Surface Effects
Pushing monitors against walls creates unnatural bass buildups. Leaving surfaces untreated, especially at first reflection points, leads to smeared mids and loss of clarity.
Overlooking Calibration
Simply having good monitors isn’t enough; failing to calibrate and periodically check your setup means you could be making mix decisions based on flawed playback, even if everything else seems correct.
Conclusion
Learning how to position studio monitors effectively transforms your mixing environment from “good enough” to truly professional. With careful attention to geometry, acoustic treatment, and calibration, you ensure that every pan, EQ move, and balance decision translates beyond your studio. Remember, accurate monitoring is a journey, not a one-time event. Each incremental adjustment takes you closer to a reliable and inspiring workspace.
Use the principles outlined in this comprehensive guide on how to position studio monitors, and you’ll empower yourself to mix with confidence, creativity, and accuracy, turning your studio into an environment where every detail counts.