Adding rattan to a cabinet door is a stylish way to rejuvenate and customize your furniture, bringing a touch of natural elegance to any room. This versatile material not only enhances the aesthetic appeal but also provides a unique texture that sets your cabinetry apart. This guide will walk you through how to put rattan on cabinet door, providing tips and techniques to help simplify the task.
The process of applying rattan involves careful preparation and adherence to detail, ensuring the end result is both durable and visually appealing. Whether you are updating an old piece or designing something entirely new, integrating rattan can transform your cabinet into a standout feature of your home decor.

What Is Rattan?
Rattan is a natural material derived from a specific type of palm tree native to tropical regions of Africa, Asia, and Australasia. Known for its durability and flexibility, rattan is widely used in furniture making, offering both strength and aesthetic appeal.
The material is characterized by its slender, reed-like appearance, which is harvested and processed into strips or woven into intricate patterns. Rattan is particularly favored in furniture design for its lightweight nature, making it easy to move and handle, while still providing robust support. Its earthy tones and natural texture make it an ideal choice for adding warmth and organic charm to any interior space.
Benefits of Adding Rattan to Cabinet Doors
Adding rattan to cabinet doors offers several benefits that enhance both style and functionality. One primary advantage is the aesthetic appeal; rattan introduces a natural, warm look that complements a variety of interior design styles, from bohemian to coastal themes.

Additionally, rattan is a lightweight yet durable material, making it an ideal choice for cabinet doors. It allows for improved air circulation, which is particularly beneficial for cabinets that store items like linens or spices. Moreover, rattan is an eco-friendly option, as it is a sustainable material that grows rapidly and requires minimal processing. By choosing rattan, you not only enrich your space visually but also contribute to a more environmentally conscious home.
10 Methods How to Put Rattan on Cabinet Door
1. Choosing the Right Rattan
Before you begin, it’s important to select the right type of rattan for your project. Rattan comes in different styles and weaves, such as flat cane, round reed, and cane webbing. Cane webbing is the most popular option for cabinet doors because it has an open weave that allows for airflow, making it both functional and decorative.
You’ll also need to choose the right color tone—whether you prefer natural, bleached, or stained rattan to match your space. Once you’ve selected the rattan, cut it to the size of your cabinet doors, allowing extra material for adjustments.
2. Measuring and Cutting the Cabinet Doors
Before applying the rattan, it’s crucial to measure and cut your cabinet doors precisely. If your cabinet doors are flat panel, you can apply the rattan directly to the surface. However, if your cabinet doors are raised panel or inset, you may need to modify the door by creating an opening for the rattan.

Use a tape measure to determine the size of the area where the rattan will be placed. Then, use a jigsaw or table saw to cut the inner panel of the door if needed, leaving a border or frame around the edges. This frame will support the rattan and provide a neat, finished look.
3. Soaking the Rattan for Flexibility
Rattan cane webbing tends to be stiff when dry, so soaking it in water before application will make it more flexible and easier to work with. Fill a bathtub or large container with warm water and submerge the rattan for about 20 to 30 minutes. Soaking the rattan softens the fibers, allowing it to stretch and conform to the shape of your cabinet door. Once soaked, gently shake off any excess water and let it dry for a few minutes before moving on to the next step.
4. Attaching Rattan with Glue
One of the easiest ways to secure rattan to your cabinet doors is by using a strong adhesive or wood glue. After cutting the rattan to size and soaking it for flexibility, apply wood glue to the back of the rattan or the surface of the cabinet door where it will be attached. Press the rattan firmly onto the door, making sure it lies flat and smooth. Use clamps or heavy books to hold the rattan in place while the glue dries. Once the glue has fully cured, trim any excess rattan from the edges for a clean finish.
5. Using Staples or Brads for Reinforcement
For added security, especially for larger cabinet doors, you can use staples or brads to reinforce the rattan. After applying glue, position the rattan on the cabinet door and use a staple gun or brad nailer to attach the rattan along the edges of the door frame. Make sure to drive the staples or brads into the frame and not into the rattan itself to prevent damage to the weave. This method ensures the rattan stays in place and prevents any sagging over time, particularly for high-traffic or frequently opened cabinets.
6. Creating a Recessed Panel for Rattan
If you want to achieve a professional, high-end look, consider creating a recessed panel on your cabinet doors specifically for the rattan. This involves routing out a section of the door so that the rattan sits flush with the surrounding wood frame.
To do this, use a router to carve out the inner panel of the door, leaving a lip or groove where the rattan can be tucked in. Once the panel is cut, attach the rattan using glue and secure it in place with staples or brads. The recessed panel creates a polished, seamless appearance and adds depth to the cabinet design.

7. Trimming the Edges with Molding
To give your rattan-inlaid cabinet doors a refined, finished look, you can add decorative molding or trim around the edges of the rattan. After securing the rattan to the cabinet door, measure and cut thin strips of wood trim to fit around the perimeter of the panel. Attach the trim with wood glue or small finishing nails, ensuring that it overlaps the edges of the rattan slightly to hide any rough or uneven cuts. Molding adds a frame-like effect to the cabinet doors and enhances the overall design by giving it a clean and professional look.
8. Painting or Staining the Cabinet Door Frame
To achieve a cohesive look, consider painting or staining the cabinet door frame after applying the rattan. Choose a color that complements the natural tone of the rattan, such as a neutral white or soft pastel for a coastal vibe, or a deep brown for a more rustic, earthy look.
Before painting or staining, be sure to tape off the rattan to prevent any accidental drips. Apply two coats of paint or stain, allowing each coat to dry thoroughly. The contrast between the rattan and the painted or stained wood will highlight the intricate texture and give your cabinets a fresh, updated appearance.
9. Securing Rattan with a Back Panel
For cabinet doors with open or recessed areas, you can use a back panel to secure the rattan and give it additional support. After attaching the rattan to the front of the door using glue or staples, cut a thin plywood or MDF panel to fit the back of the cabinet door. Attach the back panel using wood glue or screws, ensuring that it sandwiches the rattan between the panel and the door frame. This method provides extra durability and prevents the rattan from sagging or becoming loose over time.
10. Applying a Protective Finish
To protect the rattan and ensure its longevity, consider applying a protective finish, such as a clear varnish or polyurethane. A protective finish will help seal the rattan, preventing it from drying out, cracking, or becoming damaged from moisture and daily wear. Before applying the finish, make sure the rattan is completely dry and free of dust or debris.
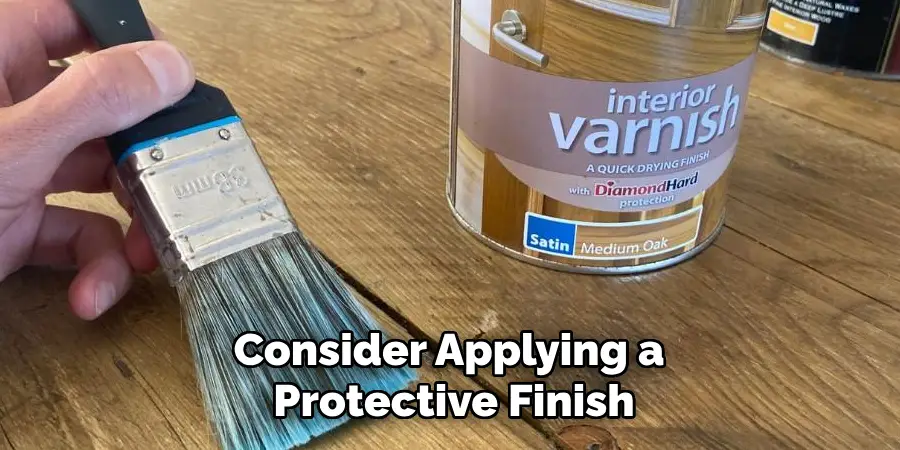
Use a brush or spray applicator to apply a light coat of varnish, making sure to cover both the rattan and the surrounding wood frame. Allow the finish to dry completely before using the cabinets. This final step adds durability and enhances the natural beauty of the rattan.
Conclusion
Incorporating rattan into your cabinet doors is an excellent way to refresh and elevate the aesthetic of any space. By following the steps outlined—from measuring and preparing the surface to applying a protective finish—you can achieve a stylish, durable, and unique design that highlights the natural beauty of rattan.
Whether you aim for a rustic, coastal, or modern look, the versatility and texture of rattan make it a timeless choice for both contemporary and traditional interiors. With a little planning and attention to detail, your DIY rattan cabinet doors will be a stunning focal point in your home for years to come. Thanks for reading, and we hope this has given you some inspiration on how to put rattan on cabinet door!