A Swingline stapler is a staple of many offices and homes, known for its reliability and durability. However, like any mechanical device, it can sometimes encounter issues that hinder its performance. A jammed or malfunctioning stapler can disrupt your workflow and cause unnecessary frustration.

The good news is that most common problems can be fixed with a bit of know-how and a few simple tools, saving you the time and expense of buying a replacement.
Learning how to perform basic repairs on your Swingline stapler not only extends its life but also promotes a more sustainable approach to office supplies. Instead of discarding a perfectly good tool, you can restore it to full function.
This guide on how to repair a swingline stapler provides a comprehensive, step-by-step process to help you diagnose and resolve common stapler issues, ensuring your trusted tool is always ready for action when you need it most.
7 Simple Step-by-step Guidelines on How to Repair a Swingline Stapler
Step 1: Gather Your Tools and Prepare the Workspace
Before you begin any repair, it’s essential to gather the necessary tools and set up a clean, well-lit workspace. Having everything you need within reach will make the process smoother and prevent you from having to search for items mid-repair.
You will likely need a pair of needle-nose pliers, a small flathead screwdriver or a similar prying tool, a can of compressed air, and a clean, dry cloth. It’s also wise to have a small container to hold any tiny parts, like springs or pins, that you might remove during the disassembly process.
Once your tools are assembled, prepare your work area. Lay down a light-colored towel or mat on a flat surface like a desk or table. This not only protects the surface from scratches but also makes it easier to spot any small components that might fall out of the stapler.
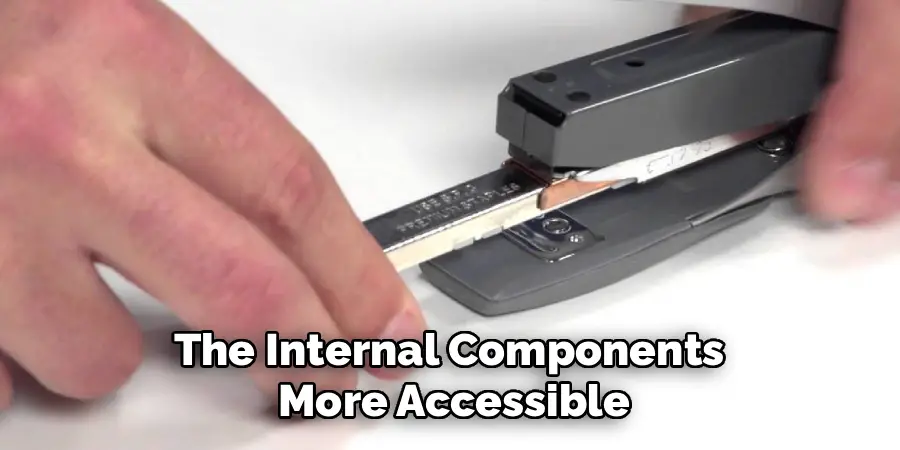
Ensure you have adequate lighting to see the inner workings of the device clearly. Unload any staples from the stapler before you start to prevent accidental stapling and to make the internal components more accessible. This initial preparation is a crucial first step that sets the stage for a successful and stress-free repair.
Step 2: Open the Stapler and Inspect the Magazine
The next step is to open the stapler completely to access its internal components, particularly the staple magazine or channel where staples are loaded. Most Swingline staplers open by pulling the top arm all the way back until it lies flat.
This action exposes the entire track. With the stapler open, you can begin a thorough visual inspection. Look for any obvious signs of a problem, such as a mangled staple, a piece of debris, or a bent staple strip that is preventing the follower spring from pushing the staples forward properly.
Carefully examine the entire length of the magazine. Check the rails for any dirt, dried adhesive from tape, or other residue that could impede the smooth movement of the staples. Also, inspect the pusher mechanism, which is the spring-loaded part that applies pressure to the staple strip. Ensure it moves freely and is not bent or caught on anything.
Sometimes, the problem is as simple as a staple strip that has broken in the middle, causing the pieces to overlap and jam. Identifying the root cause at this stage will guide the rest of your repair efforts and often leads to a quick resolution without needing to disassemble the stapler further.
Step 3: Clear Any Visible Jams or Debris
Once you have identified a jam, the primary task is to clear it carefully. Most jams are caused by a staple that has become twisted, bent, or wedged in the firing mechanism at the front of the stapler. Use your needle-nose pliers to gently grasp the misfired staple and pull it out.
It’s important to pull it straight out in the direction of the staple path to avoid damaging the delicate components of the stapler’s head. If the staple is severely mangled, you may need to wiggle it back and forth carefully to loosen it before it can be removed. Avoid using excessive force, as this could bend the metal plates that guide the staple.
After removing the jammed staple, use a can of compressed air to blow out any smaller metal fragments, dust, or other debris from the magazine and the firing mechanism. Tiny shards from broken staples can often be the cause of recurring jams, so a thorough cleaning is vital.
You can also use a dry cloth or a small, stiff brush to wipe down the inside of the magazine and the pusher. If you find any sticky residue, a cloth lightly dampened with rubbing alcohol can be effective, but ensure the area is completely dry before reloading staples. This cleaning process ensures that the staples can move smoothly along the track without any obstruction.
Step 4: Examine the Pusher and Spring Mechanism
The pusher and its associated spring are critical for feeding staples correctly. If this mechanism is faulty, the stapler will fail to load the next staple into the firing position. With the stapler still open, carefully examine the pusher—the small metal or plastic piece that slides along the track behind the staples.
Check to see if it is bent, cracked, or misaligned. The pusher should sit squarely on the rails and be able to slide smoothly from the back to the front of the magazine without catching or wobbling. If it appears damaged, it may need to be straightened or replaced.
Next, inspect the spring that provides tension to the pusher. This is often a long, coiled spring or a flat leaf spring. Verify that the spring is properly attached at both ends and is not stretched out, kinked, or broken. A weak or damaged spring will not provide enough force to push the staples forward, leading to feeding issues.
Gently slide the pusher back and forth along the track to test the spring’s tension. It should offer consistent resistance and snap back into place when released. If the spring is loose or detached, you may be able to re-hook it using your needle-nose pliers. A damaged spring is one of the more common points of failure in older staplers.
Step 5: Inspect the Striker Blade and Anvil
The striker blade (or driver) is the metal plate in the top arm that pushes the staple out and through the paper. The anvil is the metal plate on the base where the staple legs are bent to secure the pages. Both parts must be in good condition for the stapler to function correctly. Close the stapler arm and press it down slowly without any staples loaded.

Watch the striker blade as it extends. It should be perfectly straight and move smoothly. If the blade is bent, chipped, or misaligned, it can cause staples to jam or buckle instead of penetrating the paper. A bent striker can sometimes be carefully straightened with pliers, but a severely damaged one may require a replacement part.
After inspecting the striker blade, turn your attention to the anvil on the base. Most Swingline anvils can be rotated to produce either a standard clinch (legs bent inward) or a temporary pin (legs bent outward). Check that the anvil is clean and free of debris. Look closely at the two small grooves where the staple legs are formed.
Over time, these grooves can become worn down or filled with compacted paper dust and metal shavings. Use the tip of a small screwdriver or a sturdy pin to clean out these grooves. A worn anvil will not be able to properly curl the staple legs, resulting in staples that are not securely fastened.
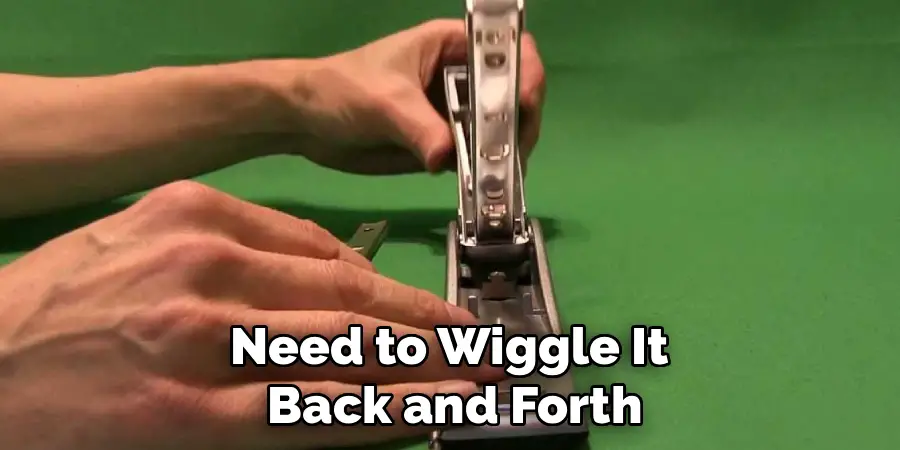
Step 6: Minor Disassembly for Deeper Cleaning and Realignment
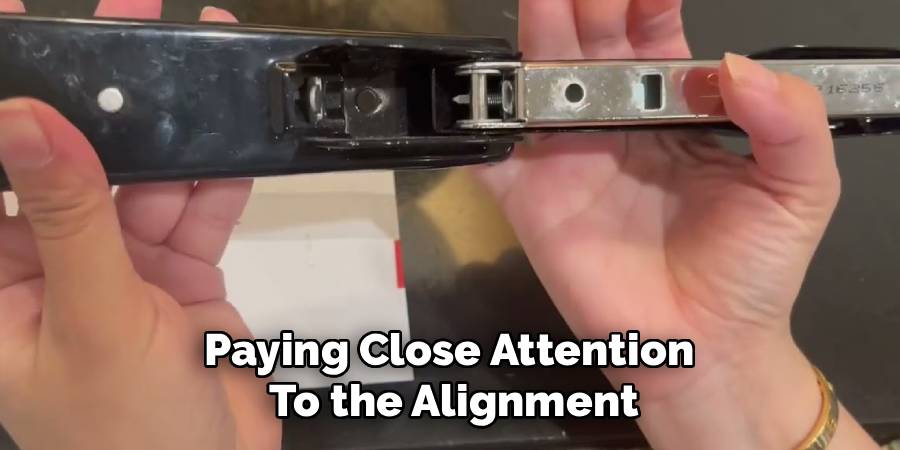
If the previous steps haven’t resolved the issue, a minor disassembly might be necessary to address a more deep-seated problem. This can be intimidating, but on most Swingline models, it’s a manageable task. Often, the magazine channel is attached to the base by a pin or rod near the hinge.
You can typically remove this pin using a small punch or the tip of a screwdriver to push it out. Be cautious and apply steady pressure. As you remove the pin, pay close attention to how the components fit together and if any springs are under tension.
Taking a photo with your phone before and during disassembly can be an invaluable reference when it’s time to put everything back together.
With the magazine assembly separated from the base, you have much better access to all the nooks and crannies. This is an excellent opportunity for a deep cleaning. Thoroughly clean the inside of the magazine, the rails, the firing mechanism, and the hinge area. Check for any hidden debris or bent parts that were not visible before.
This is also the time to realign any components that may have shifted. For example, the plates that form the channel for the striker blade can sometimes become slightly bent or separated. You can often use needle-nose pliers to gently squeeze them back into their correct alignment, ensuring a clear path for both the striker and the staples.
Step 7: Reassembly and Testing
Once you have cleaned, repaired, and realigned all the components, it’s time to reassemble your stapler. Work backward from the disassembly process, using your photos as a guide if needed. The most challenging part is often reattaching any springs under tension.
Patience is key. Use your needle-nose pliers to grip the spring and carefully guide it back into its proper position. Re-insert any pins or rods you removed, making sure they are fully seated and secure.
Double-check that all parts are correctly aligned and move freely before proceeding. The stapler arm should open and close smoothly without any grinding or catching.
With the stapler fully reassembled, the final step is to test it. Load a fresh, full strip of high-quality staples—using the correct size recommended for your model is crucial. Close the stapler and try stapling a few sheets of paper.
Start with a small stack, perhaps two or three pages, and check if the staple goes through cleanly and the legs are properly clinched on the back. Gradually increase the number of sheets to test its capacity. If it operates smoothly, you have successfully repaired your Swingline stapler.
If it still jams, you may need to revisit the previous steps to see if you missed anything, paying close attention to the alignment of the striker and the staple magazine.
Following these steps on how to repair a swingline stapler may take some time and practice, but it can save you money from having to buy a new one. Plus, being able to fix your own stapler is a handy skill to have in case of emergencies.
Do You Need To Use Professionals?
For most common issues like jams and misfeeds, a professional repair is usually not necessary. The steps outlined above can resolve the majority of problems.
However, you might consider seeking professional help or contacting Swingline support if a critical component is broken, such as a cracked base, a snapped main spring, or a fractured striker blade that you cannot source a replacement for.
If the stapler is a vintage or high-end electric model with complex internal wiring, professional service is also the safer option to avoid causing further damage or injury. For standard, everyday models, a DIY approach is typically sufficient and cost-effective.
How Much Will It Cost?
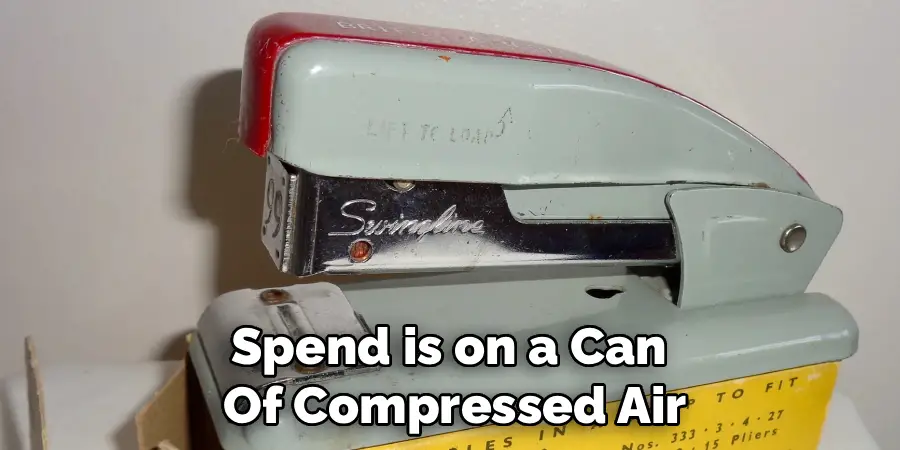
The cost of repairing a Swingline stapler yourself is minimal to nothing. Most repairs only require basic tools that you may already own, like pliers and a screwdriver. The most you might spend is on a can of compressed air or a replacement spring if needed, which are generally inexpensive.
If you decide to take it to a professional, the cost could quickly approach or exceed the price of a new stapler, as you would be paying for labor. For most consumer-grade models, if the DIY fix doesn’t work, purchasing a new stapler is often the more economical choice compared to paying for a professional repair service.
Conclusion
Fixing a Swingline stapler is a rewarding and practical skill that can save you from the inconvenience and cost of a replacement. By following a methodical approach on how to repair a swingline stapler—from preparation and inspection to cleaning and reassembly—you can tackle the most frequent problems that plague these essential office tools.
Understanding the function of each component, like the pusher spring, striker blade, and anvil, empowers you to diagnose issues accurately and perform effective repairs.
With a little patience and the right tools, you can restore your trusted stapler to its reliable, hardworking self. Not only will you have a fully functional tool, but you will also have the satisfaction of having fixed it yourself. The next time your stapler gives you trouble, you’ll be well-equipped to handle the challenge and keep your paperwork in order.