Do you need to adjust your Ergotron arm so it can be used more effectively in a given workspace? Especially if you frequently have multiple people come in and out of the same workspace, an adjustable Ergotron arm is extremely useful. However, if you don’t know how to make these adjustments, this blog post is for you!

Adjusting your Ergotron arm is a great way to ensure it holds the position you need while using technology. Although adjusting an Ergotron arm may sound complex, it doesn’t have to be. With the right steps and instructions, anyone can adjust their Ergotron arm easily and accurately to ensure optimal performance during use.
We’ll guide you through the process of how to adjust ergotron arm so that by the end of it, not only will you understand how to adjust an Ergotron arm properly but also why each adjustment matters.
What are the Benefits of Adjusting Your Ergotron Arm?
When you adjust your Ergotron arm, you will achieve the following:
- Increase comfort and usability by enabling users to adjust their arms to their preferred position and height for comfortable use.
- Improve accessibility for people of all sizes and abilities since the arm can be adjusted to match their individual needs.
- Keep your workspace organized and ergonomically correct by adjusting the arm to the optimal position for each user’s posture, productivity, and comfort.
- Reduce fatigue and discomfort from repetitive strain injuries since users can adjust their arms to fit their body type and work habits more precisely.
Now that you understand why it’s important to adjust your Ergotron arm, we’ll move on to what you need to do in order to make these adjustments.
What Tools Will I Need?
Before getting started with adjusting your Ergotron arm, you will need a few tools to complete the process:
- Phillips head screwdriver (for most models)
- Adjustable wrench
- A level or ruler
- Allen key (Size depends on model)
- Determine what type of arm is being adjusted and the instructions that come with it, if applicable.
Now that you have all the tools necessary to adjust your Ergotron arm, let’s move on to the actual process of making the adjustments.
10 Easy Steps on How to Adjust Ergotron Arm
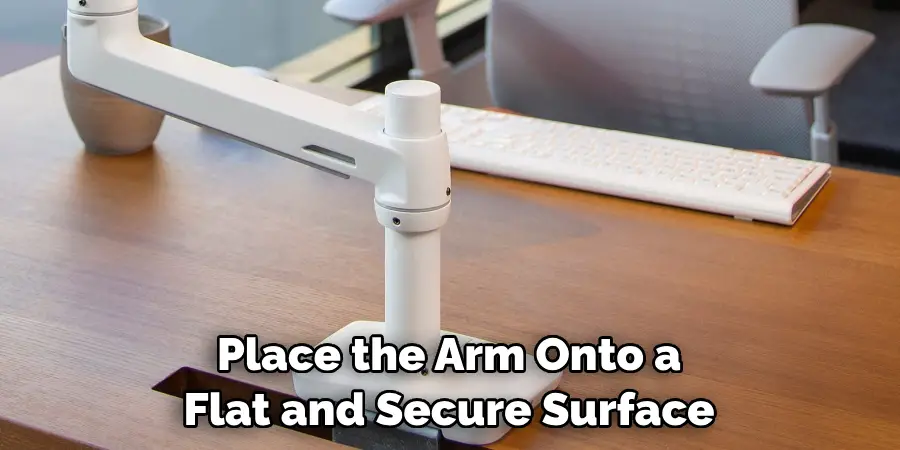
Step 1. Place Onto a Flat Surface:
Make sure to place the arm onto a flat and secure surface. This will provide stability while adjusting. If the arm needs to be raised or lowered, keep in mind that it must still remain on a flat and secure surface.
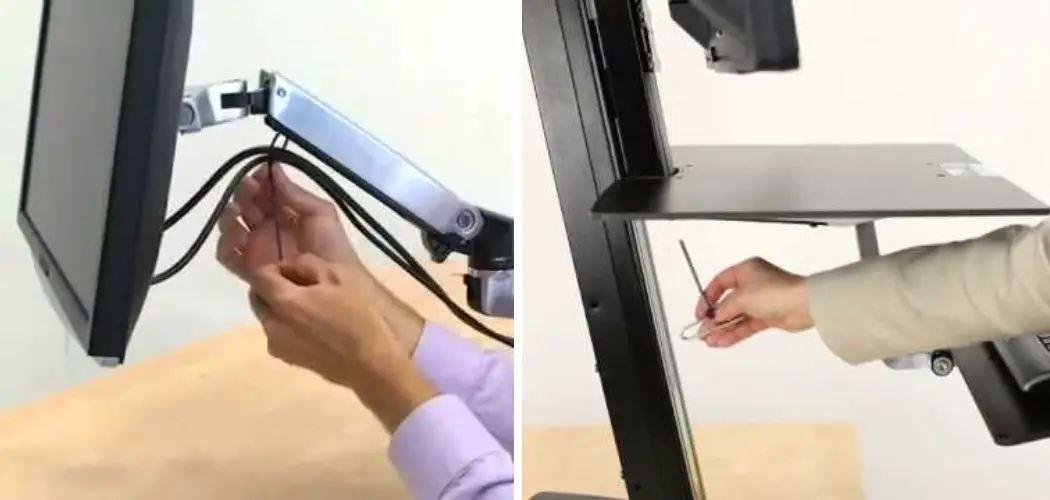
Step 2. Loosen Screws:
Loosen up the screws holding the arms together so they can be adjusted easily. As you do this, make sure to keep track of which screws were loosened. Don’t take them all out; just loosen them enough so they can be adjusted.
Step 3. Set Angle:
Adjust the angle of the arms using your level or ruler as a guide. The angle of the arms should allow for comfortable use at any height and reach for users of all sizes and abilities. If possible, adjust the arms to a 90-degree angle.
Step 4. Check Height Range:
Next, adjust the height range using your adjustable wrench to loosen or tighten it to fit between the lowest and highest points for comfort and productivity purposes. Try to ensure that the height range doesn’t exceed what Ergotron recommends. Be careful when adjusting the height range, and don’t overdo it.
Step 5. Measure Reach:
With the arm in its lowest position, measure the distance between the user and the display. This will help ensure that there is enough reach for users to use their technology comfortably. If necessary, you can adjust the reach with the adjustable wrench.
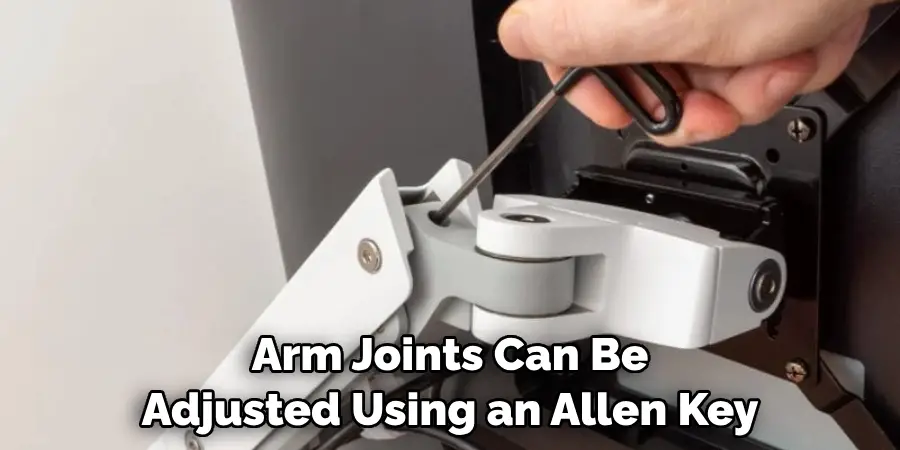
Step 6. Adjust Joints:
The arm joints can be adjusted using an Allen key or Phillips head screwdriver, depending on the model of your Ergotron arm. This step helps ensure that each joint is tightened securely so it won’t move during use. Try to make sure that the joints are level with each other for added stability.
Step 7. Check Stability:
Once all adjustments have been made, check for stability by moving each arm section and ensuring they are locked in place securely. If any part is not stable, adjust accordingly until everything feels secure and safe when used. Don’t forget to retighten all the screws.
Step 8. Test Comfort:
After all the adjustments have been made, test the comfort of using the Ergotron arm by moving it around and seeing if you can reach all areas comfortably and without any strain or fatigue. If there is still a need for more adjustments, repeat steps two through seven until you are satisfied with the results.
Step 9. Lock Parts:
Once everything is in place, lock each part of the arm so that it won’t move when using technology. This will ensure maximum stability while using your Ergotron arm. As an added measure, check to make sure that all parts have been tightened securely.
Step 10. Enjoy!
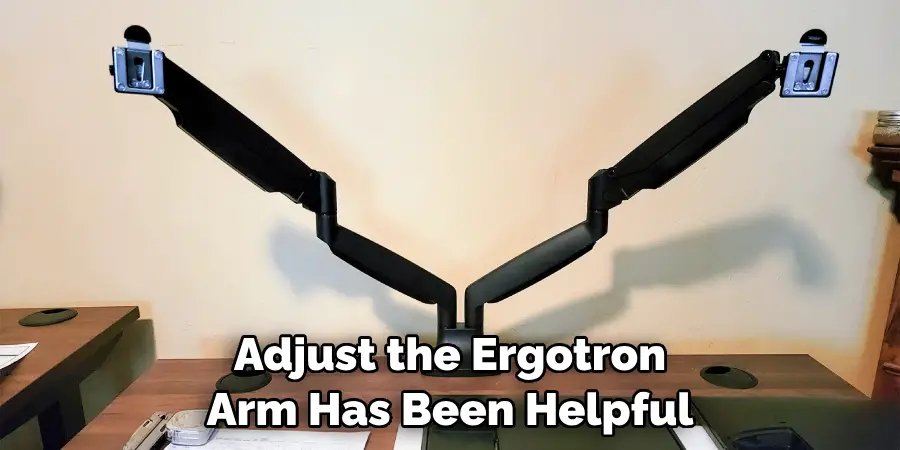
That’s all there is to adjusting your Ergotron arm! Now you can enjoy its benefits knowing that it is adjusted perfectly for your workspace. Remember, if you need to make any further adjustments in the future, simply repeat steps two through seven until you find the perfect fit.
We hope that this guide on how to adjust the Ergotron arm has been helpful and that you feel confident in making the necessary adjustments. Remember that these instructions may differ depending on the model of your Ergotron arm, so refer to the instruction manual before making any adjustments.
5 Additional Tips and Tricks
1. To adjust the height of your Ergotron arm, use the lower adjustment lever. Pull up on it to increase the overall height and push down on it to lower the height.
2. You can also adjust the tilt of your Ergotron arm by pulling up on the upper adjustment lever. This will keep your monitor level and prevent it from tilting down when you use it.
3. To change the distance between your monitor and yourself, use the side-to-side adjustment lever near the arm’s back. Pulling this lever out moves your monitor in closer while pushing it away increases the distance between you and your monitor.
4. If you need to rotate or swivel your screen, pull up on both adjustment levers at once and then push them slightly in either direction until you’ve achieved your desired angle/directional viewpoint.
5. Lastly, ensure your Ergotron arm is properly secured and tightened before you use it. This will ensure that your arm remains steady and secure while in use. Doing so will also prevent any unexpected adjustments or movements when you are using the arm.
By following these simple steps, you can easily adjust your Ergotron arm for a more comfortable working experience. With the right adjustments, you’ll be able to find the perfect angle and distance for viewing your monitor with ease!
6 Things You Should Avoid
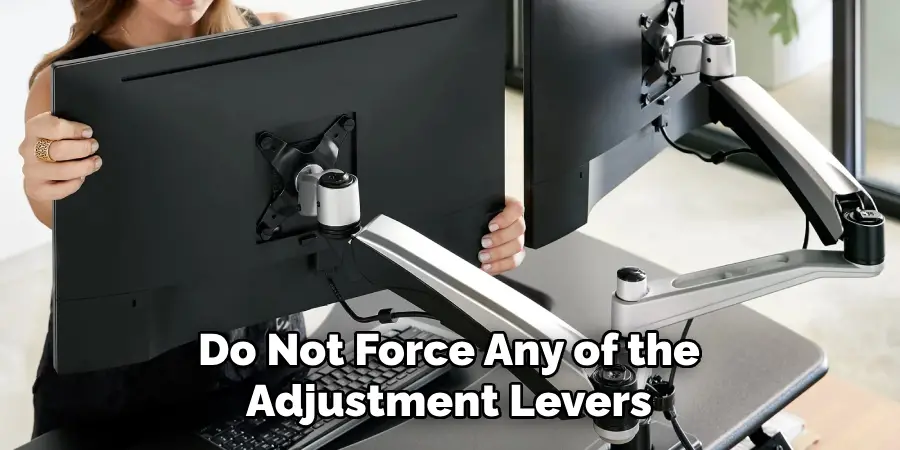
- Do not force any of the adjustment levers, as this may cause damage to your Ergotron arm.
- Do not over-adjust the tilt of your Ergotron arm, as this can result in an uncomfortable viewing angle.
- Avoid pulling or pushing on any part of the Arm except for the adjustment levers.
- Don’t rely on just one of the adjustment levers when making adjustments; use both upper and lower levers simultaneously for the best results.
- Be sure to check that all screws are tightened properly before using your Ergotron arm – loose screws could cause unexpected movements or adjustments while in use.
- Do not exceed the recommended height range for your model of Ergotron arm. This could result in an uncomfortable working experience.
By following these tips and tricks, you’ll be able to adjust your Ergotron arm with ease and get the most out of your workstation. With the perfect angle and distance, you’ll be able to view your monitor comfortably!
Conclusion
Ensuring your Ergotron unit is properly adjusted ensures its stability and longevity and makes your work experience more comfortable and efficient. By utilizing the adjustable features on the arm, you’ll find that productivity levels will rise. If you still need assistance with adjusting your Ergotron unit after reading this post, contact the product support team for guidance and assistance.
Moreover, a wide variety of youtube videos are available to help users understand how to adjust their arms correctly; viewing and following those instructions can also be beneficial. With careful use and correct adjustments, it is possible to have an ergonomic work environment that protects both your physical health as well as productivity levels for many years to come.
Hopefully, the article on how to adjust ergotron arm has been helpful, and you are now able to adjust your ergonomic arm for the perfect working experience. If you have any questions or concerns, feel free to contact us at any time! Happy Adjusting!