
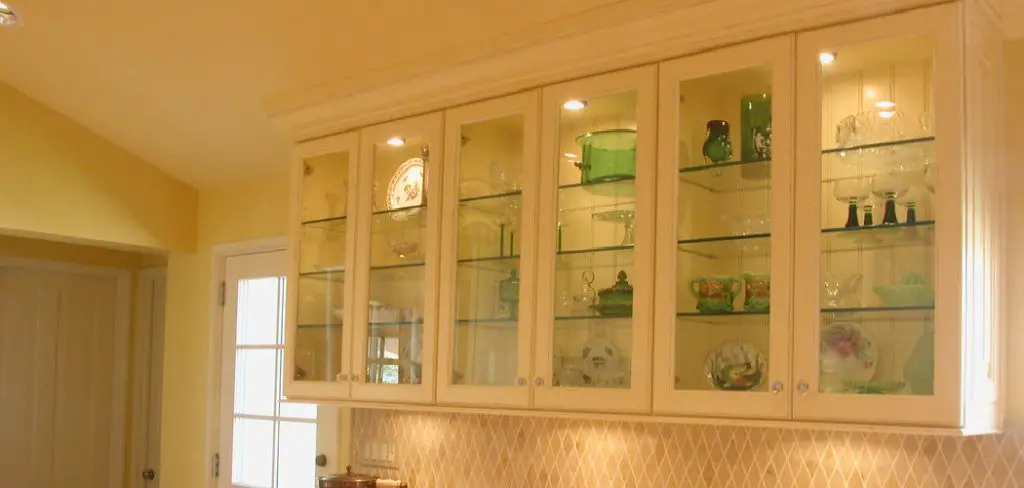
Glass cabinet doors add an elegant touch to any space, showcasing your cherished items while exuding a sense of sophistication. However, there are times when you might desire a change in style or seek more privacy for the items within. Learning how to cover glass cabinet doors offers a creative solution that allows you to revamp the look of your cabinets while maintaining functionality.
This article will guide you through various methods and materials to effectively cover glass cabinet doors, whether you’re aiming to add a pop of color, create a cozy atmosphere, or simply update the overall aesthetic.
By mastering this skill, you’ll be able to personalize your space, infuse it with your unique style, and give your cabinets a fresh and stylish makeover that complements your decor and design preferences.
The Reasons for Covering Glass Cabinet Doors
Covering glass doors on cabinet can be a great way to add some privacy or texture to the walls of your home. It can also help to keep dust and dirt particles off the cabinets, making it easier for you to keep them clean and shiny.
There are many different ways that you can cover glass cabinet doors, ranging from full-scale remodeling projects to simple DIY solutions. However, there are several key reasons why covering these surfaces can be beneficial.
First of all, covered glass doors can add a unique aesthetic to your home’s interior design. Depending on the type of material you choose, you can create a variety of looks ranging from minimalistic to intricate and eye-catching designs. The right kind of fabric or wallpaper can also provide insulation and reduce noise levels in your home.
Another benefit of covering glass cabinet doors is that it helps to keep them looking clean for longer. By shielding the interior from exposure to dust, dirt, and other debris, you can maintain the pristine condition of your cabinets without having to frequently wipe them down.
Moreover, certain materials such as vinyl or contact paper are water-resistant, making them ideal for high-humidity environments.
Finally, covering your glass cabinet doors can offer some additional security and privacy in the home. This is especially important if you store valuable items inside the cabinets or have a windows that look directly into them. With the right kind of fabric or wallpaper, you can create an opaque barrier that will help to keep nosy passers-by from peeking inside.
Measuring the Dimensions of the Glass Cabinet Doors Accurately
When it comes to covering glass cabinet doors, accuracy is key. Before you go shopping for the material you will need to cover the glass, you must first measure the dimensions of the doors accurately. To do this, use a steel measuring tape and make sure that each measurement (length, width) is taken from corner to corner.

Take note of any curves or slopes that the glass cabinet doors may have. Be sure to write down your measurements and bring them with you when you go shopping for the material. This will help ensure that you get the right size of fabric or paper for your project.
Once you are back home, begin by removing any hardware from the door (hinges, handles, knobs). Then lay out the fabric or paper you are using on a flat surface and cut it to the measurements that you previously took. Make sure to include an inch or two for extra allowance in case of any irregularities in the door’s shape.
Next, apply craft adhesive onto the back side of the material (fabric or paper) and spread it evenly with a foam brush. Carefully position the material onto the glass door and press it firmly with your hands, starting from the center and smoothing outwards towards the edges. Lastly, trim any excess material along the edges to give it a neat finish.
If you are using fabric for your project, you may choose to add decorative detail such as ribbons or lace trim around the edges. This will give your glass cabinet doors a unique, finished look.
10 Steps How to Cover Glass Cabinet Doors
Step 1: Assess Your Cabinets
Before embarking on the journey of covering glass cabinet doors, it’s important to take a moment to assess your cabinets and the current state of their glass doors. Consider the overall style of your living space and the design theme you’ve embraced.
Evaluate the size and layout of the cabinets, as well as the type of glass used in the doors. Understanding these factors will guide you in making informed decisions about the covering methods that would best suit your cabinets.
Step 2: Gather Materials and Tools
Depending on the covering method you’ve chosen, it’s time to gather all the necessary materials and tools. If you’re planning to use adhesive films or contact paper, ensure you have the correct measurements, a cutting tool, and a squeegee for smooth application.
If you’re leaning towards attaching fabric panels, you’ll need the fabric of your choice, adhesive or fasteners, and measuring tape. For painting or using frosted glass spray, gather paint or spray cans, masking tape, and protective gear. Having everything organized and ready will streamline the covering process.
Step 3: Remove Cabinet Doors
To simplify the covering process and ensure thorough application, consider removing the glass cabinet doors from their hinges. This step allows you to work on the doors while they are laid flat on a clean, stable surface. Removing the doors also prevents any accidental damage that might occur while working on them in their upright position.
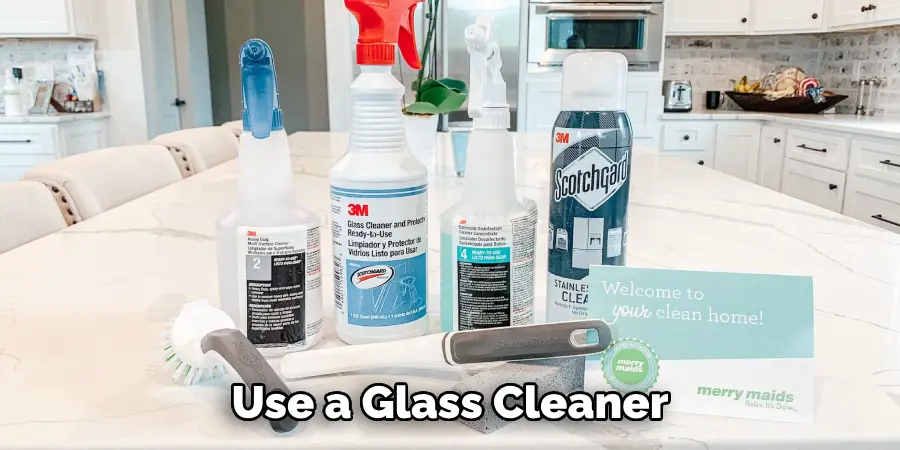
Step 4: Clean and Prep
Before applying any covering materials, it’s essential to clean the glass surface thoroughly. Use a glass cleaner or a simple mixture of water and vinegar to remove any dirt, fingerprints, or residue that might hinder proper adhesion. Ensure that the glass is completely dry before proceeding, as moisture can affect the effectiveness of adhesives and paints.
Step 5: Choose Your Covering Method
Now comes the exciting part—choosing the covering method that resonates with your design vision. Evaluate the ambiance you want to create and the texture you wish to introduce to your space. Consider options like adhesive films for a modern touch, fabric panels for added warmth, frosted glass spray for a touch of elegance, or decorative hardware for a refined look.
Step 6: Apply Adhesive Films or Contact Paper
For a quick and reversible transformation, adhesive films or contact paper offer a versatile option. Measure the dimensions of the glass accurately and cut the film or paper to fit. Carefully peel off the backing and slowly apply the adhesive material, smoothing out any air bubbles along the way for a flawless finish.
Step 7: Attach Fabric Panels
If you’re drawn to the idea of introducing texture and softness to your cabinets, attaching fabric panels is a creative option. Measure the dimensions of the glass and cut the fabric to size, leaving a small margin for attaching it to the door frame. Using adhesive or removable fasteners, secure the fabric, ensuring it is evenly taut and free of wrinkles.
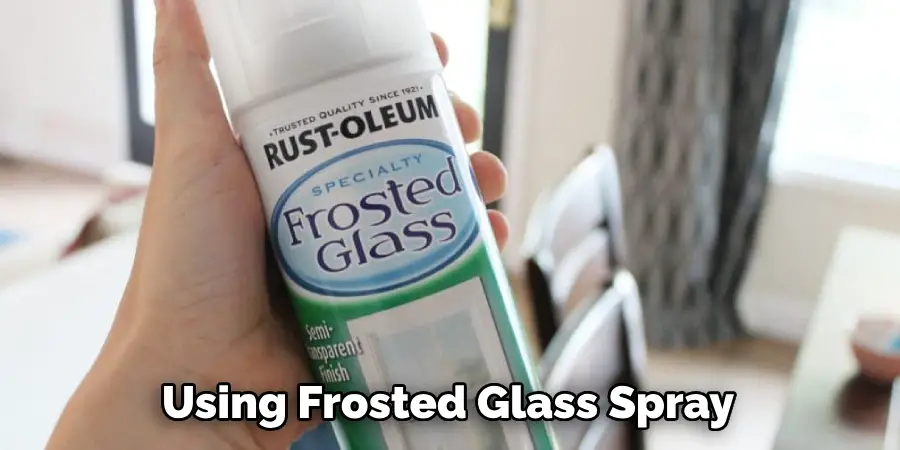
Step 8: Paint or Frosted Glass Spray
For those seeking a transformative effect, consider painting the backside of the glass doors or applying frosted glass spray. Begin by ensuring that the glass surface is impeccably clean and dry. Use masking tape to protect any areas you want to remain transparent, and follow the manufacturer’s instructions for paint or spray application. Allow sufficient drying time before handling the doors.
Step 9: Add Decorative Hardware
As a finishing touch, consider enhancing the aesthetic appeal of your covered cabinet doors by adding decorative hardware. Choose knobs, handles, or pulls that complement the overall style you’re aiming for. The hardware not only adds functionality to your cabinets but also serves as a visual focal point, elevating the entire look.
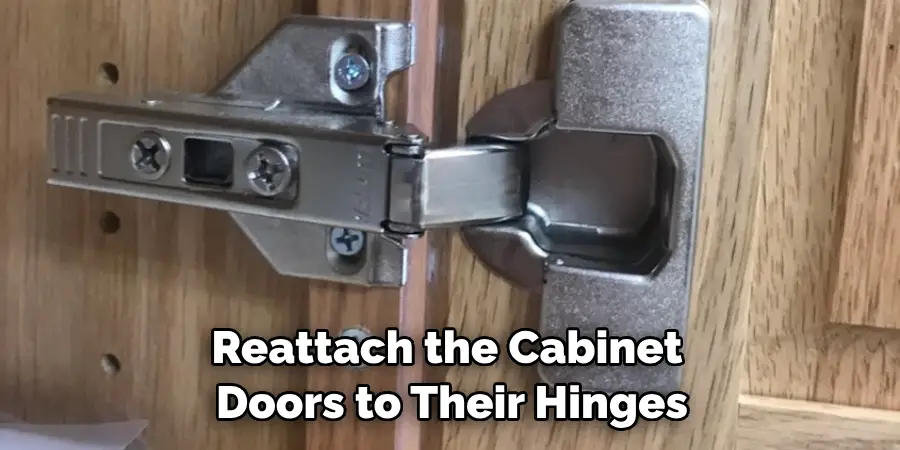
Step 10: Reattach Cabinet Doors
With the covering method applied and any additional embellishments in place, it’s time to reattach the cabinet doors to their hinges. Ensure that they are properly aligned and that they open and close smoothly.
Step back and admire the transformation you’ve accomplished—a personalized and stylish cabinet design that harmonizes with your home decor and enhances the aesthetic appeal of your living space.
Conclusion
Who knew that simply covering glass cabinet doors could bring a room together? Not only does this easy fix make a space feel more cozy and inviting, but it can also save you money and reduce the amount of time you spend on creating new projects. Therefore, if you’re looking to give your kitchen or dining room an easy facelift in no time at all, consider trying out this technique today!
For more advice on how to cover glass cabinet doors, be sure to check out our website for detailed instructions – we are here to help answer any questions you may have. With a few tips and tricks to guide you along the way, bringing your vision to life was never so easy – just know that it can be done. Good luck as you continue with your renovation project!