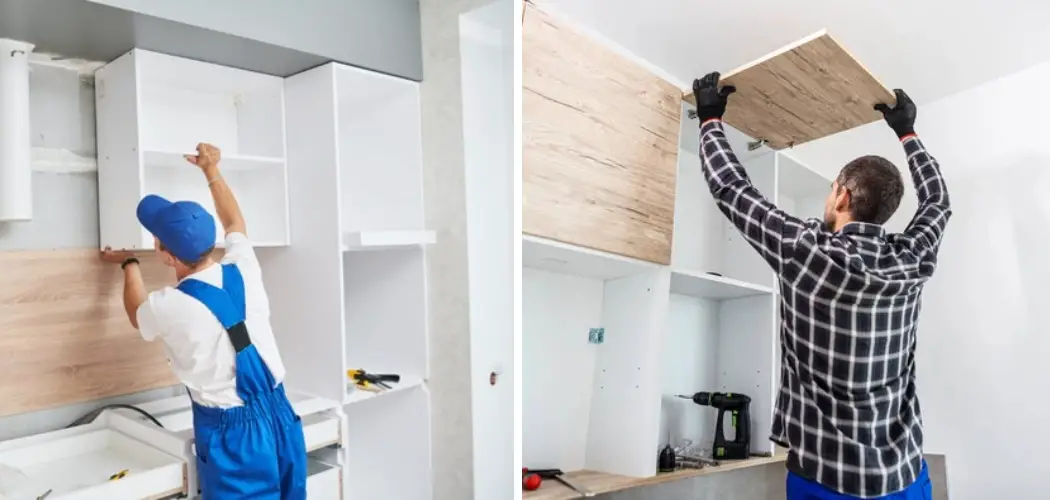
When it comes to home improvement projects, hanging cabinets can be both a functional enhancement and a design upgrade. However, the process often poses a challenge when dealing with walls lacking suitable studs for support.

Whether you’re aiming to create extra storage in your kitchen or revamp your bathroom, understanding how to hang cabinets without studs is a valuable skill.
By employing alternative methods and secure hardware, you can confidently mount cabinets on various wall types, including drywall. This article delves into innovative techniques that ensure your cabinets remain securely affixed, guiding you step by step through the process of achieving a polished and sturdy installation, even in the absence of traditional stud support.
Whether you’re an experienced DIY enthusiast or a novice looking to expand your skill set, these methods open the door to versatile cabinet placement, ensuring both functionality and aesthetics seamlessly intertwine in your living spaces.
Importance of Alternative Hanging Methods
When hanging cabinets without studs, it’s important to ensure that the cabinets are securely and firmly in place. Some methods of hanging cabinets, such as using toggle bolts or expanding masonry anchors may not be suitable for some types of wall surfaces.
It’s also important to double check all installation instructions from the manufacturer prior to installation. Although wall studs provide a strong foundation for hanging cabinets, alternative methods can be used when studs are not available.
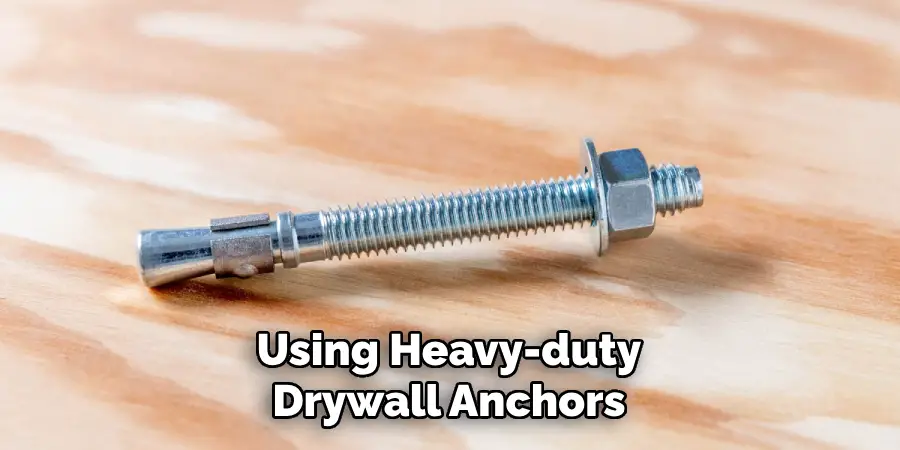
Some alternative methods for hanging kitchen or bathroom cabinets without studs include using heavy-duty drywall anchors, toggle bolts, and expanding masonry anchors. Heavy-duty drywall anchors are designed to hold heavier items such as shelves and kitchen cabinetry.
Toggle bolts are suitable for hanging items on hollow wall surfaces such as drywall. Expanding masonry anchors are ideal for concrete and brick walls, and provide a secure anchor which can hold heavier items in place.
When installing cabinets without studs, it’s important to select the right type of hardware for your specific wall surface. It’s also essential to ensure that the hardware is securely fastened into the wall surface. With the right tools, techniques, and some patience, anyone can effectively install cabinets without studs.
Understanding Wall Types and Weight Considerations
If you’re looking to hang cabinets without studs, it’s important to understand the different types of wall materials and their weight capacity. Drywall is the most common type of interior wall surface and has a limited load-bearing capacity.
It’s best for light items like shelves or pictures but not suitable for heavy objects like cabinets. If you have a drywall wall, you’ll need to find anchors that will provide the necessary support for your cabinets.
Brick walls are much stronger than drywall, and while they may not have studs, they can still be used to hang heavy objects like cabinets. However, it is important to drill carefully when using brick walls.

You should use masonry bits designed specifically for brick to ensure the right type of hole is drilled. Additionally, you should use anchors designed for masonry walls to make sure they are strong enough.
Concrete walls provide even more support than brick and don’t require special anchors. As long as you’re using a drill bit designed for concrete walls, you can use standard screws or bolts without fear of the wall crumbling.
Finally, it’s important to consider the weight of your cabinets and adding additional support if needed. If you feel like your cabinets are too heavy for any of these walls, you can always add extra supports like mounting brackets or L-brackets to provide additional strength. Doing so will ensure that your cabinets remain securely in place with no risk of falling down.
10 Steps How to Hang Cabinets without Studs
Step 1: Gather Necessary Materials and Tools
Before you begin, assemble the materials and tools you’ll need for the project. These may include the cabinets, cabinet mounting brackets, toggle bolts, a stud finder, a level, a measuring tape, a pencil, a power drill, drill bits, a screwdriver, and safety gear like goggles and gloves.
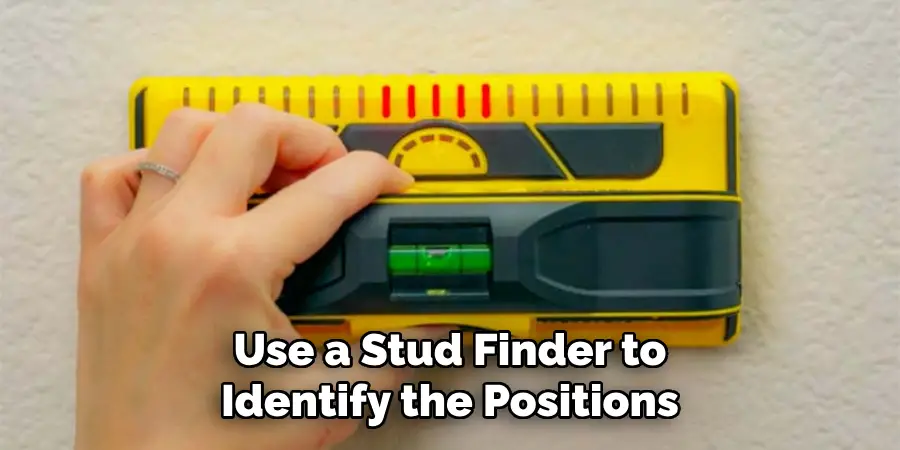
Step 2: Locate Wall Studs
While you’re not using studs for support, it’s still a good idea to locate them to avoid them while drilling. Use a stud finder to identify the positions of any nearby studs and mark them with a pencil. If you have an interior wall, the studs will be approximately 16 inches apart.
You should also use a level to make sure that your cabinets are straight. Place it on the marked spot and adjust the screws until all of them are in line with each other. Make sure to double check that your cabinet is level before moving on to drilling!
Step 3: Measure and Mark Cabinet Placement
Using a measuring tape, mark the desired height for your cabinets on the wall, making sure they’re level. Place a ledger board temporarily along the marked line to support the cabinets during installation. Screw the ledger board into the wall, then mount a 2×4 stud brace along each side. The brace should be level and parallel to the floor.
Once your ledger board is securely in place, you can start attaching cabinets. Measure and mark on the wall where cabinet sides or cleats will go. Make sure that they’re centered from side to side and evenly spaced top to bottom. Secure the cleats using long screws and an electric drill, making sure they are level and stable.
Step 4: Install Mounting Brackets
Mounting brackets provide support for the cabinets and distribute the weight more evenly across the wall. Position the brackets at the top corners of the cabinet and mark the screw hole locations on the wall. Drill pilot holes for the screws and attach the brackets securely.
Step 5: Pre-Drill Cabinet Backs
Turn the cabinets upside down and pre-drill holes through the back at the locations corresponding to the mounting brackets. Make sure the holes are slightly larger than the diameter of the toggle bolts you’ll be using. Be sure to use a drill bit meant for metal and not wood.
If you don’t have the right kind of bit, get one from the hardware store. The toggle bolts are necessary because there are no studs to support the cabinets.
Step 6: Insert Toggle Bolts
Insert the toggle bolts into the pre-drilled holes on the cabinet backs. Toggle bolts have wings that open up behind the wall, providing a secure anchor point. Be sure to use the correct size toggle bolts for the weight of your cabinet.
Step 7: Hang the Cabinets
With the help of a friend or a cabinet jack, lift the cabinets into place, aligning them with the mounting brackets. Slowly tighten the toggle bolts, ensuring they’re snug but not overly tightened, as this could damage the drywall. Make sure the doors are able to open and close smoothly. Finally, check that the cabinets are level before securing them in place with construction adhesive.
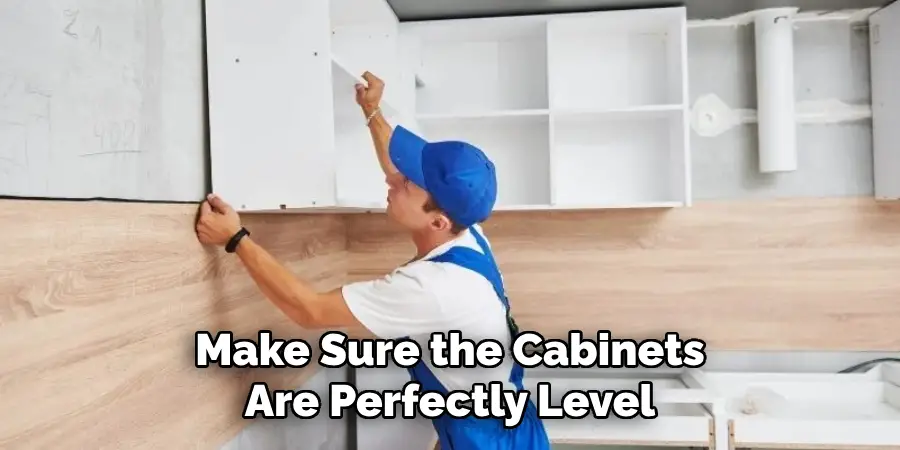
Step 8: Check for Level and Adjust
Use a level to make sure the cabinets are perfectly level and plumb. If adjustments are needed, slightly loosen the toggle bolts, level the cabinet, and then re-tighten the bolts. If you need to adjust the cabinets further after they have been installed, it is also possible to insert shims between the wall and the cabinet. This will allow for some fine-tuning of their position.
Step 9: Secure the Cabinets Together
If you’re installing multiple cabinets side by side, secure them together using screws through the sides or face frames. This ensures they remain aligned and stable.
If you’re hanging the cabinets over an existing wall, use a level to make sure they are even and secure them with screws through the top. Finally, if the wall is not completely flat, shim under each cabinet for maximum stability. Be sure all your screws are securely fastened and countersunk into the wood so they can’t be seen.
Step 10: Install Cabinet Doors and Hardware
Once the cabinets are securely in place, install the cabinet doors, drawers, and any hardware. Make any final adjustments to ensure smooth operation and alignment.
Cabinet doors should be secured to the cabinet box with screws or other hardware. When attaching drawers, you will need to make sure they are installed correctly. Depending on your cabinets, you may need to use hidden slides that attach under the drawer and onto the cabinet frame.
Conclusion
It’s important to know how to hang cabinets without studs for those tricky wall spaces. The process may seem intimidating but it is achievable with the right instructions. All you need are the correct materials and then you can begin mounting the cabinets, making sure they are level and sturdy.
With a few simple steps, a little patience, and a bit of elbow grease, you’ll be able to hang your cabinets without using studs in no time. So take heart and give it a try – you won’t regret it! Taking on projects like this one is so rewarding when the job is done, as you’ll suddenly have shelves or storage spaces where before there was nothing.