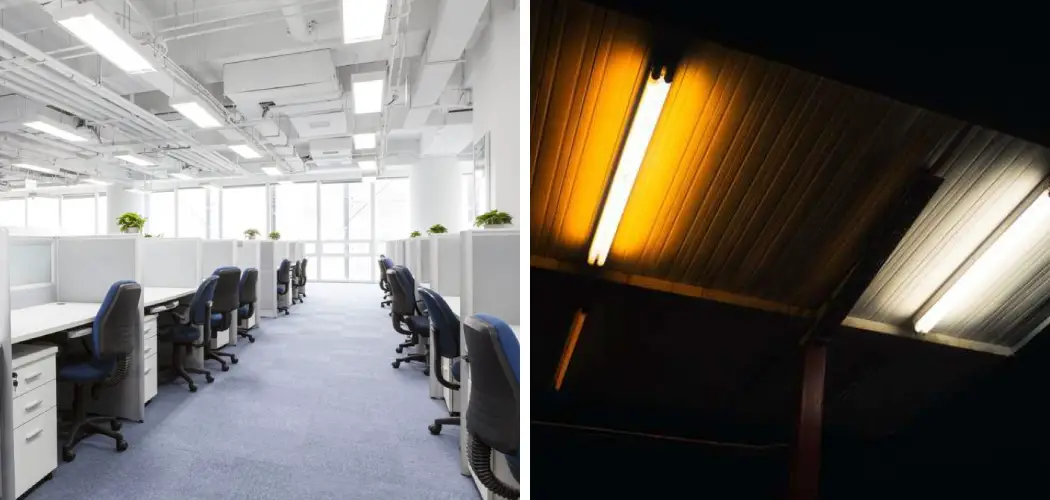
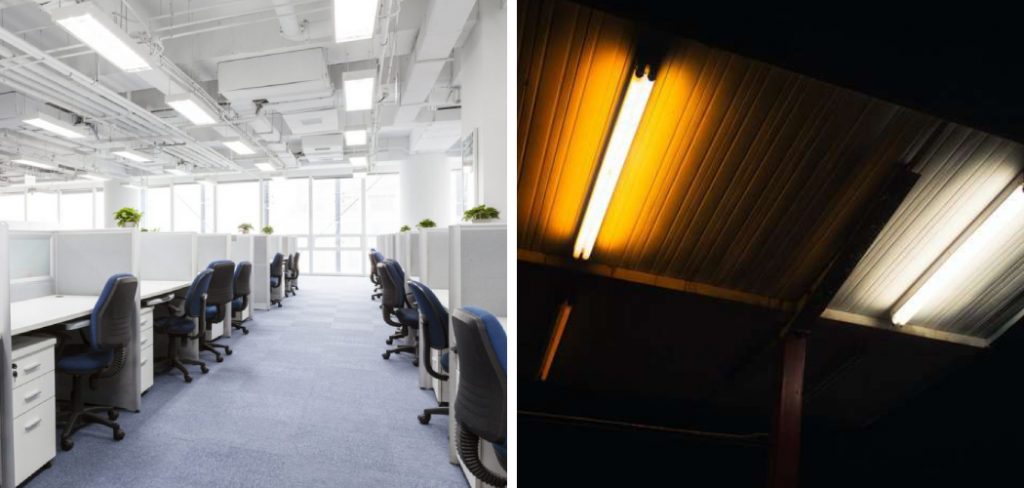
Fluorescent office lights are widely used in commercial and industrial buildings due to their energy efficiency and long lifespan. However, these bright lights can sometimes cause discomfort or headaches for some individuals. Luckily, it is possible to dim fluorescent office lights to create a more comfortable and productive work environment. In this tutorial, we will discuss the steps on how to dim fluorescent office lights.
What is Dimming?
Dimming refers to the process of reducing the intensity or brightness of a light source. This can be done manually by adjusting a dimmer switch or automatically through a lighting control system. Dimming fluorescent office lights not only creates a more comfortable environment for employees but it also helps save energy and reduce electricity costs. It also extends the lifespan of the bulbs by reducing their operating hours.
Why Dim Fluorescent Office Lights?
There are several reasons why you may want to dim fluorescent office lights. Some individuals may be sensitive to bright lighting, leading to headaches or eyestrain. In such cases, dimming the lights can provide relief and increase productivity. Additionally, dimming the lights can help reduce glare on computer screens and prevent eye fatigue for employees who work long hours in front of a computer. If you are looking to create a more relaxed and calming atmosphere in your office, dimming the lights can also help achieve this.
Needed Materials
To dim fluorescent office lights, you will need the following materials:
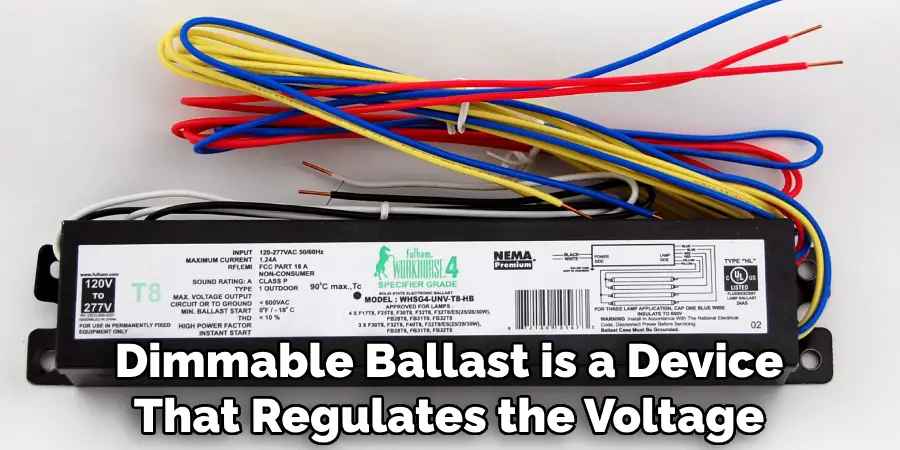
Dimmable Ballast
A dimmable ballast is a device that regulates the voltage and current going to a fluorescent light fixture. It works by adjusting the frequency of the electrical current, which in turn controls the brightness of the lights. Make sure to purchase a ballast that is compatible with your existing fluorescent lights and can be dimmed.
Dimmer Switch
A dimmer switch is a device that controls the amount of electrical current going to the light fixture. It allows you to manually adjust the brightness of the lights by sliding or turning a dial. When purchasing a dimmer switch, make sure it is compatible with your ballast and fluorescent lights.
Dimmable Bulbs
Not all fluorescent bulbs are dimmable. Make sure to purchase dimmable bulbs that are specifically designed for use with a dimmable ballast. These bulbs can usually be identified by the “dimmable” label on the packaging.
Screwdriver
You will need a screwdriver to remove and replace the existing fluorescent bulbs with dimmable ones, as well as to install the dimmer switch.
10 Simple Step-by-step Guidelines on How to Dim Fluorescent Office Lights
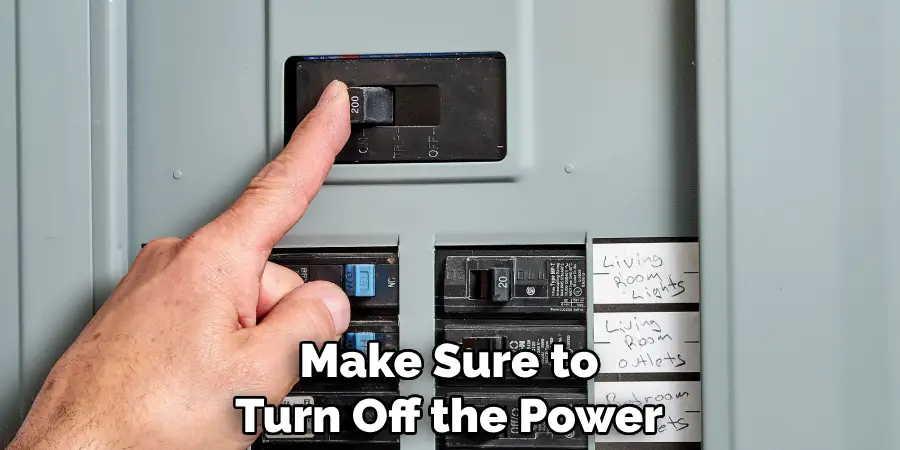
Step 1: Turn Off the Power
Before you begin, make sure to turn off the power to the lights at the main circuit breaker. This will ensure your safety while working on the lights. You may also want to use a voltage tester to confirm that the power is off. You can also unplug the lights if they are connected to a wall outlet. There should be no electricity running through the wires when you start working on them. You can also consider hiring a licensed electrician to perform this step for you if you are not familiar with electrical work. You can never be too safe! The next nine steps will guide you through the process of dimming your fluorescent office lights.
Step 2: Remove the Existing Bulbs
To install dimmable bulbs, you will first need to remove the existing fluorescent bulbs from the fixture. Carefully twist or pull out each bulb and set them aside for disposal or reuse in another fixture. If there is a plastic cover or diffuser on the fixture, remove it as well. You may need a screwdriver to remove the cover. But be careful not to damage the fixture or any wiring while doing this. This will expose the ballast and wiring for the next steps. There are different types of fluorescent fixtures, so make sure to refer to the manufacturer’s instructions for your specific model.
Step 3: Remove the Old Ballast
Locate the old ballast and disconnect it from the fixture. It should be attached with screws or clips, so use a screwdriver to remove them. Make sure to note which wires are connected to each terminal on the ballast, as you will need this information for the next steps. Carefully remove the old ballast and set it aside for disposal. Otherwise, you may need to recycle it at a proper facility. If you are unsure about safely handling the ballast, consult a professional. But remember, do not touch any wires or terminals while the power is still on.
Step 4: Install the Dimmable Ballast
Follow the manufacturer’s instructions to install the dimmable ballast. Make sure to match up the wire colors and connect them to the appropriate terminals. You may need wire nuts to secure the connections. Once done, mount the dimmable ballast back onto the fixture using screws or clips.
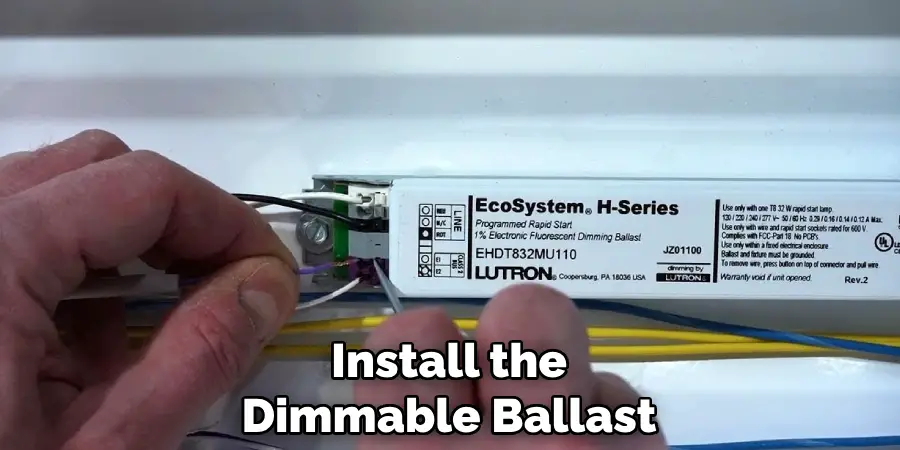
It is important to make sure all connections are secure and there are no exposed wires. You can also refer to this guide on how to properly wire a dimmable ballast. Although, if you are not comfortable doing this yourself, hire a professional electrician for safety. It is crucial to handle electricity with caution.
Step 5: Test the Lights
Before moving on to the next step, turn the power back on and test the lights. If they do not turn on, check your connections and make sure everything is properly connected. If they still do not work, consult a professional. The lights should turn on at full brightness. You will be able to dim them once you install the dimmer switch in the next step.
It is important to test the lights now before moving on so you can troubleshoot any issues. But remember, do not touch any wires or terminals while the power is still on. You may also want to keep the lights on while you install the dimmer switch. It will make it easier to test the lights later.
Step 6: Turn Off the Power Again
Once you have confirmed that the lights are working properly, turn off the power again at the main circuit breaker. This is important for your safety as you will be working with live wires in the next steps. It is always better to be safe than sorry. You can also unplug the lights if they are connected to a wall outlet. It is important to make sure there is no electricity running through the wires while you work on them. You can also consider hiring a licensed electrician to perform this step for you if you are not familiar with electrical work. It is better to have a professional handle this if you are unsure.
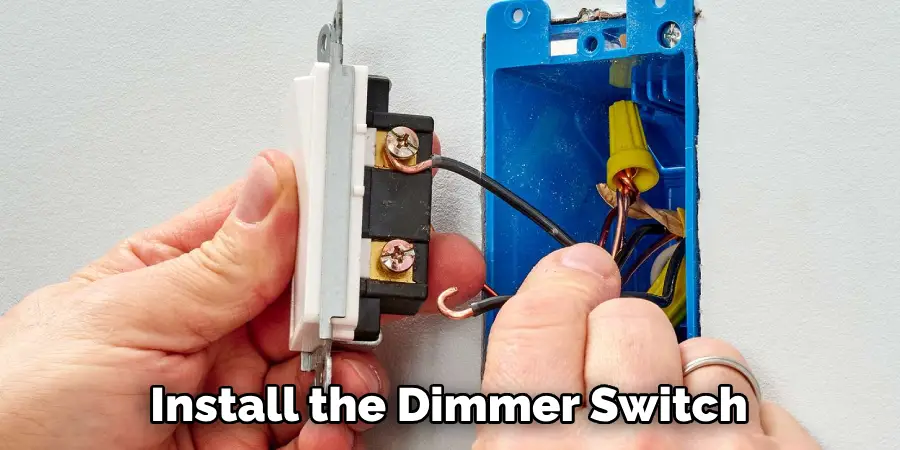
Step 7: Install the Dimmer Switch
Follow the manufacturer’s instructions to install the dimmer switch. This will usually involve connecting it to the existing wiring using wire nuts and mounting it onto the wall. Make sure to match up the wire colors and connect them to the appropriate terminals. It is important to make sure all connections are secure and there are no exposed wires. You can also refer to this guide on how to properly wire a dimmer switch. That being said, it is always recommended to have a professional electrician install the dimmer switch for you if you are not familiar with electrical work.
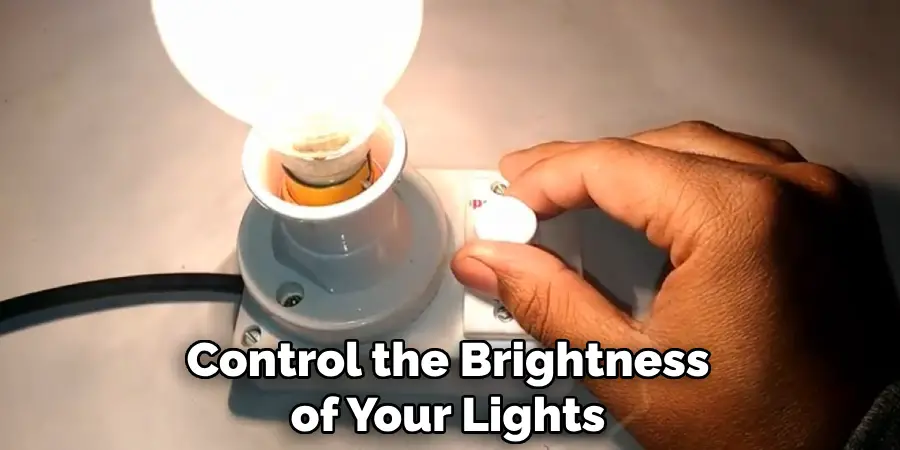
Step 8: Test the Dimmer Switch
Once the dimmer switch is installed, turn on the power again and test its functionality. Slide or turn the dial to adjust the brightness of the lights. The lights should now be able to dim according to your control. If they do not work properly, check your connections and make sure everything is properly connected. This will also be a good time to adjust the dimmer switch settings, such as minimum and maximum brightness levels. You can also refer to the manufacturer’s instructions for more information on adjusting the dimmer switch settings. The lights should now be fully functional and dimmable.
Step 9: Replace the Cover
If you removed a plastic cover or diffuser in step 2, make sure to put it back in place now. Use a screwdriver to secure it if necessary. This will help protect the bulbs and wiring from any debris or damage, as well as provide a more polished look for your fixture. It is important to make sure the cover is properly secured to avoid any potential hazards. But remember, do not touch any wires or terminals while the power is still on. You can now turn on the power at the main circuit breaker and enjoy your newly dimmable office lights!
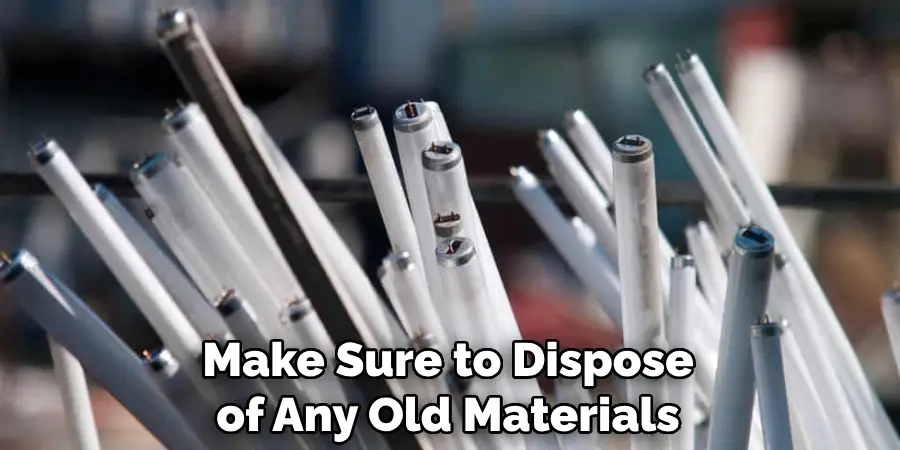
Step 10: Environmentally Friendly Disposal of Old Materials
As a final step, make sure to dispose of any old materials properly. This includes the fluorescent bulbs and old ballast. Check with your local recycling center for proper disposal options or consider repurposing them in other fixtures around your home or office. It is important to be environmentally conscious when disposing of these materials, as they can contain harmful chemicals. Taking the extra step to properly dispose of these materials will help protect both the environment and your health. So, always make sure to follow proper disposal methods for an eco-friendly approach to home improvement.
Following these 10 steps on how to dim fluorescent office lights will help you successfully convert your office lights to a dimmable option. Not only will this provide more control over lighting in your workspace, but it can also save energy and extend the lifespan of your bulbs.
Do You Need to Take Help From a Professional?
While the process of dimming fluorescent office lights may seem straightforward, it is always recommended to consult a professional if you are not familiar with electrical work. Working with live wires can be dangerous and it is always better to prioritize your safety. A licensed electrician will have the necessary knowledge and experience to properly handle and install the necessary components for dimmable lighting.
They can also provide valuable advice and ensure the job is done correctly and safely. So, if you are unsure about any aspect of this process, it is always best to seek professional help.
Maintenance and Troubleshooting
Once you have successfully installed your dimmable office lights, it is important to regularly maintain them for optimal performance. This can include dusting the bulbs and fixtures to prevent buildup that can affect lighting quality. It is also recommended to periodically check and tighten any loose connections to avoid potential hazards.
If you encounter any issues with your dimmable lights, such as flickering or not turning on properly, there are a few troubleshooting steps you can take. First, check the connections and make sure they are secure. It is also important to ensure that the dimmer switch is compatible with your specific type of light bulb. If the issue persists, consult a professional electrician for further assistance.
Energy Efficiency and Savings
One of the major benefits of converting to dimmable office lights is energy efficiency and potential cost savings. By being able to control the brightness of your lights, you can use only the amount of light needed for a specific task or time of day. This can lead to reduced energy consumption and ultimately lower electricity bills.
Additionally, dimming lights can also extend the lifespan of your bulbs, saving you money on replacement costs over time. Overall, investing in dimmable office lights can not only improve the functionality of your workspace but also save you money in the long run. So why wait? Start dimming your office lights today for a brighter and more efficient workspace!
Regulatory and Safety Considerations
It is important to note that there may be specific regulations or safety considerations regarding dimmable office lights in your area. Always check with your local government or building regulations before making any changes to your lighting. Additionally, it is crucial to follow all safety precautions and instructions when working with electricity.
If you are not familiar with electrical work, it is recommended to hire a licensed electrician to ensure the safety of yourself and others. Remember, safety should always be the top priority when undertaking any home improvement project. With proper installation and maintenance, dimmable office lights can provide a safe and efficient lighting solution for your workspace. Enjoy your new dimmable lights!
Frequently Asked Questions
Q1: Can I Dim Any Type of Fluorescent Light?
A1: While it is possible to dim most types of fluorescent lights, not all are compatible with dimmers. Make sure to check the packaging or manufacturer’s instructions to ensure the fluorescent light is dimmable before attempting to install a dimmer switch. It is also important to use a dimmer switch specifically designed for fluorescent lights.
Q2: Can I Use LED Bulbs with a Dimmable Ballast?
A2: Yes, as long as the LED bulbs are compatible with dimmable ballasts. It is important to check the packaging or manufacturer’s instructions for compatibility before installation. You can also consult with a professional for help in choosing the right LED bulbs for your dimmable office lights.
Q3: Can I Install a Dimmer Switch Myself?
A3: If you have experience with electrical work and feel comfortable working with live wire connections, then you can install a dimmer switch yourself. However, if you are not familiar with electrical work, it is recommended that you hire a licensed electrician for safety purposes.
Q4: Will Dimming My Fluorescent Lights Save Energy?
A4: Yes, dimming your fluorescent lights can save energy since they will be using less electricity when set at a lower brightness level. However, the amount of energy saved will depend on the specific type and wattage of your fluorescent bulbs.
Q5: Are There Any Other Benefits of Dimmable Office Lights?
A5: Yes, in addition to energy efficiency and cost savings, dimmable office lights can provide better lighting control for different tasks or times of day. They can also reduce eye strain and improve overall comfort in the workspace.
So why not make the switch to dimmable office lights today? You will not only have more control over your lighting but also save money and improve the overall atmosphere of your workspace. Remember to follow all safety precautions and consult a professional if needed. With the right tools and knowledge, you can successfully convert your office lights to dimmable ones for a brighter and more efficient workspace.
Conclusion
In conclusion, adjusting the brightness of fluorescent lights in the office is not only beneficial for improving comfort but also for enhancing overall productivity and well-being at work. Whether you choose to use light filters, adjust the lighting arrangement, or even replace fixtures with more adjustable options, the key is to find a solution that meets the specific needs of your workspace and its occupants.
Remember, the goal is to create an environment that promotes health, comfort, and efficiency, making the time spent in the office as pleasant and productive as possible. So don’t be afraid to try out different methods and find what works best for you. With these tips in mind on how to dim fluorescent office lights, you can now confidently take control of the lighting in your office and create a workspace that is both functional and comfortable. So go ahead and dim those fluorescent lights to your desired level and enjoy a more personalized and productive working environment. Happy dimming!