Installing recessed lights in a drop ceiling can significantly enhance the lighting and overall ambiance of a room. This task, while appearing daunting at first, can be accomplished with the right tools and a solid understanding of the process. Recessed lighting offers a sleek, modern look and can be particularly effective in rooms with drop or suspended ceilings, providing uniform light without the clutter of fixtures hanging below the ceiling level.

Whether you’re updating an office space, optimizing a living area, or just looking to improve a room’s brightness, this guide is designed to walk you through the necessary steps for a successful installation. By the end of this tutorial on how to put recessed lights in a drop ceiling, you’ll be equipped with the knowledge to transform any space with the elegant simplicity of recessed lighting.
What is a Drop Ceiling?
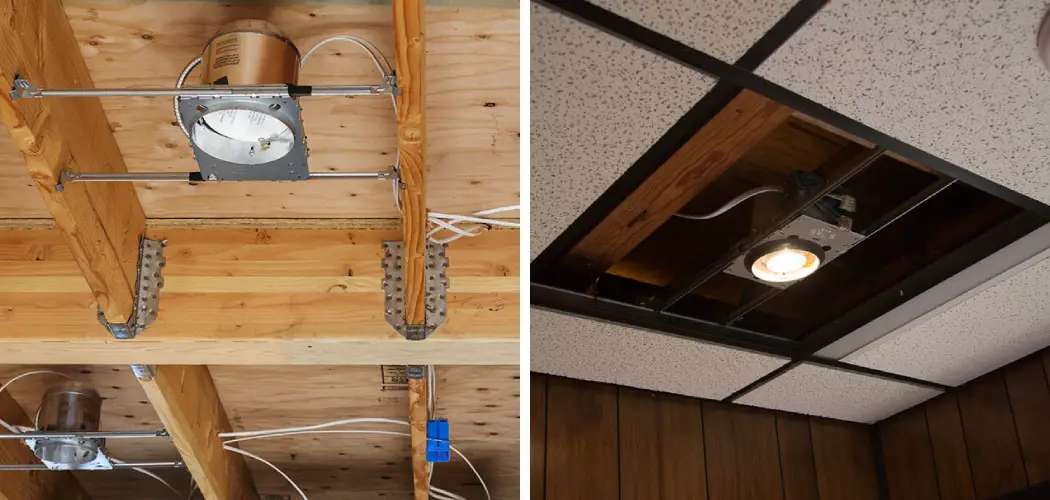
A drop ceiling, also known as a suspended or false ceiling, is a secondary ceiling that hangs below the structural ceiling of a room. This type of ceiling is often used in commercial and residential buildings to hide unsightly pipes, wires, ductwork, and other mechanical systems while creating an even surface for lighting fixtures. Drop ceilings are typically made up of a grid system of metal or vinyl channels and removable ceiling tiles, allowing easy access to the space above for maintenance or repairs.
Tools and Materials Needed
Before you begin your installation, make sure that you have all the necessary tools and materials on hand. Here is a list of items that will come in handy during this project:
Measuring Tape and Pencil
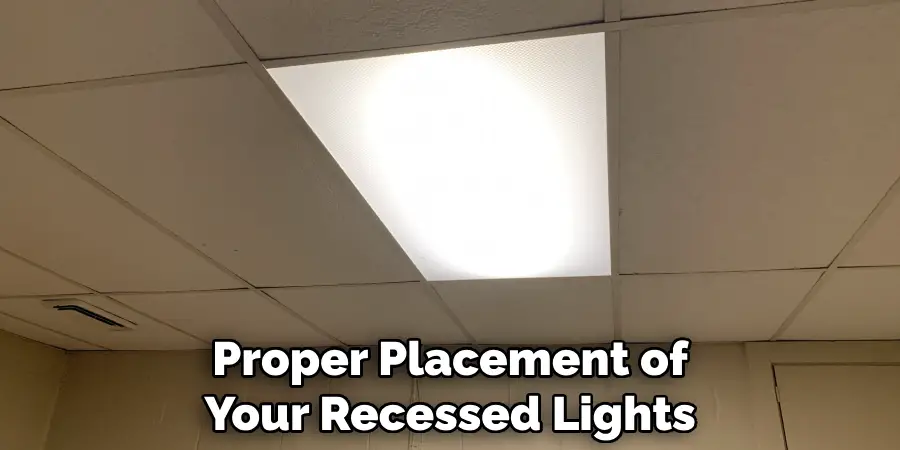
To ensure the proper placement of your recessed lights, it’s crucial to accurately measure and mark the exact locations where you want them to be installed.
Ladder or Scaffolding
Since you’ll be working on a ceiling, having a safe way to reach your installation area is essential. A ladder or scaffolding will provide the necessary support for working at a higher level.
Screwdriver
A screwdriver will be needed to remove any existing light fixtures and to secure the recessed lights in place.
Drywall saw or Hole Saw
You’ll need a drywall saw or hole saw to create openings for the recessed lights in the ceiling tiles.
Wire Cutters and Strippers
Wire cutters are necessary for cutting and stripping the electrical wires to connect the recessed lights.
Electrical Tape
Electrical tape is used to secure and insulate electrical connections.
Recessed Light Housing and Trim Kits
These kits contain all the necessary components for installing a recessed light, including the housing, trim, bulb, and mounting hardware. Make sure to choose a kit that fits both the size of your ceiling tile and the type of bulb you want to use.

Wire Connectors
Wire connectors are used to connect the electrical wires from the recessed lights to the existing wiring in your ceiling.
Safety Glasses and Gloves
It’s always important to protect yourself while working with tools and equipment. Make sure to wear safety glasses and gloves throughout this project.
10 Step-by-step Guides on How to Put Recessed Lights in a Drop Ceiling
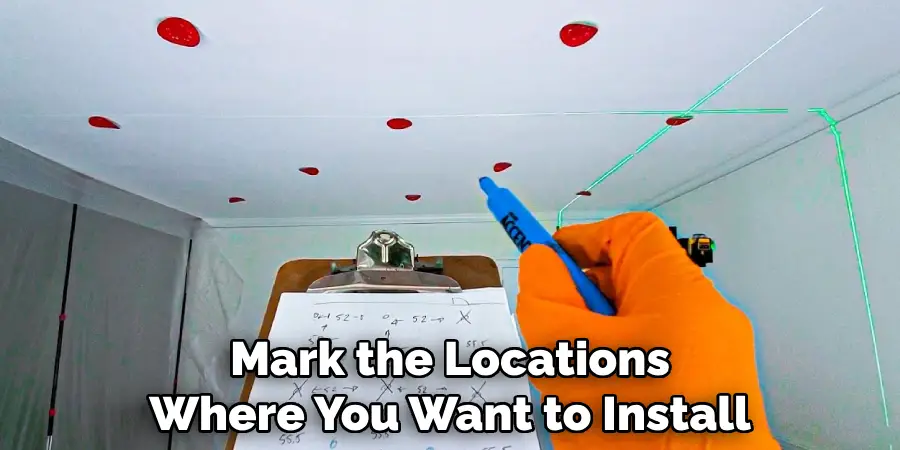
Step 1: Measure and Mark the Locations of the Recessed Lights
Using a measuring tape and pencil, mark the locations where you want to install your recessed lights on the ceiling tiles. Make sure to leave enough space between each light for proper coverage. Otherwise, you may end up with dark spots in your room. It’s also essential to consider the placement of any furniture or obstructions in the room. You don’t want to install a recessed light directly above a table or chair.
Step 2: Turn off the Power
Before starting any electrical work, make sure to turn off the power at the circuit breaker and use a voltage tester to confirm that there is no electricity flowing to the area where you will be working. You don’t want to risk electrocution or any other accidents. But, if you’re not comfortable working with electricity, it’s best to hire a licensed electrician. The safety of you and your home should always be a top priority. You can always enlist the help of a professional if you’re unsure about any step in this process.
Step 3: Remove Existing Light Fixtures
If there are any existing light fixtures in the area where you will be installing the recessed lights, take them down using a screwdriver. Make sure to save these fixtures if they’re still in good condition. You can always repurpose them for another project. But, if they’re old or damaged, dispose of them properly. If there are any wires connected to the existing fixtures, use wire connectors to secure them and cover them with electrical tape. The wires will be used to connect the recessed lights later on.
Step 4: Cut Holes in Ceiling Tiles
Using a drywall saw or hole saw, cut holes in the marked locations on your ceiling tiles. The size of the hole will depend on the size of your recessed light housing. Make sure to follow the instructions that come with your recessed light kit to ensure proper sizing. Otherwise, you may end up with a hole that is too big or small for your light.

You can also use a template provided with your kit to make sure the holes are evenly spaced and accurately cut. But, if you don’t have a template, you can also use a compass or circle cutter to trace a circle on the tile and then cut it out.
Step 5: Install the Recessed Light Housing
Take the recessed light housing from your kit and insert it into the hole in the ceiling tile. Make sure that it is securely attached to the ceiling grid and that there are no gaps or loose connections. Otherwise, the light may fall out or not function correctly. If needed, use screws to secure the housing in place. You can also use a piece of wire or zip ties to keep it in place. The purpose is to prevent the housing from moving during installation.
Step 6: Connect the Wires
Using wire connectors, connect the wires from the recessed light to the existing wiring in your ceiling. Make sure that you match up the correct colors and secure them tightly with a wire nut. You can also use electrical tape to cover any exposed wires for added safety. But if you’re not comfortable working with wires, it’s best to hire a licensed electrician. Although this step may seem simple, it’s crucial to ensure that all connections are secure and properly connected to avoid any electrical issues in the future.
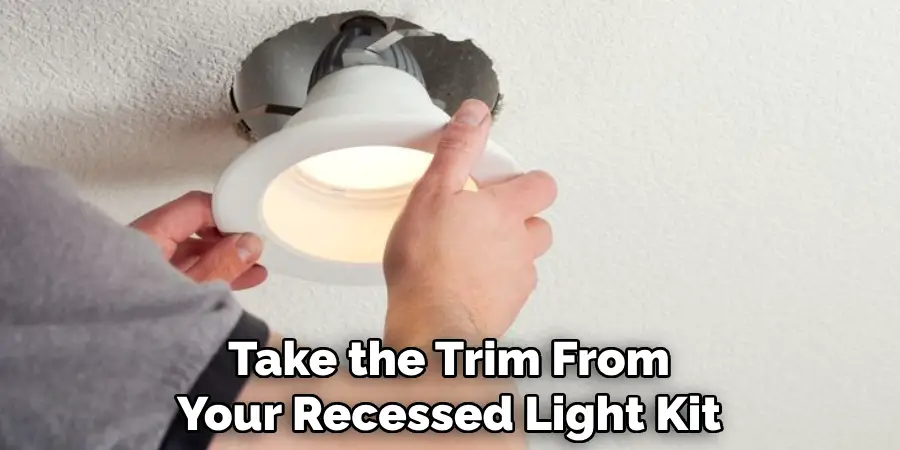
Step 7: Install the Light Trim
Take the trim from your recessed light kit and carefully snap it into place on the housing. Make sure that it is evenly flush with the surrounding ceiling tiles. If needed, use screws or clips provided with the kit to secure the trim in place. You can also use caulk or sealant around the edges for a finished look.
But if you’re using a trim that has built-in gaskets or seals, this step may not be necessary. The purpose of the trim is to cover any gaps between the housing and ceiling tile and provide a clean, polished look. But if you prefer exposed housing, you can skip this step.
Step 8: Install the Bulb
Take the bulb from your recessed light kit and carefully screw it into place inside the housing. Make sure that it is securely connected to avoid any potential accidents or damage to your light. If you’re using LED bulbs, make sure to handle them carefully as they can be delicate and break easily. You may also want to wear gloves to avoid any oils from your hands transferring onto the bulb’s surface, which can cause it to burn out quickly. You can also use a light bulb changing tool to help you install the bulb if needed.
Step 9: Test the Light
Now that all of the components are installed turn the power back on and test your recessed light. If everything is working correctly, you should have a fully functioning recessed light in your ceiling tile. But, if there are any issues or the light doesn’t turn on, make sure to turn off the power again and double-check all connections.
It’s better to be safe than sorry when it comes to electricity. It’s also a good idea to test the light for a few days before installing any additional lights to ensure that it is functioning correctly and there are no issues.
Step 10: Repeat Steps for Additional Lights
If you plan on installing more than one recessed light, follow the same steps for each one. Make sure to leave enough space between each light for proper coverage and avoid any obstructions or furniture in the room. Also, make sure that all lights are connected to a separate switch or dimmer for ease of use. You can also experiment with different bulb types or wattages to achieve your desired lighting effect. Recessed lights are a great way to add both function and style to any room in your home, so have fun with the installation process and enjoy your new lighting!
Following these steps on how to put recessed lights in a drop ceiling and with proper caution, you can successfully install recessed lights in your home without any complications. Remember to always prioritize safety and seek professional help if needed. With the right tools and knowledge, you can transform your space with beautiful and functional lighting. And who knows, maybe this experience will inspire you to take on more DIY projects in the future. Happy installing!
Maintenance and Safety Considerations
As with any electrical work, it’s essential to follow safety protocols and take proper precautions. Make sure to turn off the power before beginning any work and double-check all connections before turning it back on. Also, be careful when handling wires and light bulbs, as they can cause shock or break easily. If you’re not comfortable working with electricity, it’s best to hire a licensed electrician to ensure proper installation and safety.
To maintain your recessed lights, make sure to clean them regularly with a soft, damp cloth to remove any dust or debris. You should also check for any loose connections or burnt-out bulbs and replace them as needed. It’s also essential to keep an eye out for any signs of damage, such as discoloration or flickering lights, and address them promptly to prevent potential hazards.
By following these maintenance tips, you can keep your recessed lights in excellent condition and prolong their lifespan. Overall, with proper installation and upkeep, recessed lights can be a beautiful and functional addition to any room in your home.
Do You Need to Use Professionals?
While installing recessed lights can be a DIY project for some, it’s essential to know your limits and skill level. If you’re not confident in your abilities or uncomfortable working with electricity, it’s best to hire a licensed electrician. Professionals have the knowledge, experience, and tools to ensure a safe and proper installation. They can also help you determine the best placement and lighting options for your space.
It may be a more substantial initial investment, but it can save you time, stress, and potentially costly mistakes in the long run. So, if you have any doubts or concerns about installing recessed lights yourself, don’t hesitate to seek professional help. The safety and functionality of your home lighting are worth it. After all, the goal is to enjoy your new recessed lights and not worry about any potential hazards.
How Much Could It Cost?
The cost of installing recessed lights can vary depending on various factors, such as the number of lights, type of housing and trim, and whether you hire a professional or not. On average, the cost can range from $100 to $200 per light for materials and installation. However, if you decide to install them yourself, the cost could be significantly less.
Keep in mind that this estimate does not include any additional electrical work or repairs if needed. It’s always best to get a quote from a licensed electrician before beginning any project to have a better understanding of the potential costs involved.

Ultimately, the investment in recessed lights can add value and functionality to your home, making it worth considering for your next lighting upgrade. So, why not give it a try and see the difference recessed lights can make in your space? The results may just surprise you. Happy lighting!
Frequently Asked Questions
Q: Can Recessed Lights Be Installed in Any Type of Ceiling Tile?
A: Recessed lights can typically be installed in most types of ceiling tiles as long as they are not too thick or have obstructions such as ductwork or pipes. It’s best to check the manufacturer’s instructions for compatibility and consult a professional if needed.
Q: Can I Install Recessed Lights in a Drop Ceiling by Myself?
A: While it is possible to install recessed lights in a drop ceiling on your own, it’s essential to have proper knowledge and experience with electrical work. If you’re not confident or comfortable working with wires and electricity, it’s best to hire a licensed electrician for the installation process.
Q: Is It Safe to Install Recessed Lights in a Drop Ceiling?
A: As long as proper safety protocols are followed and all connections are secure, it is safe to install recessed lights in a drop ceiling. However, if you’re unsure or uncomfortable with electrical work, it’s best to seek professional help for the installation process.
Q: What Type of Bulb Should I Use for Recessed Lights?
A: The type of bulb you use for your recessed lights will depend on personal preference and the desired lighting effect. LED bulbs are energy-efficient and have a longer lifespan, while halogen or incandescent bulbs may provide a warmer and more traditional look. It’s essential to follow the manufacturer’s recommendations and consult a professional for specific bulb types and wattages. Overall, recessed lights can accommodate various bulb types, so it’s ultimately up to your preference and needs.
Conclusion
Installing recessed lights in a drop ceiling can dramatically uplift the ambiance and functionality of any space, turning even the most mundane room into a well-lit and inviting area. By following the steps outlined in this guide, you can achieve professional-grade lighting that not only enhances the visual appeal of your space but also contributes to a more energy-efficient and modern home or office environment.
Remember, while the process may seem complex at first glance, patience and attention to detail will ensure a successful installation. Feel empowered to tackle this project, knowing that the end result will be a beautifully illuminated space that you can be proud of. Thanks for reading this article on how to put recessed lights in a drop ceiling.