
Replacing under-cabinet light bulbs is a simple yet crucial task that enhances the functionality and ambiance of your office space. The process might seem straightforward, but it requires a bit of know-how to select the right bulb and execute the replacement safely and efficiently. This guide on how to replace under cabinet light bulbs is designed to walk you through each step of replacing your under cabinet light bulbs, ensuring you can maintain the perfect lighting in your office with ease.
What is an Under Cabinet Light Bulb?
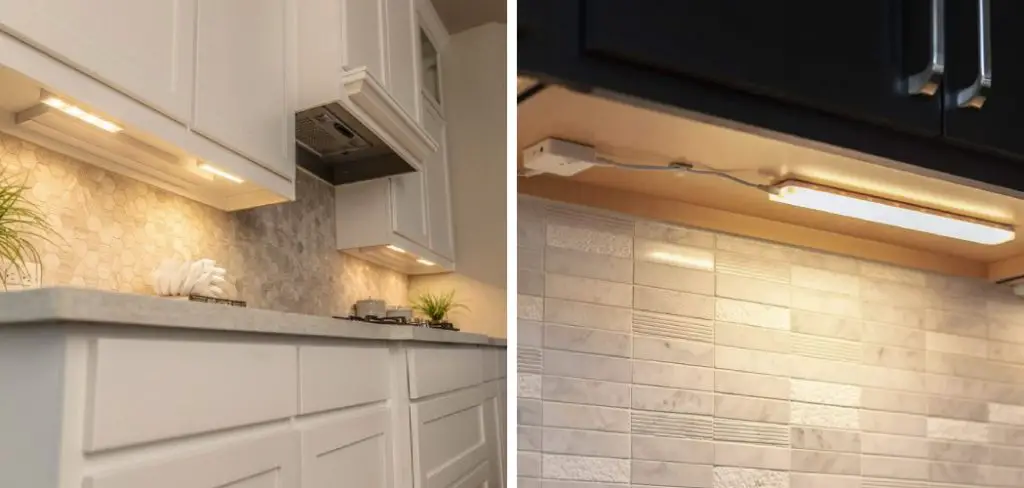
An under cabinet light bulb is a small, low-profile light fixture that is installed underneath office cabinets to provide additional lighting and visibility for food preparation and other office tasks. These bulbs are typically smaller in size compared to traditional household light bulbs and are designed to fit into compact spaces.
Types of Under Cabinet Light Bulbs
There are various types of under cabinet light bulbs available on the market, each with its own unique features and benefits. Some common types include:
LED Bulbs:
These are energy-efficient bulbs that produce less heat and have a longer lifespan compared to traditional incandescent bulbs.
Fluorescent Bulbs:
Also known as CFLs (Compact Fluorescent Lamps), these bulbs use low energy to provide bright, white light.
Halogen Bulbs:
Halogen bulbs produce a warm, yellow-toned light and are known for their high-intensity brightness.
Xenon Bulbs:
Similar to halogen bulbs, these produce warm-toned light but have a longer lifespan.

Necessary Tools
Before replacing your under cabinet light bulbs, make sure you have the necessary tools on hand. These may include:
Step Stool or Ladder to Access the Light Fixture
Since under-cabinet light fixtures are installed above eye level, having a step stool or ladder will make it easier to reach and replace the bulb.
Protective gear
It is always recommended to wear protective gear, such as gloves and safety glasses when replacing light bulbs to prevent any potential accidents.
New Light Bulbs
Make sure you have the appropriate type of replacement bulb for your under cabinet light fixture. It is also a good idea to have extra bulbs on hand in case of future replacements.
Cleaning Supplies
It’s a good practice to clean the area around the light fixture before and after replacing the bulb to ensure proper lighting and prevent any buildup of dust or debris.
10 Step-by-step Guidelines on How to Replace Cabinet Light Bulbs
Step 1: Identify the Type of Bulb You Need to Replace
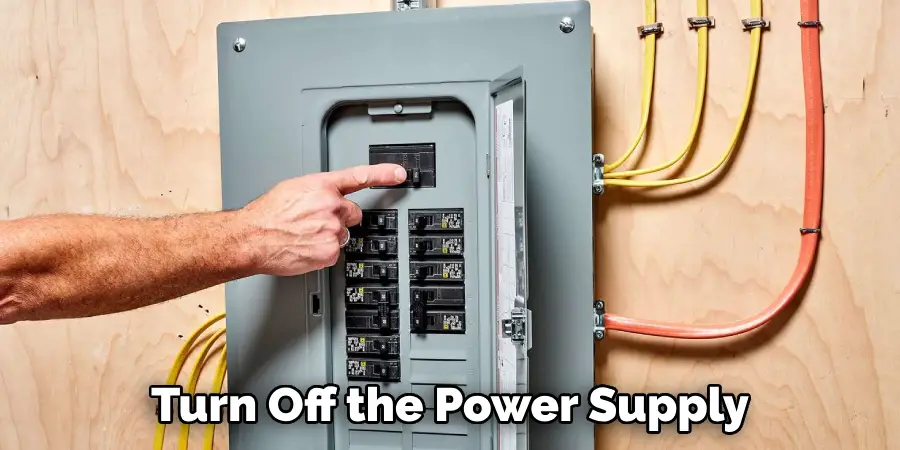
As mentioned earlier, there are various types of under-cabinet light bulbs. Before replacing a bulb, it is essential to know the type and size you need. You can refer to the manufacturer’s guide or take a picture of the current bulb to compare it with the options available at the store. It is also a good idea to turn off the power supply to the fixture before handling the bulb.
Step 2: Prepare your Work Area
Clear the area around the light fixture and make sure you have enough space to work comfortably. Lay down a cloth or paper underneath the work area in case of any accidental drops or spills. You can also use a flashlight to improve visibility in dimly lit areas. The cleaner the work area, the easier it will be to replace the bulb. You can also turn on the overhead lights or open a window for additional lighting. But remember to turn them off before working on the fixture.
Step 3: Access the Light Fixture
Use a step stool or ladder to reach the light fixture. Make sure it is safely secured and you have a steady footing before proceeding. But if the fixture is within reach, you can skip this step. The key is to have a clear view of the fixture and enough space to maneuver comfortably. You can also ask for assistance from someone to hold the ladder or step stool in place. It’s always better to be safe than sorry.
Step 4: Remove the old Bulb
Once you have access to the light fixture, remove the old bulb by twisting it counterclockwise. For LED and fluorescent bulbs, gently wiggle and pull them out of their sockets. If the bulb is stuck, don’t force it as you might break it or damage the fixture. Instead, try using a small suction cup or a pair of rubber gloves for a better grip. However, if the bulb is shattered or broken, use a broom and dustpan to clean up the area before proceeding. The last thing you want is to step on a piece of broken glass.
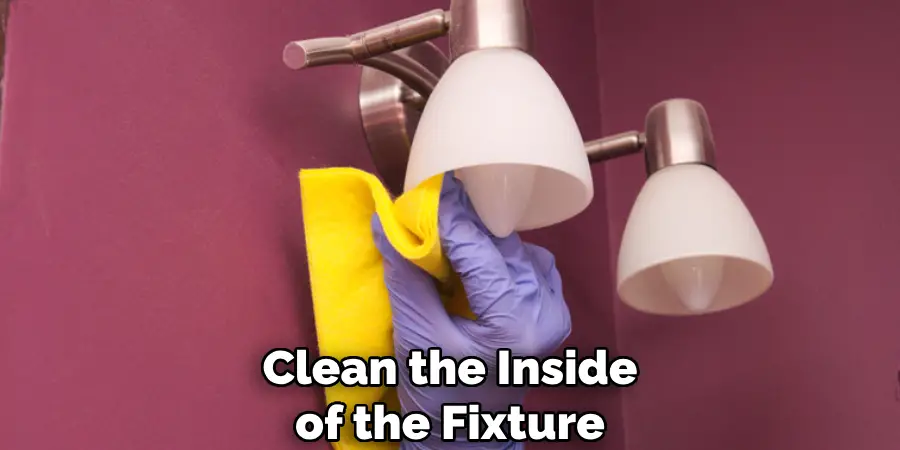
Step 5: Clean the Fixture
Before installing the new bulb, take this opportunity to clean the inside of the fixture. Use a dry cloth or compressed air to remove any dust or debris that may have accumulated in the fixture. This will help improve the brightness and lifespan of the new bulb. It’s also a good idea to wipe down the exterior of the fixture and the surrounding area for a polished finish. But make sure the fixture is completely dry before proceeding. It’s a safety precaution to avoid any potential electrical hazards.
Step 6: Install the New Bulb
Gently screw the new bulb into place, making sure it is securely fitted. If you are using an LED or fluorescent bulb, push and wiggle it into the socket until it clicks. Avoid over-tightening as this may damage the fixture. You can also refer to the manufacturer’s guide for specific instructions on installing their bulbs. The same goes for xenon and halogen bulbs, as they may require a different method of installation. You can also use gloves or a cloth to handle the bulbs, as oils from your skin can affect their lifespan.
Step 7: Turn on the Power
Once you have successfully replaced the bulb, turn on the power supply and test if the new bulb is working correctly. If it doesn’t turn on, double-check if it is securely fitted or try a different bulb. It’s also a good idea to wait a few minutes after turning on the power before testing if the bulb is working. Some bulbs may take a few seconds to reach full brightness. It’s also a good idea to test the switch or dimmer for any malfunctions. The last thing you want is to replace a bulb, only to find out that the issue lies with the switch or dimmer.
Step 8: Check for Proper Lighting
After testing, check if the light is evenly distributed and there are no dark spots or flickering. If you notice any issues, turn off the power supply and try reinstalling the bulb. You can also clean the fixture and surrounding area again to see if that improves the lighting. If all else fails, it may be a sign of a faulty fixture or wiring, and you may need to consult a professional electrician. There may also be an issue with the power supply or circuit, so it’s best to have a thorough inspection done. It’s always better to be safe than sorry when it comes to electrical work.
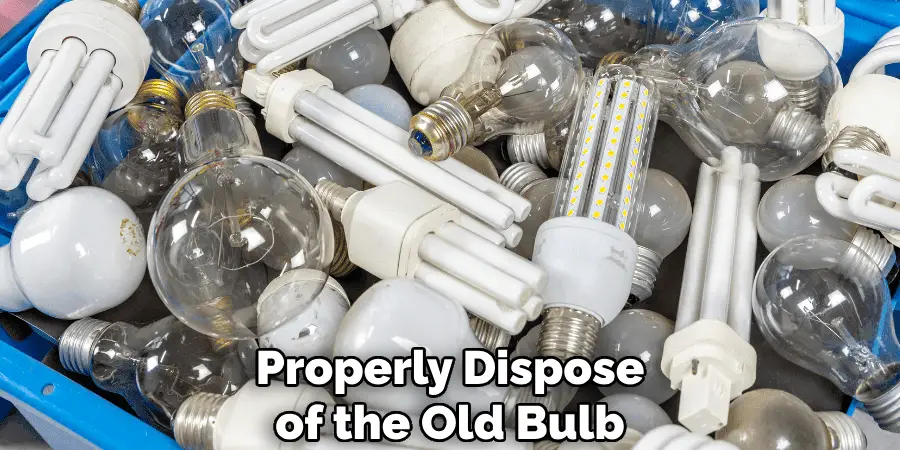
Step 9: Dispose of the Old Bulb
Properly dispose of the old bulb by wrapping it in a cloth or newspaper and placing it in a sealed plastic bag. This is to prevent any broken pieces from causing harm and also as a safety precaution for those handling the garbage. But if the bulb is still intact, you can also donate it to a local recycling center or program. You can also check with your local government for proper disposal methods in your area. The key is to handle the bulb with care and avoid any accidents.
Step 10: Clean up
Dispose of any used cleaning supplies and put away any tools or equipment that you may have used. If there are any spills, make sure to clean them up before storing the cleaning supplies. This will prevent any accidents or hazards when using them in the future.
You can also take this opportunity to organize and declutter your work area, making it easier for the next time you need to replace a bulb. And with that, your under cabinet light is now as good as new and ready to brighten up your space once again!
So remember, always handle bulbs safely, turn off the power supply before replacing them, and follow these simple steps on how to replace under cabinet light bulbs for a hassle-free experience. Happy lighting!
Testing and Adjustments
After following these steps, it’s always a good idea to test and make any necessary adjustments before storing away your tools. Here are some additional tips for testing and adjusting your under-cabinet light:
- Test the switch or dimmer by turning it on and off multiple times to ensure it is functioning properly.
- Use a level to check if the fixture is evenly mounted or if there are any adjustments needed.
- Try different bulb types or wattages to achieve your desired lighting effect.
- Consider using LED bulbs for their energy efficiency and long lifespan.
- If you have multiple under cabinet lights, test each one individually to ensure they are all working properly.
- Make sure the bulbs are securely fitted and tight, but avoid over-tightening to prevent damage.
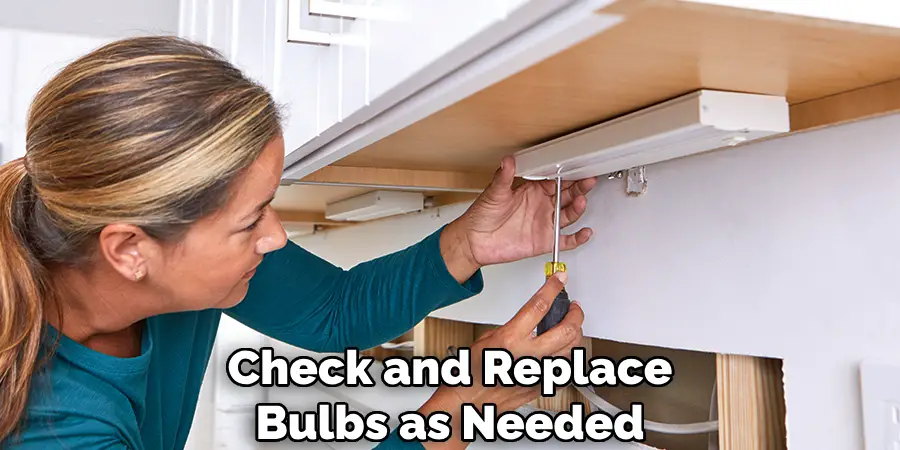
- With regular use, check and replace bulbs as needed to maintain optimal lighting.
By following these additional steps, you can ensure your under cabinet light is installed correctly and functioning at its best. And with proper maintenance, it will continue to brighten up your space for a long time to come! Keep shining on!
Maintenance Tips
To keep your under cabinet light in top condition, here are some maintenance tips to follow:
- Regularly Clean and Dust the Fixture to Prevent Any Buildup That May Affect the Brightness or Lifespan of the Bulb.
- Check the Bulbs Periodically for Any Signs of Damage or Wear and Replace them as Needed.
- If Using Fluorescent Bulbs, Be Aware of Their Lifespan and Plan for Replacements Accordingly.
- Consider Using Energy-efficient Bulbs to Save on Electricity Costs and Reduce the Need for Frequent Replacements.
- Inspect the Fixture and Wiring for Any Signs of Damage or Wear, and Consult a Professional if Needed.
By following these maintenance tips, you can ensure your under cabinet light stays in optimal condition and provides you with the lighting you need for everyday tasks.
Troubleshooting Common Issues
If you encounter any issues with your under cabinet light, here are some troubleshooting tips to help resolve them:
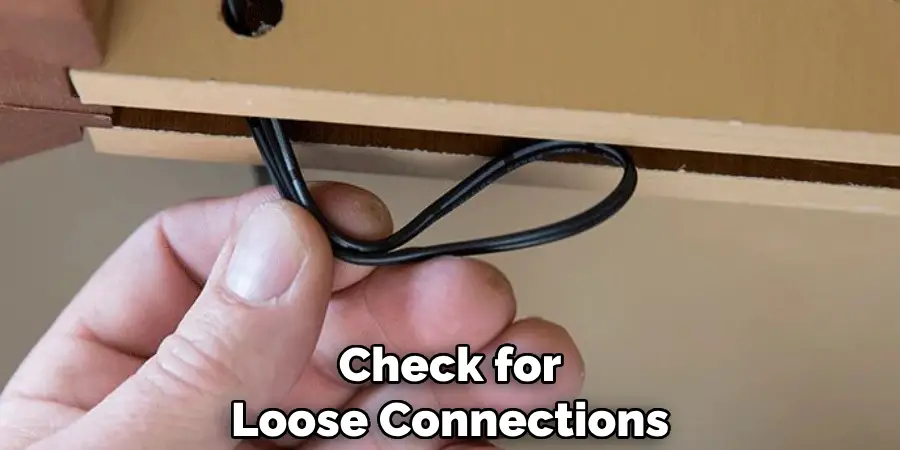
- If the light is flickering, check for loose connections or a faulty switch. Replace as needed.
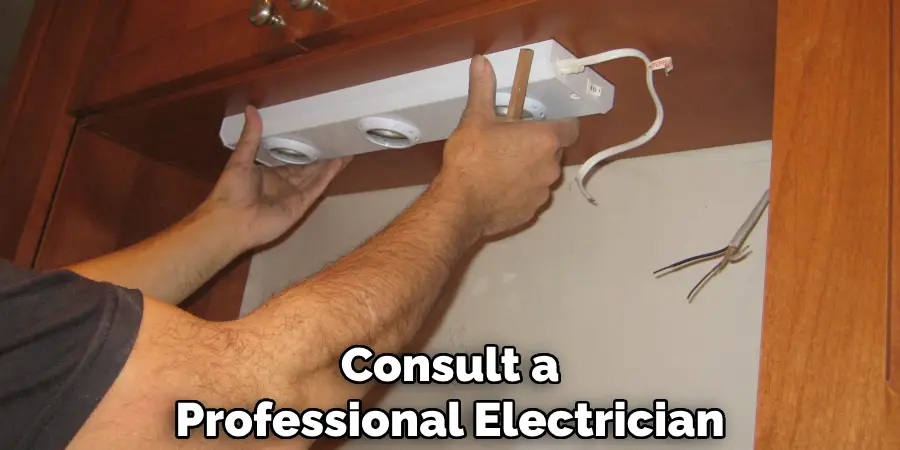
- If the light turns on and off intermittently, there may be an issue with the wiring or circuit. Consult a professional electrician for assistance.
- If the light is not turning on at all, check if it’s securely connected and replace the bulb with a new one.
- If there are dark spots or uneven lighting, try repositioning the fixture or changing the angle of the bulbs.
- If there is a buzzing sound, it could be a sign of a defective ballast in fluorescent bulbs. Replace as needed.
If you encounter any other issues or are unsure about how to troubleshoot, always consult a professional for assistance.
Do You Need to Use Professionals?
While replacing under cabinet light bulbs is a relatively simple task, there may be instances where you need to consult a professional. These include:
- If there are any signs of faulty wiring or damage to the fixture.
- If you encounter any issues with the circuit or power supply.
- If you are unsure about how to safely handle electrical work and lack experience or knowledge in this area.
- If you are replacing fluorescent bulbs and need assistance with ballast or wiring replacements.
- If you are not comfortable working with electricity and prefer to have a professional handle the task.
Remember, safety should always be the top priority when it comes to electrical work, so don’t hesitate to seek professional help if needed.
How Much Could It Cost to Replace Under Cabinet Light Bulbs?
The cost of replacing under cabinet light bulbs may vary depending on factors such as the type of bulb, size and number of fixtures, and labor cost. It can range from a few dollars for a single bulb replacement to a few hundred dollars for multiple fixtures or professional assistance.
Some factors to consider when estimating costs include:
- The Type of Bulb You Choose (Led Bulbs Are Typically More Expensive but Have Longer Lifespans).
- The Number of Fixtures That Need to Be Replaced.
- The Cost of the Bulbs and Any Additional Tools or Supplies Needed for Installation.
- If You Are Hiring a Professional, the Cost of Their Labor and Expertise.
Do some research and compare prices to find the most cost-effective solution for your specific needs. And remember, investing in energy-efficient bulbs can save you money in the long run by reducing electricity costs and the need for frequent replacements.
Frequently Asked Questions
Q: How Often Should I Replace My Under Cabinet Light Bulbs?
A: It is recommended to replace your under cabinet light bulbs every 1-2 years, depending on usage and the type of bulb. It’s also a good idea to replace them if they start flickering or have dark spots. You can also refer to the manufacturer’s guide for specific recommendations on their bulbs.
Q: Can I Use Different Types of Bulbs for my Under Cabinet Lights?
A: It is best to stick with the same type and wattage of bulb recommended by the fixture manufacturer. Using a different type or wattage may cause damage to the fixture or affect its performance. However, if you are unsure, you can consult a professional electrician for their recommendation.
Q: Is It Safe to Replace the Bulb Myself?
A: Yes, it is safe to replace the bulb yourself as long as you follow safety precautions and turn off the power supply before replacing it. However, if you are uncomfortable or inexperienced with electrical work, it’s best to consult a professional electrician for assistance. Remember, safety should always come first.
Q: What If the Light Fixture Still Doesn’t Work After Replacing the Bulb?
A: If the light fixture still doesn’t work after replacing the bulb, it may be a sign of a faulty fixture or wiring. It’s best to consult a professional electrician for a thorough inspection and repair if needed. It’s also important to check the power supply and circuit for any issues.
Conclusion
In conclusion, replacing under cabinet light bulbs is a necessary skill for any homeowner or renter. By following these steps and tips, you can ensure that your office remains well-lit and functional without any hassle or risk of injury. Remember to always turn off the power before attempting to replace a bulb, use the correct type of bulb, and handle them with care. With these tips on how to replace under cabinet light bulbs in mind, you can confidently tackle any under cabinet light bulb replacement and keep your office shining bright. So next time a bulb burns out, don’t panic – just grab your new bulb and follow this guide for a quick and easy replacement process!