The Steelcase Leap V2 is a masterpiece of ergonomic engineering, but there may come a time when you need to take it apart. Whether you’re planning a deep clean, reupholstering the fabric, replacing a worn-out component, or simply trying to move it through a narrow doorway, disassembly can seem like a daunting task. The chair’s complex appearance hides a surprisingly straightforward and logical construction. With a few common tools and a bit of patience, you can deconstruct your chair safely and efficiently. This guide will provide clear, beginner-friendly instructions on how to disassemble a steelcase leap v2, empowering you to tackle the project with confidence.

Disassembling your Steelcase Leap V2 chair may seem intimidating at first, but with the right guidance, the process can be straightforward and manageable. Whether you’re preparing to ship the chair, replace a part, or simply store it away, breaking it down into its components can save time and effort. Throughout the process, it’s essential to handle each part carefully to avoid damage and ensure that reassembly, if needed, will be just as smooth. By following the steps outlined here, you’ll be able to approach the task with ease and confidence.
Step-by-Step Guide on How to Disassemble Steelcase Leap V2
Step 1: Prepare Your Tools and Workspace
Before you begin, it’s wise to prepare your workspace and gather the necessary tools. You will need a clean, open area with enough space to lay out the chair parts without losing them. A soft blanket or mat can protect both your floor and the chair’s components from scratches. The primary tools required for this job are a set of Torx bits (T20 and T25 are common), a Phillips head screwdriver, and a flathead screwdriver or a trim removal tool for prying. A rubber mallet can also be very helpful for separating the gas cylinder from the base.
Step 2: Remove the Seat Cushion
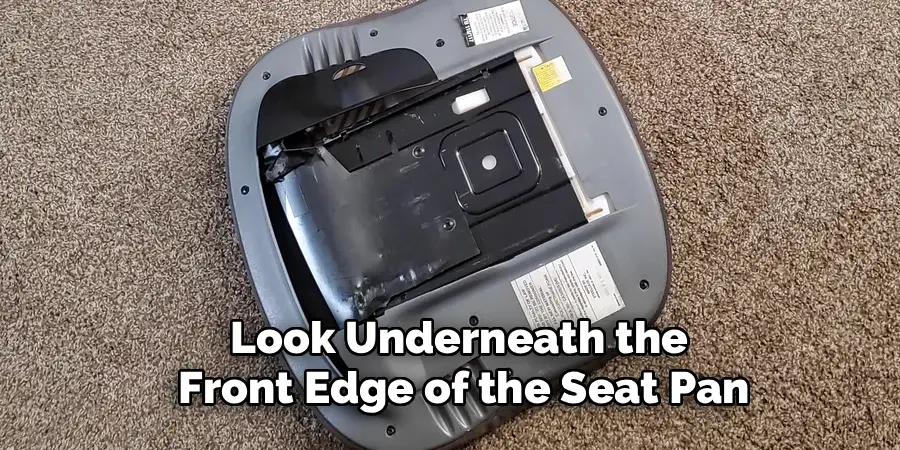
The easiest place to start is with the seat cushion. To remove it, slide the seat all the way forward using the adjustment lever on the right side. This will expose the plastic clips or screws that hold it in place. Look underneath the front edge of the seat pan. You will see two clips or screws securing the cushion to the frame. Use your fingers or a flathead screwdriver to gently release these clips, or unscrew them if that’s what your model has. Once they are released, you can slide the entire seat cushion forward and lift it off the chair frame.
Step 3: Detach the Backrest Pad
Next, you will remove the padded backrest. This component is typically held in place by a series of plastic clips along its perimeter. Start at the top of the backrest and gently pull the edge of the fabric-covered pad away from the plastic frame. You should hear a series of soft popping sounds as the clips disengage. Work your way down both sides, carefully prying the pad away from the main back structure. A trim removal tool can be very helpful here to avoid damaging the plastic. Once all the clips are free, the backrest pad will lift away easily.
Step 4: Remove the Armrests
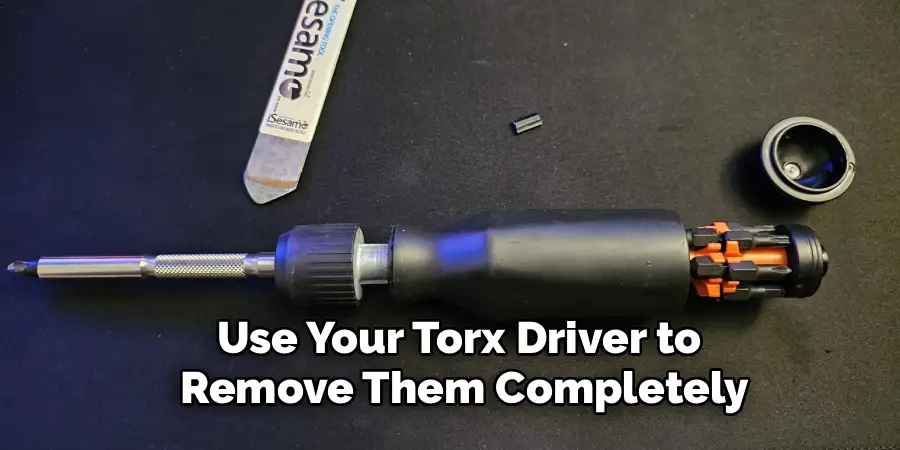
The armrests can be removed by accessing the bolts on the underside of the seat frame. For each arm, you will typically find two or three Torx bolts (usually T25 size). These bolts connect the armrest support post to the main mechanism of the chair. Position the chair so you have clear access to these bolts and use your Torx driver to remove them completely. Once the bolts are out, the entire armrest assembly, including the pad and the support post, can be pulled away from the side of the chair.
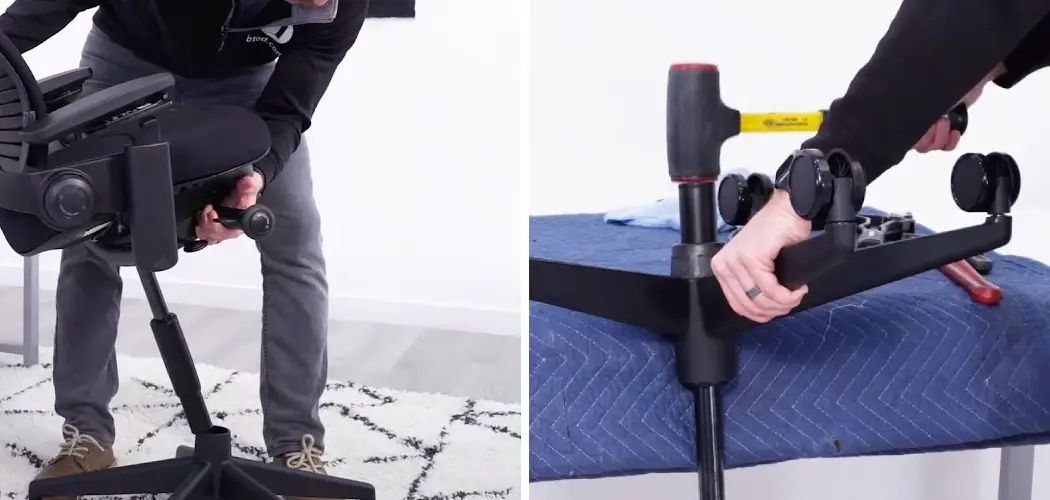
Step 5: Detach the Chair Mechanism from the Gas Cylinder
This step separates the entire top portion of the chair from its base. Turn the chair upside down or carefully lay it on its side. Look at the point where the main metal mechanism connects to the top of the gas cylinder post. You will see a small lever or a clip that locks it in place. Press this lever or use a screwdriver to release the clip. With the lock released, the mechanism should simply lift off the cylinder. It might be a tight fit, so a gentle wiggle may be necessary to free it.
Step 6: Separate the Gas Cylinder from the Wheel Base
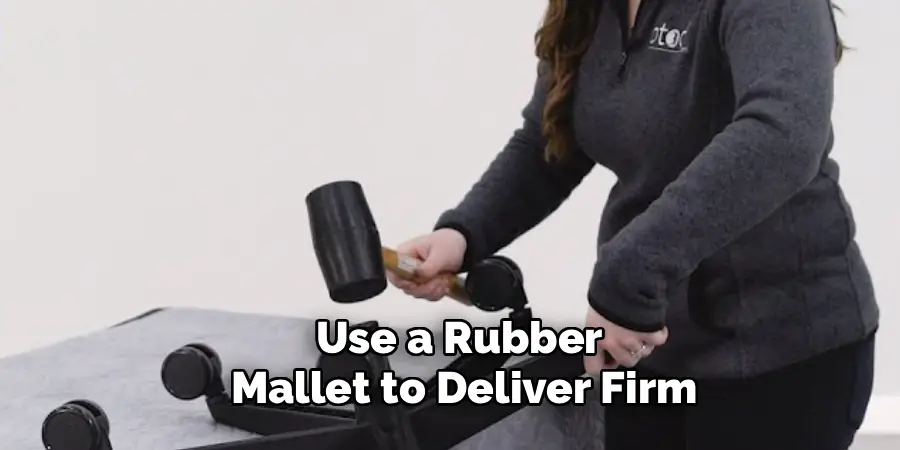
This is often the most challenging part of the disassembly. The gas cylinder is pressure-fitted into the five-star base and can become very tightly wedged over time. Turn the base upside down so the cylinder is pointing toward the floor. Use a rubber mallet to deliver firm, sharp blows to the bottom edge of the cylinder where it protrudes through the base. Work your way around the cylinder, striking it evenly to slowly knock it out. Avoid using a metal hammer, as this can damage the cylinder.
Step 7: Remove the Casters (Wheels) from the Base
With the base now free, you can easily remove the casters. The wheels on a Leap V2 are typically friction-fit, meaning they are held in place by pressure, not by screws. Firmly grip one of the casters and pull it straight out from its socket on the end of the base leg. It may require a strong tug and a slight wiggling motion to pop it free. If a wheel is particularly stubborn, you can use a large flathead screwdriver to gently pry it out, using the base for leverage.
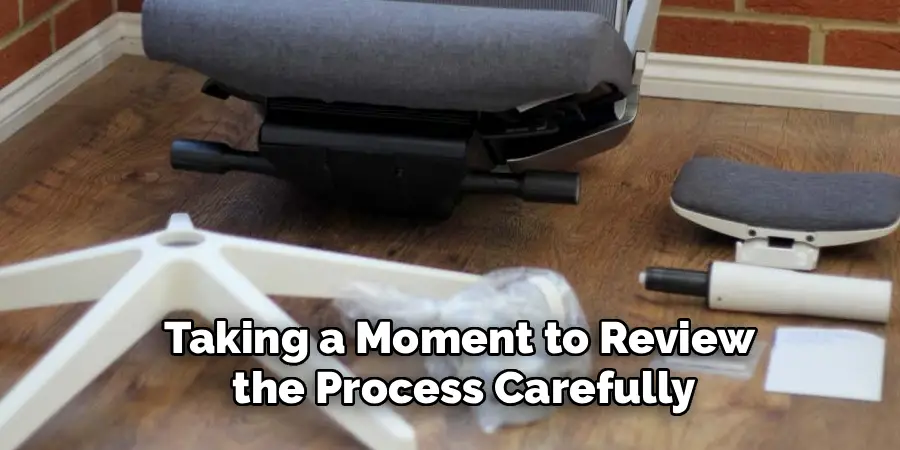
Common Disassembly Mistakes
When disassembling a Leap V2 chair, there are a few common mistakes to avoid to prevent damage to the chair or injury to yourself. One frequent mistake is applying excessive force to components without checking if they are correctly aligned for removal. This can lead to cracks or breaks in the plastic parts of the chair. Similarly, attempting to use the wrong tools or makeshift substitutes, like knives or other inappropriate objects, can damage the chair and create safety hazards.
Another common error is failing to properly support the base or other heavy parts during disassembly. Dropping these components, especially on hard surfaces, can damage the parts or even the floor. Lastly, skipping the step of consulting the manufacturer’s instructions or guides can result in unnecessary frustration or improper reassembly later. Taking a moment to review the process carefully and ensuring you have the correct tools on hand can save time and effort in the long run.
Frequently Asked Questions (FAQ)
What Tools Do I Need to Disassemble a Steelcase Leap V2?
The tool list is surprisingly simple. For most of the job, you will need:
- A set of Torx head screwdrivers or bits (T20 and T25 are the most common sizes).
- A Phillips head screwdriver.
- A flathead screwdriver or a plastic trim removal tool for prying off pads.
- A rubber mallet is highly recommended for separating the gas cylinder from the base.
Is It Possible to Reupholster the Seat and Back Pads?
Yes, absolutely. Once you have removed the seat and backrest pads from the chair frame, they can be reupholstered. The fabric is typically attached with staples on the underside of the pad. You can carefully remove the old staples, use the old fabric as a template to cut your new material, and then use a staple gun to attach the new fabric, ensuring it is pulled taut for a smooth, professional finish.
How Do I Remove the Gas Cylinder if It’s Stuck?
A stuck gas cylinder is the most common issue. The best method is to turn the base upside down and use a rubber mallet to strike the bottom of the cylinder where it emerges from the base. If that doesn’t work, apply some penetrating oil (like WD-40) around the joint and let it sit for a while before trying again. As a last resort, a pipe wrench can be used to twist the cylinder free, but this risks scratching it.
Can I Replace Just the Armrest Pads?
Yes. You don’t need to replace the entire armrest mechanism. The armrest pads themselves are usually held on by a few Phillips head screws on the underside. Simply flip the armrest over, remove the screws, and the old pad will come right off. You can then attach the new replacement pad using the same screws. This is a common and easy repair to perform.
Why Won’t the Backrest Pad Come Off?
The backrest pad is held on by a series of plastic clips. If it feels stuck, it’s likely that one or more clips are still engaged. Do not use excessive force, as this can break the clips or the pad’s backing board. Work slowly around the perimeter, using a plastic trim removal tool to gently pry between the pad and the frame to locate and release the stubborn clips.
Conclusion
Disassembling a Steelcase Leap V2 is a very manageable project that opens up a world of possibilities for maintenance, repair, and customization. By following a logical sequence and using the right tools, you can confidently take apart your chair without causing damage. From removing the cushions and arms to separating the base and cylinder, each step is straightforward. This guide has provided you with the fundamental knowledge on how to disassemble steelcase leap v2. Now you can approach your cleaning, moving, or reupholstering project with the skills needed to get the job done right.