
The zero gravity chair has become a symbol of ultimate relaxation, found on patios, in living rooms, and even in wellness clinics. Inspired by the posture of astronauts in space, these chairs are designed to distribute your body weight evenly, reducing pressure on your spine and creating a feeling of near-weightlessness. While they look like simple recliners, understanding their mechanics is key to unlocking their full potential for comfort and health benefits. This guide will provide clear, beginner-friendly instructions on how to use zero gravity chair, ensuring you can sit back, recline, and drift into a state of perfect calm.
Zero gravity chairs have become increasingly popular for their unique ability to provide unmatched relaxation and health benefits. Inspired by NASA’s research on the most ergonomic posture for astronauts, these chairs are carefully engineered to promote better circulation, reduce stress on the muscles, and alleviate pressure on the lower back.
Whether you’re seeking comfort after a long day or aiming to improve your overall well-being, zero gravity chairs offer a practical and luxurious solution for rest and rejuvenation.
Why Reason Zero Gravity Chairs
The reason zero gravity chairs are so effective lies in their design and functionality. When reclined into the zero-gravity position, the body’s weight is evenly distributed across the chair, simulating the feeling of weightlessness. This position reduces the strain on the spine, improves blood circulation, and helps lower the heart rate, fostering a state of deep relaxation. Additionally, this position allows for the optimal alignment of the body, relieving tension in the joints and muscles. For those experiencing back pain or stress, zero gravity chairs provide a therapeutic experience that supports both physical health and mental tranquility.
Step-by-Step Guide on How to Use Zero Gravity Chair
Step 1: Unfold and Set Up Your Chair
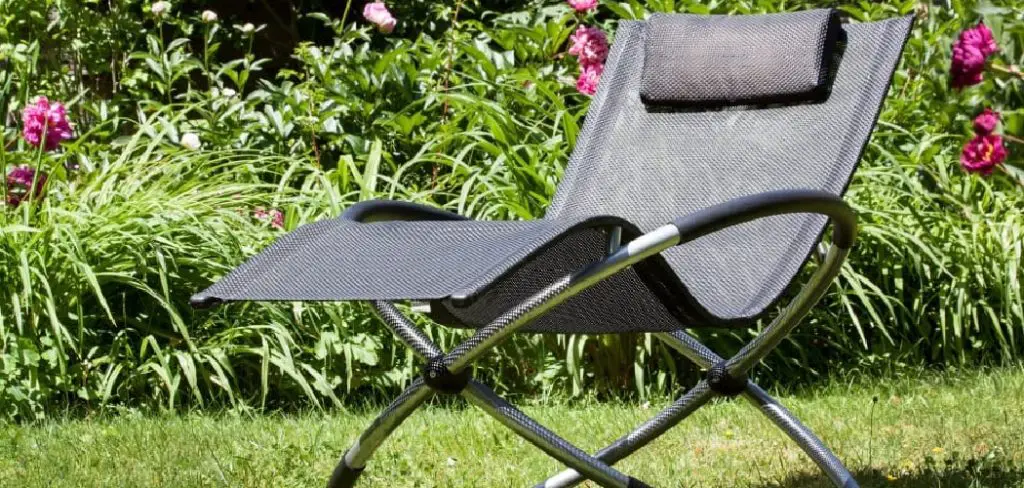
Before you can relax, you need to set up the chair. Most zero gravity chairs are designed for portability and fold flat for storage. To unfold it, stand the chair upright on its feet and pull the front and back legs apart until the frame is fully extended. You will feel it settle into a stable, upright seating position. Give the armrests a gentle push to ensure everything is locked into place. Make sure you set it up on a level, stable surface, whether you’re on your patio, deck, or indoors, to prevent any wobbling or tipping.
Step 2: Sit Down and Get Comfortable
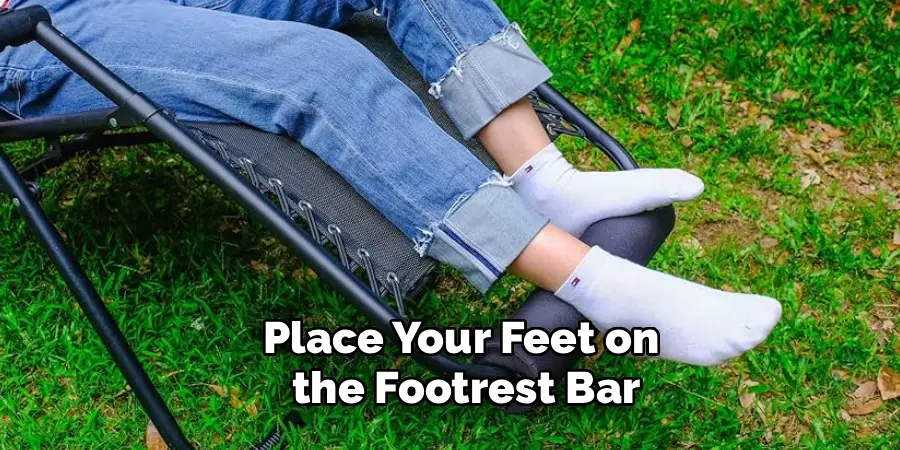
Once the chair is stable, sit down as you would in any normal chair. Place your feet on the footrest bar at the bottom and your arms on the armrests. Your initial position should be upright. Before you start to recline, take a moment to adjust yourself so your back is comfortably against the chair’s fabric. Some models come with an adjustable pillow for head or lumbar support. Slide this pillow up or down along its track until it sits perfectly at the curve of your neck or the small of your back for customized comfort.
Step 3: Reclining Gracefully
The magic of the zero gravity chair happens during the recline. To lean back, simply push gently against the backrest with your body while simultaneously pushing forward lightly with your feet on the footrest. The motion should be smooth and fluid. The chair is designed to glide back with your body’s weight, elevating your legs as your torso leans back. You don’t need to force it; a gentle, steady pressure is all that’s required. You can stop at any angle that feels comfortable, from a slight recline to the full zero gravity position.
Step 4: Find the Zero Gravity Position
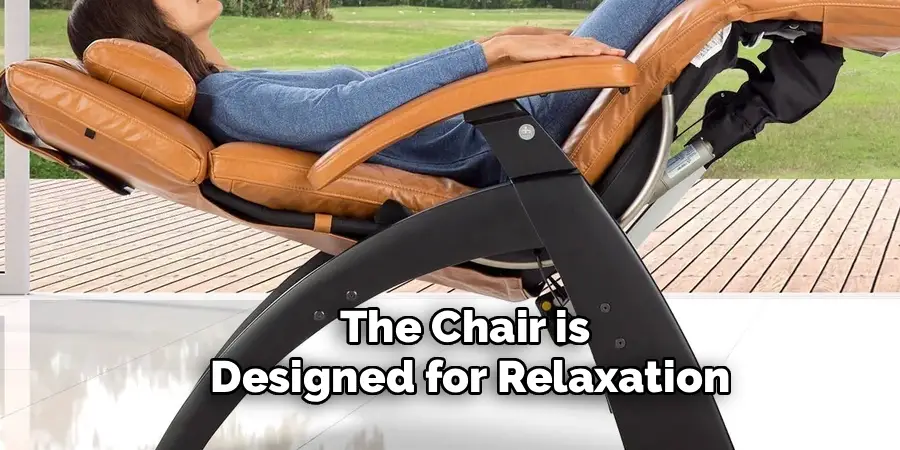
The “zero gravity” position is achieved when your legs are elevated to a level slightly above your heart. This is the posture that most effectively reduces spinal pressure and improves circulation. Continue to lean back smoothly until you feel that your feet are higher than your chest. In this position, you should feel a sense of weightlessness as the pressure points on your body are minimized. This is the optimal position for deep relaxation and reaping the chair’s therapeutic benefits. It may feel a little unusual at first, but your body will quickly adapt to the comfortable, supportive posture.
Step 5: Lock the Chair in Place
Once you find your perfect angle of recline, you must lock the chair to keep it from moving. Located just under each armrest, you will find a locking mechanism. These can be small levers, twist knobs, or clips. To engage the lock, either turn the knob until it’s tight or flip the lever into the locked position. This will secure the chair at your chosen angle, so you don’t have to use your body to hold the position. This is a critical step for relaxing completely, as it allows your muscles to fully let go.

Step 6: Returning to the Upright Position
When you are ready to get up, you first need to disengage the locking mechanism. Turn the knobs or flip the levers back to the “unlocked” position. Once unlocked, the process of sitting up is the reverse of reclining. Engage your core muscles and gently lean your torso forward while allowing your feet to drift back down towards the ground. The chair’s gliding mechanism will assist you, bringing you back to a full, upright seating position smoothly and with minimal effort. Avoid any sudden or jerky movements.
Step 7: Fold the Chair for Storage
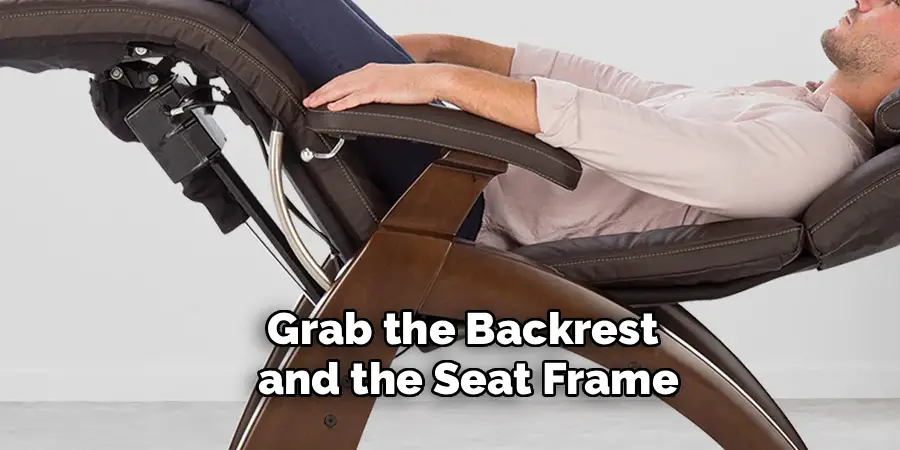
If you need to store your chair, folding it is just as easy as setting it up. First, make sure the chair is in its fully upright position. Then, grab the backrest and the seat frame and simply push them together. The chair will collapse into its flat, portable form. Many models have a small clasp or lock to keep the chair from unfolding during transport. This compact design makes it easy to store in a closet, garage, or the trunk of your car for your next camping trip or beach day.
Cleaning and Maintenance Tips
To keep your chair in great condition, regular cleaning and proper maintenance are essential. Start by wiping down the frame and fabric with a damp cloth to remove dirt, dust, or spills after each use. For stubborn stains, use a mild soap solution and rinse thoroughly with clean water. Avoid using harsh chemicals, as these can degrade the material over time. If your chair has metal components, check for signs of rust periodically and treat them promptly with an appropriate rust remover.
Additionally, ensure all screws and joints are securely tightened to maintain stability. When not in use, store your chair in a dry, cool place to prevent mildew or damage caused by excess moisture. With a little care, your chair will remain functional and look great for years to come.
Frequently Asked Questions (FAQ)
Is It Safe to Sleep in a Zero Gravity Chair All Night?
While napping in a zero gravity chair is incredibly comfortable and generally safe, using it for a full night’s sleep is not typically recommended. The chair is designed for relaxation and therapeutic positioning, not for the movements and position changes that occur during a long sleep cycle. Extended, motionless sleep in one position could potentially lead to stiffness. It’s best used for naps and periods of deep relaxation.
How Do I Clean My Zero Gravity Chair?
Most zero gravity chairs are made with durable, weather-resistant fabric. For general cleaning, simply wipe the fabric down with a damp cloth using a mixture of mild soap and water. For tougher stains, you can use a soft-bristled brush. Rinse the fabric thoroughly with clean water and allow it to air dry completely before folding or storing it to prevent mildew. Avoid using harsh chemicals or bleach.
What Are the Health Benefits of a Zero Gravity Chair?
The main benefits come from the neutral-posture reclining position, which can:
- Reduce pressure on the spine and relieve back pain.
- Improve blood circulation by elevating the legs above the heart.
- Decrease swelling in the legs.
- Promote deeper, more relaxed breathing by opening up the diaphragm.
- Lessen tension in the neck and shoulders.
The Chair Won’t Lock in Place. What Should I Do?
If the locking mechanism isn’t holding, first ensure you are engaging it fully. Twist knobs need to be tightened firmly (by hand), and levers should click securely into place. If it still slips, the mechanism may be worn or faulty. Check for any visible damage or loose parts. Some models allow for minor adjustments with a screwdriver, but if the part is broken, you may need to contact the manufacturer for a replacement part.
Can a Zero Gravity Chair Be Left Outside?
While most zero gravity chairs are built with weather-resistant materials like powder-coated steel and UV-resistant fabric, it is not ideal to leave them exposed to the elements permanently. Prolonged exposure to direct sun, rain, and humidity can eventually cause the fabric to fade and the metal frame to rust. To extend the life of your chair, it’s best to store it indoors or use a protective cover when not in use.
Conclusion
Mastering the use of a zero gravity chair is your ticket to a new level of comfort and relaxation. The simple, intuitive design allows you to effortlessly glide from an upright seat to a weightless, therapeutic recline. By understanding how to smoothly lean back, find the ideal position, and securely lock the chair in place, you can fully enjoy all the benefits it has to offer. This guide has walked you through everything you need to know about how to use zero gravity chair, so you can now confidently set up your chair and escape the pressures of the day.