
A standing desk can make your workday feel more active, but only if it is set at the right height. If your desk is too high, your shoulders may tense up. If it is too low, you may lean forward and strain your neck, wrists, or back. That is why learning how to set heights on standing desk is a simple but important skill for comfort and posture.
The goal is not to stand all day or find one “perfect” number for everyone. The right setup depends on your height, arm position, monitor placement, shoes, floor surface, and the tasks you do most often. Small changes can make a big difference.

This guide walks you through the process in a clear, beginner-friendly way. You will learn how to set your desk for both standing and sitting, adjust your screen, protect your wrists, and save your preferred settings if your desk has memory controls.
Why Standing Desk Height Settings Matter
Correct standing desk height helps your body stay in a neutral, relaxed position. When your elbows, wrists, neck, and eyes line up well, you can work longer with less discomfort.
Good height settings can reduce shoulder tension, wrist pressure, lower back fatigue, and neck strain. They also make it easier to switch between sitting and standing without breaking focus.
A well-set desk supports better typing, clearer screen viewing, and smoother movement during the day. It also helps you build healthier habits because standing feels more natural when the desk fits your body. Instead of forcing your posture, the desk should support it.
Step-by-Step Guide To How To Set Heights On Standing Desk
Step 1: Measure Your Natural Elbow Position
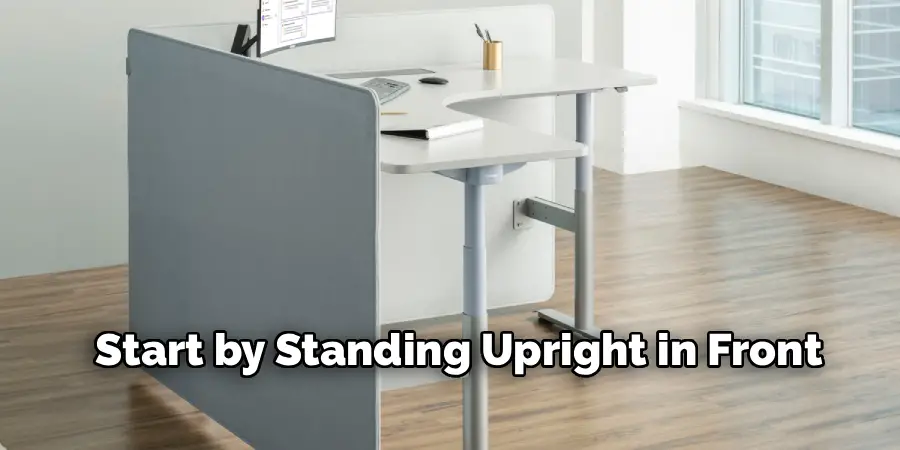
Start by standing upright in front of your desk with your shoulders relaxed. Keep your arms close to your sides and bend your elbows to about a 90-degree angle. Your forearms should feel level with the floor, not angled sharply up or down.
This elbow position is the main reference point when learning how to set heights on standing desk because it helps keep your shoulders, wrists, and hands in a neutral working posture.
Raise or lower the desktop until the keyboard surface lines up with your forearms. Do not shrug your shoulders to reach the desk. If you feel tension right away, the desk is probably too high.
Step 2: Set The Keyboard At A Comfortable Level
Your keyboard should sit at a height where your wrists stay straight while typing. If your wrists bend upward, the desk may be too high. If your hands drop below your forearms, the desk may be too low.
Keep your elbows close to your body, not stretched forward. Your hands should move easily across the keyboard without your shoulders lifting.
If you use a thick keyboard, wrist rest, or keyboard tray, include that extra height in your setup. Even a small difference can affect comfort. Type for a minute and notice whether your arms feel relaxed. A good height should feel easy, not forced.
Step 3: Place The Mouse Beside The Keyboard
Your mouse should sit on the same level as your keyboard. If it is higher, lower, or too far away, your shoulder may work harder than needed. Keep the mouse close enough that your elbow stays near your side.
Avoid reaching forward or outward every time you move the mouse. That repeated reach can cause shoulder and upper back fatigue over time.
Your wrist should stay mostly straight while using the mouse. If your wrist bends, adjust the mouse position or try a different mouse style. The goal is smooth movement from your arm and hand without tightness in your neck, shoulder, or wrist.
Step 4: Adjust Your Monitor To Eye Level
After setting the desk height for your hands, check your monitor. The top third of the screen should be near eye level when your head is upright. You should not need to tilt your chin up or bend your neck down to read.
Place the monitor about an arm’s length away. If you use a larger screen, you may need a little more distance. If text feels too small, increase the display size instead of leaning forward.
A monitor arm or stand can help if your screen is too low. This adjustment is important because desk height and monitor height are related, but they often need separate fixes.
Step 5: Check Your Standing Posture
Stand with your feet about hip-width apart. Keep your knees soft, not locked. Your weight should feel balanced between both feet, with your spine tall and your shoulders relaxed.
Do not lean on the desk for long periods. Light contact is fine, but heavy leaning can round your shoulders and reduce the benefit of standing.
Pay attention to your lower back. If you feel pressure, shift your stance or use a footrest to place one foot slightly higher for a short time. Changing position often is better than standing still. A standing desk works best when it supports movement, not stiff posture.
Step 6: Find Your Best Sitting Height
A standing desk should also fit you well when you sit. Lower the desk until your elbows rest at about a 90-degree angle while typing. Your shoulders should stay relaxed, and your wrists should remain straight.
Set your chair so your feet rest flat on the floor or on a footrest. Your knees should be close to hip level, and your back should feel supported.
This sitting position matters because many people switch between sitting and standing several times a day. If only one position is comfortable, you may avoid using the desk fully. A good setup should make both positions easy to use.

Step 7: Test The Height During Real Work
Once your desk looks correct, test it during normal tasks. Type an email, use your mouse, read a document, and join a video call. A setup can seem right at first but feel different after ten or fifteen minutes.
Watch for warning signs like raised shoulders, bent wrists, leaning forward, or neck tightness. These signs usually mean you need a small adjustment.
When practicing how to set heights on standing desk, think in small changes. Move the desk up or down by half an inch at a time, then test again. Comfort often comes from fine-tuning, not one large adjustment.
Step 8: Save And Review Your Settings
If your standing desk has memory buttons, save your best sitting and standing heights. Many desks let you hold a number button for a few seconds until the setting stores. Check your desk manual if the process is not obvious.
Write down your preferred heights as a backup. This is helpful if the desk resets or if someone else uses it.
Review your settings after a few days. Shoes, chair height, monitor changes, and new accessories can all affect comfort. Your ideal setup may change slightly over time. Treat desk height as something you can adjust, not a one-time decision.
Frequently Asked Questions
What Is The Best Height For A Standing Desk?
The best height is the one that lets your elbows bend at about 90 degrees while your shoulders stay relaxed. For many people, this means the desktop is around elbow height when standing. There is no single perfect number because body height, arm length, shoes, and keyboard thickness all affect the final setting.
Should My Standing Desk Be At Elbow Height?
Yes, elbow height is a strong starting point for most users. Your keyboard and mouse should line up with your forearms so your wrists stay straight. However, you may need small adjustments based on comfort. If your shoulders lift, lower the desk. If you hunch forward, raise it slightly or adjust your screen.
How High Should My Monitor Be On A Standing Desk?
Your monitor should be high enough that the top third of the screen is near eye level. This helps you keep your head upright instead of looking down all day. The screen should also sit about an arm’s length away. If you use a laptop, a laptop stand with an external keyboard can improve your position.
Is It Better To Stand All Day Or Switch Positions?
Switching positions is better for most people. Standing all day can cause foot, leg, and lower back fatigue, especially if you stay still. A healthy routine includes sitting, standing, walking, and small posture changes. Try standing for short periods at first, then increase the time as your body adjusts.
Do I Need An Anti-Fatigue Mat?
An anti-fatigue mat is not required, but it can help if you stand for long periods. It adds cushioning under your feet and may reduce pressure on your legs and lower back. Supportive shoes also matter. If you stand on a hard floor, a mat can make your setup feel more comfortable.
Conclusion
Setting up a standing desk is easier when you focus on your body instead of guessing a random height. Start with your elbows at about 90 degrees, keep your keyboard and mouse at the same level, and place your monitor near eye level. Then test your setup during real work and make small changes until it feels natural.
Remember that comfort depends on both sitting and standing positions. Save your preferred settings if your desk has memory controls, and review them whenever your chair, shoes, monitor, or accessories change.
Once you know how to set heights on standing desk, you can create a workspace that supports better posture, less strain, and a smoother workday. Adjust it today, test it carefully, and let your desk work with your body instead of against it.
