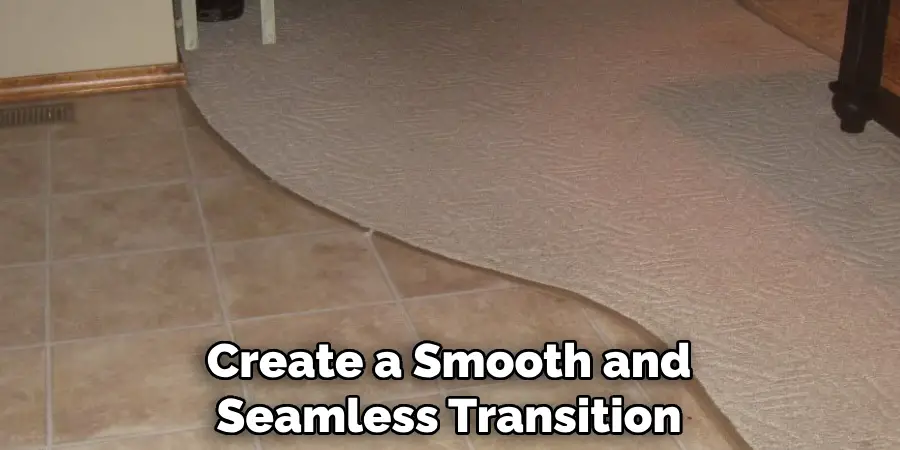
Are you tired of having two different types of flooring in your home? You may have tile in one room and carpet in another, and you want to create a seamless transition between the two.
Merging the aesthetic appeal of tile with the warmth and comfort of carpet in a seamless transition can significantly enhance the beauty and functionality of your living space. This guide is designed to help DIY enthusiasts, and professionals understand and master the art of blending these two distinct flooring types. Whether you’re renovating a room or seeking to add a touch of elegance to your home décor, the process of joining tile and carpet requires careful planning, the right tools, and a bit of patience.
In the following sections, we’ll walk you through a step-by-step approach to how to join tile and carpet.
What are the Benefits of Joining Tile and Carpet?
There are several benefits to joining tile and carpet, including:
- A seamless transition between rooms or areas of your home
- Increased durability and longevity compared to using only one type of flooring
- Enhanced design options, allowing you to create unique patterns or borders with the two types of flooring
Moreover, blending tile and carpet can increase the value of your home and create a cohesive look throughout your living space. Now, let’s dive into the steps you must take to join tile and carpet successfully.
What Will You Need?
Before we get started, here’s a list of the tools and materials you will need:
- Measuring tape
- Utility knife
- Straight edge
- Trowel
- Thinset mortar or adhesive glue
- Grout (if using tile)
- Carpet tack strips and carpet padding (if joining carpet to tile)
- Carpet stretcher (if joining carpet to tile)
- Knee pads
- Safety glasses and gloves
These tools will make the process smoother and ensure a professional-looking finish.
10 Easy Steps on How to Join Tile and Carpet
Step 1: Choose Similar Materials
The first step in joining tile and carpet is selecting visually similar materials that complement each other well. This will help create a smooth and seamless transition between the two flooring types. The transition may appear abrupt and unappealing if you choose materials with significantly different colors, patterns, or textures.
Step 2: Plan Your Layout
Before beginning any installation, planning out your layout carefully is essential. Measure the areas where the tile and carpet will meet and determine how much space each material needs. Consider any doorways or transitions between rooms and make a plan for how the flooring will flow.
Step 3: Prepare the Subfloor
Ensuring your subfloor is clean, level, and stable is crucial before laying down any flooring. Start by thoroughly cleaning the area to remove any debris, dust, or old adhesive that could interfere with the installation. If you’re working over a concrete subfloor, check for any cracks or imperfections and repair them as necessary. For wooden subfloors, ensure they are dry, rot-free, and securely fastened to the joists beneath.
Using a level, check the entire area where the tile and carpet will meet to ensure no significant dips or rises could affect the finished look of your flooring. Use a self-leveling compound for concrete subfloors or sand down high spots in wood subfloors if any leveling is required. A well-prepared subfloor is the foundation of a successful tile and carpet transition, ensuring durability and a seamless appearance between the two materials.
Step 4: Install the Carpet Tack Strips
Now that your subfloor is prepared, installing the carpet tack strips is next. These strips should be placed around the perimeter of the area where the carpet will meet the tile. Leave a gap of about 1/2 inch between the tack strips and the edge of the tile to allow space for the carpet to be tucked in. Ensure that the tacks are facing towards the carpet area; this will grip the carpet backing and keep it securely in place.
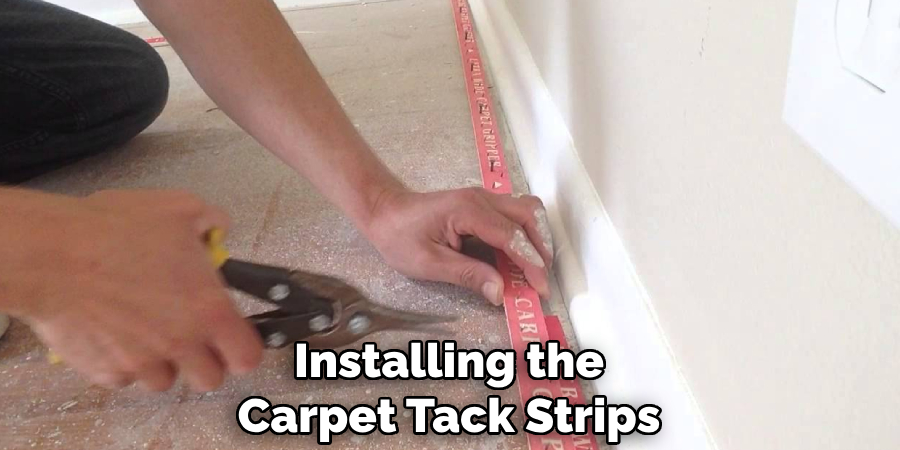
Once the tack strips are laid down, use nails or adhesive to fix them firmly to the subfloor. This step is essential for a tight and professional-looking carpet-to-tile transition.
Step 5: Lay Down the Carpet Padding
Cut the carpet padding to fit the area, ensuring that it stops just before reaching the carpet tack strips. This padding should not overlap the tack strips or extend into the tile area. Carpet padding enhances the feel of the carpet underfoot and helps with noise reduction and insulation. Secure the padding to the subfloor using staple guns or adhesive, ensuring it’s flat and wrinkle-free. Properly laying down the carpet padding is crucial as it directly affects the comfort and appearance of the final carpet installation.
Step 6: Trim the Carpet to Size
With the padding in place, it’s time to trim the carpet to the correct size. Roll out your carpet over the area, allowing for a few inches of excess material on all sides. Carefully cut the carpet using a straight edge and a utility knife, ensuring the edges are clean and straight.
It’s important to measure twice and cut once to avoid any unnecessary waste of material. When trimming the carpet, consider the direction of the pile and how it will look once installed next to the tile. This step is critical for achieving a professional and seamless transition between the two flooring types.
Step 7: Install the Tile
Once the carpet is trimmed and ready, focus on laying down the tile. Begin by applying a thin layer of thinset mortar or adhesive glue to the prepared subfloor using a trowel. Be sure to spread the mortar evenly to avoid bumps under the tiles. Carefully lay each tile down, starting from the edge closest to where the carpet will meet the tile, ensuring you maintain uniform gaps between tiles for grout.
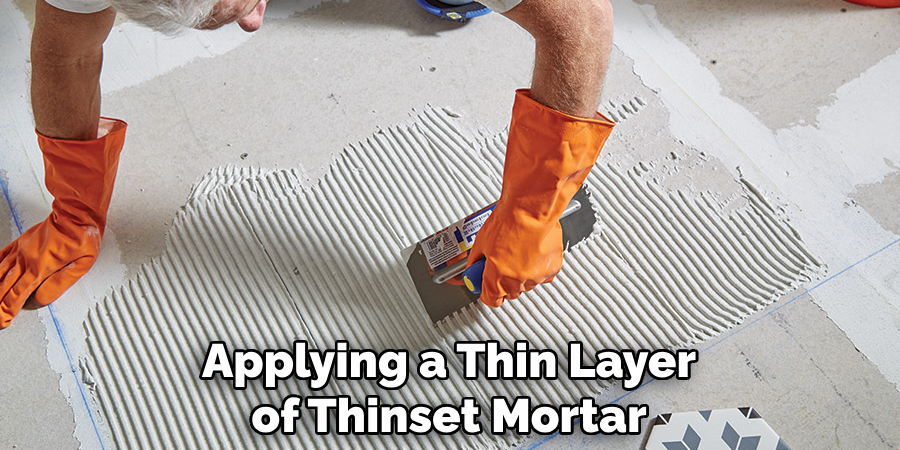
Use spacers to keep the tile lines straight and consistent. After laying down all the tiles, allow the adhesive to set according to the manufacturer’s instructions before proceeding to the next step. Installing the tile with precision is essential for a durable surface that complements the adjoining carpet installation.
Step 8: Apply Grout
After the tiles have been properly laid and the adhesive has been fully set, the next step is to apply grout to the spaces between the tiles. Mix the grout according to the manufacturer’s instructions, ensuring it reaches a smooth, paste-like consistency. Using a rubber float, apply the grout at an angle to the gaps, pressing down firmly to fill them completely.
Wipe away any excess grout from the tile surface with a damp sponge, being careful not to remove grout from the gaps. Allow the grout to dry for the time specified by the manufacturer before applying a sealer to protect it from staining and moisture. Achieving neat and even grout lines is crucial for the overall aesthetics of the tile area and ensures a clean, professional transition to the carpet section.
Step 9: Finishing the Carpet Installation
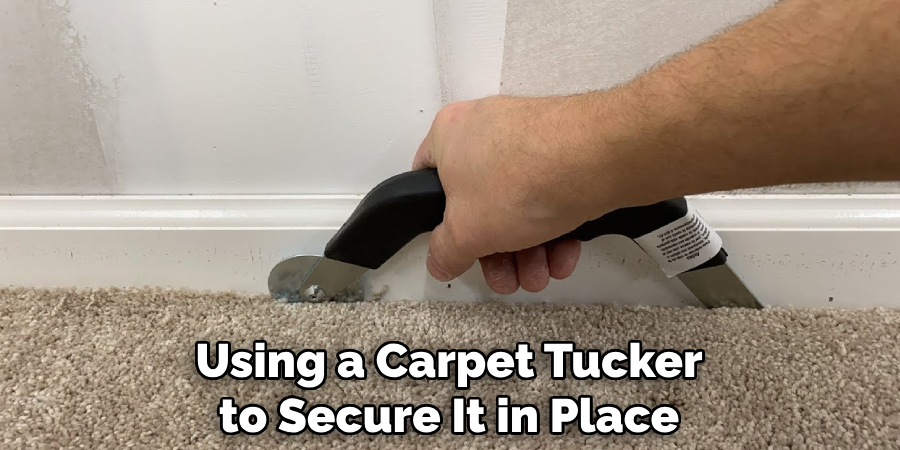
Now that the tile is fully installed and the grout has been set, it’s time to finalize the carpet installation. Begin by stretching the carpet towards the tack strips, using a knee kicker to ensure it is tight and wrinkle-free. Carefully press the carpet’s edge into the gap between the tack strips and the tile, using a carpet tucker to secure it in place.
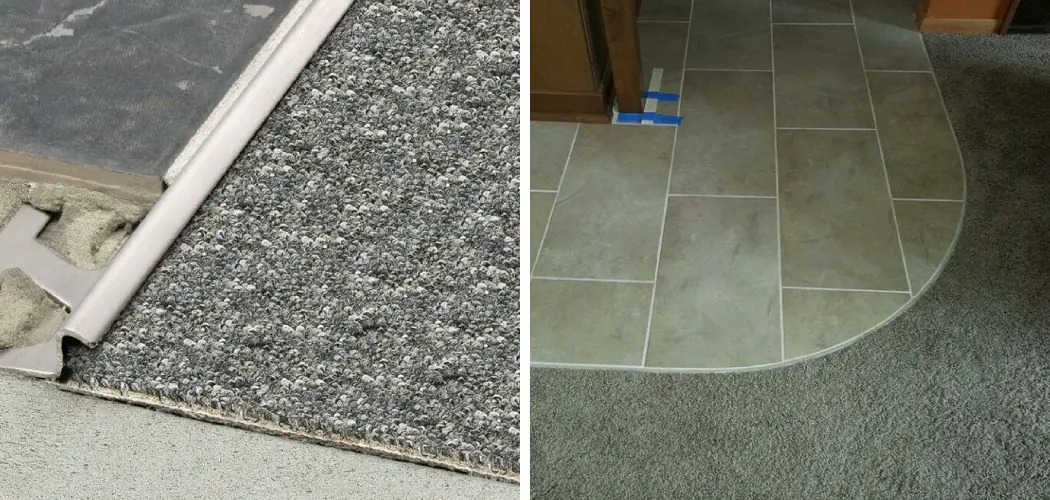
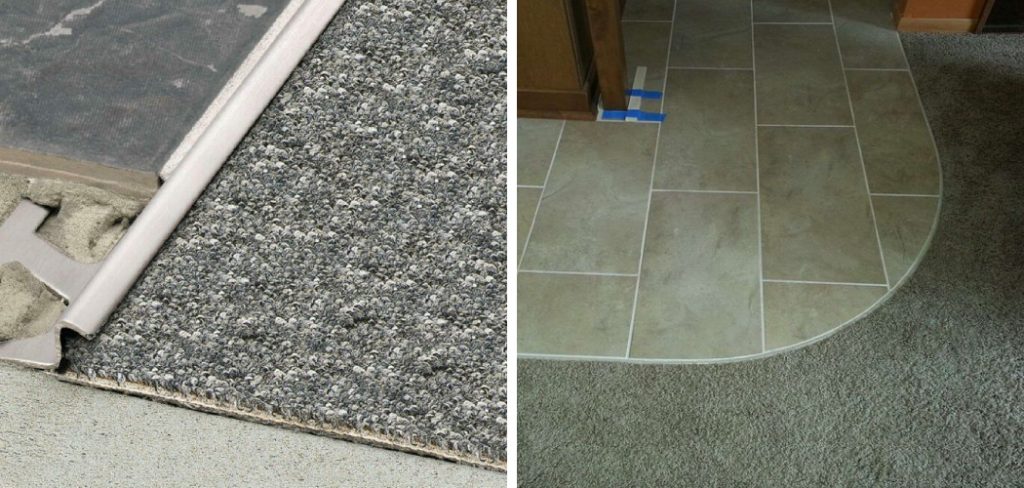
Trim any excess carpet with a utility knife to ensure a clean, flush finish with the edge of the tile. You may also install a transition strip over the seam where the carpet meets the tile for a clean and professional appearance. This covers the junction for a neat look and protects the edges of both flooring types from wear and tear. Completing the carpet installation with attention to detail and precision ensures a smooth and visually appealing transition between the different flooring materials.
Step 10: Final Inspection and Clean-Up
Once the carpet and tile installation is complete, it’s important to conduct a final inspection of the work area. Check for any loose tiles, uneven grout lines, or areas where the carpet may not be securely attached to the tack strips. Address any issues promptly to ensure the longevity and aesthetic appeal of your flooring.
Finally, clean up the workspace by removing any leftover materials, debris, and tools. Vacuum the carpet to remove any dust and particles, and clean the tile surface to remove any remaining grout haze or adhesive residues. A thorough clean-up and final inspection are the finishing touches that will showcase the quality and craftsmanship of your flooring transition project.
By following these steps and paying attention to detail, you can achieve a seamless and professional transition between your carpet and tile flooring.
5 Additional Tips and Tricks
- Use a Transition Strip: A transition strip not only neatly covers the gap between tile and carpet but also prevents the edges of the carpet from fraying. It’s crucial to select a strip that complements the tile and carpet for a seamless look.
- Consider the Carpet’s Thickness: When joining tile and carpet, consider the thickness of the carpet. If the carpet is significantly thicker than the tile, a reducer strip may be necessary to create a smooth transition and reduce tripping hazards.
- Secure the Carpet Edge: To prevent the carpet from lifting and ensure durability, secure its edge with tack strips placed a few inches away from the tile. This method also facilitates easy stretching and adjustments of the carpet over time.
- Choose the Right Adhesive: Utilizing a high-quality, waterproof adhesive for securing the transition strip is vital, especially in areas susceptible to moisture. Ensure the adhesive is compatible with the flooring materials and the transition strip.
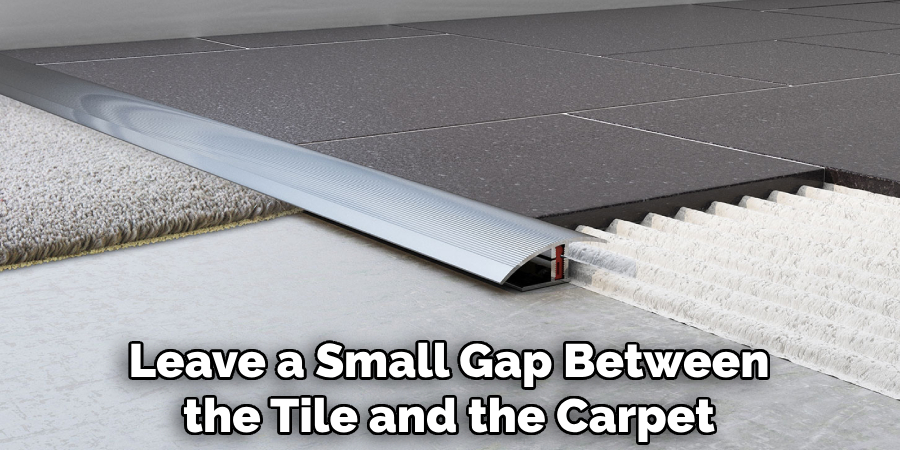
- Account for Expansion: Both tile and carpet can expand and contract due to temperature and humidity changes. It’s essential to leave a small gap between the tile and the carpet under the transition strip to accommodate this natural movement and prevent buckling.
With these additional tips and tricks, you can achieve a seamless transition between tile and carpet while also ensuring the long-term durability of your flooring.
5 Things You Should Avoid
- Neglecting to Measure Properly: One common mistake is failing to accurately measure the gap between the tile and carpet before installing the transition strip. This can lead to either an overly tight fit that causes buckling or a gap that looks unprofessional and could be a tripping hazard.
- Skipping the Tack Strips: As mentioned earlier, tack strips are crucial in securing the carpet’s edge and preventing it from lifting. Neglecting to install them can result in an uneven transition and possible damage to the carpet.
- Using Incompatible Materials: It’s essential to ensure that all materials used for joining tile and carpet are compatible with each other. Using incompatible adhesives or transition strips can lead to damage and compromise the overall integrity of the flooring.
- Not Consulting a Professional: If you are unsure about how to properly join tile and carpet, it’s best to consult a professional installer. They have the expertise and experience to ensure a seamless and durable transition between the two flooring materials.
- Ignoring Safety Measures: When installing any type of flooring, it’s important to follow proper safety measures. This includes wearing protective gear and using tools correctly. Safety measures should be revised to avoid accidents or damage to the flooring materials.

By avoiding these mistakes and following our tips and tricks, you can achieve a perfect transition between tile and carpet while also ensuring the safety and longevity of your flooring.
5 Different Ways to Create a Seamless Transition between Tile and Carpet
- Using a Z-Bar: A Z-bar, also known as a carpet gripper or binder bar, is a metal strip with teeth that grip onto both the carpet and tile, creating a seamless transition. This method is ideal for thicker carpets.
- Installing T-molding: T-molding is another type of transition strip that creates a smooth transition between tile and carpet. It is shaped like a “T” and can be easily installed with adhesive or screws.
- Utilizing Caulk: For smaller gaps between tile and carpet, using caulk can create a seamless transition without the need for additional materials. Simply apply caulk along the edge of the tile and press the carpet into it.
- Using a Threshold Strip: A threshold strip is a transition piece that covers the gap between tile and carpet while also providing a smooth surface to walk on. It is usually made of wood or metal and can be easily installed with screws or adhesive.
- Creating an Inlay Design: You can create an inlay design where the tile and carpet meet for a more unique and visually appealing transition. This involves cutting both materials at an angle and fitting them together, creating a seamless and stylish transition.
With these different methods, you can choose the one that best suits your needs and achieve a seamless transition between tile and carpet in your home or office space.
How Can You Choose the Colors of Your Tile and Carpet to Create a Cohesive Look?
When selecting the colors of your tile and carpet, there are a few things to consider to ensure a cohesive look:
- Choose Complementary Colors: To create a harmonious look, choose colors that complement each other instead of competing. This could mean selecting different shades of the same color or using complementary colors on the color wheel.
- Consider the Room’s Style: The room’s style and theme should also be considered when choosing colors. Opt for neutral colors like grey or beige for a modern, minimalist look. Bold and contrasting colors can work well for a more vibrant and eclectic space.
- Take Lighting into Account: Natural and artificial light can significantly impact how colors appear in a space. Consider the lighting in the room when choosing colors to ensure they look cohesive in both natural and artificial light.
- Experiment with Samples: Before committing to specific colors, it’s always a good idea to test out samples in the space. This will give you a better visual of how the colors will look together and allow you to make any necessary adjustments.

By considering these factors, you can confidently choose the colors for your tile and carpet that will create a cohesive and visually appealing look in your home or office.
Conclusion
How to join tile and carpet is not just about achieving a functional threshold but also about creating a visually appealing transition that enhances the overall decor of your space. Whether you choose to utilize a Z-bar, T-molding, caulk, threshold strip, or a custom inlay design, the key is to select the method that best matches your aesthetic preferences, flooring materials, and the specific demands of your space.
Additionally, carefully selecting complementary colors for your tile and carpet can create a cohesive look that ties the room together beautifully. Careful planning, precise measurement, and attention to detail are crucial in achieving a seamless and durable transition between tile and carpet.
This improves the functionality and safety of your flooring and elevates the style and cohesion of your home or office environment.