As offices evolve to accommodate the changing needs of employees, cubicles continue to be a popular choice for creating functional workspaces. These modular partitions provide privacy, organization, and a sense of personal space within a shared office environment.
If you’re tasked with assembling or reconfiguring cubicles, understanding the process of putting cubicle walls together is crucial. From ensuring proper alignment to securing stability, there are several key steps to follow to ensure a successful installation.
In this article, we will guide you through the process of how to put cubicle walls together, providing you with valuable tips and insights to make the task efficient and effective.
Whether you’re a facility manager, an office administrator, or an employee taking on the responsibility, mastering the art of assembling cubicle walls will enable you to create a productive and visually appealing workspace for yourself and your colleagues.
Importance of Well-Structured Cubicle Walls
Cubicle walls not only provide privacy and separation in the office, but also help create an organized work environment. When properly constructed, cubicle walls can foster a more productive workspace as well as enhance employee morale. For these reasons, it is important to put cubicle walls together using the highest quality materials and methods.
When selecting materials to construct cubicle walls, pick something that is lightweight yet durable. Plywood, particle board and fiberboard are popular options for cubicle wall construction as they offer both strength and a cost-effective price tag. Be sure to use appropriate fasteners such as screws or bolts when connecting the wall panels together.
When assembling cubicle walls, be sure to take extra care in getting the angles and measurements right. Pay attention to detail when constructing the wall frames as any misalignments or incorrect measurements can result in an uneven cubicle wall.
If needed, use a level to ensure that each corner is perfectly straight and square. Make sure all of the panels fit together seamlessly so that there are no gaps or spaces.
Enhancing Privacy, Productivity, and Personalization
Cubicle walls are an essential part of any office, providing privacy and creating separate workspaces for employees. Installing cubicle walls can help to create a more productive office environment, allowing individuals to focus on their work without distraction or disruption.
Additionally, cubicle walls provide the opportunity for employees to personalize their workspace with photos, plants, and other decorations.
By following the steps outlined in this guide, you’ll be able to install cubicle walls quickly and easily. Before beginning installation, it’s important to familiarize yourself with the instructions included in the package.
You may also need certain tools to complete the installation, such as a drill, screws, and wall anchors. Make sure to have these things available before you start.
Once you’ve familiarized yourself with the instructions and have all of the necessary tools, it’s time to begin the installation. First, measure the area where the cubicle walls will be placed in order to ensure that they fit properly.
Mark where you need to drill and where you need to place the wall anchors. Use a level to make sure that everything is lined up correctly before drilling or attaching any components.
10 Methods on How to Put Cubicle Walls Together
Method 1: Familiarize Yourself with the Cubicle Components
Begin by familiarizing yourself with the cubicle components. Identify the different panels, connectors, brackets, and hardware that come with the cubicle kit. Review the assembly instructions provided by the manufacturer to understand the specific requirements and steps involved.
Make sure to separate all the pieces for easy assembly and organization. However, you may want to check the pieces several times against the manufacturer’s instructions and diagrams before beginning.
Method 2: Clear the Workspace
Ensure that the area where the cubicle walls will be assembled is clear of any obstructions. Remove any furniture, equipment, or debris that may hinder the installation process. This will provide you with a clean and spacious environment to work in.
However, depending on the size and complexity of the cubicle walls you’re assembling, it may be necessary to temporarily move out furniture or equipment that’s located nearby. Make sure that all necessary tools, hardware, and other materials are on-hand before beginning the assembly process.
Method 3: Establish the Cubicle Layout
Before assembling the cubicle walls, determine the desired layout and configuration. Consider factors such as privacy, accessibility, and workflow. Plan the placement of each cubicle panel and mark the locations accordingly to ensure consistency and accuracy during the installation.
Once the layout is determined, it’s time to start putting together the cubicle walls. Locate and identify all of the parts and pieces that are included in the cubicle, such as corner connectors, mounting brackets, wall panels, tracks, feet, and other hardware.
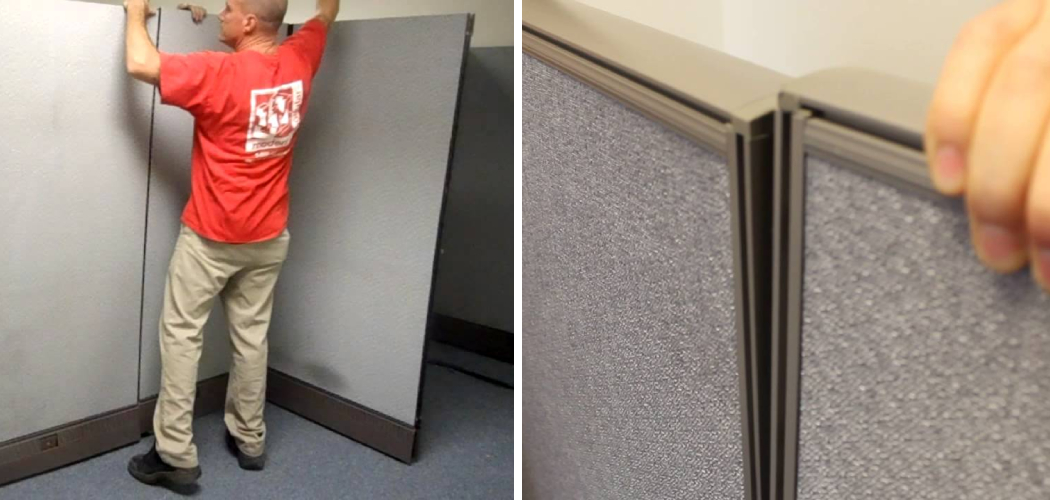
Method 4: Start with the Corner Posts
Begin the assembly process by installing the corner posts. These vertical posts provide stability and support to the cubicle walls. Attach them to the floor and secure them tightly, following the manufacturer’s instructions. Use a level to ensure they are perfectly vertical. Once the corner posts are in place, attach the horizontal panels to them.
The horizontal panels will fit snugly into slots on top of the corner posts. Make sure the panels are level and securely attached before moving on to the next step. Finally, connect the vertical wall dividers to the corner posts and the horizontal panels. Be sure to check the manufacturer’s instructions for specific details on how to connect these pieces. Once all of the wall dividers
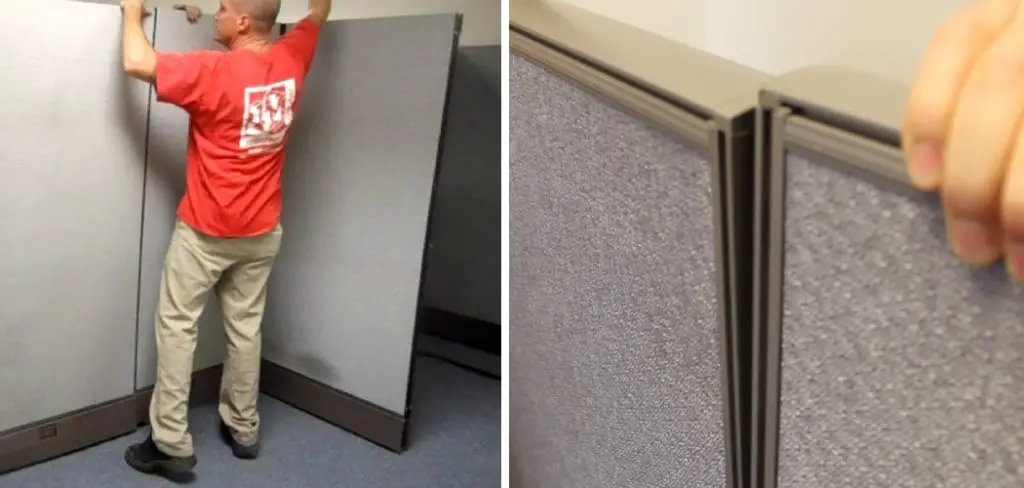
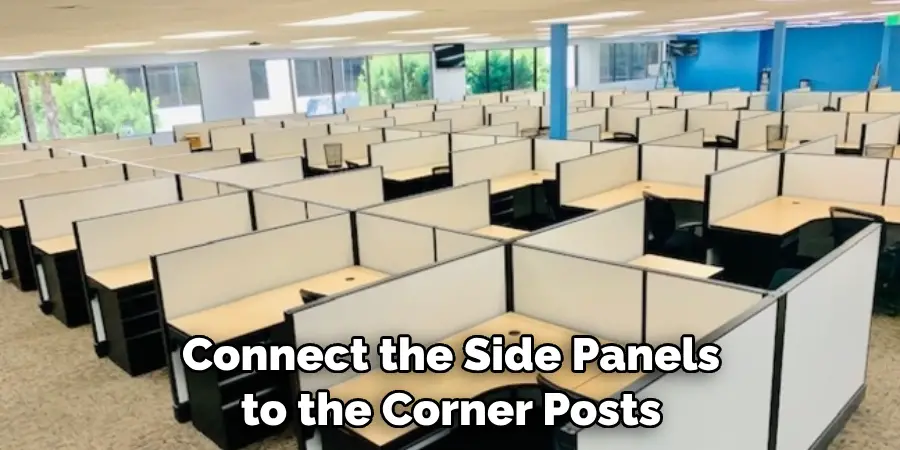
Method 5: Connect the Side Panels
Next, connect the side panels to the corner posts. Slide the panels into the designated slots or connectors on the corner posts. Align them properly and secure them in place using the appropriate hardware or connectors provided.
Double-check the alignment and adjust if necessary. Finally, test the panels to make sure that they are secure and won’t move. Depending on the type of cubicle walls you have, you may need to add additional side panels or dividers in order to complete the cubicle setup.
Method 6: Install the Top Rails
Attach the top rails across the top of the cubicle walls. These rails provide structural support and stability to the overall cubicle structure. Follow the manufacturer’s instructions to secure the top rails to the corner posts and side panels using the recommended hardware.
Make sure to attach the top rails firmly in place, and double-check their alignment before securing them with screws. Once all of the top rails are connected, your cubicle walls are ready to be used. Enjoy the extra privacy and workspace that your new cubicles provide!
Method 7: Add the Worksurfaces and Accessories
Install the worksurfaces and accessories, such as desk surfaces, shelves, or storage components, according to the cubicle design and layout. Ensure that they are properly aligned and securely attached to the cubicle structure. Follow any specific instructions provided for the installation of these components.
Method 8: Connect the Front Panels
Connect the front panels to the side panels and top rails. Slide the panels into the designated slots or connectors and secure them in place using the recommended hardware. Ensure that all panels are aligned correctly, creating a uniform and cohesive appearance. Adjust the panels as necessary until they fit snugly and securely.
Method 9: Secure the Cubicle Walls
Once all the panels are connected, secure the cubicle walls to the floor and adjacent walls, if applicable. Follow the manufacturer’s instructions for anchoring the cubicle to the floor or using brackets to attach it to existing walls. This step will ensure stability and prevent any unwanted movement or shifting.

Method 10: Test and Adjust
Once the cubicle walls are assembled, test their stability and adjust if necessary. Make sure all panels are securely attached and the entire structure is level and balanced. Conduct a thorough inspection to ensure that all connections are tight and secure. If there is movement or instability, add extra support.
Check the frame for wobbling and secure any loose joints if needed. After all, adjustments are made, double-check that the cubicle walls are securely attached and ready for use. Once your customized cubicle is complete, enjoy the benefits of a professional workspace that suits your needs.
Conclusion
From cord grips and shock cords to nuts and bolts, learning how to put cubicle walls together can save you both time and money. With the step-by-step instructions outlined in this blog post, you should have no problem completing your project with success.
It is important that you follow each step carefully so that all pieces fit together securely and won’t come apart while in use.
There’s nothing worse than pulling up on a divider wall only to find it comes apart on the other side! Taking the time to put partitions together properly will prevent any future disappointments or trouble down the road. Follow these simple instructions outlined in this blog post about how to put cubicle walls together and you’ll be able to get the job done with ease.