
An organized space can transform your productivity and peace of mind. Piles of paper, scattered documents, and misplaced files can create a sense of chaos in any home or office.
A simple, functional file shelf is an excellent solution to bring order to your environment. Building one yourself not only provides a customized storage solution tailored to your exact needs but also offers a rewarding DIY experience.
This guide on how to build a file shelf will walk you through everything you need to know, from the initial design to the final finishing touches, empowering you to create a durable and stylish file shelf that tames the clutter for good.
What Will You Need?
Before you begin, gathering all the necessary tools and materials will ensure a smooth and efficient building process.
Materials:
- Lumber: Pine boards are a great, affordable choice for beginners. You will need:
- Two 1×12 boards for the sides (length depends on your desired shelf height).
- Several 1×12 boards for the shelves (length depends on your desired shelf width).
- One 1×4 board for the top and bottom support braces.
- One thin sheet of plywood or hardboard for the back panel (optional, but recommended for stability).
- Fasteners:
- 1 ¼-inch wood screws.
- Wood glue.
- Finishing nails (optional, for the back panel).
- Finishing Supplies:
- Sandpaper (medium and fine grit).
- Wood stain or paint of your choice.
- Polyurethane or another clear sealant.
Tools:
- Tape measure
- Pencil
- Carpenter’s square or speed square
- Circular saw or miter saw
- Power drill with screwdriver bits and drill bits
- Level
- Clamps
- Safety glasses
- Dust mask
- Paintbrushes or rags for finishing
10 Easy Steps on How to Build a File Shelf
Follow these detailed steps to construct your custom file shelf. Accuracy and patience are your best friends in this process.
Step 1: Measure and Plan
First, decide where your file shelf will go and measure the available space. Determine the height, width, and depth you want your unit to be. A standard depth for shelving is around 11-12 inches, which works perfectly with 1×12 boards.
Sketch out your design on paper. Mark the overall dimensions and decide on the number of shelves and the spacing between them. Consider what you will be storing—standard letter-sized file holders are about 12 inches tall, so a spacing of 13-14 inches between shelves provides ample room.
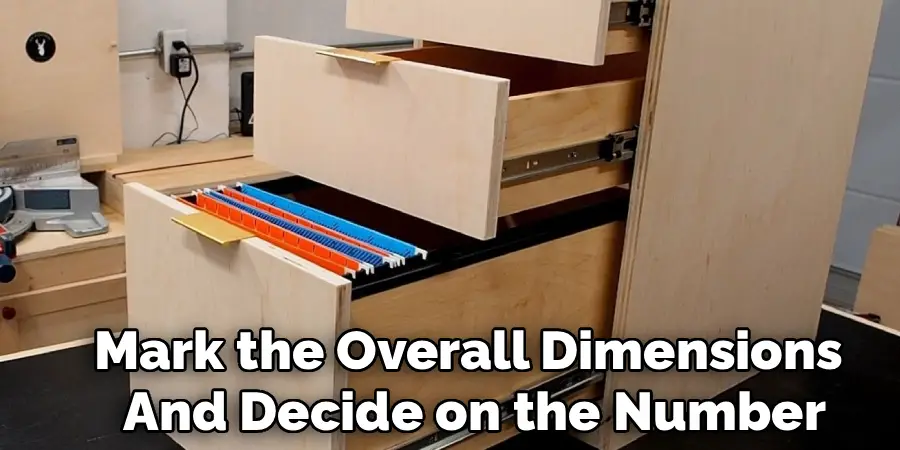
This planning phase is crucial; a well-thought-out design prevents mistakes later. Double-check all your measurements before you move on to cutting the wood. A good plan is the foundation of a successful project, ensuring all your pieces will fit together as intended.
Step 2: Cut the Wood
With your plan finalized, it’s time to cut your lumber. Put on your safety glasses. Using your tape measure and carpenter’s square, carefully mark the cut lines on your 1×12 boards. You will need two identical pieces for the vertical sides of the shelf.

Next, mark the lengths for your shelves. All shelf pieces must be the same length to ensure the unit is square and stable. Finally, cut the 1×4 board into two pieces that match the width of your shelves; these will serve as top and bottom support braces.
Use a circular saw or a miter saw for clean, straight cuts. A miter saw is particularly useful for ensuring perfectly square cuts, which are essential for a professional-looking result. Take your time with this step, as precision here will make assembly much easier.
Step 3: Sand All Pieces
Before you begin assembly, it is vital to sand every piece of wood you just cut. Sanding removes splinters, smooths rough edges, and prepares the wood surface for finishing. Start with a medium-grit sandpaper (around 120-grit) to smooth out any saw marks and imperfections.
Go over every surface and all edges. Once the pieces are smooth, switch to a fine-grit sandpaper (around 220-grit) for a final pass. This will give the wood a polished, professional feel. Remember to sand in the direction of the wood grain to avoid scratching the surface.
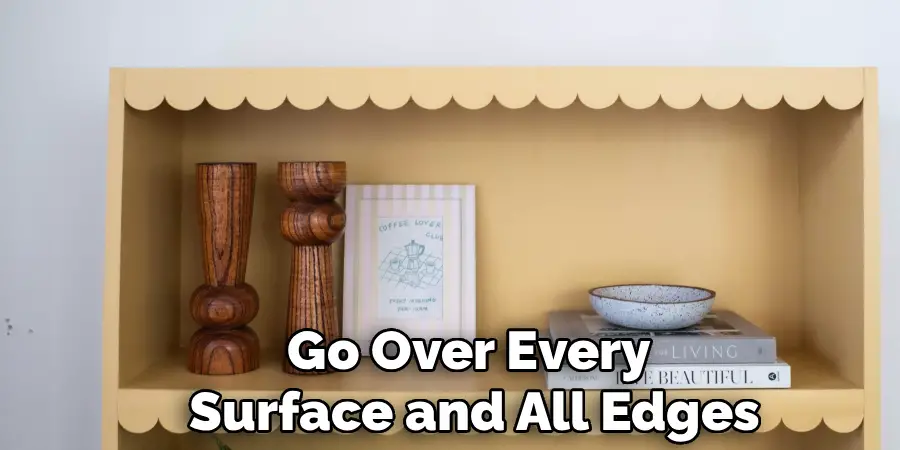
This step can be tedious, but it makes a world of difference in the final appearance and feel of your shelf. Wear a dust mask to avoid inhaling wood dust.
Step 4: Mark the Shelf Positions
Lay the two side pieces on a flat surface. Using your tape measure and pencil, carefully mark the positions for each shelf on the inside face of both boards. Refer back to your initial plan for the spacing. For example, if your bottom shelf sits 4 inches from the floor and shelves are spaced 14 inches apart, measure and mark accordingly.
Use a carpenter’s square to draw a straight line across the width of the board at each mark. These lines will be your guide for placing the shelves, ensuring they are perfectly level. Make sure the marks on both side pieces are identical. Any discrepancy will result in crooked shelves.
Step 5: Assemble the Frame
Now you will start to see your shelf take shape. Begin by assembling the main frame. Stand one side piece up and have a friend hold it steady, or use clamps to secure it to your work surface. Apply a thin line of wood glue along the top edge. Place one of the 1×4 support braces on top, aligning it with the front and back edges.
Use your drill to drive two 1 ¼-inch wood screws through the top of the brace into the side piece. Repeat this process for the bottom brace. Next, attach the other side piece to the other end of the braces in the same manner. You should now have a basic rectangular frame. Check that it is square using your carpenter’s square.
Step 6: Attach the Top and Bottom Shelves
With the basic frame assembled, the next step is to install the top and bottom shelves. The top shelf will sit directly under the top support brace, and the bottom shelf will sit on top of the bottom support brace. Apply wood glue to the ends of the bottom shelf and slide it into place on top of the bottom brace.
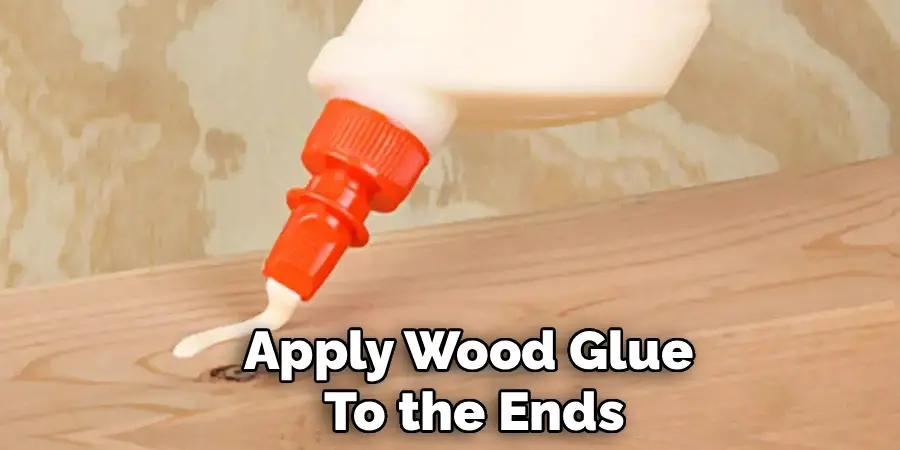
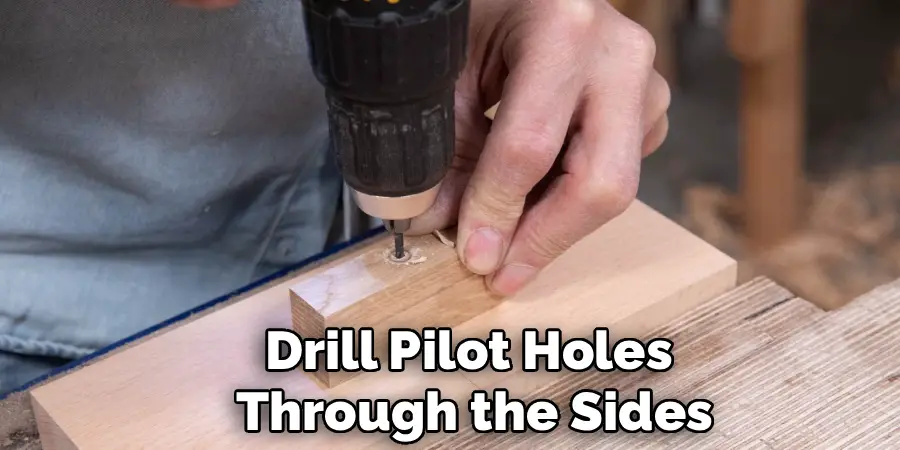
Drill pilot holes through the side pieces and into the ends of the shelf to prevent the wood from splitting. Then, secure it with two screws on each side. Repeat this entire process for the top shelf, placing it snugly against the top brace and securing it with glue and screws. These two shelves will add significant rigidity to the entire structure.
Step 7: Install the Middle Shelves
Installing the middle shelves requires care to ensure they are level. Take one of your shelf pieces and apply wood glue to both ends. Slide it into position, aligning it with the guidelines you drew in Step 4. It can be helpful to use clamps to hold the shelf in place while you work.
Check that the shelf is level using your level. Once you are satisfied with its position, drill pilot holes through the sides and into the shelf ends. Secure the shelf with two screws on each side. Repeat this for all remaining middle shelves, checking for level each time. Take your time to get each shelf perfectly aligned.
Step 8: Attach the Back Panel
Adding a back panel is an optional but highly recommended step. It dramatically increases the stability of the shelf, preventing it from wobbling or rocking side-to-side. Lay the shelf unit face down on a clean, flat surface. Place your pre-cut sheet of plywood or hardboard on the back. Ensure it is perfectly square with the frame.
You can secure the back panel with a small amount of wood glue around the perimeter and then fasten it using finishing nails every 6-8 inches along the sides and shelves. This simple addition turns a wobbly frame into a rock-solid piece of furniture.
Step 9: Finishing Touches
With the assembly complete, it’s time for the finishing work. If you used wood filler to cover screw heads, sand those spots smooth. Give the entire shelf a final light sanding with fine-grit sandpaper to remove any marks or glue residue from assembly. Wipe it all down with a clean, dry cloth to remove all dust.
Now you can apply your chosen finish. For a natural look, apply a wood stain according to the manufacturer’s directions. If you prefer a solid color, prime the wood first and then apply two coats of your chosen paint. Let the finish dry completely.
Step 10: Apply a Protective Sealant
The final step is to protect your new file shelf. Apply two to three coats of a clear sealant, such as polyurethane or a water-based polycrylic. This top coat will protect the wood from scratches, moisture, and wear and tear, ensuring your shelf looks great for years to come.
Lightly sand with very fine-grit sandpaper (220-grit or higher) between each coat for an ultra-smooth finish. Allow the sealant to cure completely as recommended by the manufacturer before you start loading it up with your files and office supplies.
5 Things You Should Avoid
Building a file shelf can be a straightforward project, but a few common mistakes can lead to frustration. Here’s what to watch out for:
- Skipping the Planning Stage: Rushing into cutting wood without a detailed plan is a recipe for disaster. You may end up with mismatched pieces, crooked shelves, or a unit that doesn’t fit your space.
- Making Inaccurate Cuts: “Measure twice, cut once” is a classic for a reason. Imprecise cuts will make assembly difficult and result in a wobbly, unprofessional-looking final product. Use a square to ensure your lines are straight and your cuts are true.
- Forgetting to Sand: Un-sanded wood is rough, prone to splinters, and does not take stain or paint well. Skipping this step will drastically reduce the quality and appearance of your finished shelf.
- Not Using Wood Glue: Screws alone can loosen over time. Wood glue creates a bond that is often stronger than the wood itself, adding immense strength and durability to the joints. Always use it in conjunction with screws.
- Ignoring Safety Precautions: Woodworking tools can be dangerous. Always wear safety glasses to protect your eyes from sawdust and debris. A dust mask is also important, especially during sanding, to protect your lungs.
Conclusion
How to build a file shelf is more than just a way to get organized; it’s an opportunity to create a custom piece of furniture that perfectly suits your needs and style.
By following these steps, you can construct a sturdy, functional, and attractive shelf that will serve you well for years. You’ll not only solve your storage problems but also gain valuable skills and the immense satisfaction of a project well done.
So gather your tools, put on some music, and get ready to build something you can be proud of. Your tidy, personalized workspace awaits.