
Have you ever looked at a plain bookshelf and wished it had more personality? While bookshelves are functional, they can sometimes lack the character that makes a room feel truly yours.

An upholstered bookshelf frame offers a creative solution, transforming a simple piece of furniture into a statement piece. This DIY project involves wrapping the frame of your bookshelf in fabric, adding texture, color, and a touch of custom elegance to your space.
How to upholster a book shelf frame is a fantastic way to breathe new life into an old shelf or elevate a new one to match your unique interior design vision.
What Will You Need?
Before you begin, gather all your materials and tools to ensure a smooth and efficient process. Having everything on hand will help you focus on the creative steps without interruption.
Materials:
- Bookshelf with a removable back panel
- Upholstery fabric (enough to cover the front-facing frame surfaces, plus extra for adjustments)
- Foam or cotton batting (for a padded feel)
- Spray adhesive
- Fabric glue or a hot glue gun with glue sticks
Tools:
- Tape measure
- Pencil or fabric marker
- Sharp scissors or a rotary cutter and mat
- Staple gun (manual or electric) with staples (1/4″ or 3/8″ are usually suitable)
- Screwdriver (to remove the back panel and any hardware)
- Putty knife or a flat-head screwdriver (for tucking fabric)
- Safety glasses
10 Easy Steps on How to Upholster a Book Shelf Frame
Step 1: Prepare the Bookshelf
The first and most crucial step is preparing your workspace and the bookshelf itself. Start by finding a clean, well-ventilated area where you can work comfortably, such as a garage, a workshop, or a covered outdoor space. Lay down a drop cloth or old sheets to protect the floor from spray adhesive and any debris.

Next, empty the bookshelf. Carefully remove the shelves and set them aside. Most standard bookshelves have a thin back panel that is either tacked or screwed on.
Use a screwdriver or pry bar to gently remove this back panel. This is essential because you will be wrapping the fabric around the frame and securing it on the back. Store all screws and hardware in a small bag or container so you don’t lose them.
Step 2: Measure and Cut the Batting
The batting provides a soft, padded layer underneath your fabric, giving the finished project a plush and high-end feel. It also helps to smooth out any minor imperfections on the wood surface. Lay the bookshelf frame face down. Using a flexible tape measure, carefully measure the width and length of all the front-facing frame sections you plan to upholster.
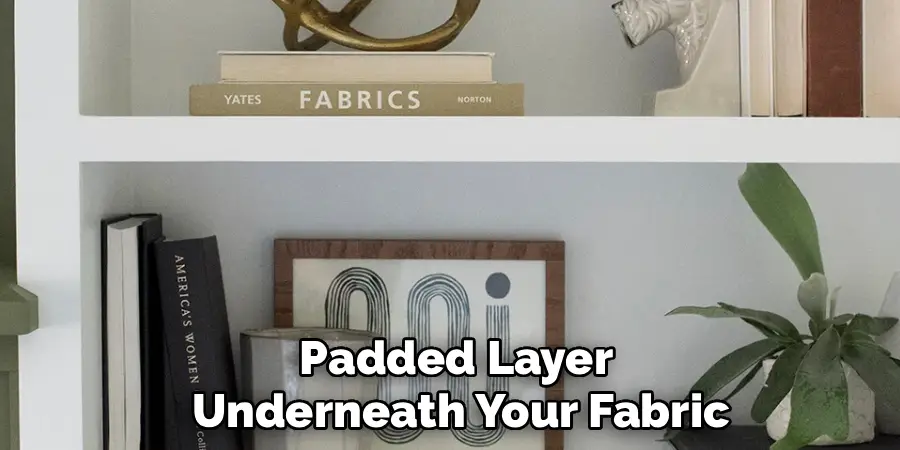
This typically includes the two vertical sides and the top and bottom horizontal pieces. As you measure, write down the dimensions. It’s a good practice to add about an inch to each measurement to ensure you have enough batting to wrap slightly around the edges.
Step 3: Attach the Batting to the Frame
With your batting pieces cut, it’s time to adhere them to the bookshelf frame. This step requires spray adhesive, so ensure your workspace is well-ventilated and you are wearing safety glasses. Working with one section at a time, apply a light, even coat of spray adhesive to the front surface of the frame.
Also, apply a light coat to one side of the corresponding batting piece. Wait for the adhesive to become tacky, as per the manufacturer’s instructions—this usually takes about a minute. Carefully position the batting onto the frame, starting from one end and smoothing it down as you go to eliminate any air bubbles or wrinkles.

The extra inch you added earlier will allow you to wrap the batting around the inner and outer edges of the frame for a seamless look. Gently press the batting into place, ensuring it is smooth and secure. Repeat this process for all sections of the frame you are upholstering.
Step 4: Measure and Cut the Fabric
Now for the most exciting part: working with your chosen fabric. Before you cut, it’s wise to iron the fabric to remove any wrinkles or creases, as these will be difficult to remove once it’s attached. Lay the ironed fabric face down on your work surface.
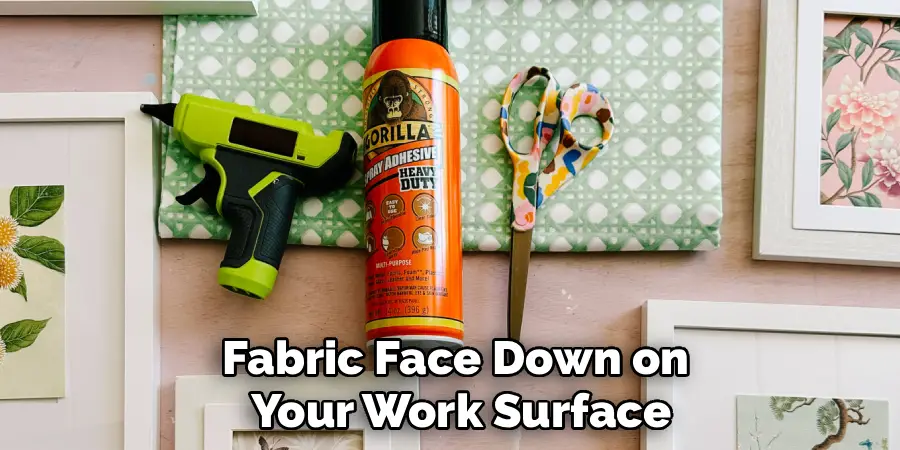
Just as you did with the batting, measure the dimensions of each frame section. However, for the fabric, you need to leave a more generous allowance. Add at least two to three inches to each side of your measurements. This extra material is crucial for pulling the fabric taut and stapling it securely to the back of the frame.
If your fabric has a pattern, take some time to plan the layout. Decide which part of the pattern you want to be visible on each section of the frame. Ensure the pattern is aligned correctly and runs in the same direction on all pieces for a cohesive look.
Once you are satisfied with the layout, use a fabric marker and a straight edge to mark your cutting lines. Carefully cut the fabric pieces using sharp scissors or a rotary cutter.
Step 5: Begin Upholstering the First Section
Start with one of the main vertical sides of the bookshelf frame. Lay the corresponding fabric piece face down and place the bookshelf frame on top of it, also face down. Ensure the frame is centered on the fabric, with an equal amount of excess fabric on all sides.
Take a moment to double-check the pattern alignment from the front if you are using a patterned fabric. Begin by securing one of the long sides. Pull the fabric taut, but not so tight that it distorts the pattern. Fold the raw edge of the fabric over to create a clean hem (this prevents fraying) and staple it to the back of the frame.
Place your first staple in the center of the edge. Then, work your way out towards the corners, placing staples every two to three inches. Keeping the fabric taut and smooth is key to a professional finish.

Step 6: Secure the Opposite Side
Once one side is fully stapled, move to the opposite long side. This is where you will create the necessary tension for a wrinkle-free surface. Starting from the center again, pull the fabric firmly and evenly across the frame. You should feel a good amount of resistance.
As you pull, check the front side to ensure the fabric is smooth and the pattern remains straight. Fold the raw edge over for a neat hem and place a staple in the center, directly opposite your first staple on the other side. Continue pulling and stapling from the center outwards, maintaining consistent tension.
Step 7: Address the Shorter Sides
With the long sides secured, it’s time to tackle the shorter top and bottom ends. The process is similar: pull the fabric taut, fold the edge, and staple it to the back of the frame. Start from the center and work your way outward. As you approach the corners, stop about two inches before the edge.
The corners require a special technique to create a clean, crisp fold, which you will handle in the next step. Securing the shorter sides completes the main attachment process and ensures the fabric is held firmly in place from all four directions.
Step 8: Create Neat Corners
Corners can be tricky, but with a bit of patience, you can achieve a very polished look. There are a few methods, but a simple and effective one is the “hospital corner” or mitered fold. At each corner, you will have a square of excess fabric.
Pull the fabric diagonally from the corner point and staple it down. This creates two flaps. Then, take one of the flaps, pull it tightly across the corner, fold the raw edge under, and staple it securely. Do the same with the remaining flap, folding it neatly over the first one.
Alternatively, you can trim some of the excess bulk before folding. Cut a diagonal slit in the fabric heading towards the corner of the frame, stopping just before you reach the wood.
Step 9: Repeat for All Sections and Make Cutouts
Now that you have perfected your technique on the first section, repeat Steps 5 through 8 for the remaining upholstered parts of the frame. Work methodically, ensuring your pattern alignment and tension are consistent across the entire bookshelf. Once all the main surfaces are covered, you need to make cutouts for the shelf peg holes.
Feel for the holes through the fabric. Use a sharp craft knife or an awl to make a small ‘X’ or a small circular cut directly over each hole. Be very careful to only cut through the fabric covering the hole itself. This will allow you to re-insert the shelf pegs later without tearing the upholstery.
Step 10: Reassemble the Bookshelf
You’ve reached the final step! It’s time to put your beautifully upholstered bookshelf back together. First, carefully re-attach the back panel using the original screws or nails. The back panel not only adds stability to the structure but also neatly conceals the stapled fabric edges, giving your project a clean, professional look from all angles.
Once the back is secure, insert the shelf pegs into the holes you exposed. Finally, slide the shelves back into place. Stand your newly transformed bookshelf upright and take a moment to admire your work. You have successfully turned a standard piece of furniture into a custom creation that reflects your style.
5 Things You Should Avoid
To ensure your project is a success, be mindful of these common pitfalls:
- Skipping the Prep Work: Failing to clean the frame or remove the back panel will lead to a poor finish. Adhesive won’t stick to a dirty surface, and you won’t be able to wrap the fabric neatly without taking the back off.
- Not Measuring Correctly: Cutting your fabric or batting too small is a frustrating and costly mistake. Always measure twice and cut once, leaving plenty of extra material for pulling and stapling.
- Using the Wrong Adhesive: Not all glues are created equal. Use a spray adhesive specifically designed for foam and fabric to ensure a strong, lasting bond for your batting.
- Ignoring Pattern Alignment: If you’re using a patterned fabric, rushing this step can result in a crooked or mismatched design. Take your time to plan the layout and ensure everything lines up perfectly.
- Pulling Fabric Unevenly: Inconsistent tension will create wrinkles, puckers, and a distorted pattern. Always pull the fabric taut and evenly, working from the center outwards on each side.
Conclusion
How to upholster a book shelf frame is a rewarding DIY project that offers a high-impact return for your efforts.
With a few basic tools and a fabric of your choice, you can completely redefine a piece of furniture and infuse your space with personal flair. This project not only enhances the look of your room but also gives you a durable, one-of-a-kind item built with your own hands.
Don’t be afraid to get creative and give your old bookshelf the stylish makeover it deserves.