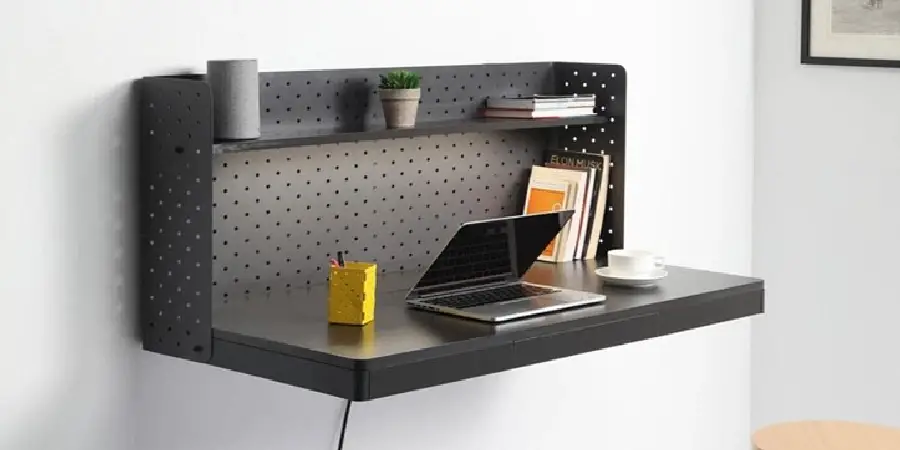
Do you have a small home office, but not enough room for a regular desk? Or maybe you’ve been dreaming of setting up an artsy workspace in your bedroom or living room? If so, it may be time to consider building a floating desk. Often seen as stylish and modern, these desks are perfect for spaces where bulky furniture is impossible and they often provide several storage solutions while taking little floor space.
Having all the supplies on hand and some basic DIY skills can make the job easy – whether you’re creating one from scratch or making modifications to pre-made pieces. Here, we’ll walk through all the necessary steps of how to build a floating desk.
Tools and Materials You Will Need to Build a Floating Desk
- Saw
- Drill and bits
- Measuring tape
- Sandpaper
- Clamps or brackets to mount the desk securely to the wall
- Wood screws
- Lumber (or pre-made shelves, if you’re using those instead)
- Paint, stain, or sealer for the desk
Step-by-Step Guidelines on How to Build a Floating Desk
Step 1: Measure the Space
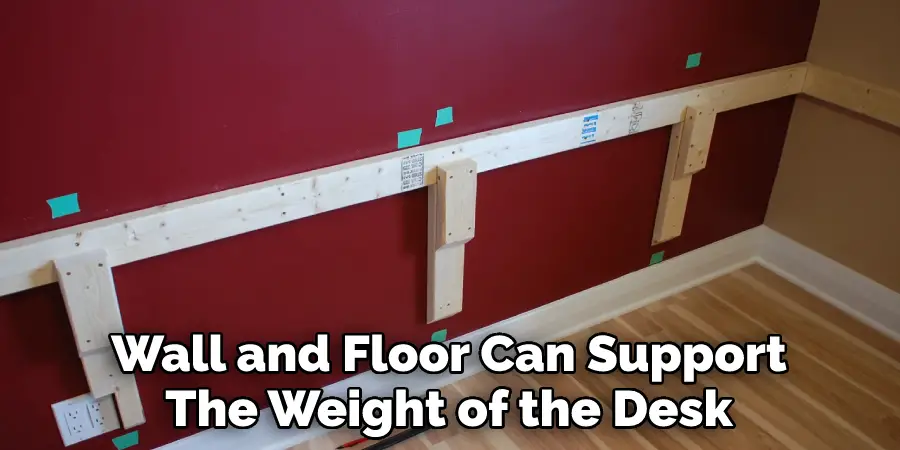
Before you start building, it’s important to measure the intended space for your floating desk. Make sure that the wall and floor can support the weight of the desk and whatever will be stored on it. Additionally, make sure there is enough room for any drawers or storage options you may want to include.
Step 2: Cut the Wood
Once you have the measurements, it’s time to cut the wood. If using pre-made shelves, this step can be skipped. Otherwise, use a saw to cut each piece of lumber to size. Measure twice and make sure your cuts are precise in order to ensure a sturdy finish. While cutting, wear protective eyewear and gloves to avoid any accidents.
Step 3: Assemble the Desk
Now that you have all your pieces cut, it’s time to assemble. If you are using pre-made shelves, start by screwing them together in an L-shape or U-shape with wood screws. If building from scratch, use wood glue to secure the pieces together before screwing. Use a drill and bits for extra security.
Step 4: Prep for Mounting
Once your desk is assembled, it’s time to prep for mounting. If there are any gaps between the boards, fill them with wood filler and sand smooth when dry. Stain or paint the desk with your preferred finish before mounting. This step can also be done after the desk is mounted if desired.
Step 5: Mount the Desk
Before you mount, make sure to attach the brackets or clamps that will provide extra stability and keep your floating desk secure to the wall. Once those are in place, use a drill and wood screws to securely attach them to your wall. Make sure the screws are long enough to reach into the studs behind the wall.
And that’s it! You now have a stylish, functional floating desk ready to be used in whatever way you like. With these easy-to-follow steps, you can create your own unique workspace in no time. So go ahead and get creative – the possibilities are endless!
Additional Tips and Tricks to Build a Floating Desk
1. Use a drywall anchor to secure the desk to the wall. Drywall anchors will ensure that your floating desk is firmly attached to the wall and can hold up against any bumps or vibrations while you’re working.
2. Measure twice, cut once! It’s always important to measure and mark accurately before cutting any pieces of wood. This will help you save time and materials in the long run since you won’t have to re-cut anything due to mistakes.
3. Sand down any rough edges or splinters on your wood before starting the building process. Make sure that all surfaces are smooth and free from defects, as this will make it easier to attach pieces together. Additionally, sanding the wood will make sure that all edges are rounded and safe from any sharp corners.
4. Use clamps to hold pieces of wood in place while you’re attaching them. This is a great way to ensure that everything lines up correctly before you drive in any screws or nails.
5. Choose the right hardware for your desk. Make sure to use wood screws that are specifically designed for outdoor furniture, as these will be able to hold up to the elements better than regular drywall screws or nails. Additionally, choose a stain or paint that is suitable for outdoor use so that you don’t have to worry about it fading or deteriorating over time.
6. Use a leveler when installing the brackets onto your desktop to ensure that everything is even and level. This will make sure that your desk has a professional look once it’s finished.
7. Finally, don’t forget to enjoy your new desk! You worked hard to build it, so take some time to admire your work and use it for all the projects you have in mind.
Hopefully, these tips and tricks will help you build a great floating desk that can last for years to come! Good luck!
Things You Should Consider to Build a Floating Desk
1. Choose a Wall:
When building a floating desk, it is important to determine which wall you want the desk to be mounted on. This will depend on the size of the room and the type of work you intend to do while using the desk. Consider taking into account any available outlets nearby as well as lighting when selecting the wall for your desk.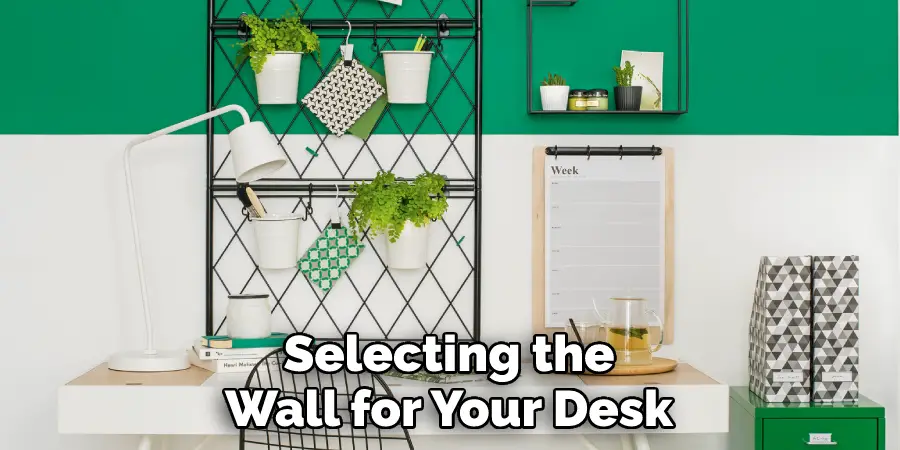
2. Measure Space:
After you have selected a wall, take detailed measurements of the space to determine what size desk you will need and how it will fit within the room. This includes measuring the length and width of the area, as well as the height from floor to ceiling. Measuring will help ensure your desk fits perfectly in the space and won’t be too big or too small.
3. Choose Desk:
Next, it’s time to choose a desk that will best suit your needs. Consider the type of work you plan to do while using the desk as well as any features you would like it to have such as drawers, shelves, or a keyboard tray. When selecting the desk, make sure to check its weight capacity as you will need to mount it directly on the wall.
4. Purchase Desk Mounting Hardware:
Once you’ve chosen your desk and taken measurements of the space, you’ll need to purchase the necessary hardware for mounting it on the wall. This includes brackets, screws, and anchors that will securely hold your desk in place. This hardware should be selected based on the weight of your desk and the type of wall you’re mounting it to.
5. Prepare Wall:
Before you begin mounting your desk, it’s important to prepare the wall where it will be mounted. This includes making sure there is no loose wallpaper or debris that could affect the installation. The wall should also be smoothed out with sandpaper and wiped down with a damp cloth to remove any dust or dirt.
6. Install Desk:
Now that you have chosen your desk, purchased the necessary mounting hardware, and prepared the wall it’s time to install your floating desk! Start by marking the location of where you would like the desk to be mounted and attaching the mounting brackets. Then, carefully lift your desk into place and screw it securely into the wall. Finally, plug in any cords or electrical devices needed for your workstation, and enjoy your new floating desk!

With these above considerations, you can easily build a floating desk to create an efficient and organized workspace. It is important to take the time to measure carefully and purchase the right hardware for your project in order to ensure it is safely and securely mounted on the wall. When done correctly, you will have created a great workspace that can be enjoyed for years to come!
Frequently Asked Questions
What Materials Do I Need to Build a Floating Desk?
You will need two-by-fours, plywood, screws, and wall anchors. Make sure you purchase the appropriate size screws for your particular wall material. Additionally, you may want to invest in some wood glue or construction adhesive for extra stability.
How Do I Position the Wall Anchors?
Position the wall anchors at least one foot away from any corners or edges. Make sure to measure twice and drill once to ensure accuracy. It’s also important to make sure that your chosen screws are long enough for your particular wall material.
What Type of Finishing Should I Use?
The type of finishing you choose will depend on the look you’re going for. You can opt for a stain, varnish, or paint. Whichever option you choose, it’s important to make sure that your finish is specifically designed to protect wood surfaces and is water-resistant. Additionally, most finishes come in a range of colors, so you’ll be able to customize your desk however you’d like.
Conclusion
Knowing how to build a floating desk is a great way to add stylish and functional furniture to any room. With the right materials, tools, and finishing products, you will be able to create a beautiful piece of furniture that can last for years. It is important to measure twice and drill once when attaching wall anchors, as well as choose a finishing product that will protect your desk from water damage. With a little bit of patience and creativity, you can create the perfect desk for your home. Good luck!