
If you’re looking to expand the storage capabilities of your home or add a feature such as a track lighting system, one challenge is drilling through joists in your ceiling.
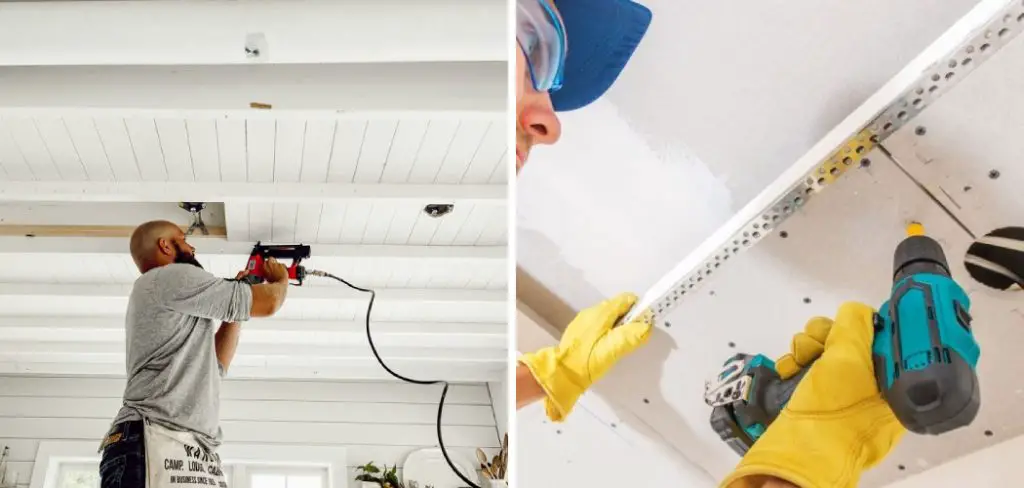
The process may seem intimidating at first glance, but with the right tools and technique, you can confidently and safely drill holes in your finished ceiling without damaging support structures.
In this blog post on how to drill through joists in a finished ceiling, we’ll discuss step-by-step instructions on how to successfully drill through joists in a finished ceiling so that you can complete any project with confidence.
Safety Measures
Before you begin drilling through joists in your finished ceiling, it’s essential to take the necessary precautions to protect yourself and others. Make sure to wear protective gear such as safety goggles, gloves, and a dust mask to prevent any potential injury or irritation.
Additionally, make sure that all electrical power is turned off before starting any drilling. It’s also recommended to have a fire extinguisher nearby, in case of any emergencies.
Tools Needed
To drill through joists in your finished ceiling, you’ll need the following tools:
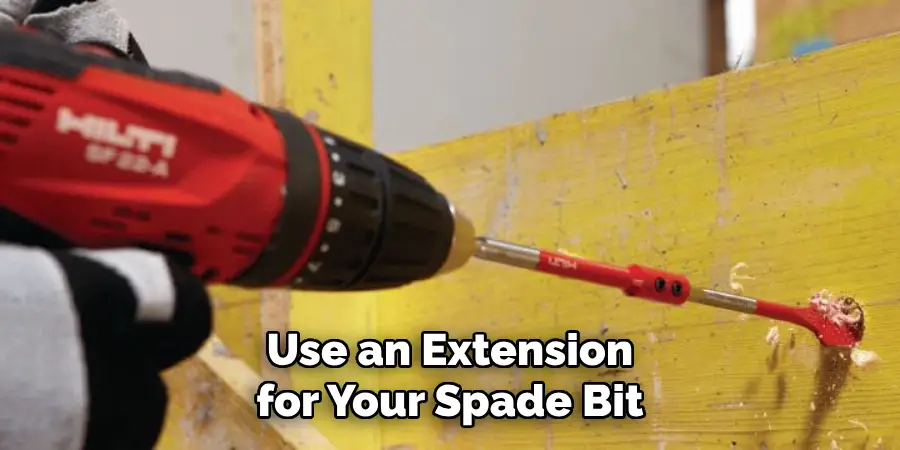
- A Drill With a Long Spade Bit or Extension
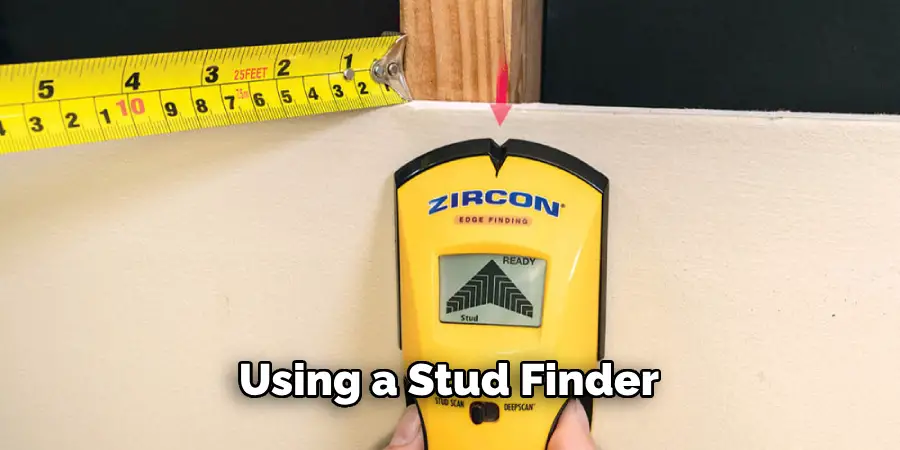
- A Stud Finder
- A Pencil or Marker
- Ladder or Step Stool (if Needed)
10 Step-by-step Instructions on how to drill through joists in a finished ceiling
Step 1: Determine the Location of the Hole
Using a stud finder, locate the position of the joist where you want to drill the hole. Mark the spot with a pencil or marker on the ceiling. It’s best to drill between joists rather than directly through them. You can use a pipe or wire locator to confirm that there are no hidden pipes or wires in the location you selected. It’s crucial to be extra careful during this step as hitting a wire or pipe can cause significant damage.
Step 2: Measure and Mark the Depth of the Hole
Use a tape measure to determine how deep your joists are. This measurement will help you know how long your spade bit should be. Once you have this measurement, mark the depth on your drill bit using masking tape or a permanent marker. This step will help you know when to stop drilling. You can also purchase an extension for your drill bit if needed.
Step 3: Put on Protective Gear and Turn off the Power
Before you begin drilling, make sure to put on your protective gear such as gloves, safety goggles, and a dust mask. Additionally, turn off all electrical power in the room where you’ll be working.
It’s essential to take these safety precautions seriously to prevent any potential injury or damage. But, if you feel uncomfortable or unsure of how to turn off the power, it’s best to call a professional electrician for assistance.
Step 4: Choose and Attach the Right Drill Bit
To ensure smooth drilling, choose a spade bit that is slightly smaller than the hole size you need. Attach it to your drill, making sure that it is tightly secured.
If needed, use an extension for your spade bit to reach the desired depth. You can also use a long spade bit if you have one. But, make sure that it is long enough to reach the required depth. It’s best to avoid using a standard drill bit as it may not be long enough to reach the joist.
Step 5: Start Drilling Slowly
Place your drill on your marked spot and start drilling slowly at a low speed. As you reach the depth mark, pull out the spade bit to remove any wood shavings or debris from the hole. You can also use a vacuum to remove the debris.
This step will also help you see if there are any hidden pipes or wires in the hole. If you encounter any obstruction, stop drilling immediately and reassess the location. Although, if you’re confident that there are no obstacles, continue drilling slowly until you reach the other side of the joist.
Step 6: Repeat for Other Holes
If you need to create multiple holes, repeat steps 1-5 for each one. Make sure to measure and mark the depth of each hole before drilling. You can also use a level or ruler to ensure that each hole is straight. It’s essential to take your time and work carefully to avoid any mistakes. Other safety tips to keep in mind include not leaning too hard on the drill and keeping your hands away from the spinning bit.
Step 7: Clean Up Debris
As you drill, debris may fall into the room below. Use a vacuum or broom to clean up any wood shavings or sawdust that has been collected on the floor or furniture.

This step will help keep your workspace clean and safe. But, make sure to wait until you have finished drilling before cleaning up. It’s best not to leave your workstation until you have completed the project. It’s also a good idea to cover any furniture or flooring with drop cloths for added protection.
Step 8: Install Any Necessary Features
After drilling through the joists, you can now install any necessary features such as recessed lighting or a track system for hanging shelves. Make sure to follow manufacturer instructions carefully and double-check that all electrical power has been turned off before installing any fixtures. You can also use a cable guard to protect any electrical wiring or pipes that may be near the drilled holes.
Step 9: Seal Any Gaps or Cracks
Once you have completed your project, it’s essential to seal any gaps or cracks that may have occurred during the drilling process. You can use caulk or putty to fill in any openings and create a finished look.
This step will also help prevent any drafts from entering your home. It’s best to wait until the caulk or putty has fully dried before painting over it. However, if you notice any significant damage or cracks, it’s best to consult a professional for repairs.
Step 10: Clean Up and Inspect
Before leaving your workspace, make sure to clean up any remaining debris and inspect the drilled holes for any missed debris or obstructions. If everything looks good, you can turn the electricity back on and enjoy your newly completed project. But, if you encounter any problems or are unsure of your work, it’s best to call a professional for assistance.
Following these step-by-step instructions on how to drill through joists in a finished ceiling will help you safely drill through joists in your finished ceiling. Remember to always take precautions and use the right tools for the job. By doing so, you can complete your project efficiently without any accidents or damages. So, don’t hesitate to try out this DIY skill on your next home improvement project! Happy drilling!
Frequently Asked Questions
Q: Can I Use a Regular Drill Bit Instead of a Spade Bit?
A: It’s not recommended to use a standard drill bit as it may not be long enough to reach the joist. A spade bit is specifically designed for drilling through wood and is the best tool for this task.
Q: Do I Need to Turn off the Power Even If I’m Not Drilling Near Electrical Wires?
A: Yes, it’s always best to turn off all electricity in the room as a safety precaution. You never know what may be hidden behind your ceiling, and it’s better to be safe than sorry.

Q: What Should I Do If I Encounter an Obstruction While Drilling?
A: If you encounter any obstruction, stop drilling immediately and reassess the location. It’s possible that there may be a pipe or wire in the way, and you will need to find a new spot to drill. If you’re unsure, it’s best to call a professional for assistance.
Q: Can I Drill Multiple Holes at Once?
A: No, it’s best to drill one hole at a time to ensure accuracy and prevent any damage or accidents. Take your time and work carefully for the best results.
Conclusion
By following the tips outlined in this blog, you’ll have a much better understanding of how to drill through joists in a finished ceiling. If you take the time now to prepare for your project correctly, you’ll be able to ensure a success story with minimal disturbance to your newly installed ceiling.
So what are you waiting for? Start prepping today so that tomorrow, you can confidently and safely begin drilling through your joists – without incident.
And if it all goes too complex or overwhelming at any point along the way, just remember that help is only a few clicks away whenever necessary. With the right tools and technique, anyone should be able to drill through their joists with ease!