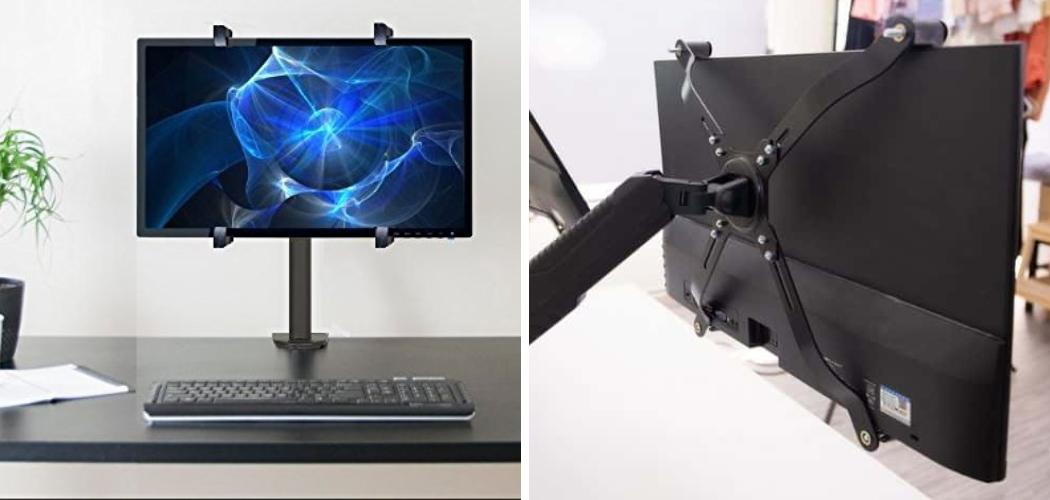
Are you looking for a way to mount your monitor without having to use screws and holes? If so, then you have come to the right place. In this blog post, we will go over all of the simple steps involved in mounting a monitor without screwing directly into it.
We’ll also provide some solutions if mounting is impossible due to incompatible equipment or lack of available space. From securing monitors on articulating arms and VESA mounts to hanging them from ceilings with help from special cups – by the end of this post on how to mount a monitor without screw holes, you’ll be armed with multiple options that will make sure your screen is safe and secure!
11 Step-by-step Guidelines on How to Mount a Monitor Without Screw Holes
Step 1: Check for Mounting Compatibility
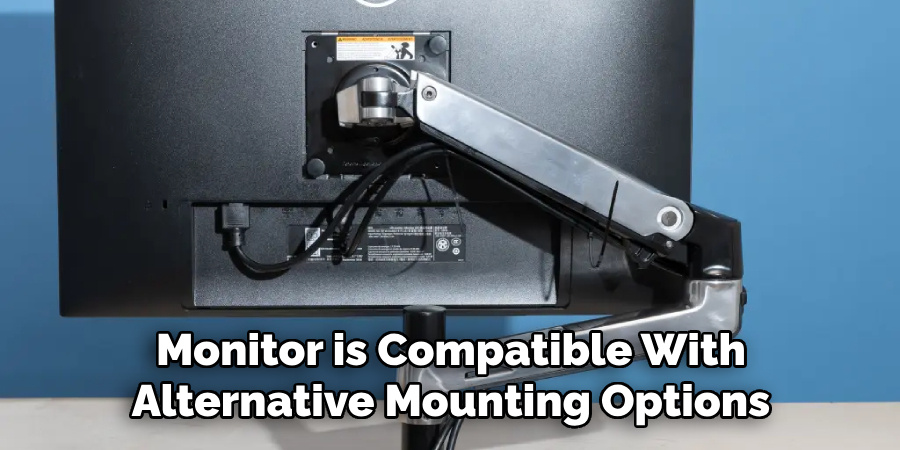
The first step to mount a monitor without screw holes is to make sure the monitor is compatible with alternative mounting options. This means that the back of your monitor should have either VESA mounting holes or available space for a VESA adapter. If your monitor doesn’t have these features, then you may need to consider other options for mounting it.
Step 2: Determine the Weight and Size of Your Monitor
Before proceeding with any type of mounting, it is important to know the weight and size of your monitor. This will help ensure that the alternative mounting option you choose can handle the weight and size of your monitor. You don’t want to end up with a monitor falling off its mount due to insufficient weight capacity.
Step 3: Choose the Right Mounting Option
There are several mounting options available for monitors without screw holes, such as adhesive mounts, suction cup mounts, and clamp mounts. Choose the one that is most suitable for your specific monitor and workspace setup. But keep in mind, that some options may not be suitable for heavier or larger monitors.
Step 4: Prepare the Workspace
Make sure your workspace is clean and free of any dust or debris before mounting the monitor. This will ensure that the adhesive or suction cups stick properly and provide a secure hold.
It is also important to have enough space for the monitor to move freely after mounting. You don’t want it to be obstructed by other objects. It is recommended to have at least 1.5 inches of clearance around the monitor.
Step 5: Clean the Back of Your Monitor
If you are using adhesive mounts, it is important to clean the back of your monitor with a non-abrasive cleaner and let it dry completely before attaching the mount. This will ensure a strong bond between the mount and the monitor. It is also a good idea to clean the surface where you will be mounting your monitor for a stronger hold.

Step 6: Attach the Mounting Option
Follow the instructions provided by the manufacturer to properly attach your chosen mounting option. Make sure it is attached securely and can support the weight of your monitor. You can also use additional support, such as zip ties or safety straps, for added security. But be careful not to obstruct the movement of the monitor.
Step 7: Test the Mounting Option
Before placing your monitor on the mount, do a test run by attaching something with a similar weight and size to see if it holds securely. This will give you an idea of how well the mounting option will work for your specific setup. It is better to find out any issues before placing your monitor on the mount. You can also make adjustments if needed.
Step 8: Place the Monitor on the Mount
If everything checks out with the test run, it’s time to place your monitor on the mount. Make sure to do so carefully and avoid any sudden movements that may cause the monitor to slip or fall off. Once it is securely in place, double-check all attachments for added security. It is also recommended to periodically check the attachments over time.
Step 9: Adjust the Monitor
If you are using an adjustable mount, now is the time to adjust the monitor to your desired height and angle. This will ensure a comfortable viewing experience and help prevent eye strain. It is important to avoid placing the monitor too high or too low, as this can cause neck and back pain. But also make sure it is not too close to your face.

Step 10: Route Cables
After mounting the monitor, it is important to properly route any cables and cords. This will prevent them from tangling or getting in the way of the monitor’s movement. You can use cable ties to keep them in place and tidy. It is also recommended to periodically check and adjust the cables as needed. You don’t want them getting caught on anything or becoming a safety hazard.
Step 11: Enjoy Your Mounted Monitor Without Screw Holes!
Congratulations, you have successfully mounted your monitor without using a screws! Now you can enjoy a clean and clutter-free workspace with your monitor securely mounted in the perfect position. Just remember to regularly check and adjust the attachments and cables for added security.
Following these simple steps on how to mount a monitor without screw holes, you can easily mount a monitor without screw holes and have a more organized and efficient workspace.
And if mounting is not an option for your specific setup, don’t worry! There are still other ways to secure your monitor, such as using a stand or wall shelf. It all depends on the equipment you have and the space available. Happy mounting!
How Much Could It Cost?
The cost of mounting a monitor without screw holes will vary depending on the type of mount and the size and weight of your monitor. Adhesive mounts and suction cup mounts tend to be more affordable, ranging from $10 to $30. Clamp mounts may be a bit pricier, starting at around $40 and going up to over $100 for heavier-duty options. VESA adapters can also be used, but they may cost anywhere from $20 to $50.
It is important to research and compare prices before purchasing a mounting option to ensure it fits your budget. So, don’t let the lack of screw holes hold you back from having a properly mounted monitor. With the right tools and techniques, you can achieve a secure and functional setup without spending a fortune. It’s all about finding the right fit for your specific monitor and workspace setup.
Frequently Asked Questions
Q1: Can I Mount Any Monitor Without Screw Holes?
A1: It depends on the size and weight of your monitor. Most adhesive mounts and suction cup mounts have a weight capacity limit, so it is important to make sure your monitor falls within that range.
Clamp mounts may be more suitable for heavier or larger monitors. And if your monitor is not compatible with any of these options, a VESA adapter may be the solution. It is important to research and check compatibility before purchasing a mounting option.
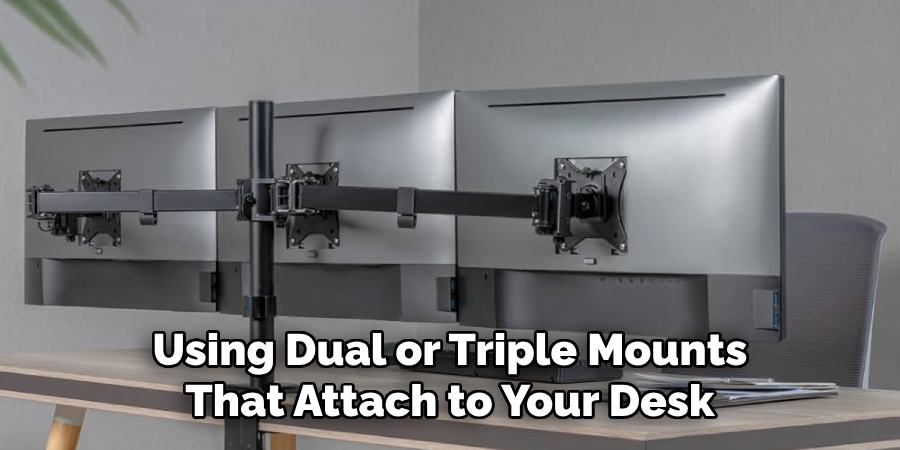
Q2: Can I Mount Multiple Monitors Without Screw Holes?
A2: Yes, you can mount multiple monitors without screw holes using dual or triple mounts that attach to your desk or wall. These mounts typically have a weight capacity limit, so make sure to check the specifications and choose one that can support the combined weight of your monitors.
Q3: Is It Safe to Mount a Monitor Without Screw Holes?
A3: Yes, as long as you follow the instructions provided by the manufacturer and regularly check and adjust the attachments for added security. Just make sure to choose a mounting option that is suitable for your monitor’s weight and size, and be careful not to obstruct the movement of the monitor.
It is also recommended to periodically check the attachments over time for added safety. So, you can safely mount your monitor without screw holes and enjoy a clutter-free workspace.
Conclusion
Therefore, when it comes time to mount your monitor without any screw holes, remember all the information in this blog post. Hang the VESA adaptor to the wall with a bracket or adhesive depending on your preference and secure it tight with bolts and washers. Then you should attach the mounting plate to the back of your monitor.
Finally, connect the two parts together. With this knowledge and careful execution of the steps on how to mount a monitor without screw holes discussed in this article, you will be able to get the best out of monitor mounting without having to resort to puncturing holes through walls or monitors! Don’t forget to have all of your tools available before you start and make sure surfaces are clean for optimal strength adhesion.
You’ll be surprised at how easy mounting your monitor will be once you follow these simple instructions! So don’t delay, take action now and get your monitor securely mounted without needing any unsightly screws marring its pristine appearance!