
An antique chair is more than just a place to sit; it’s a piece of history. Each one has a story, with its elegant curves, detailed carvings, and unique character.
Over time, however, the fabric can become worn, torn, or simply outdated. Instead of letting that beautiful piece languish in a corner, you can give it a new life. Recovering an antique chair is a deeply rewarding project that lets you blend history with your personal style. It’s a hands-on way to preserve craftsmanship while creating a stunning, functional piece of furniture for your home.
This guide on how to recover an antique chair will walk you through everything you need to know to do it right.
What Will You Need?
Before you begin, gathering the right tools and materials will make the process much smoother. Having everything on hand ensures you can work efficiently without interruptions.
Tools:
- Pliers (needle-nose)
- Staple remover or a flat-head screwdriver
- Tack hammer
- Heavy-duty staple gun and staples (1/2 inch)
- Fabric scissors
- Measuring tape
- Chalk or fabric marker
- Protective gloves and safety glasses
Materials:
- Upholstery fabric (a durable, high-quality choice is best)
- Cotton batting or foam (if the existing padding needs replacement)
- Upholstery tacks or decorative nails (for finishing touches)
- Dust cover fabric (cambric) for the underside
- Cardboard or flexible metal tack strip (for creating clean edges)
10 Easy Steps on How to Recover an Antique Chair
Follow these steps carefully to transform your antique chair. Take your time, especially with older, more delicate frames.
Step 1: Document and Disassemble
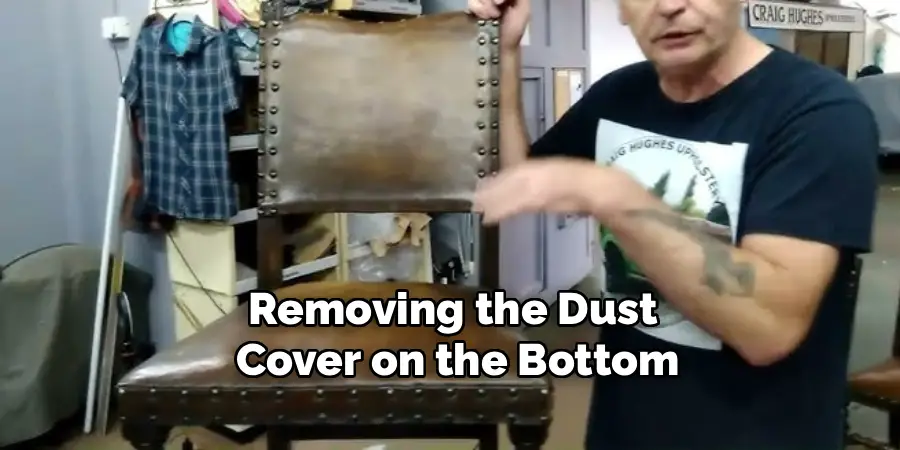
Before you remove a single staple, take photos of your chair from every angle. Pay close attention to how the current fabric is attached, folded at the corners, and secured. These pictures will be your roadmap when it’s time to put the new fabric on. Once you have documented everything, carefully begin removing the chair’s seat pad if it is a drop-in style. If the fabric is attached directly to the frame, start by turning the chair upside down and removing the dust cover on the bottom. This will expose how the main fabric is attached.
Step 2: Remove the Old Fabric
This is often the most time-consuming part of the job. Using a staple remover or a flat-head screwdriver and pliers, carefully pry up and pull out every staple and tack holding the old fabric in place. Work slowly to avoid gouging or damaging the wood frame. Keep the old pieces of fabric as intact as possible; they will serve as the perfect templates for cutting your new material. Label each piece with a marker (e.g., “seat,” “inside back,” “outside arm”) so you know exactly where it goes.
Step 3: Inspect and Repair the Frame and Padding
With the fabric gone, you have a clear view of the chair’s skeleton and padding. Now is the time to check for any structural issues. Look for loose joints, cracks in the wood, or wobbly legs. Apply wood glue to any loose joints and clamp them firmly until the glue dries completely. Inspect the padding and batting. If it’s compressed, crumbling, or has a musty smell, you should replace it. Remove the old padding and use it as a template to cut new foam or layers of cotton batting.
Step 4: Cut Your New Fabric
Lay your new upholstery fabric flat on a large surface, wrong side up. Arrange the old fabric pieces (your templates) on top. Pay attention to the fabric’s pattern and direction. You want to ensure any patterns are centered and aligned correctly on the chair. For example, stripes should run straight. Pin the old templates to the new fabric and carefully cut around them, leaving about 2-3 inches of extra material on all sides. This excess gives you plenty of fabric to grip and pull taut when attaching it.
Step 5: Attach the Seat Fabric
If your chair has a drop-in seat, this is your starting point. Lay your new fabric piece on your work surface, face down. Place the new padding on top, centered, followed by the wooden seat base. Start by pulling the fabric taut in the center of one side and securing it to the underside of the base with a single staple. Go to the opposite side, pull the fabric tight, and place another staple. Repeat this for the remaining two sides. This “north, south, east, west” method prevents the fabric from shifting and ensures it’s evenly tensioned.
Step 6: Work Out from the Center
Continue stapling from the center of each side out toward the corners, placing staples about an inch apart. Keep pulling the fabric consistently taut as you go to avoid any wrinkles or sagging. Stop about 2 inches from each corner. Don’t worry about making the corners perfect just yet; the goal here is to get the four main sides securely attached and smooth.
Step 7: Create Neat Corners
Corners are what separate an amateur job from a professional one. For a basic drop-in seat, the most common method is to create neat pleats. Pull the corner point of the fabric tightly toward the center of the seat base and put one staple in to hold it. Then, fold the excess fabric on each side into tidy, overlapping pleats, pulling them snug before stapling them down. The goal is to reduce bulk and create a sharp, clean corner on the visible side.
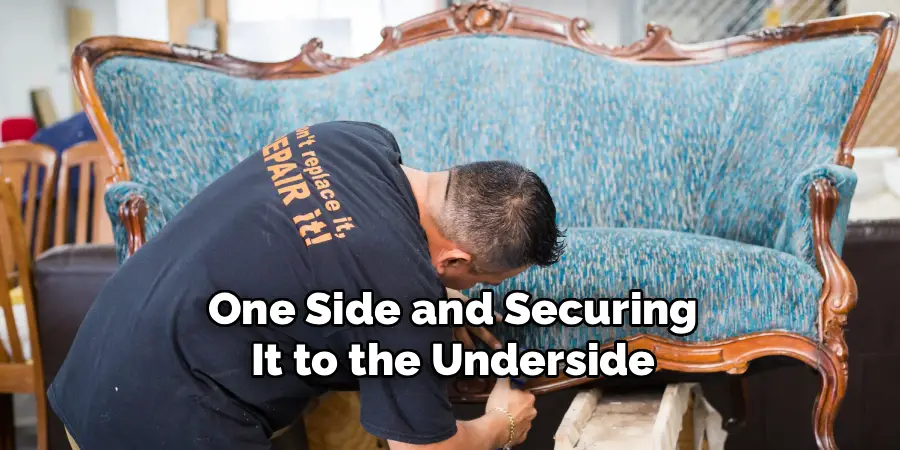
Step 8: Upholster the Back and Arms
If your chair’s fabric is attached directly to the frame, the process is similar but done in place. Typically, you work from the inside out. Start with the inside back, then the inside arms, followed by the outside arms and outside back. Use the same technique of stapling in the center of each side first and working your way out. You may need to use a cardboard tack strip along the edges where fabric panels meet to create a straight, clean seam without visible staples.
Step 9: Add Finishing Touches
Once all the fabric is attached, it’s time to cover your work. For a drop-in seat, you can reinstall it into the chair frame. For chairs upholstered directly on the frame, trim any excess fabric on the underside. Then, cut a new piece of cambric dust cover slightly smaller than the bottom of the chair. Fold the edges under by about half an inch and staple them neatly in place to hide the raw fabric edges and staples. If you want a more decorative look, you can add gimp braid with fabric glue or apply decorative upholstery tacks over the seams.
Step 10: Final Inspection
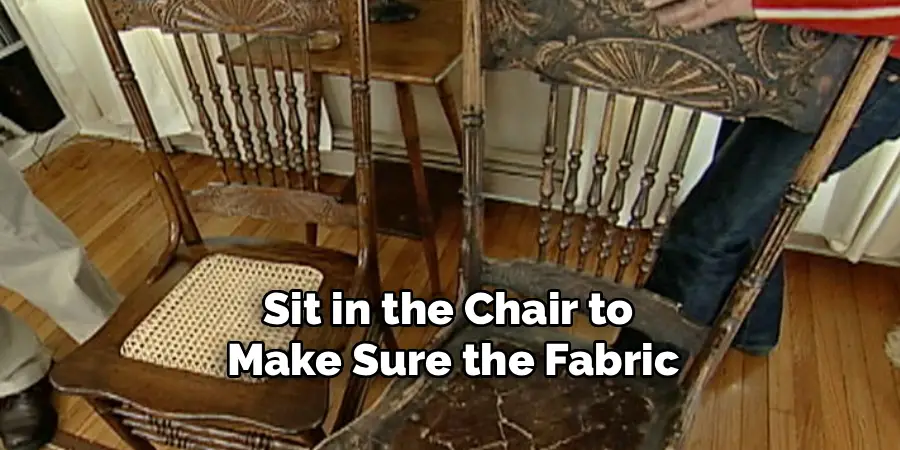
Give your newly recovered chair a final look-over. Check for any puckers, loose spots, or uneven lines. Trim away any stray threads with a pair of sharp scissors. Sit in the chair to make sure the fabric and padding feel secure and comfortable. Then, step back and admire your work. You’ve successfully preserved a piece of history and created a beautiful, custom piece of furniture.
5 Things You Should Avoid
- Skipping the Documentation: Don’t assume you’ll remember how everything goes back together. Taking detailed photos before you start is the single most important step for a successful outcome.
- Using the Wrong Fabric: Avoid thin, stretchy, or delicate fabrics. Choose a durable, medium-to-heavy-weight upholstery-grade fabric that can withstand tension and daily use.
- Not Leaving Enough Excess Fabric: Cutting the fabric to the exact size of your old pieces is a common mistake. Always leave a few extra inches around the edges to give you something to grip and pull for a taut finish.
- Ignoring Frame Repairs: Covering a wobbly or damaged frame is like putting a new roof on a house with a crumbling foundation. Take the time to make any necessary wood repairs before you add new fabric.
- Rushing the Corners: Hasty corner work can ruin the look of your chair. Be patient and practice folding the fabric to create neat, professional-looking pleats or folds.
Frequently Asked Questions
- How Much Fabric Do I Need for My Antique Chair?
To find out, measure the widest and longest points of each section you need to cover (seat, back, arms, etc.). Add at least 4-6 inches to each dimension for pulling and wrapping. It’s always better to buy slightly more fabric than you think you’ll need, especially if you’re working with a patterned material that requires matching. - Can I Paint the Wood Frame Before Reupholstering?
Absolutely. The best time to paint or refinish the wooden parts of your chair is after you’ve removed all the old fabric and before you put on the new. This allows you to work freely without worrying about getting paint on your new upholstery. Just be sure the paint is completely dry and cured before you start stapling. - What if the Original Padding is Horsehair?
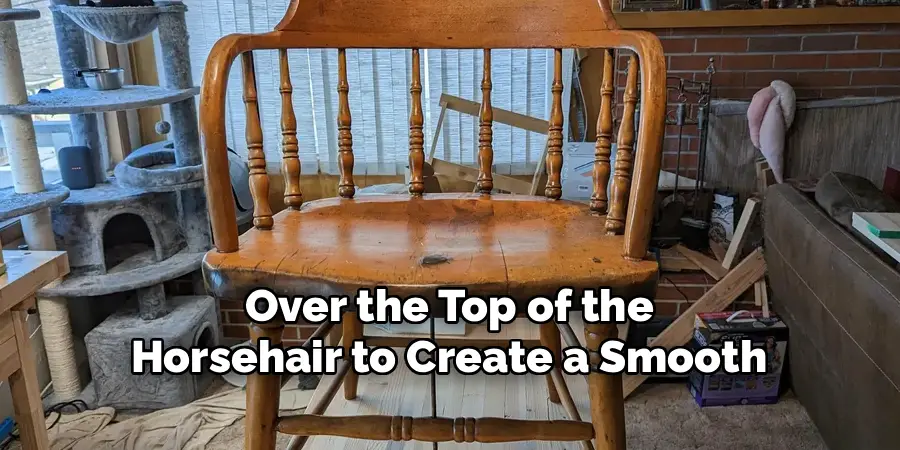
If you find horsehair, you’ve got a truly old piece. If the horsehair is in good, clean condition, you can reuse it. Often, it just needs to be “fluffed up” by hand to restore its loft. You can place a new layer of cotton or polyester batting over the top of the horsehair to create a smooth, comfortable surface before adding your new fabric.
Conclusion
How to recover an antique chair is more than a simple DIY task; it’s an act of preservation.
By trading worn-out fabric for a fresh pattern and color, you breathe new life into a piece of furniture that has stood the test of time. The process requires patience and attention to detail, but the result is incredibly satisfying. You not only save a beautiful chair from being discarded but also create a custom piece that reflects your own taste.
Now that you have the steps, it’s time to choose your fabric and give that old chair the beautiful new beginning it deserves.