Expanding your digital workspace from a single laptop screen to a dual-monitor setup can be a game-changer for productivity. Whether you’re a professional juggling multiple applications, a creative working with large timelines, or a student organizing research, learning how to extend your laptop to two monitors can transform your workflow.
This setup provides the screen real estate needed to view documents side-by-side, keep communication apps visible, and manage complex projects without constantly switching between windows.
This comprehensive guide will walk you through every step of the process. We will cover everything from the initial planning and hardware checks to the detailed software configuration on both Windows and macOS. You’ll learn how to identify the right cables, choose between adapters and docking stations, and troubleshoot common issues.
By the end, you will have a clear, actionable plan to create a powerful and ergonomic dual-monitor workstation.
The Benefits of a Dual-Monitor Setup
Before diving into the technical details, it’s helpful to understand why extending your display is so beneficial. A dual-monitor setup fundamentally changes how you interact with your computer, offering significant advantages in efficiency and organization.
Enhanced Multitasking Capabilities
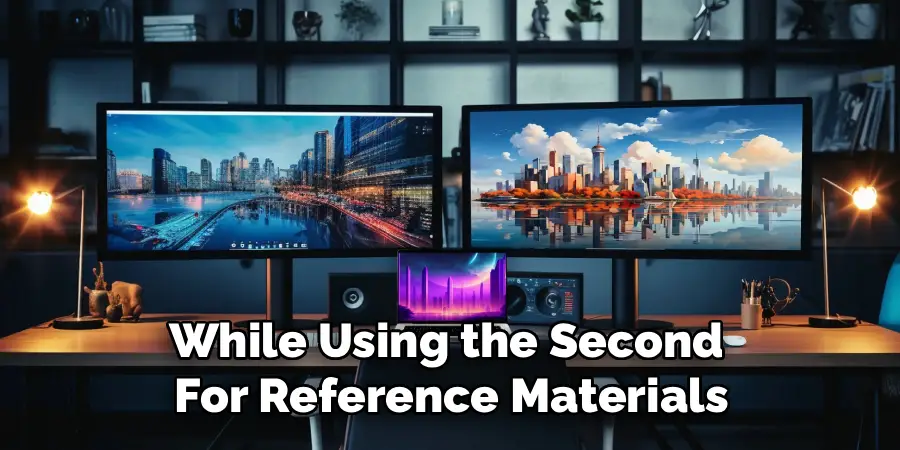
The most immediate benefit is the ability to multitask more effectively. With two screens, you can dedicate one monitor to your primary task, such as writing a report or editing a video, while using the second for reference materials, emails, or team chat applications.
This eliminates the constant need to minimize and maximize windows, which saves time and reduces mental friction.
Improved Information Comparison
For tasks that require comparing information from different sources, two monitors are invaluable. You can display a spreadsheet on one screen and a financial report on the other, or view source code next to its rendered output. This side-by-side view makes analysis, data entry, and editing far more accurate and efficient.

A More Organized and Expansive Workspace
Extending your desktop gives you a larger digital canvas to organize your applications logically. You can create dedicated zones for different types of tasks, keeping your primary work front and center while secondary tools remain accessible but out of the way. This leads to a less cluttered and more focused work environment.
Before You Begin: Planning and Compatibility Checks
A successful setup starts with a bit of planning. Taking a few minutes to assess your hardware and needs will prevent headaches later. You need to confirm your laptop’s capabilities and ensure you have the necessary equipment to connect everything.
Confirming Your Laptop’s Graphics Capabilities
The first step is to verify that your laptop’s graphics processing unit (GPU) can support multiple external displays. Nearly all modern laptops can handle at least one external monitor, and most can support two or more.
You can typically find this information on the manufacturer’s website by searching for your laptop’s model number and looking at its technical specifications. Pay attention to the maximum number of supported displays and the maximum resolution for each.
Checking Operating System Support
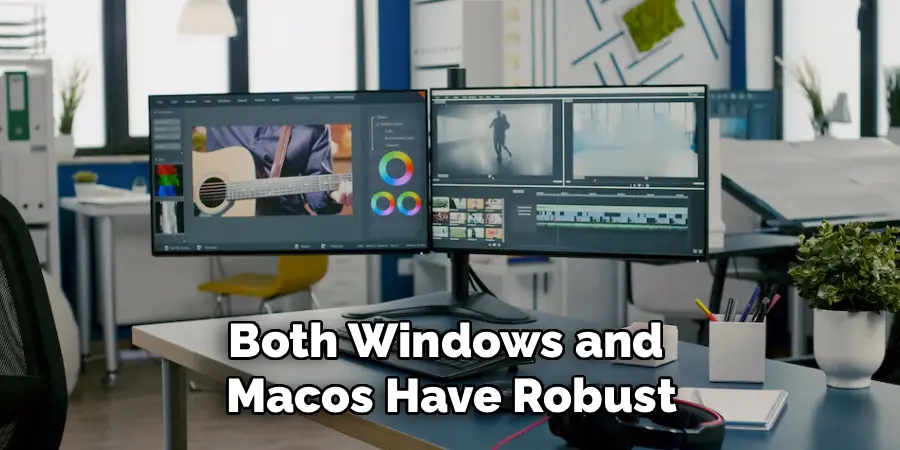
Both Windows and macOS have robust built-in support for multiple monitors. Windows 10 and 11 offer extensive customization options through their display settings, as do recent versions of macOS. Ensure your operating system is up to date to get the latest features and driver support for your hardware.
Inventory Your Existing Monitors and Cables
Take stock of the monitors you plan to use. Note the types of video input ports they have on the back. Common ports include HDMI, DisplayPort, and sometimes older standards like VGA or DVI. Knowing what connections your monitors accept is crucial for selecting the right cables and adapters.
Understanding Ports, Cables, and Connection Hardware
The physical connection is often the most confusing part of setting up multiple monitors. Understanding the different types of ports on your laptop and monitors will help you choose the right connection method.
Common Video Ports Explained
Your laptop and monitors use specific ports to transmit video signals. The most common ones today are HDMI, DisplayPort, and USB-C.
- HDMI (High-Definition Multimedia Interface): This is one of the most widespread video ports, found on most laptops and nearly all modern TVs and monitors. It carries both video and audio signals.
- DisplayPort: This is another high-performance standard that is common on business-class laptops and dedicated graphics cards. Like HDMI, it carries video and audio. Mini DisplayPort is a smaller version with the same capabilities.
- USB-C and Thunderbolt: USB-C is a versatile port that can handle data, power, and video (a feature known as “DisplayPort Alternate Mode”). Thunderbolt 3 and Thunderbolt 4 ports use the same physical USB-C connector but offer much higher bandwidth, making them ideal for driving multiple high-resolution displays. Not all USB-C ports support video output, so check your laptop’s specifications.
- VGA (Video Graphics Array): This is an older, analog-only standard found on legacy monitors and laptops. It provides lower image quality and should be avoided if possible.
Using Adapters and Dongles
If your laptop’s output ports don’t match your monitors’ input ports, you’ll need an adapter. For example, if your laptop has a USB-C port and your monitor has an HDMI input, you’ll need a USB-C to HDMI adapter. There are adapters for almost every combination of ports, but be sure to purchase one from a reputable brand to ensure signal quality.

The Power of Docking Stations and Hubs
For a cleaner and more powerful setup, a docking station is the ultimate solution. A dock connects to your laptop via a single USB-C or Thunderbolt cable and provides a wide array of ports, including multiple video outputs (like HDMI and DisplayPort), USB-A ports, an Ethernet jack, and an audio jack. This allows you to connect both monitors, a keyboard, a mouse, and other peripherals to the dock, turning your laptop into a full-fledged desktop with a single connection. Some docks can also charge your laptop, further simplifying your setup.
Multi-Stream Transport (MST) hubs are another option. An MST hub connects to a single DisplayPort or USB-C port on your laptop and splits the signal to drive two or more independent monitors. This is a great way to add multiple displays if your laptop has limited video outputs, but it requires that your laptop’s GPU supports MST.
How to Extend Your Laptop to Two Monitors: Configuration Steps
Once your hardware is physically connected, the next step is to configure your operating system to use the two external monitors as an extended desktop. The process is similar for both Windows and macOS.
Configuring Displays in Windows 10 and 11
First, ensure your monitors are connected to your laptop and powered on. Windows should automatically detect them. Right-click on your desktop and select “Display settings.”
In the display settings window, you will see representations of your three screens (the laptop display and the two external monitors). If a monitor isn’t showing up, click the “Detect” button.
Select one of the external monitors and scroll down to the “Multiple displays” section. From the dropdown menu, choose “Extend desktop to this display.” Repeat this for the second external monitor. This tells Windows you want to use them as separate workspaces, not just mirror your main screen.
You can then drag the monitor icons at the top of the window to match their physical arrangement on your desk. This ensures your mouse cursor moves naturally from one screen to the next. Click “Apply” to save the changes.
Configuring Displays in macOS
On a Mac, connect your monitors and open “System Settings” (or “System Preferences” on older versions), then navigate to the “Displays” section.
You will see windows for each of your connected displays. In the main settings window, click the “Arrange” button. Here, you’ll see icons for all your displays. Make sure the “Mirror Displays” checkbox is unchecked.
Now, you can drag the monitor icons to match their physical layout on your desk. The display with the white bar at the top is your primary monitor, where new windows and notifications will appear by default. You can drag this white bar to any of the displays to change which one is primary. Close the window to save your arrangement.

Fine-Tuning Your Multi-Monitor Setup
With your desktop extended, you can now optimize the settings for each monitor to create a seamless and visually consistent workspace.
Setting Resolution, Refresh Rate, and Orientation
In your operating system’s display settings, you can adjust the resolution, refresh rate, and orientation for each monitor independently. It’s best to set each monitor to its native resolution for the sharpest image. The refresh rate determines how smoothly motion appears on screen; 60Hz is standard, but gaming monitors may support higher rates. You can also change the orientation to “Portrait” for monitors that you physically rotate, which is great for coding or reading long documents.
Managing Windows and Workflows
The real power of a multi-monitor setup comes from how you manage your application windows. Both Windows (with its Snap Assist feature) and macOS offer tools to quickly arrange windows. You can drag a window to the edge or corner of a screen to snap it into place. For even more control, consider third-party window management tools that allow you to create custom layouts and save window positions.
Calibrating Color and Scale
If you are using monitors of different brands or models, you may notice variations in color and brightness. Both Windows and macOS include built-in color calibration tools that can help you adjust the gamma, contrast, and color balance to make them match more closely. You can also adjust the scaling setting for each display, which enlarges text and icons on high-resolution monitors to make them more readable.
Troubleshooting Common Dual-Monitor Issues
Sometimes, things don’t work perfectly on the first try. Here are solutions to some of the most common problems you might encounter when setting up two external monitors.
Monitor Not Detected or “No Signal”
If a monitor isn’t being detected or shows a “No Signal” message, start by checking the physical connections. Ensure the cable is securely plugged into both the laptop and the monitor. Try using a different cable or a different port if available. Also, make sure the correct input source is selected on the monitor itself using its on-screen menu. Finally, updating your laptop’s graphics drivers can often resolve detection issues.
Only One External Monitor Works
If you connect two monitors but only one displays an image, it could be a limitation of your laptop’s port, adapter, or GPU. For example, some simple USB-C to HDMI adapters can only drive one display at a time. This is where a docking station or an MST hub becomes necessary. Also, confirm that your laptop’s GPU supports the number of displays you are trying to connect.
USB-C Connection Problems
If you are using USB-C and a monitor isn’t working, verify that the specific USB-C port on your laptop supports DisplayPort Alternate Mode. Not all of them do; some are for data and charging only. For Thunderbolt docks, ensure you are using a certified Thunderbolt cable, as a standard USB-C cable may not provide enough bandwidth.
Conclusion
Successfully setting up and learning how to extend your laptop to two monitors is one of the most impactful upgrades you can make to your computing environment. By carefully planning your setup, understanding the hardware involved, and properly configuring your operating system, you can create a seamless, expansive, and highly productive workspace. This investment in screen real estate pays dividends through improved multitasking, better organization, and a more comfortable workflow.
Remember to address ergonomics by positioning your monitors at eye level and managing your cables for a clean desk. By following the guidance in this article and avoiding common pitfalls, you can unlock the full potential of a dual-monitor setup and take your productivity to the next level.